
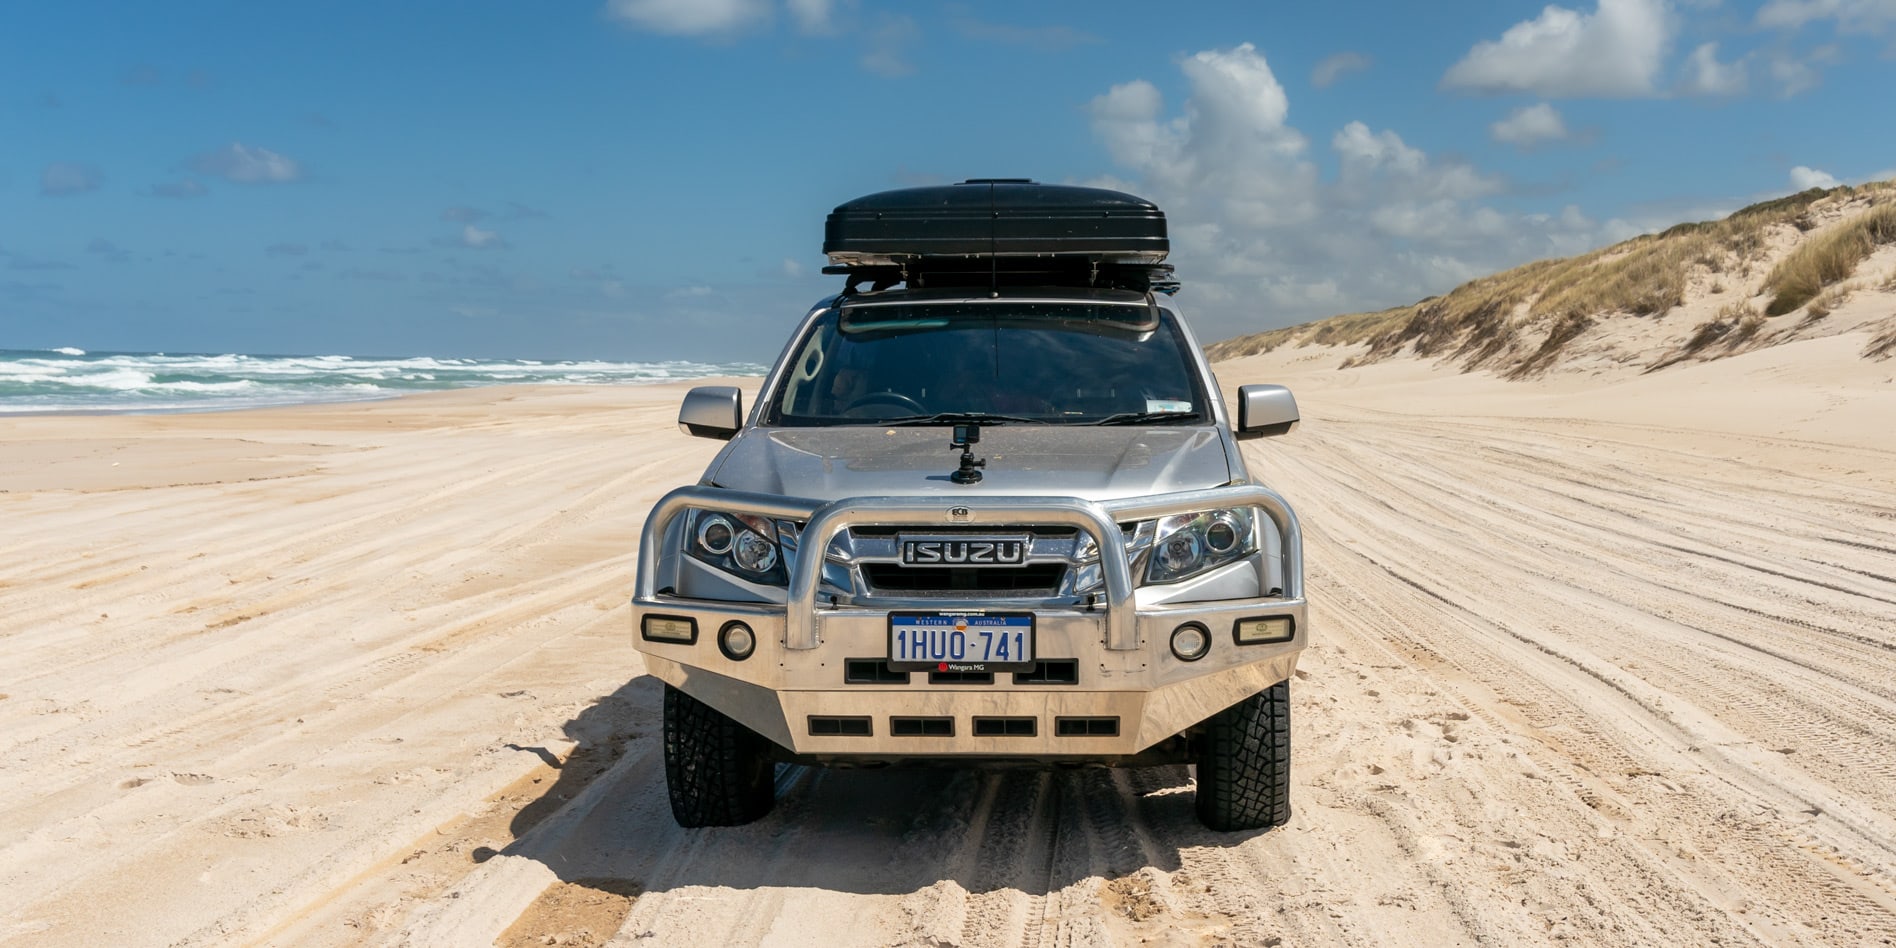
This article walks through the fit-out of my 2014 Isuzu Dmax Crewcab into a dual-purpose vehicle for off-grid camping.
I completed the camping modifications for the Isuzu Dmax in the backyard without any fancy tooling. This article may help others who are considering the same.
The vehicle’s designation is MY14 LS-M Utility Crew Cab 4dr Sports Auto 5sp 4×4 1040kg 3.0DT. Yep, that’s a mouthful alright.
The vehicle is a stock-standard diesel, and I’m the second owner. I bought the vehicle in 2024 with 280,000 kilometres on the clock and immaculate service logbooks.
The main goals of this Isuzu Dmax fitout for camping were to:
- Equip the Isuzu with practical equipment for remote, off-grid camping
- Securely store our possessions
- Stick to a budget-friendly build.
This was my first proper fit out of a ute for camping.
We aren’t new to camping or offroad 4×4 driving, for that matter, so I already had some ideas about what I wanted for the modification.
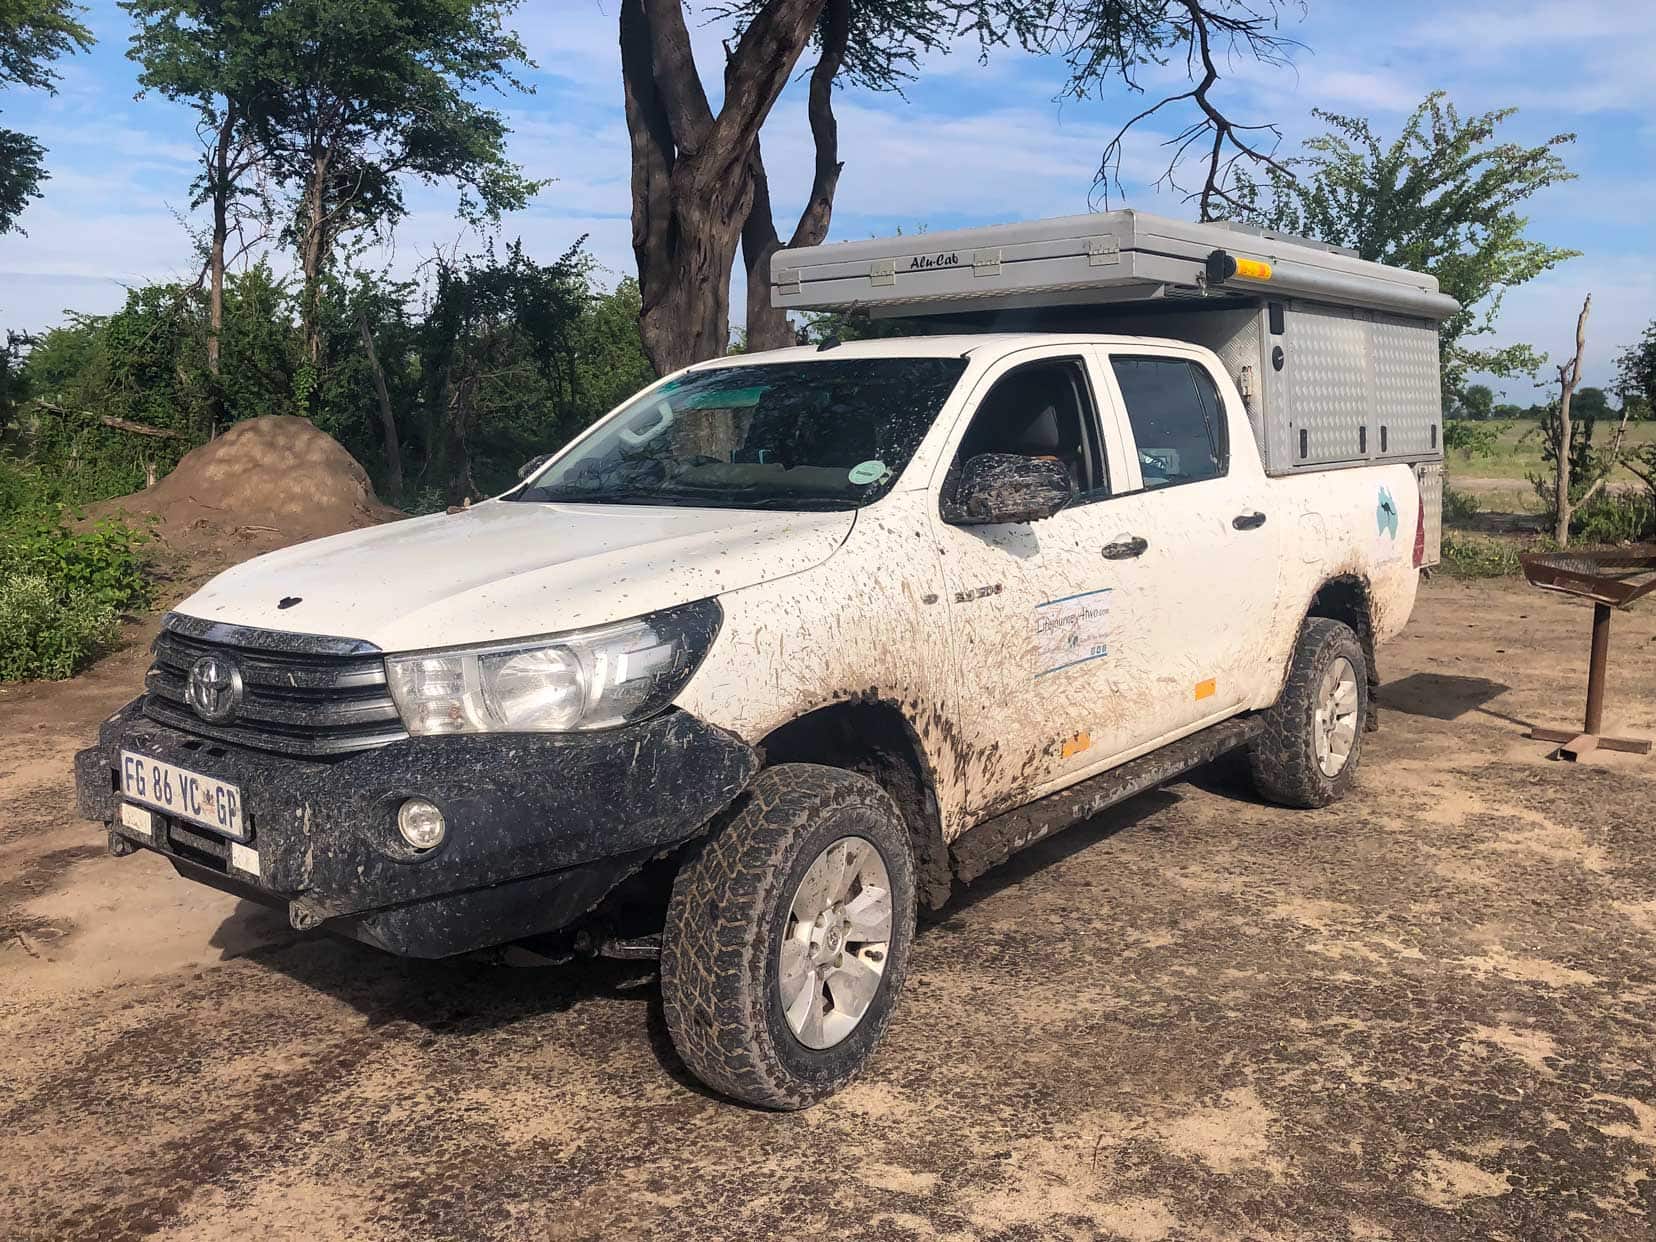
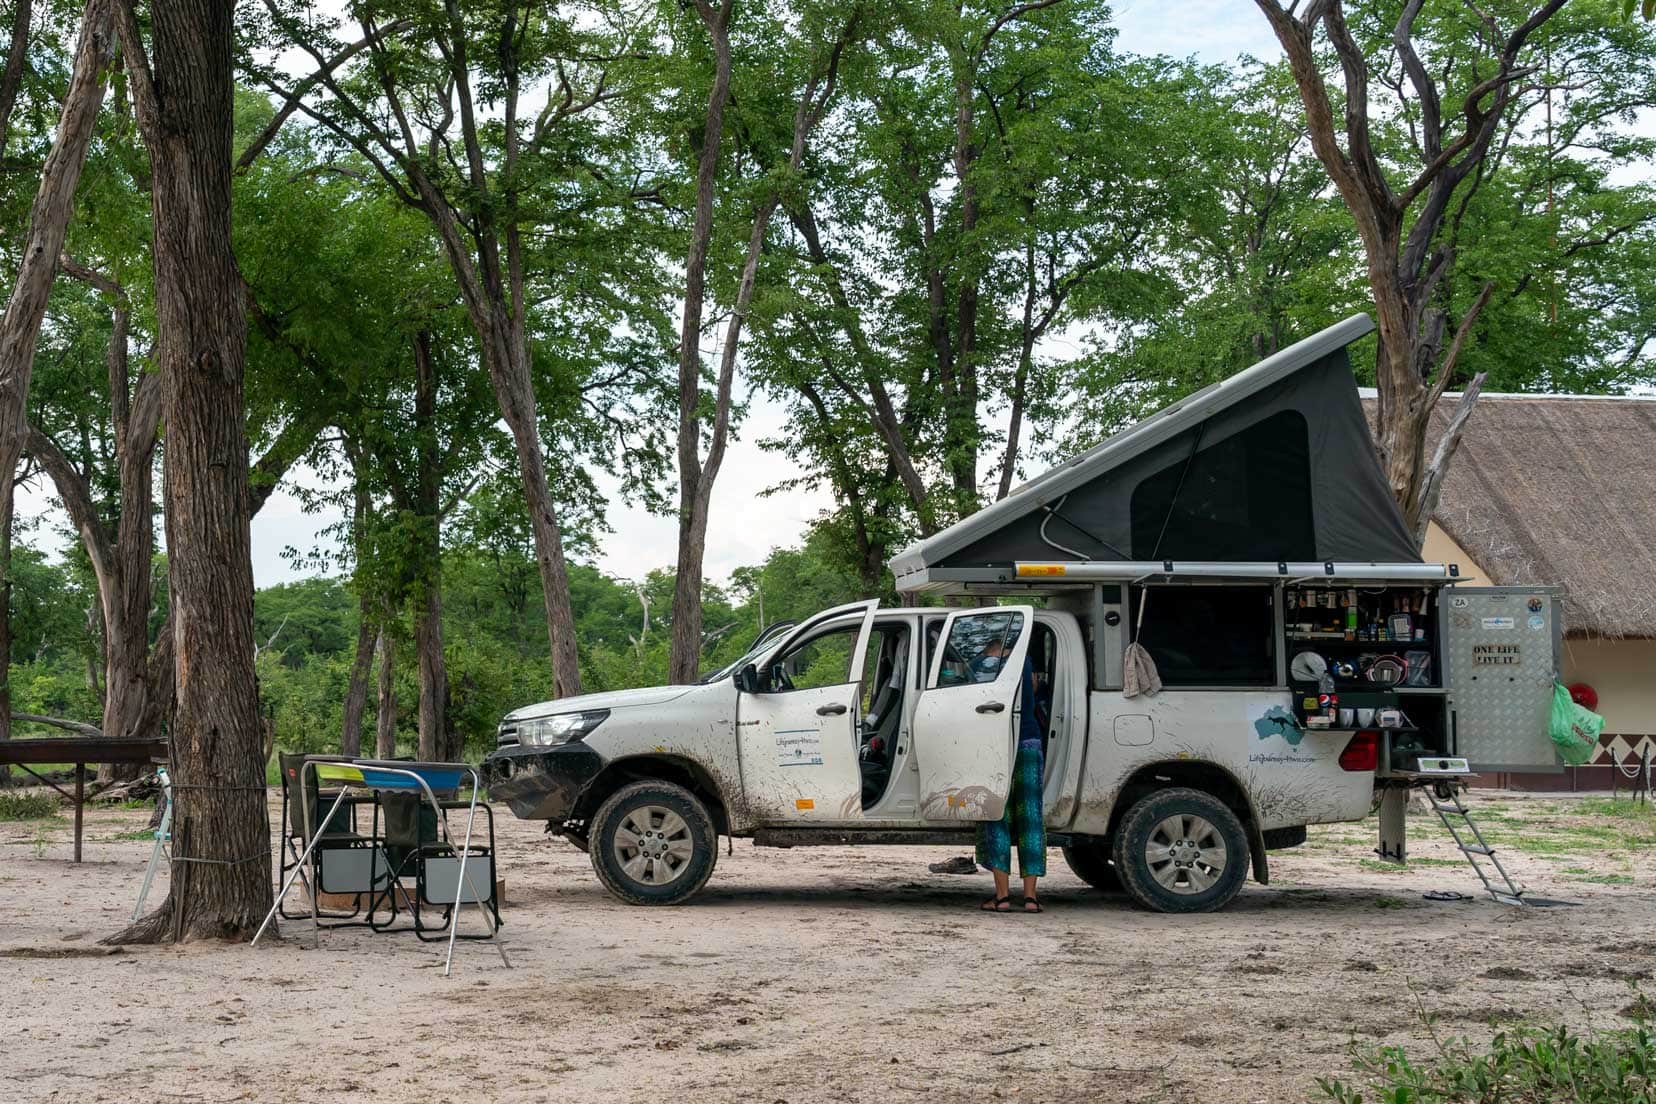
We’ve been overlanding Africa for the past few years in our own South African-registered 2017 Toyota Hilux 4×4 Bushcamper with a rooftop tent currently stored in Botswana.
The African bush calls to us each year, drawing us away for months at a time. Although I previously explored in a Holden Rodeo 4×4, my recent adventures in the Isuzu have led me to discover the rugged terrains of Western Australia.
Read more about our off-road escapades at the iconic Yeagarup Dunes here.
In a Hurry? Here’s the Lowdown on the Products I Used
- ⛺️ Rooftop Tent: Tourer-X (Kings)
- 💦 48-litre wheel arch water tank (Dunn and Watson)
- 🔋 Maxi Battery Box (Kings)
- 🚗 Steel Black Canopy
- ⚡️ Ridge Ryder 12V Control box (Supercheap Auto)
- 🔋 Lithium Battery 120Ah (Kings)
- MSA drawers (MSA)
- ⚡️25Amp DCDC charger (Kings)
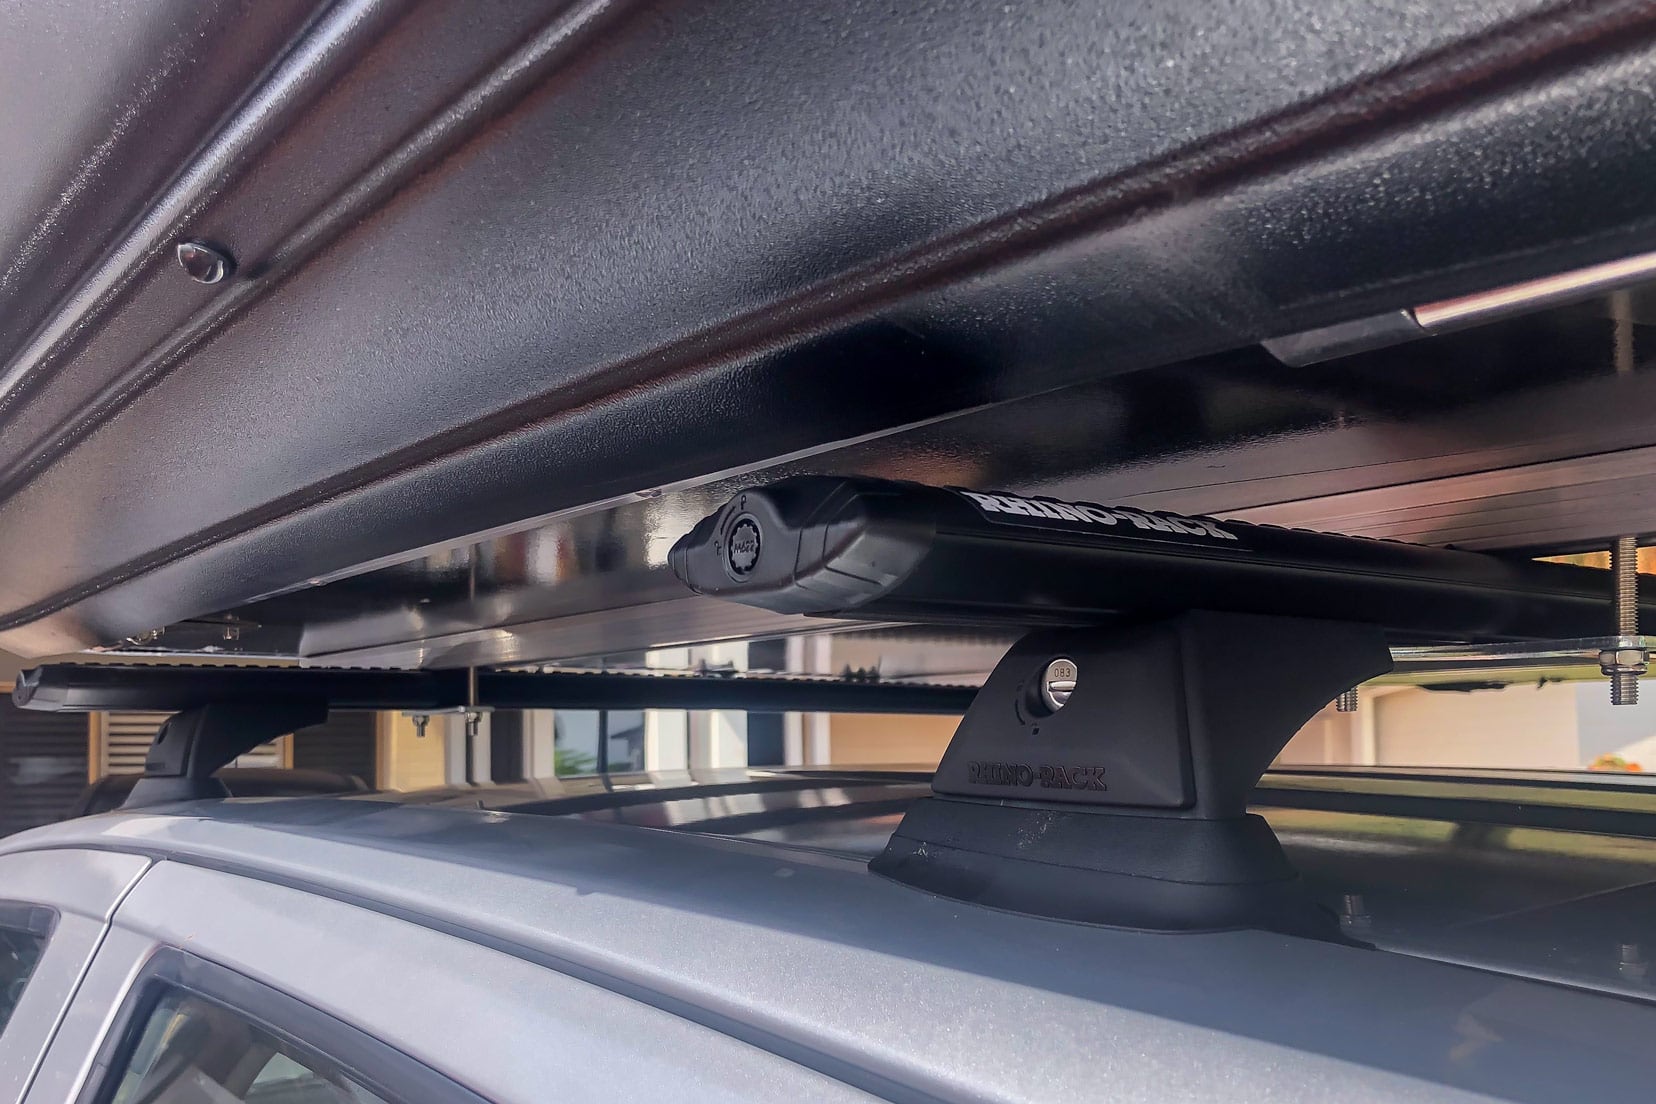
- 🦏 Roof Bars (Rhino Rack)
- Ametalin ThermalLiner Insulation (Bunnings)
- Fridge Slide Large (Kings)
- 🥶 75-litre Fridge/Freezer (Kings)
- 300W Inverter (Jaycar)
- 🔌 50A wiring kit for second battery (Kings)
Prepping the Isuzu Dmax for the Camping Fitout: Trim the Fat
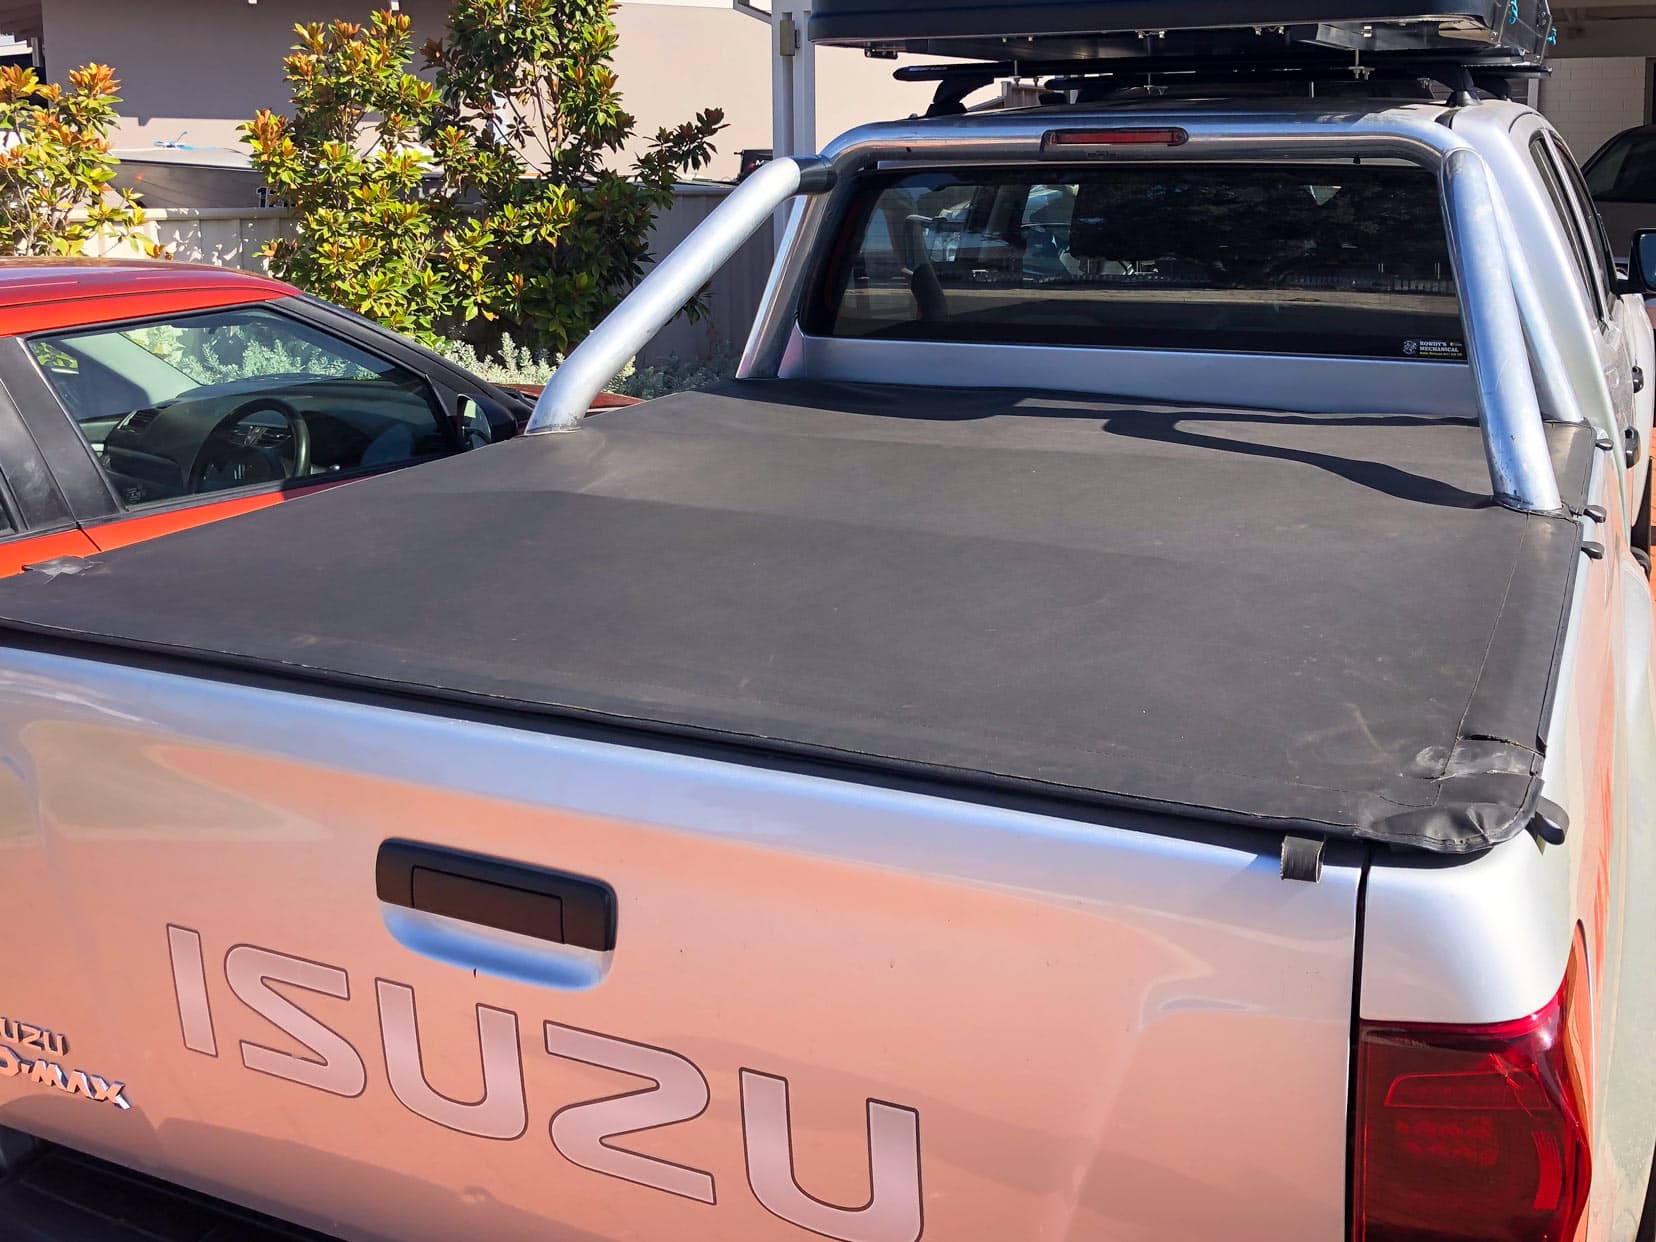
My first job was to remove the chrome sports bar attached to the tub. I advertised it as a freebie on Facebook Marketplace, but no one was interested. Not wanting to hang about, I off-loaded it at a scrap metal yard for $10.
The tonneau cover I had to bin.
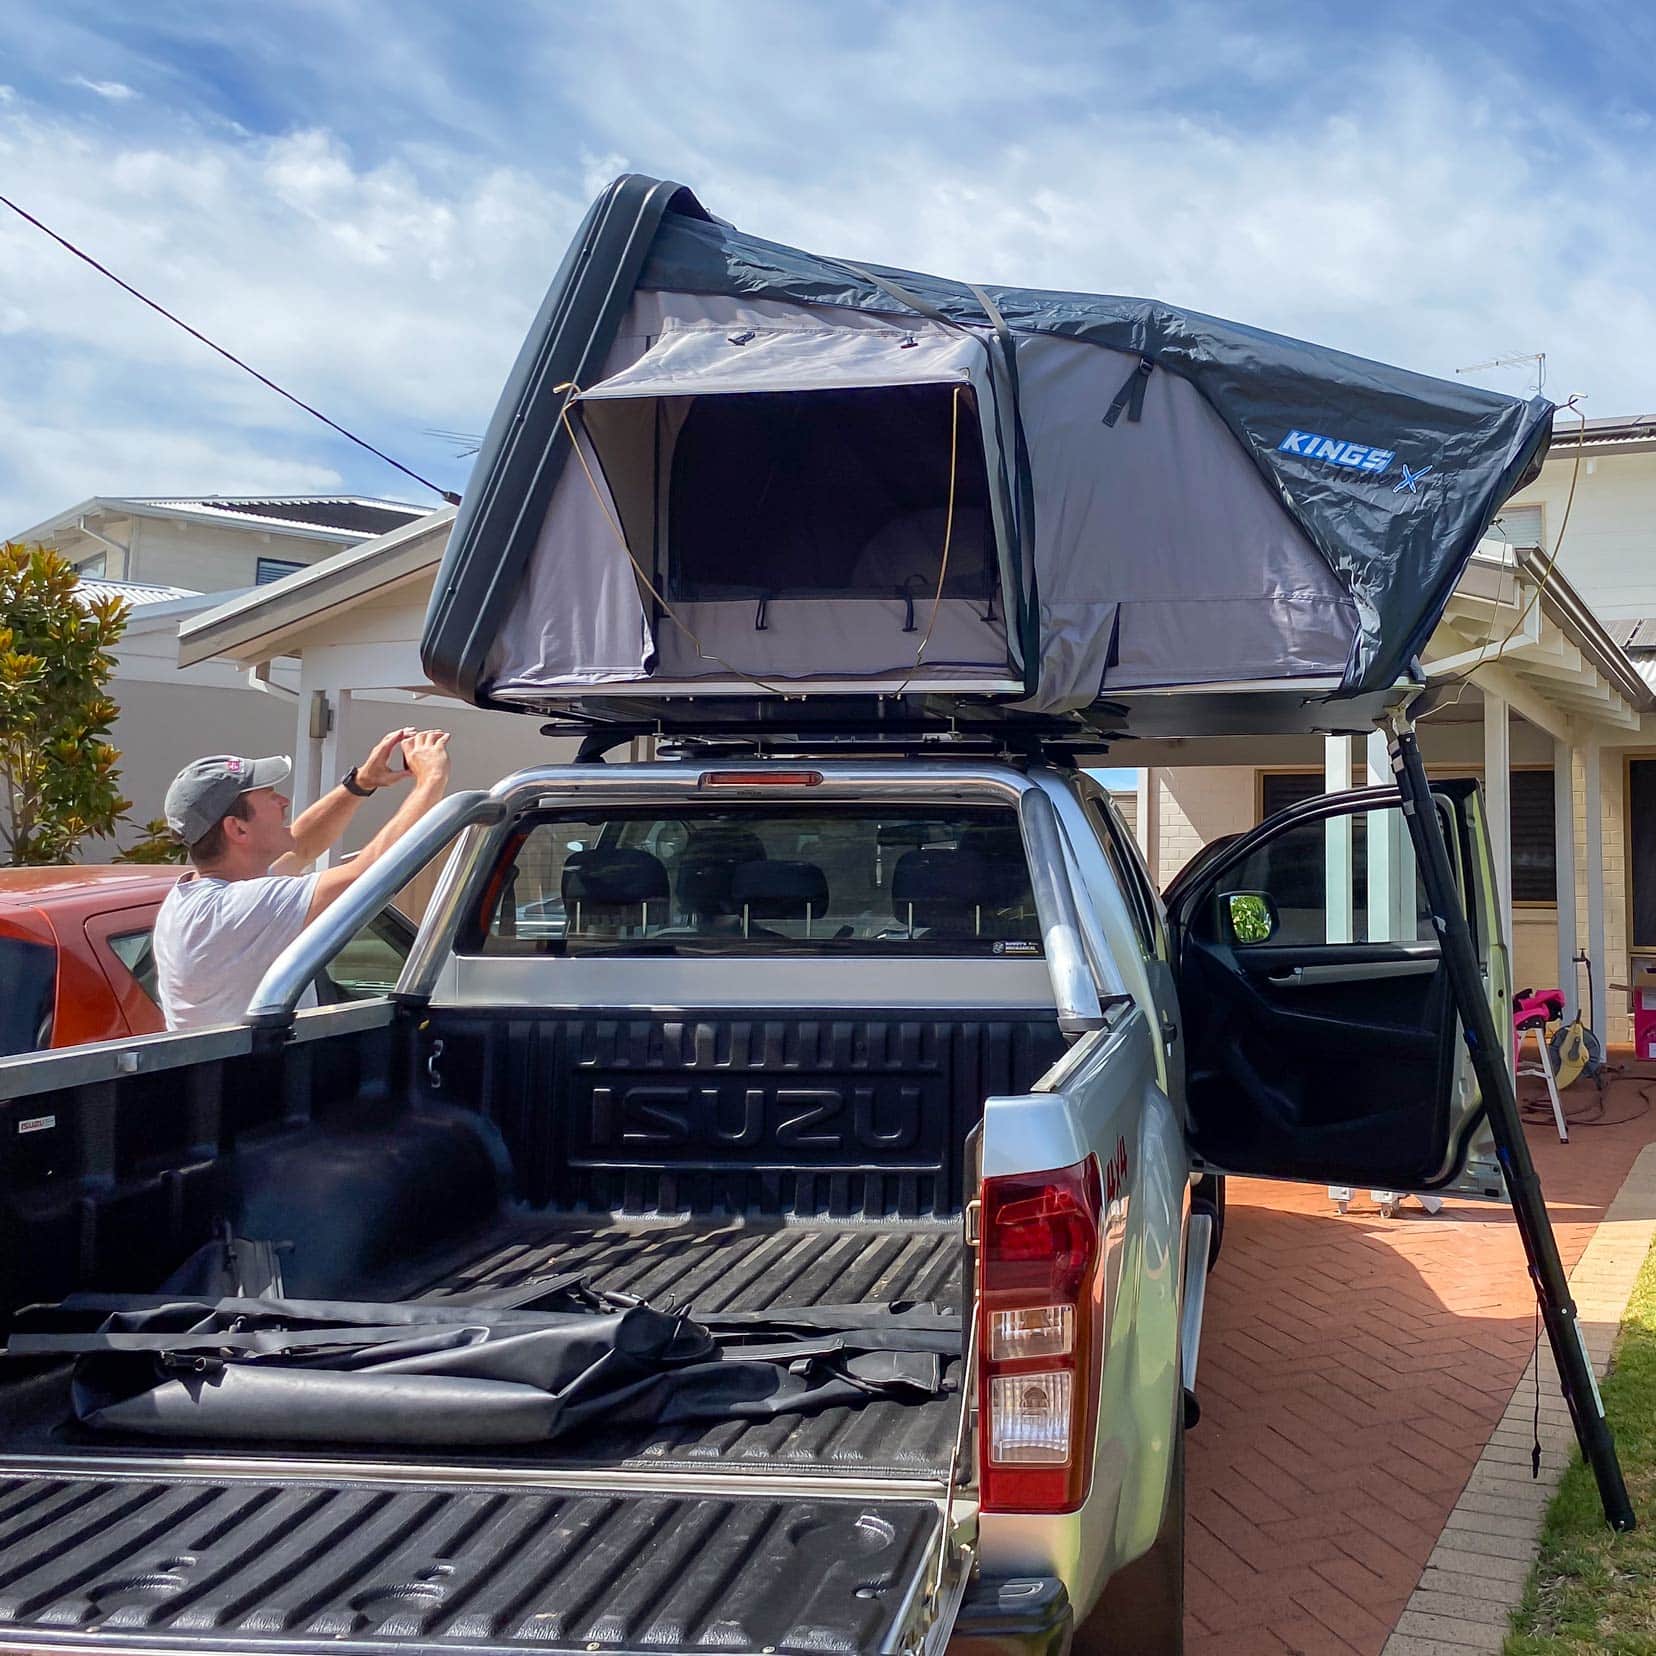
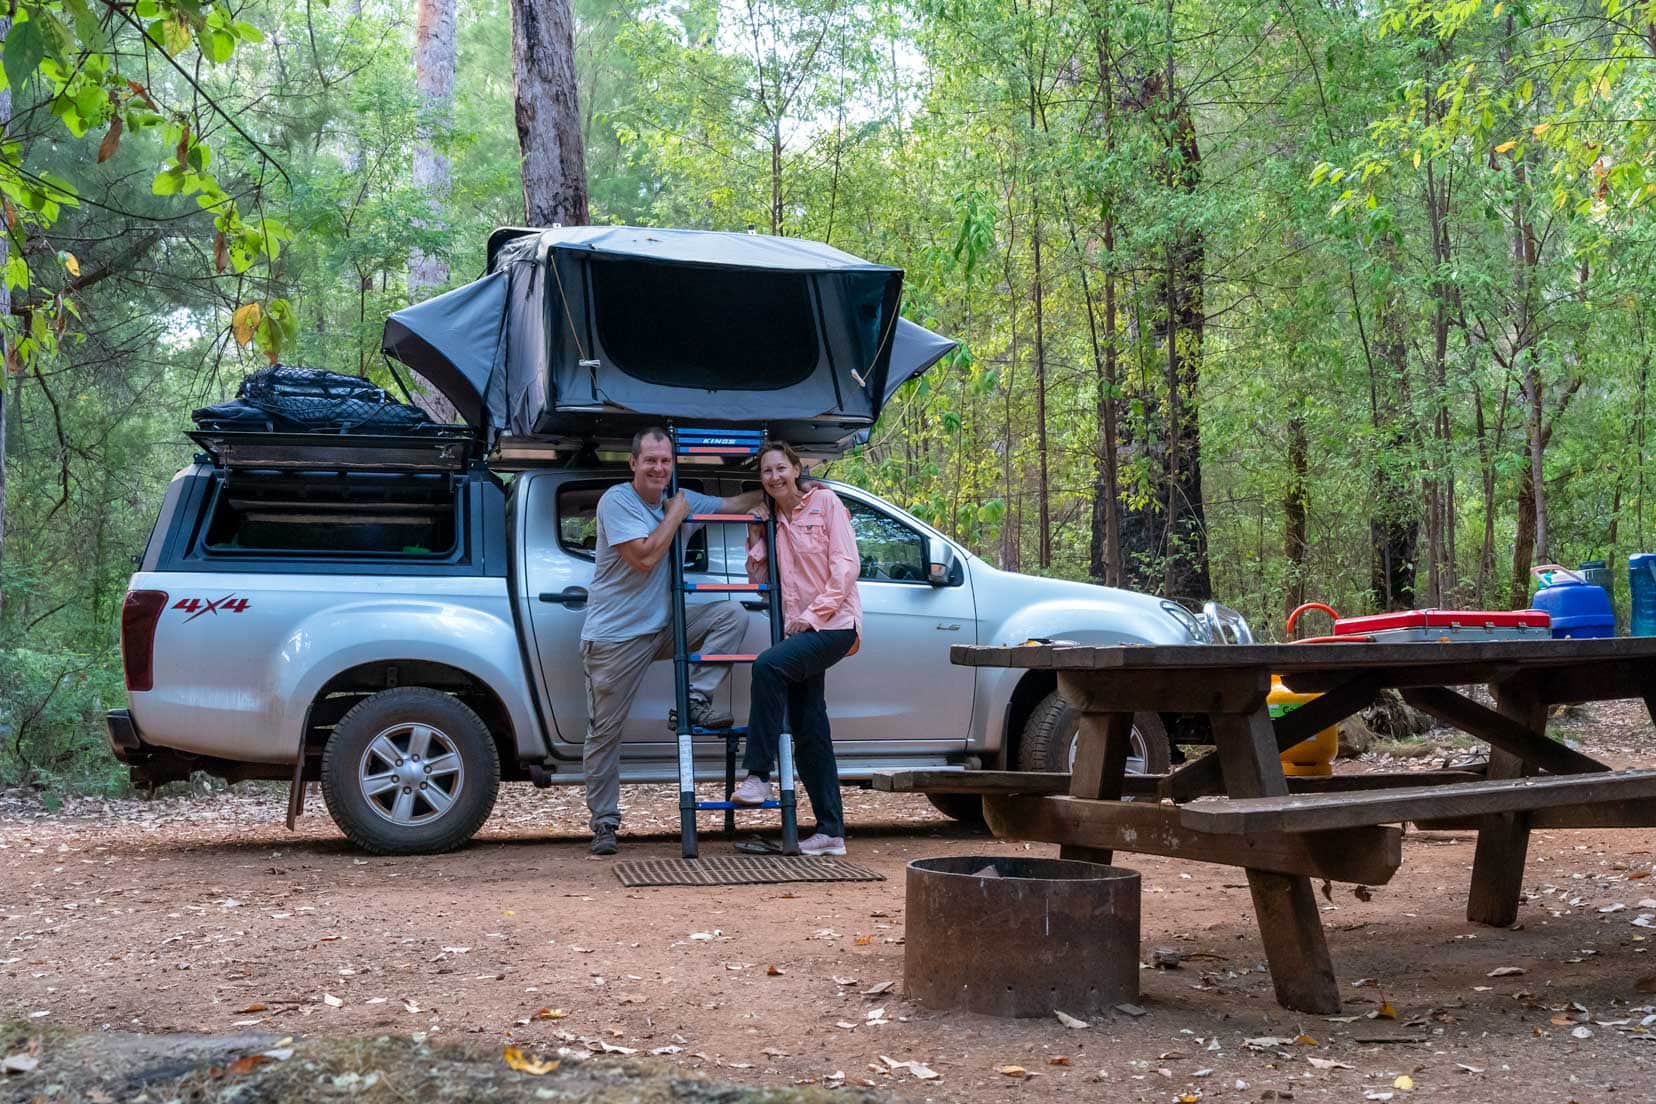
We were already fans of the rooftop tent (RTT), so we were going to follow this route for a new RTT. Searching online, it wasn’t long before I was looking hard at a Kings Tourer-X rooftop tent on sale for $1200 at Kings in Perth.
I didn’t let it slip through my fingers.
Video: How to Open and Close the Tourer X Rooftop Tent
If you’re thinking about how to open and close the Tourer X rooftop tent, then this video might help you out.
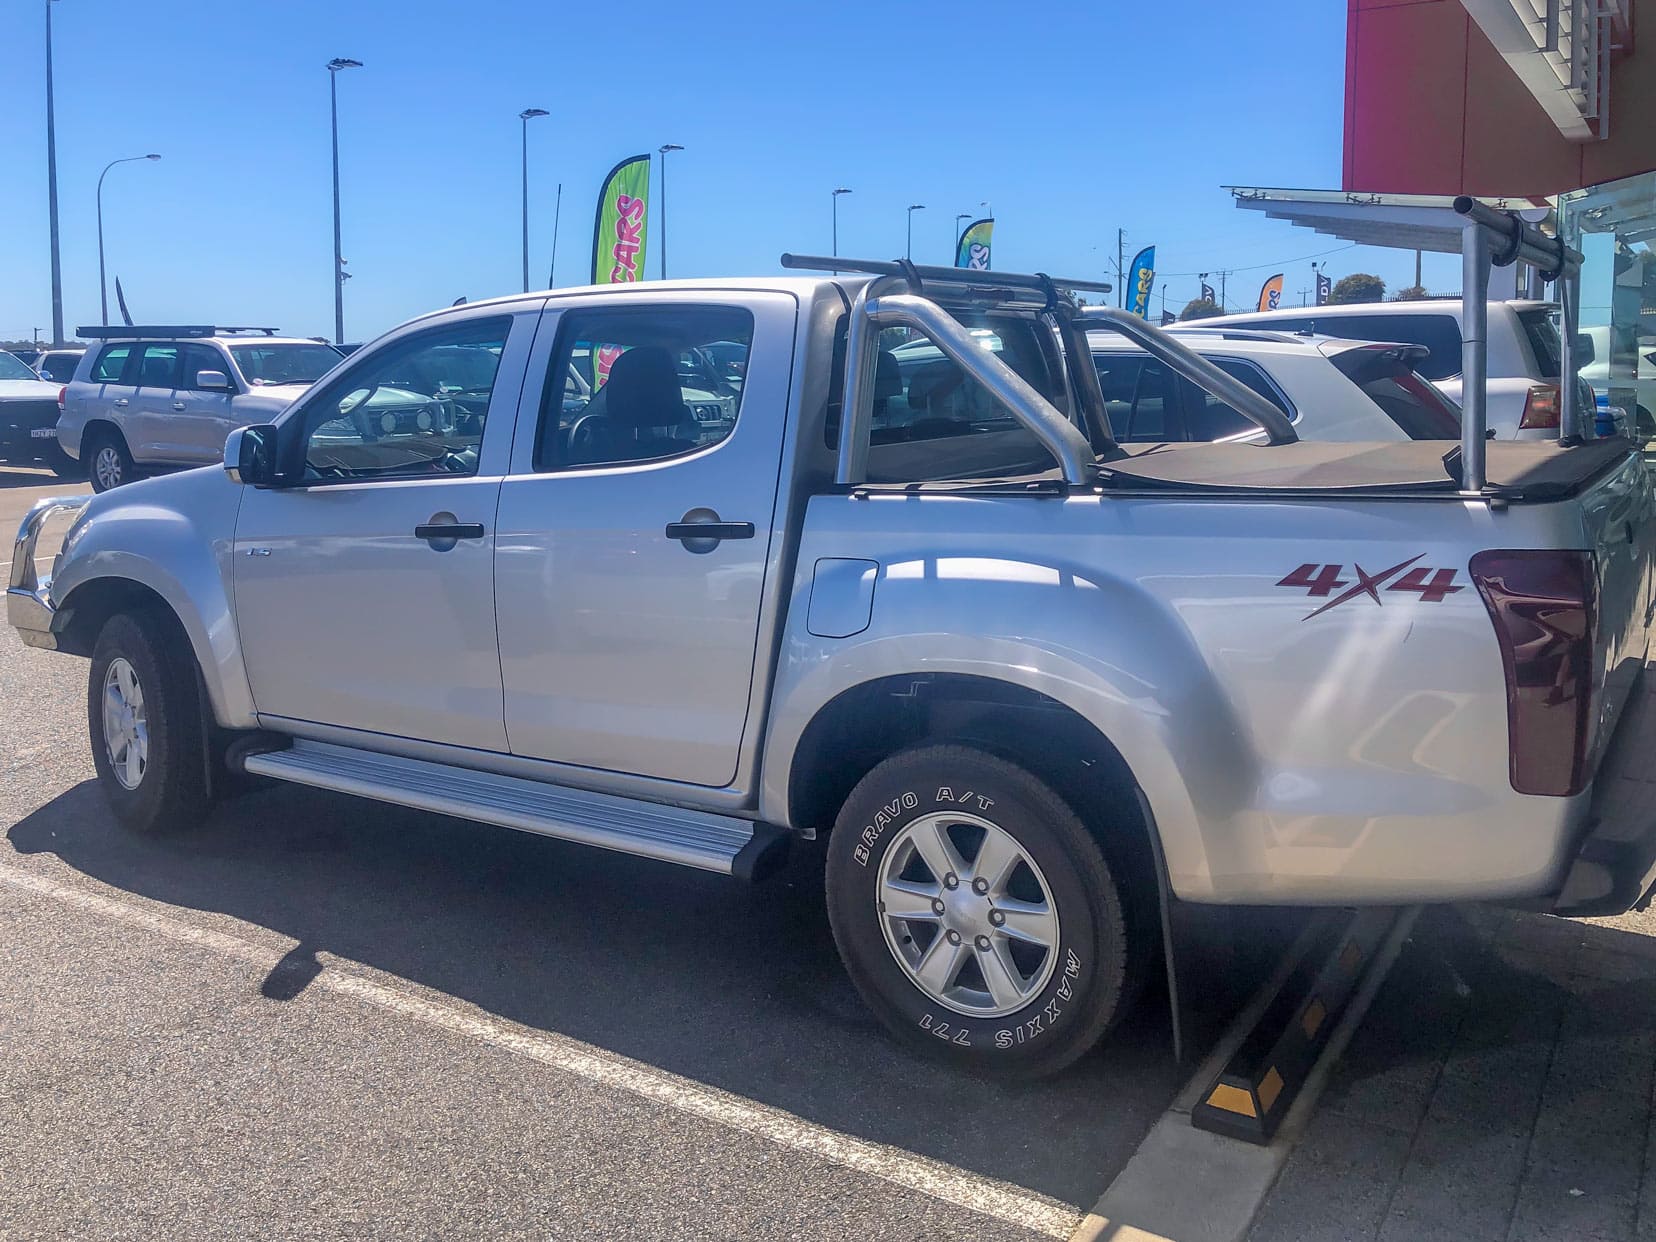
Choosing a Canopy for the Isuzu D-Max
I decided early on that I was going to install a canopy over the tub.
The big plusses in favour of a canopy were:
- It would add weather protection to gear stored in the tub
- Integral security
- And offer badly needed storage space
Shopping around in Perth for a canopy was not fruitful. There was no available stock, a lead time of 8 weeks, and prices were over the top.
So I looked to the east and found a powder-coated black steel canopy from a Queensland supplier for $2000, half the price of similar WA products.
Sold!
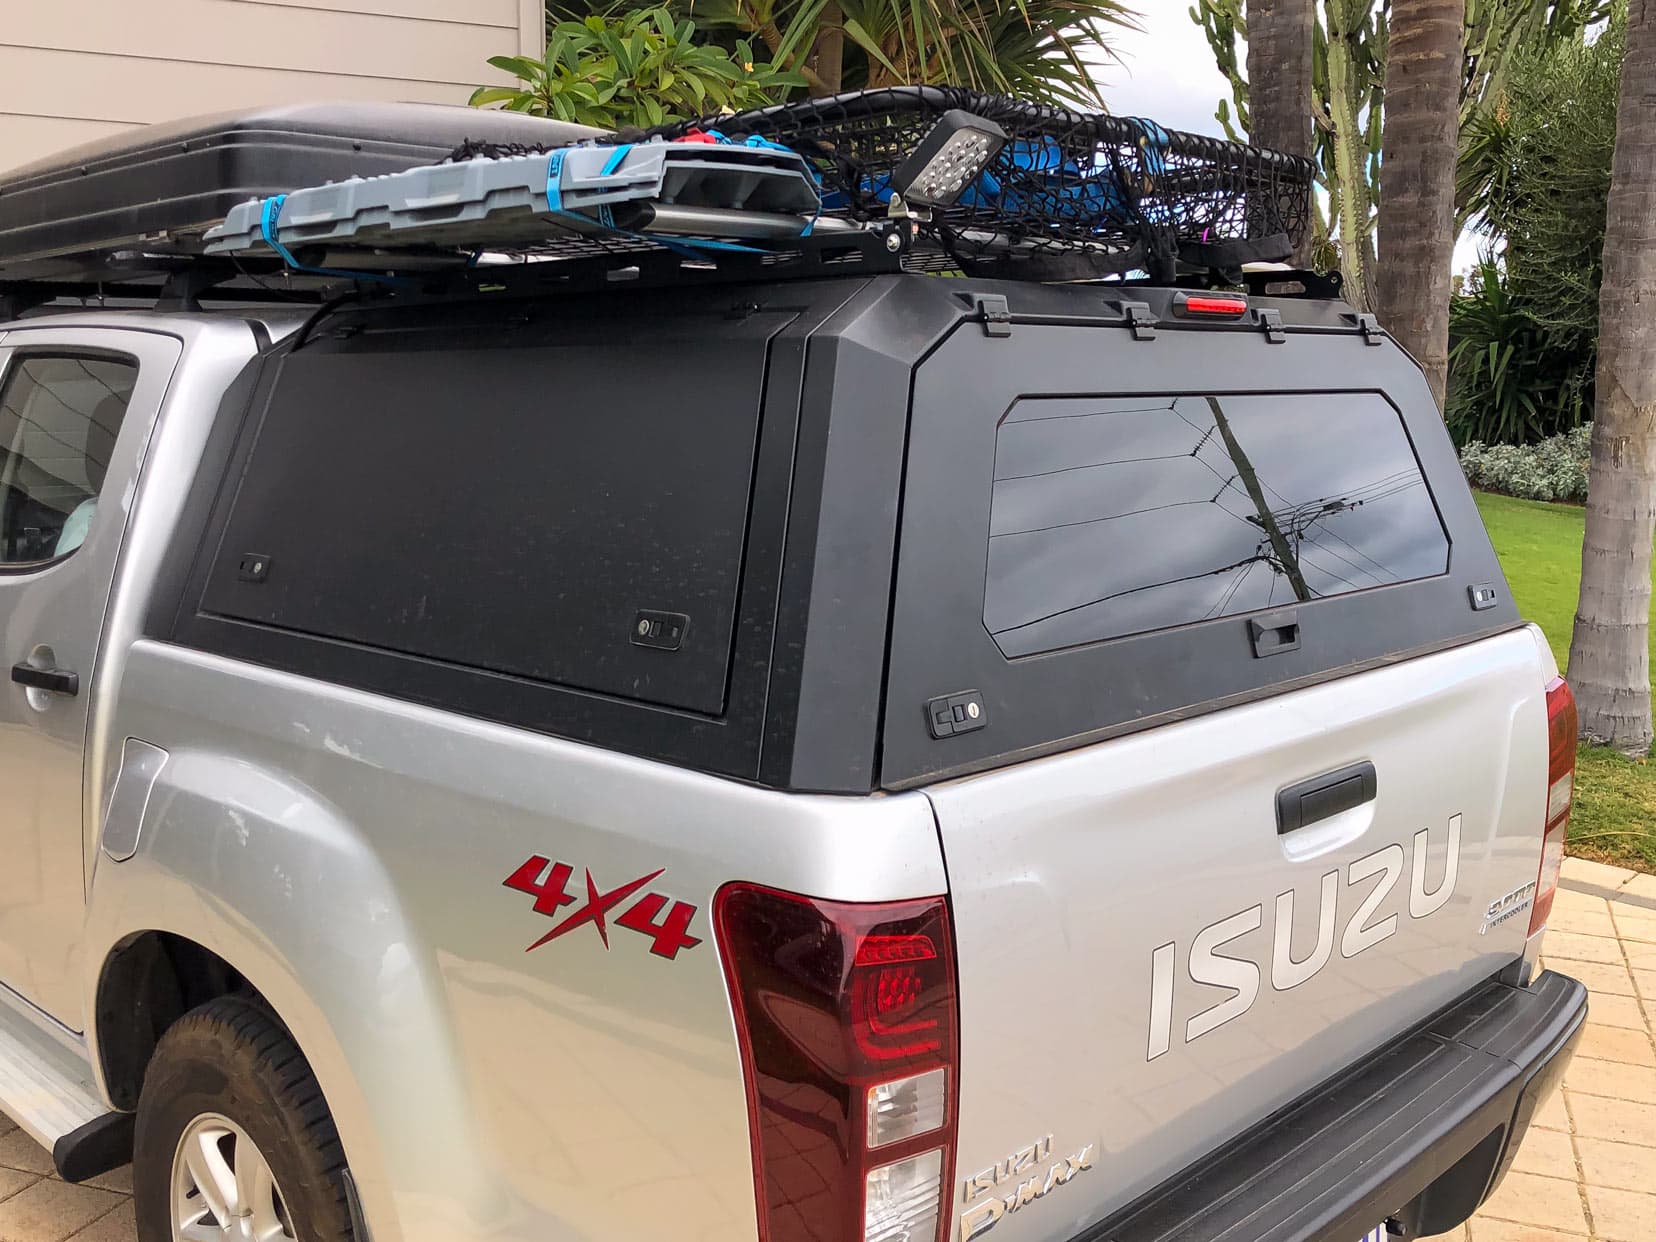
I forked out an extra $400 for shipping and had the canopy on the doorstep within the week. What I liked about the canopy is:
- It is steel and not fibreglass, so it has inherent strength
- It has side gull-wings that are window-less, making it harder for prying eyes to see into the tub space
- A tie-down rail on the canopy roof
- The reasonable price tag.
I had a bit of help to get the 110 kg canopy fitted.
Deciding Where to Mount the Roof Top Tent on the Isuzu Dmax
The positioning of the rooftop tent presented two obvious options: over the cab or on the canopy.
The rooftop tent weighed in at 68kg. I had to account for static and dynamic load ratings for both configurations. Here are the figures I had to weigh up.
Canopy
- Dynamic load rating = 200kg (manufacturer claim);
- Static load rating = 300kg (manufacturer claim)
Cab Roof
- Dynamic load rating = 60kg (estimated)
- Static load rating = 180kg (estimated x 3 of dynamic load rating)
Why only an estimated load rating for the cab roof?
I couldn’t find concrete information on dynamic or static roof load values in the owner’s manual, which was frustrating. Still, this sentence gave me a ballpark dynamic load figure to work off: ‘The roof rail maximum loading capacity is 60kg.’
Another assumption I made for static load is that manufacturers build a ‘factor of safety‘ into their figures. The cab-mounted tent plus rails would push the total dynamic weight on the cab to 71kg or an excess of 18%.
Given that I was over the estimated 60kg dynamic load rating by a fair margin, mounting on the cab roof did not seem viable. However, I intended to install a second roof rack with a cargo basket on the canopy. This was to hold the heavier camping items plus a second spare tyre.
The decision was already made for me, so I mounted the rooftop tent on the cab roof.
When calculating the roof’s static load, I used the formula (x3 dynamic load = static load) that I’ve read others tend to use.
- Total static roof load = 180kgs
- Total weight of equipment = 71kg
- Available load = 109kg for my wife and me. Cutting it pretty fine, but I reckon we’d be ok.
Tub Fitout of the Isuzu D-Max
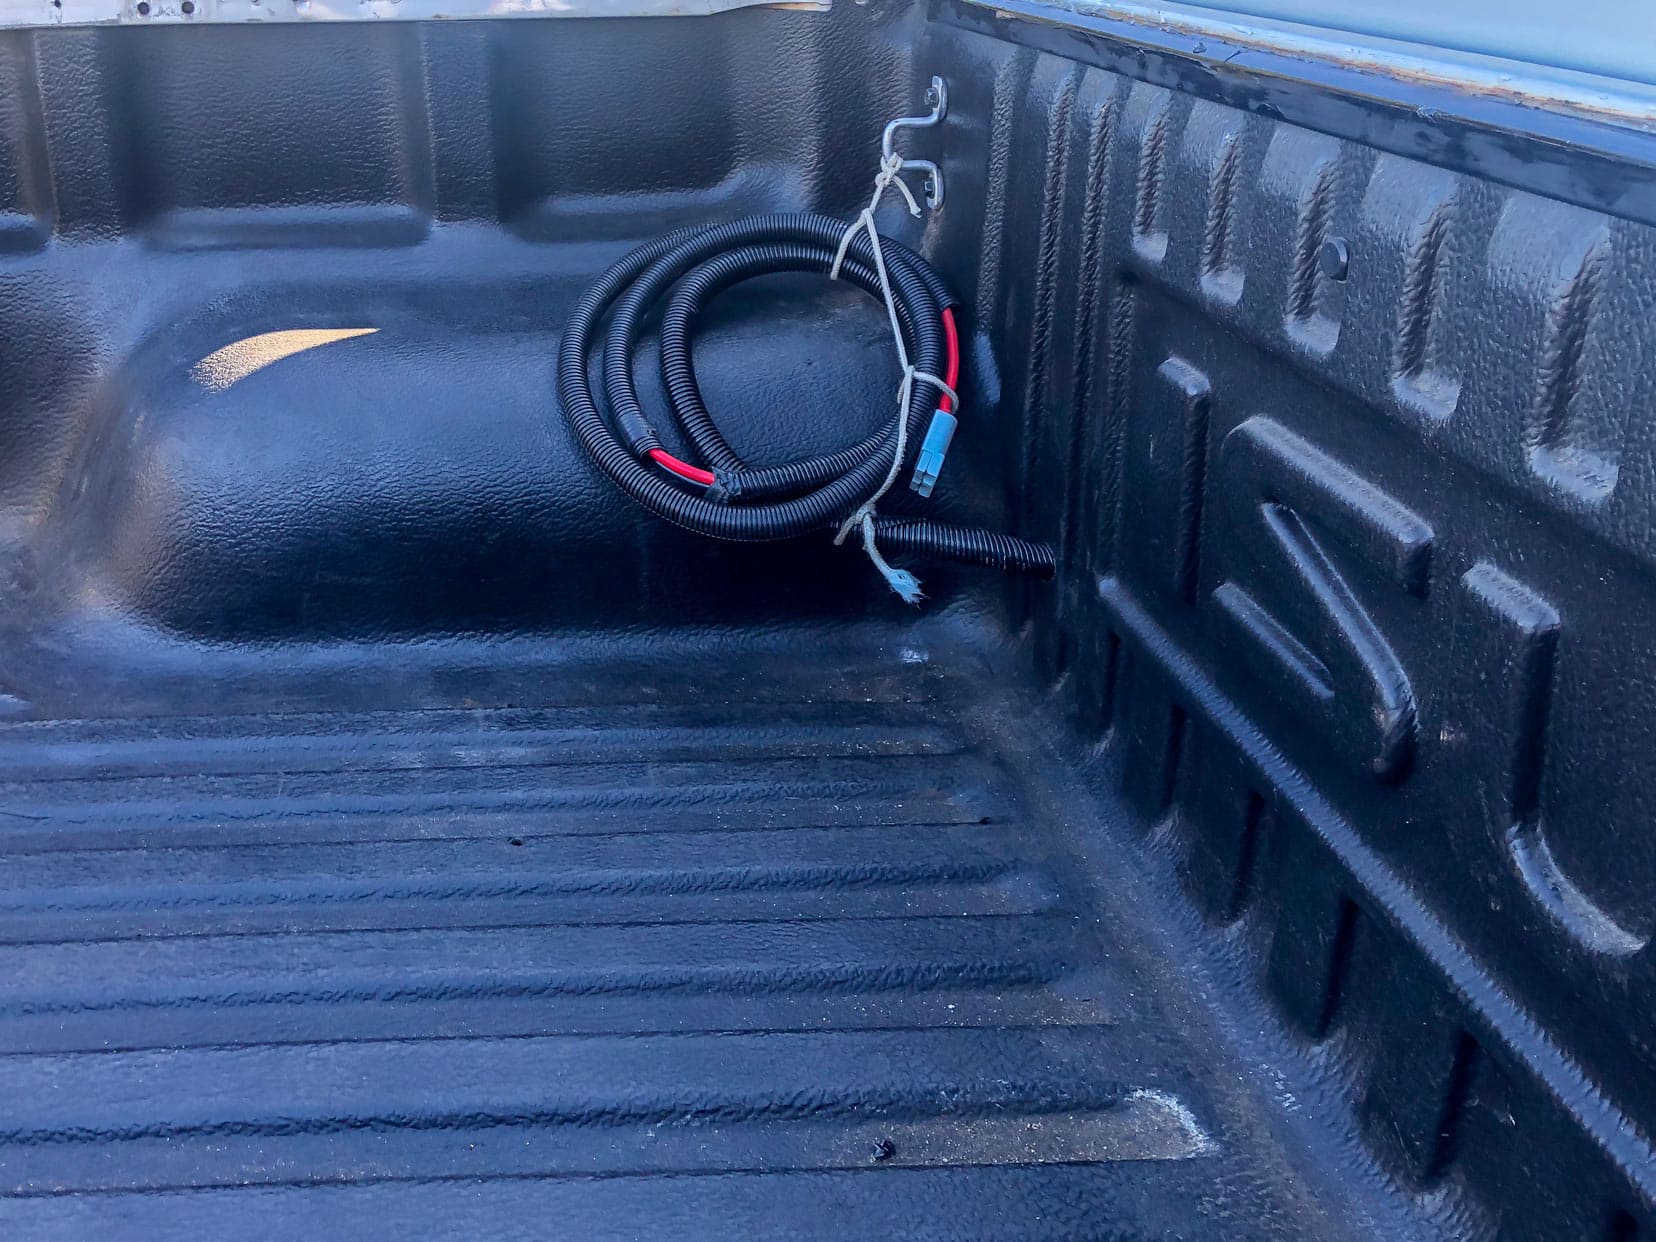
Run Power
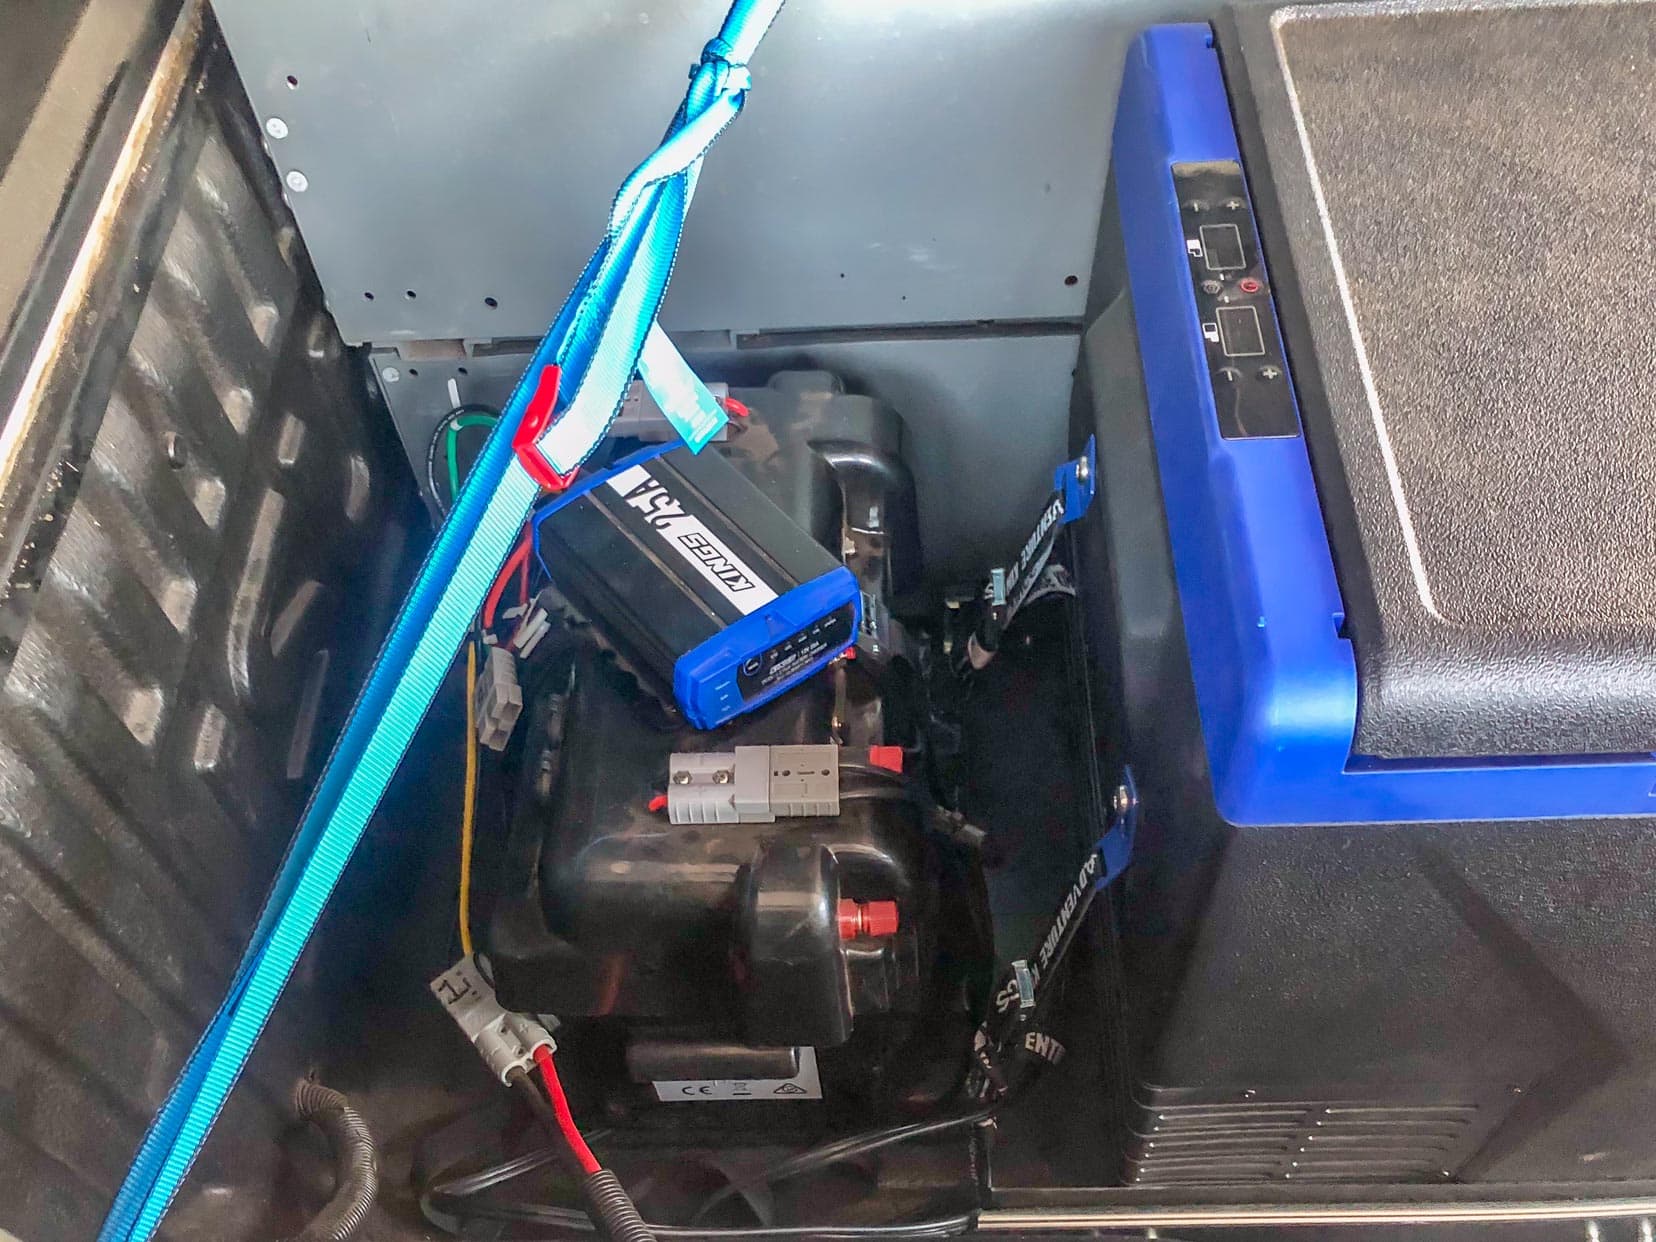
The first job was to run power down to the tub from the starting battery. I’d bought a Kings 50A wiring kit that came with battery ring connectors, a fuse, and an Andersen plug and was quick to install.
Starting from the front battery, I ran the wires through the conduit and back to the front of the tub, tie-wrapping them to the underside of the car as I went.
Removing a rubber grommet in the front wall of the tub body, I drilled out a hole in the plastic lining and pushed the wires through.
Passing the wires through the hole was a bit fiddly, but I did it this way to avoid drilling into the tub elsewhere.
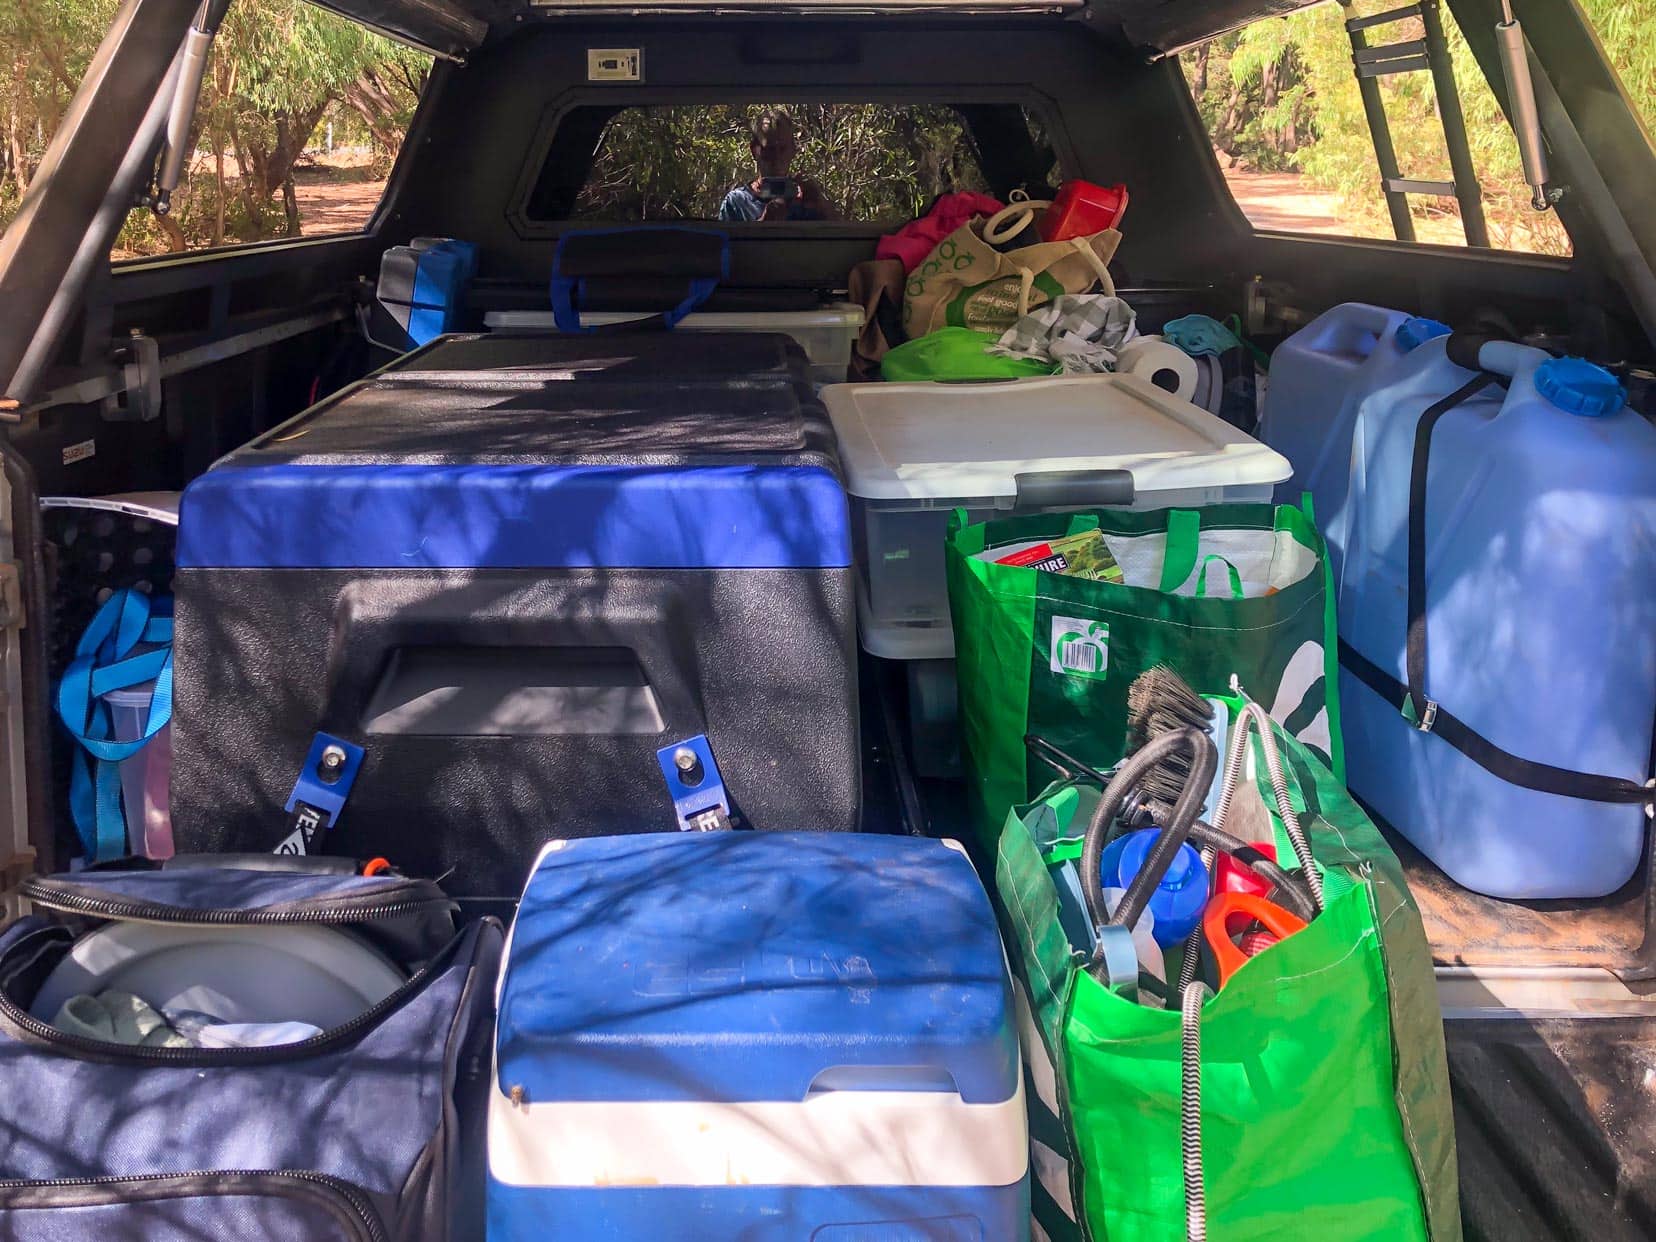
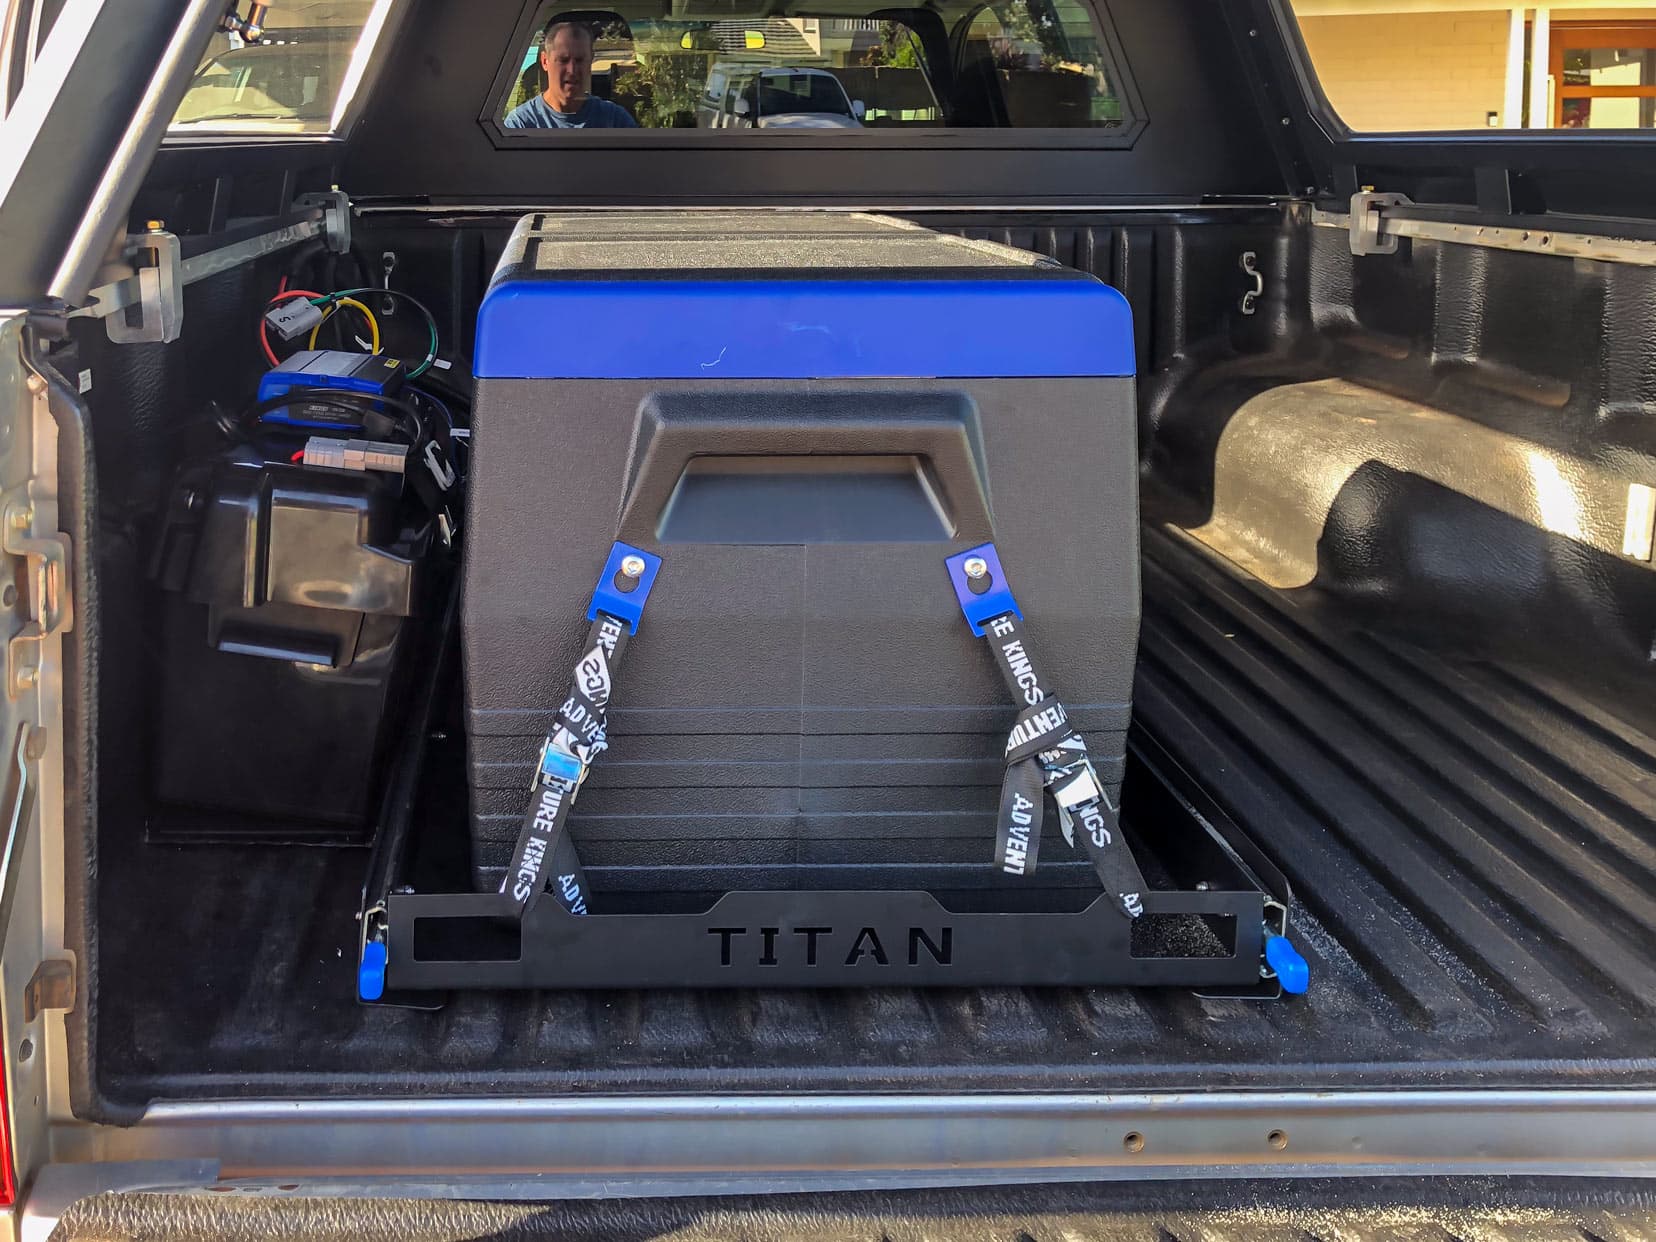
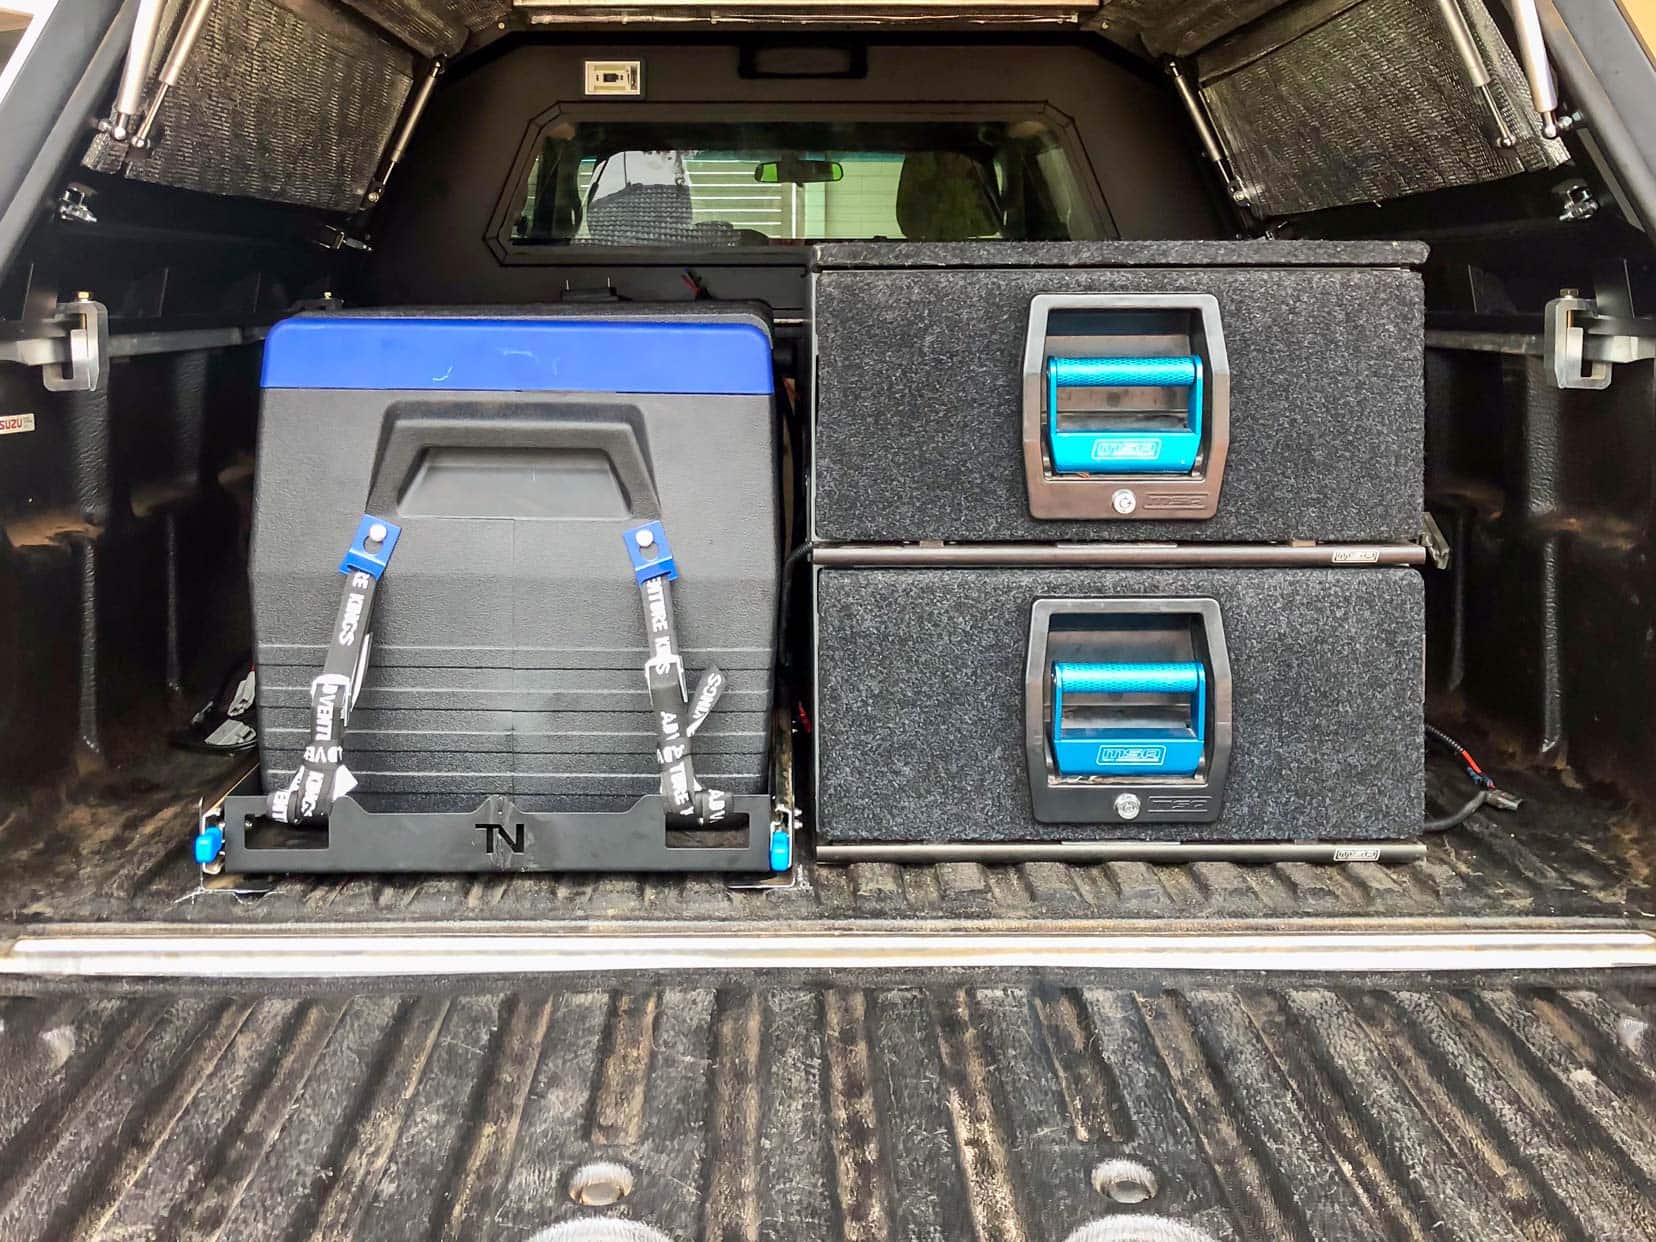
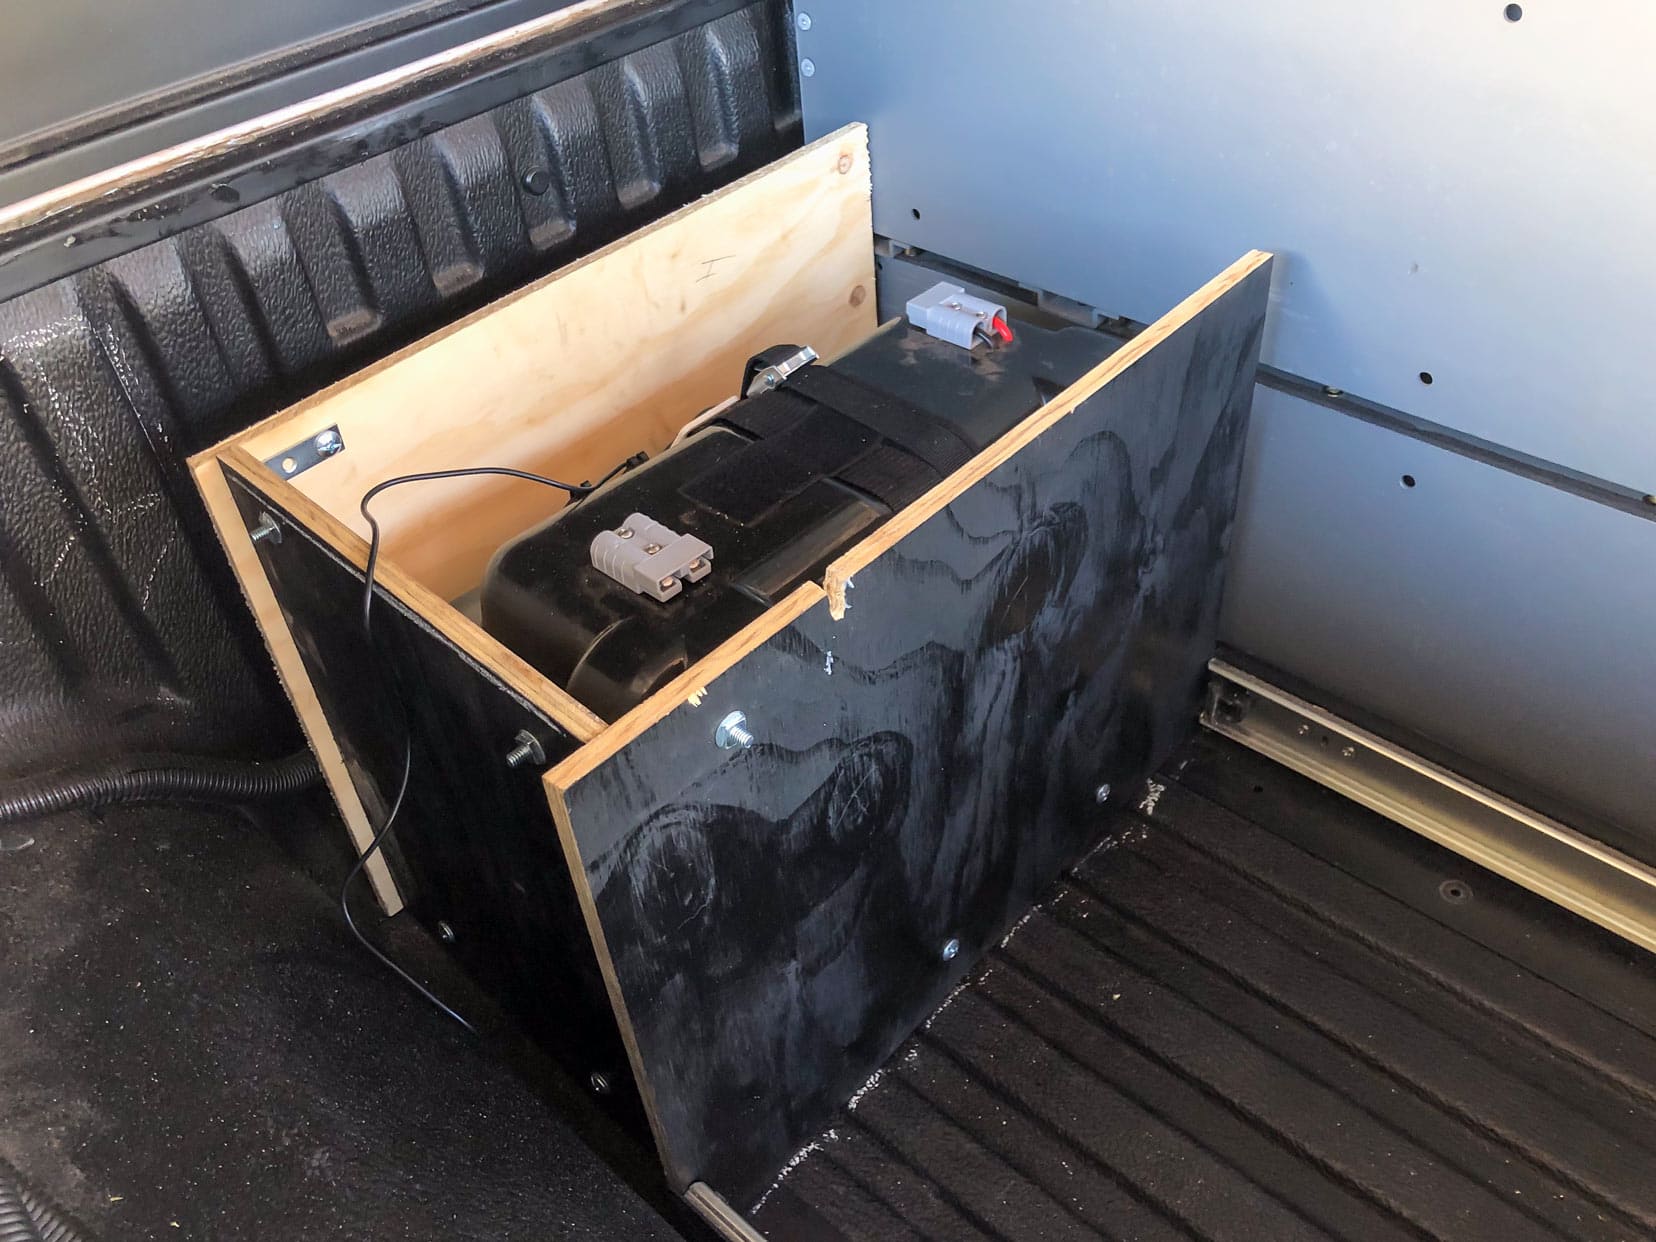
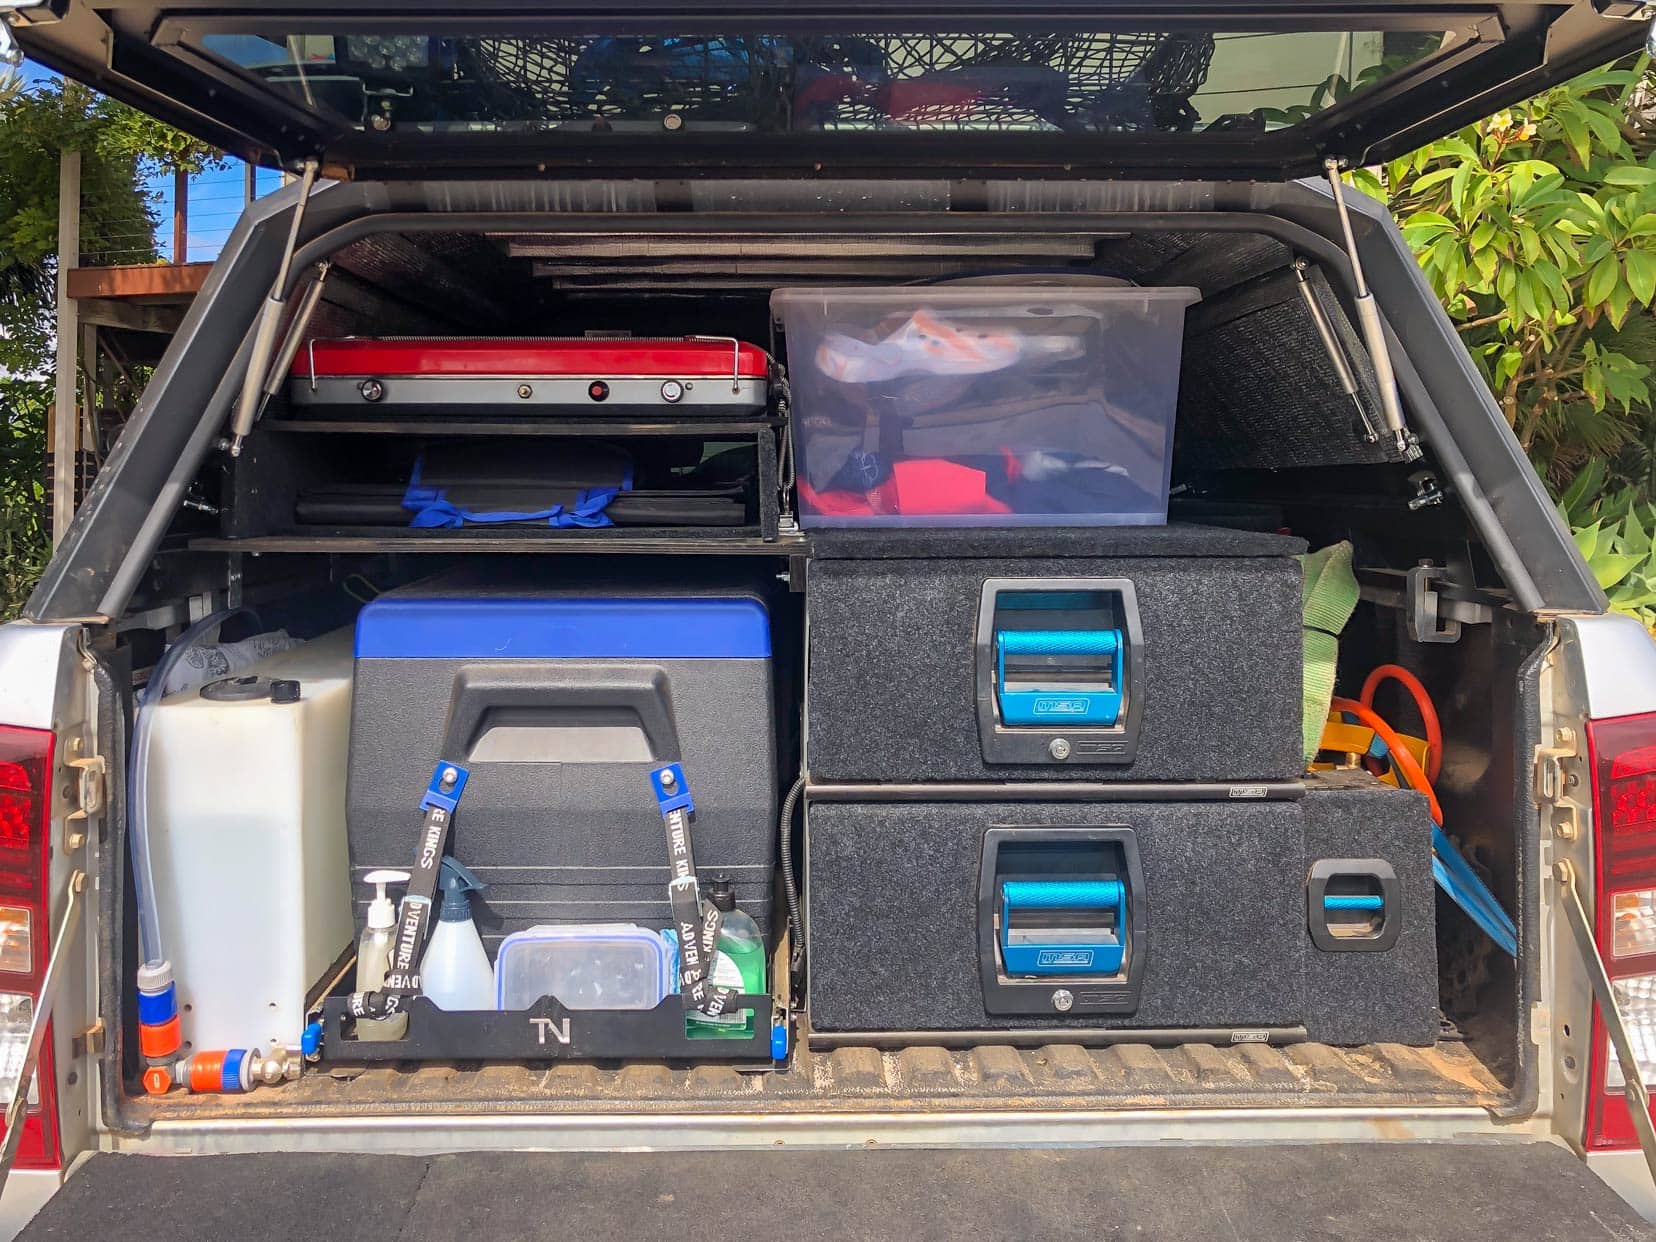
With the power run to the tub, I could focus on fitting a Kings battery box with a 120Ah lithium battery and a large-sized Kings fridge/freezer slide for the Kings 75-litre fridge/freezer.
Still to fit in the tub space were a water tank and a couple of stackable drawers, which I hadn’t yet bought.
I did a trial fit, placing the second battery box beside the fridge/freezer slide to see how workable it was during our camping trip to Walpole.
At this stage, I considered a vertical-mount water tank that would sit along the forward tub wall to be held by securing straps off to the side.
However, I had reservations about access to fill the tank with the canopy already fitted. On top of that, I couldn’t be sure the tank could be secured properly to prevent forward and aft movement and be the right size to allow the electrical cables to fit.
The side-by-side battery and fridge-slide combo just wasn’t a workable option. I removed both from the tub, which was no big deal at that stage of the build. That’s the value of doing a test run before everything is fitted.
I could now place the battery box behind the fridge/freezer slide and started considering a wheel arch-type water tank.
Modify the Fridge Slide
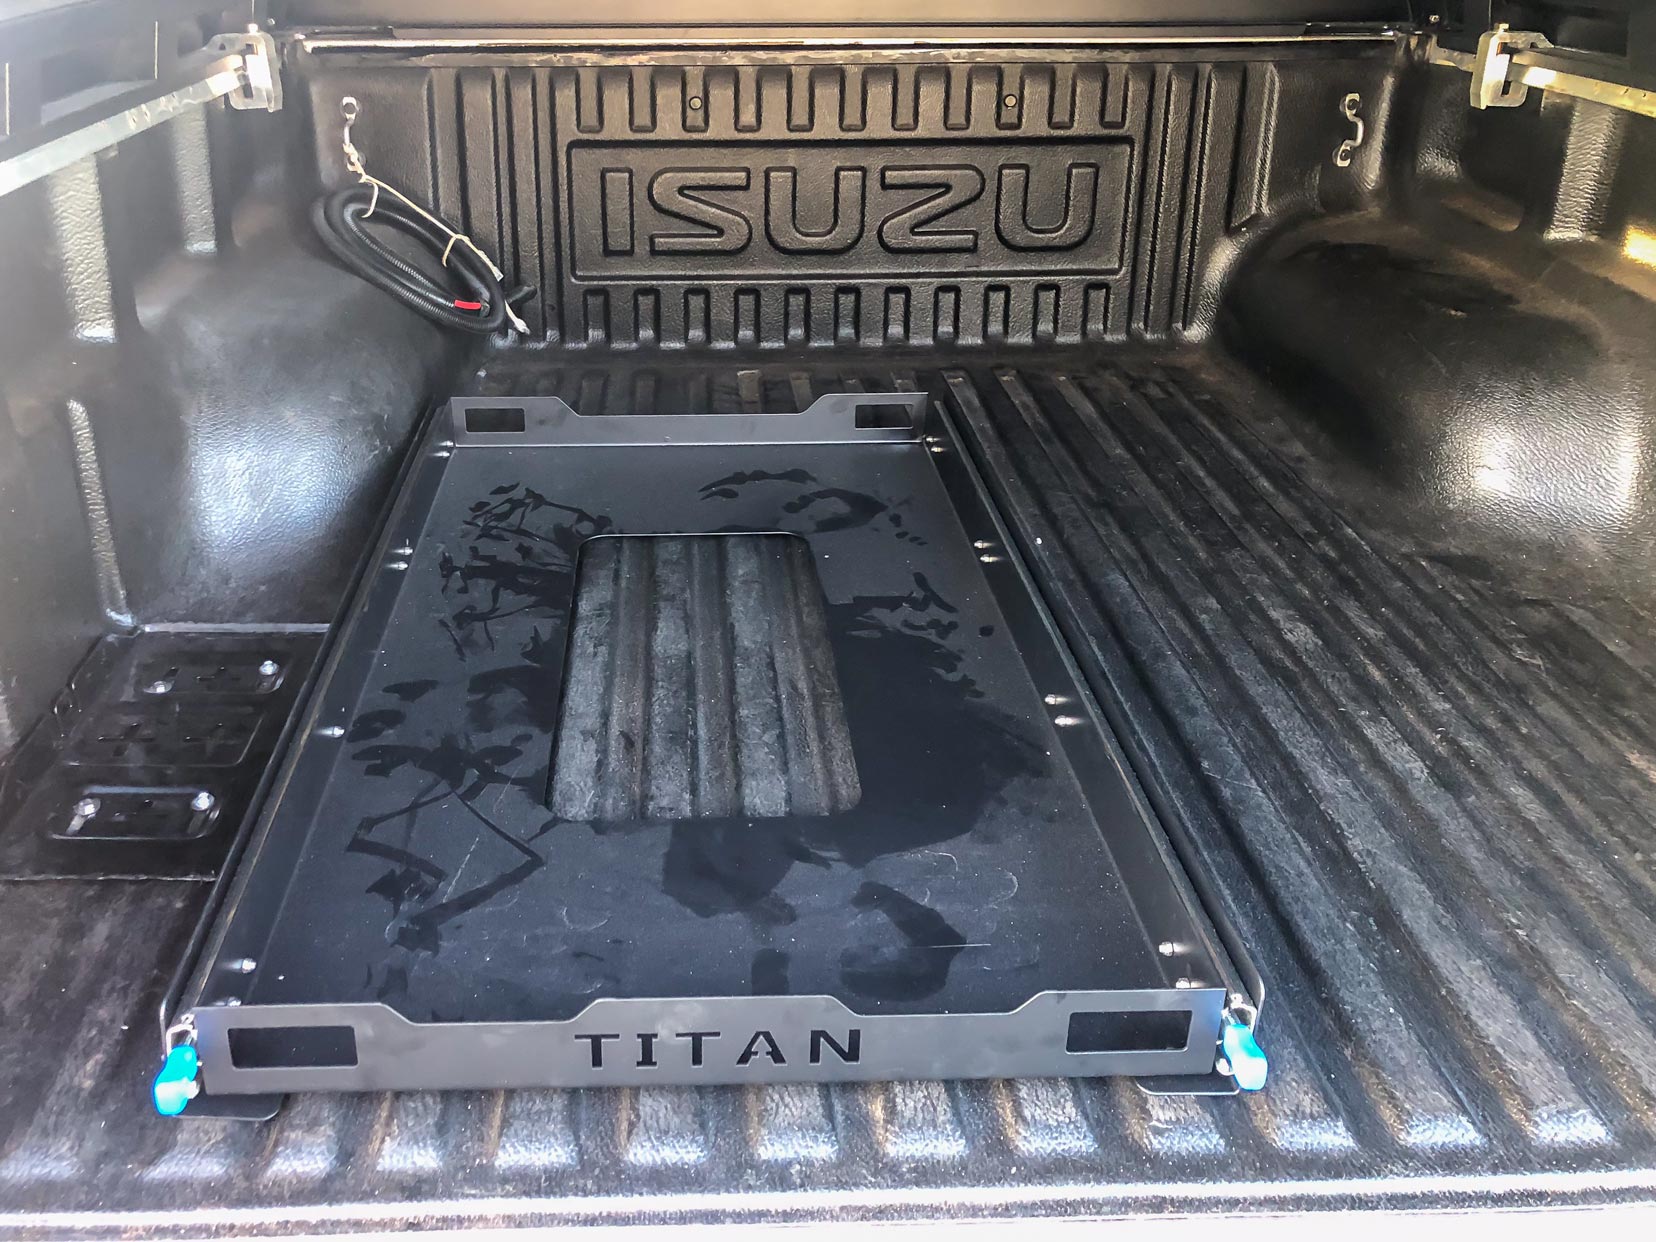
Tub space is a premium. When I sat the 75-litre fridge on the oversized slide, I saw I could free up about 4” of valuable width. This would be needed for the drawer system.
I did a quick look online to see if a different slide would do the job, but I couldn’t find anything that would fit the fridge snugly. That left me with one solution: a cut and re-weld of the slide.
After marking up the slide, I found a welder on Gumtree who could complete the 45-minute job for $70.
The Kings 75-litre fridge/freezer. unit now fits snugly within the slide, which is butted up against the wheel arch. This maximises the remaining available tub width for the drawers.
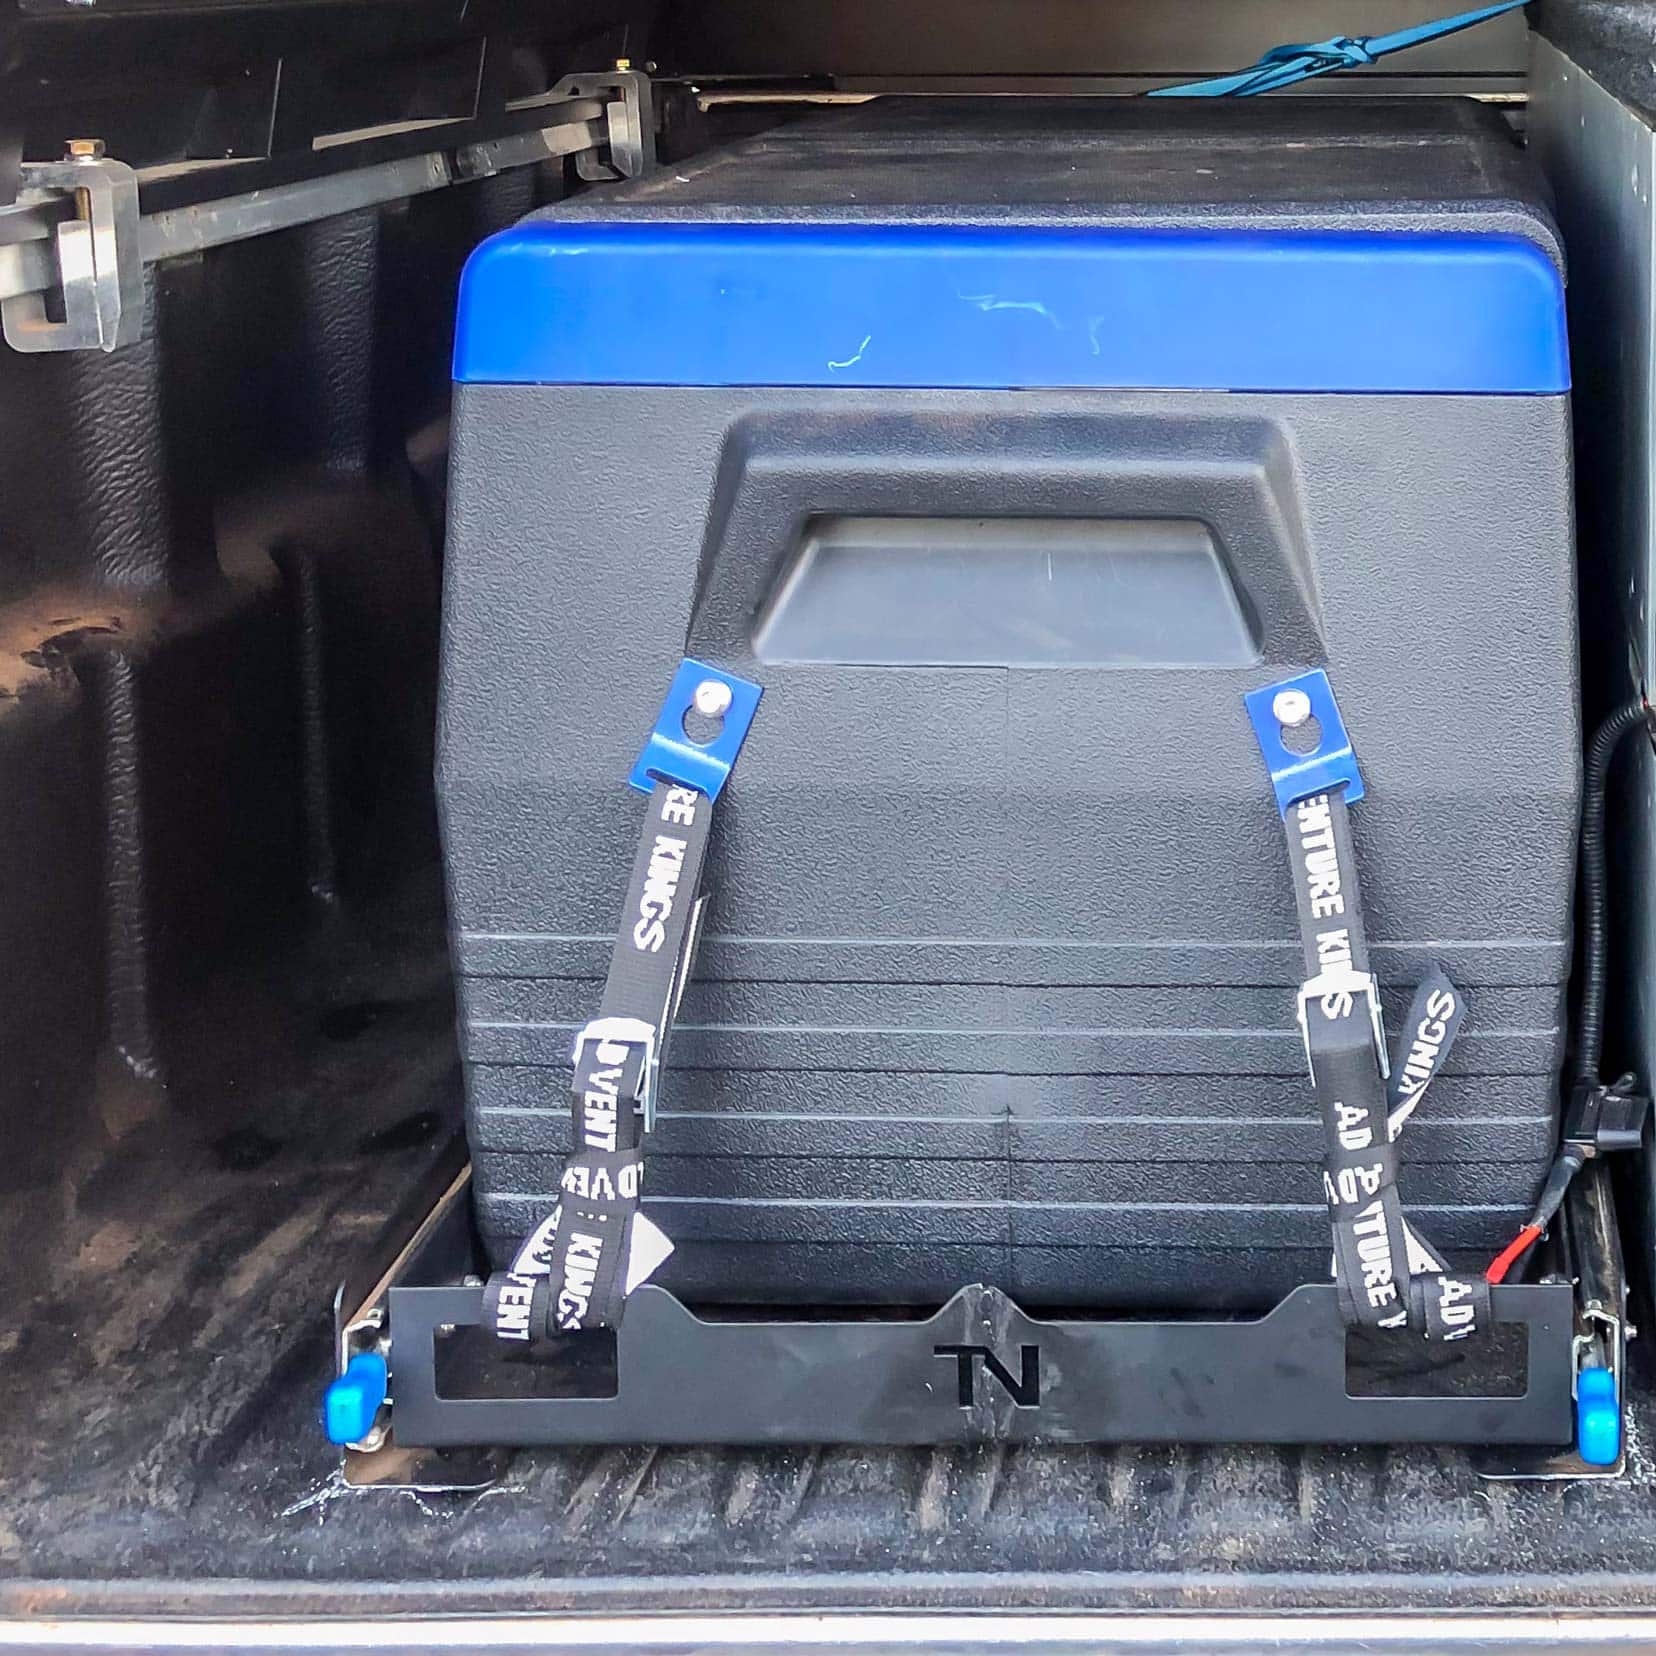
Next, with the fridge slide bolted into position as close to the wheel arch as I could get it, I positioned and bolted down the battery tray behind it. The battery box was secured to the tray.
Ute Tub Drawer System
I‘d seen some new MSA drawers on display that were very well made, 134cm long and the right width, but I couldn’t justify the asking price of $1550 per drawer. At the other end of the scale, there were quite a lot of cheap Titan drawers available, but the customer reviews were hit/miss.
The old saying ‘You get what you pay for‘ rang in my head, so I gave the Titans a miss. I’d wait for a second-hand set of MSA drawers to surface.
Lady Luck obviously overheard.
A week later, I found a set of MSA drawers on Facebook Marketplace for less than half the price of a pair of new ones. I pounced. These drawers had come out of a Nissan Patrol and were a side-by-side assembly.
I called MSA in Queensland to discuss vertical stacking and promptly ordered an MSA drawer stacking kit. Everything was going according to plan.
At this stage of the build, I decided to add some insulation to the inside roof and gull wings of the black, powder-coated canopy. A 4mm thick Ametalin ThermalLiner roll for $85 did the job. It took a good few hours as I glued down a double layer.
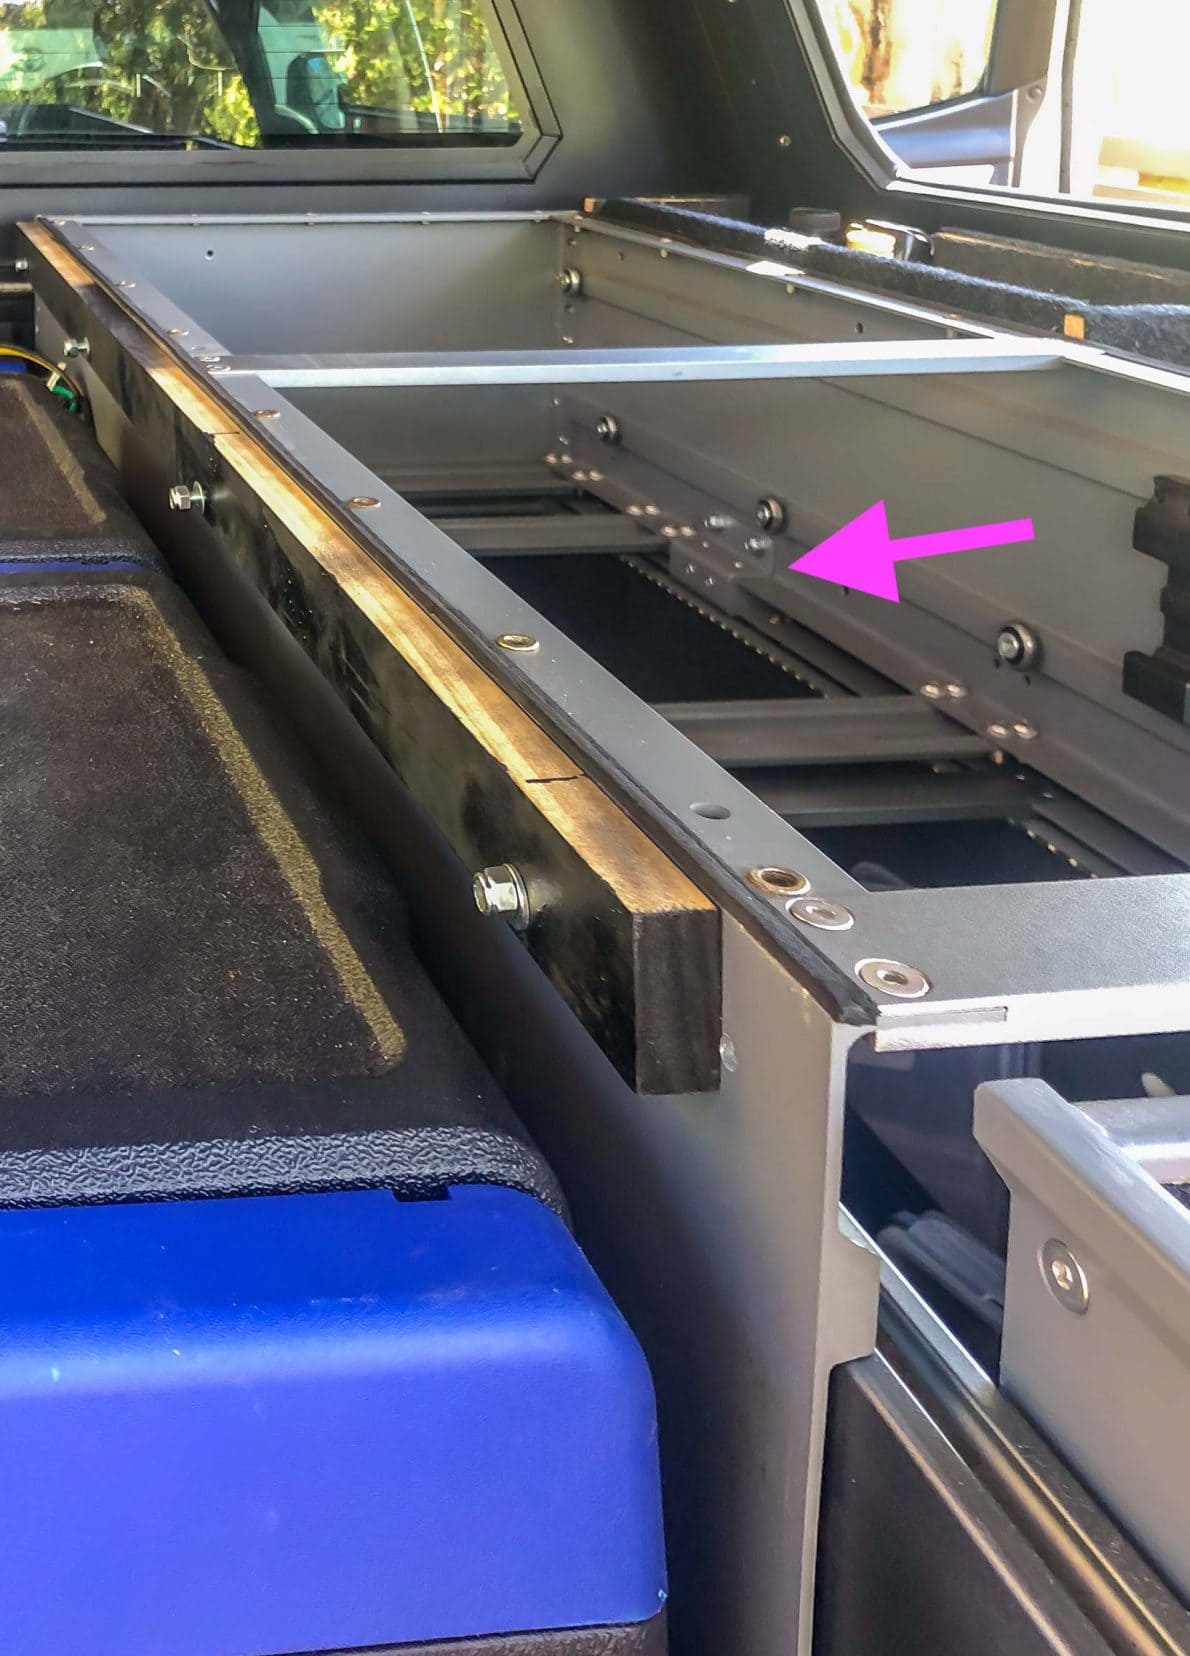
I then split the MSA drawers and stacked them, bolting the bottom drawer to the tub. However, to my surprise/dismay, the drawers did not have bolt holes for the stacking kit.
Over the next few hours, I measured, drilled the holes, and fitted the stacking kit’s three brackets. While I was at it, I fitted a wooden baton to the top drawer with the intention of building a shelf over the fridge.
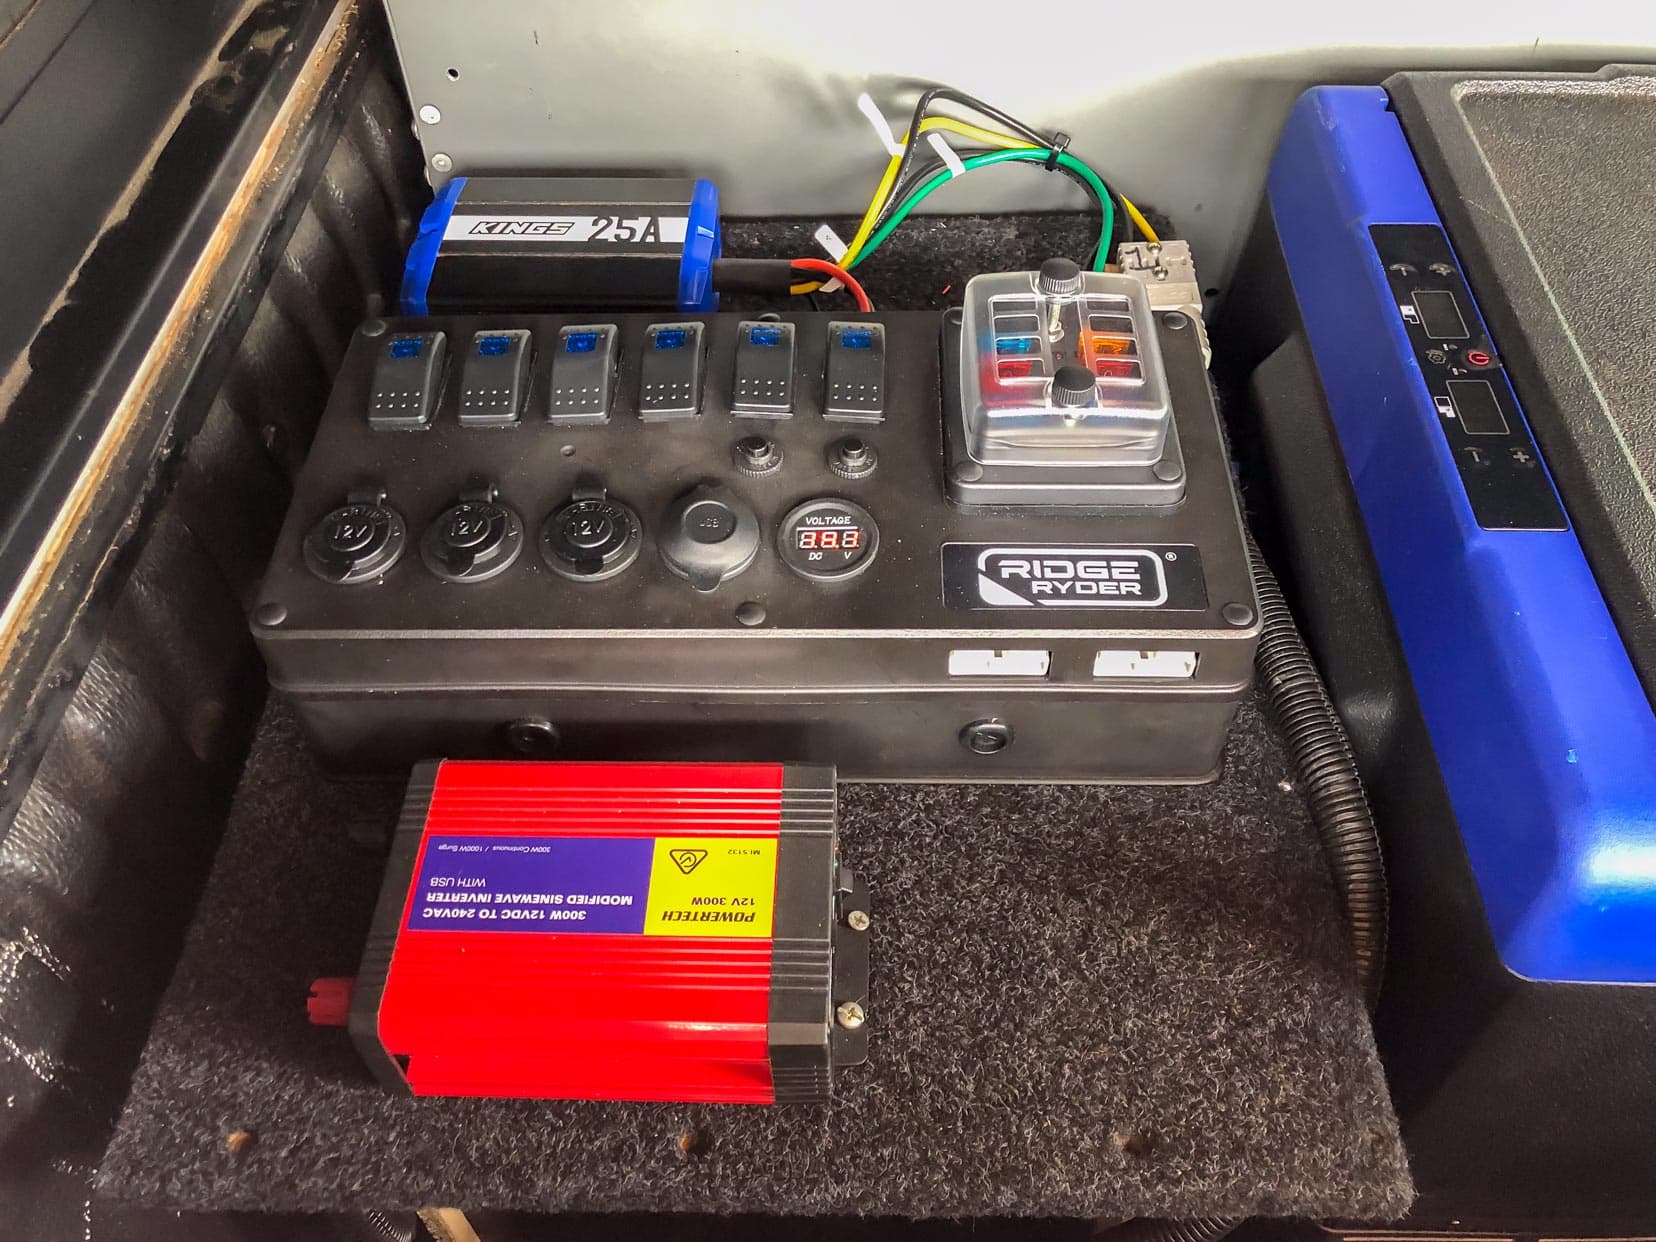
Power Distribution
Because the second battery was now sitting on the tub base, it was too low to reach the accessory ports from the outside of the car. Also, I wanted to run some external lighting from a switch in the tub and an inverter.
The solution was to build a wooden box around the battery box, fit a power control box above it and connect it all. I found a new Ridge Ryder control box on sale for just $99.
I couldn’t build it for anywhere near that price.
This control box unit has two Andersen plugs, 6 fused switches, 3 x 12V sockets and dual USB ports. The three 12V sockets were daisy-chained together, but I separated one to specifically run an inverter for possible higher amperage draw.
Same for the six switches. Daisy chained in groups of three, but I separated them into groups of two. I added a 40A fuse to the battery box and ran power to the control box.
Water Storage in the Isuzu Tub
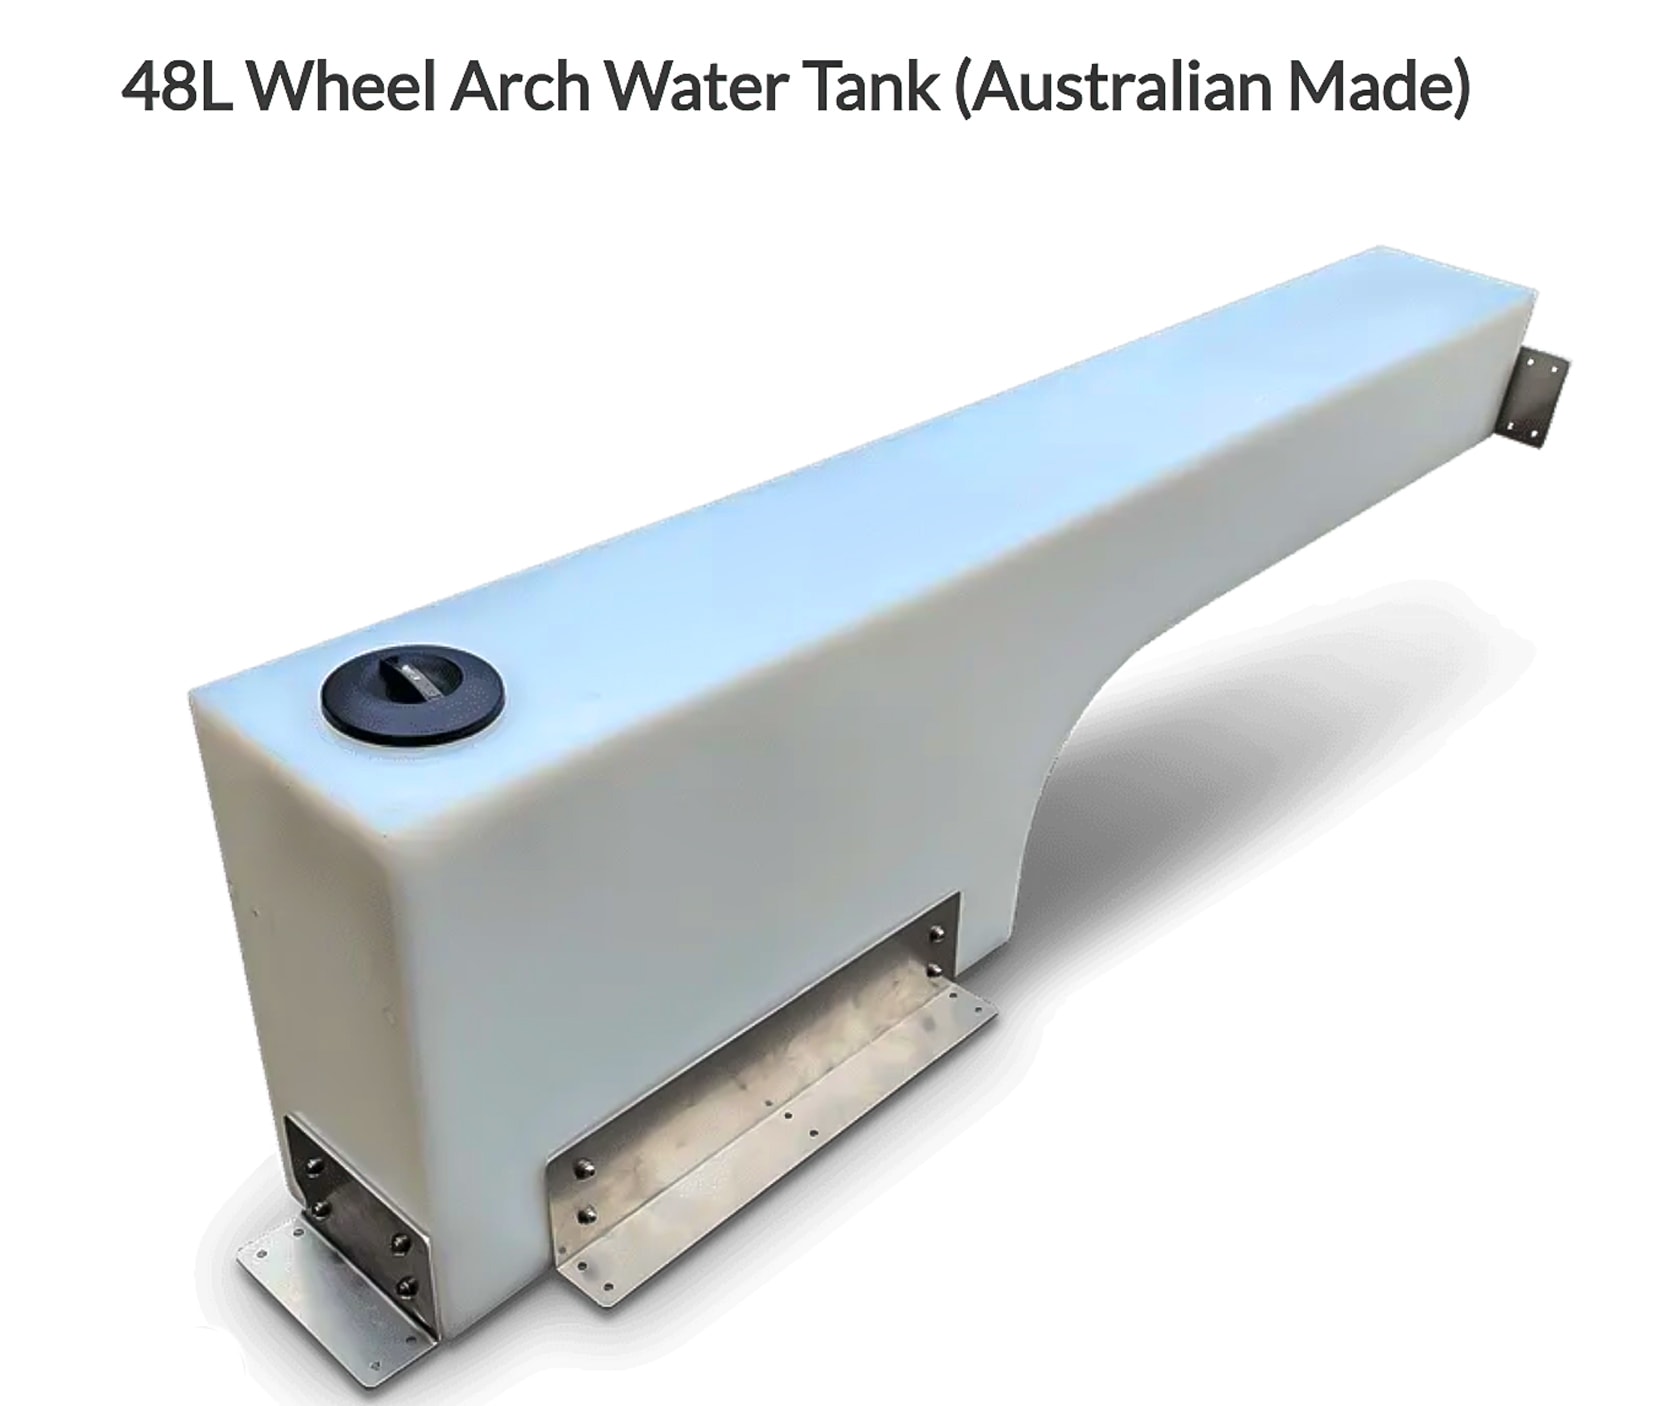
There was only one remaining priority item to address, and that was water storage. I needed to find a wheel arch water storage that didn’t exceed the width of the wheel arch. Although I was hoping for a 70-litre tank, I found a 48-litre wheel arch water tank manufactured by Dunn and Watson in Queensland with a width of just 17cm.
I bought it, fit it, and I haven’t looked back.
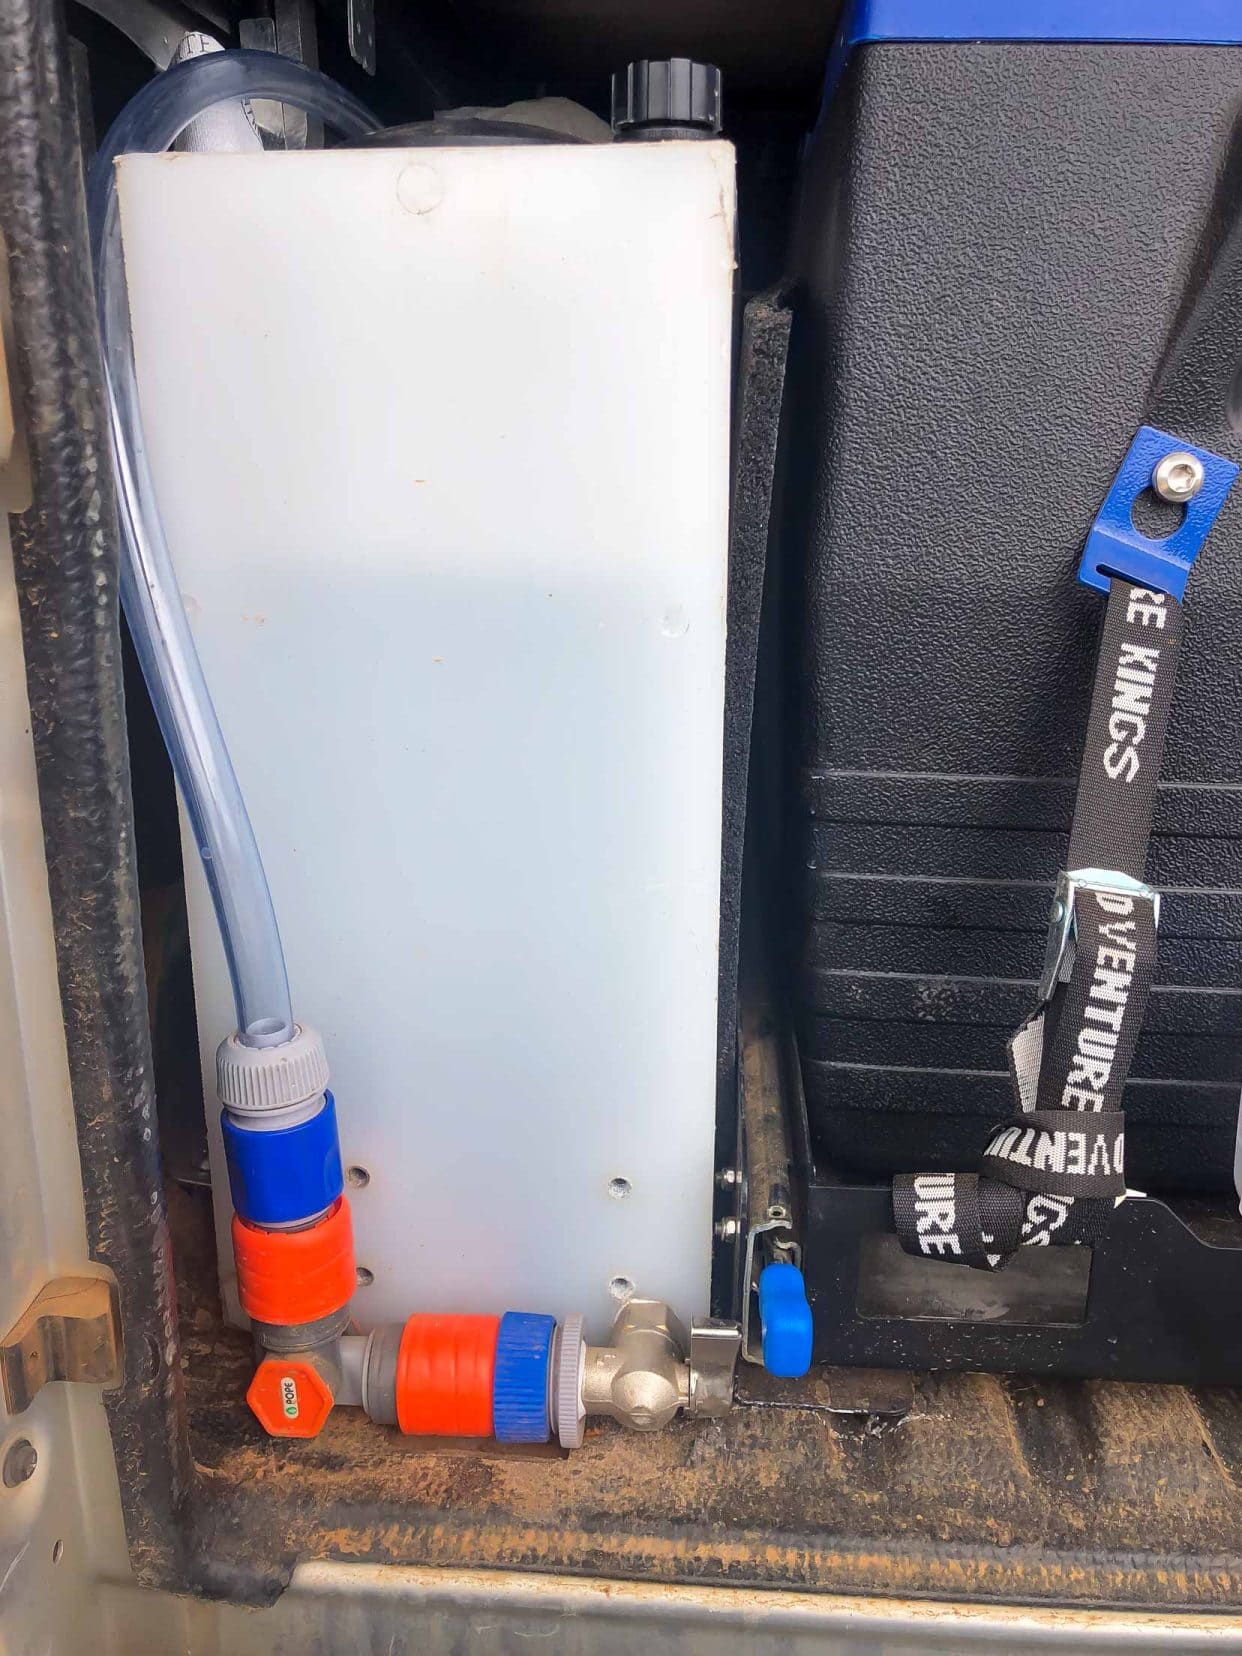
The only hiccup I encountered was that I could only fit one of the two water tank side brackets to the tub due to a lack of space between it and the fridge slide. A front bracket is also in place.
The brackets are substantial, keeping the full tank secure. It hasn’t budged.
Other Features of the Isuzu DMax Camping Fitout
Below are a few of the final touches I made to complete the camping fitout of the Isuzu Dmax:
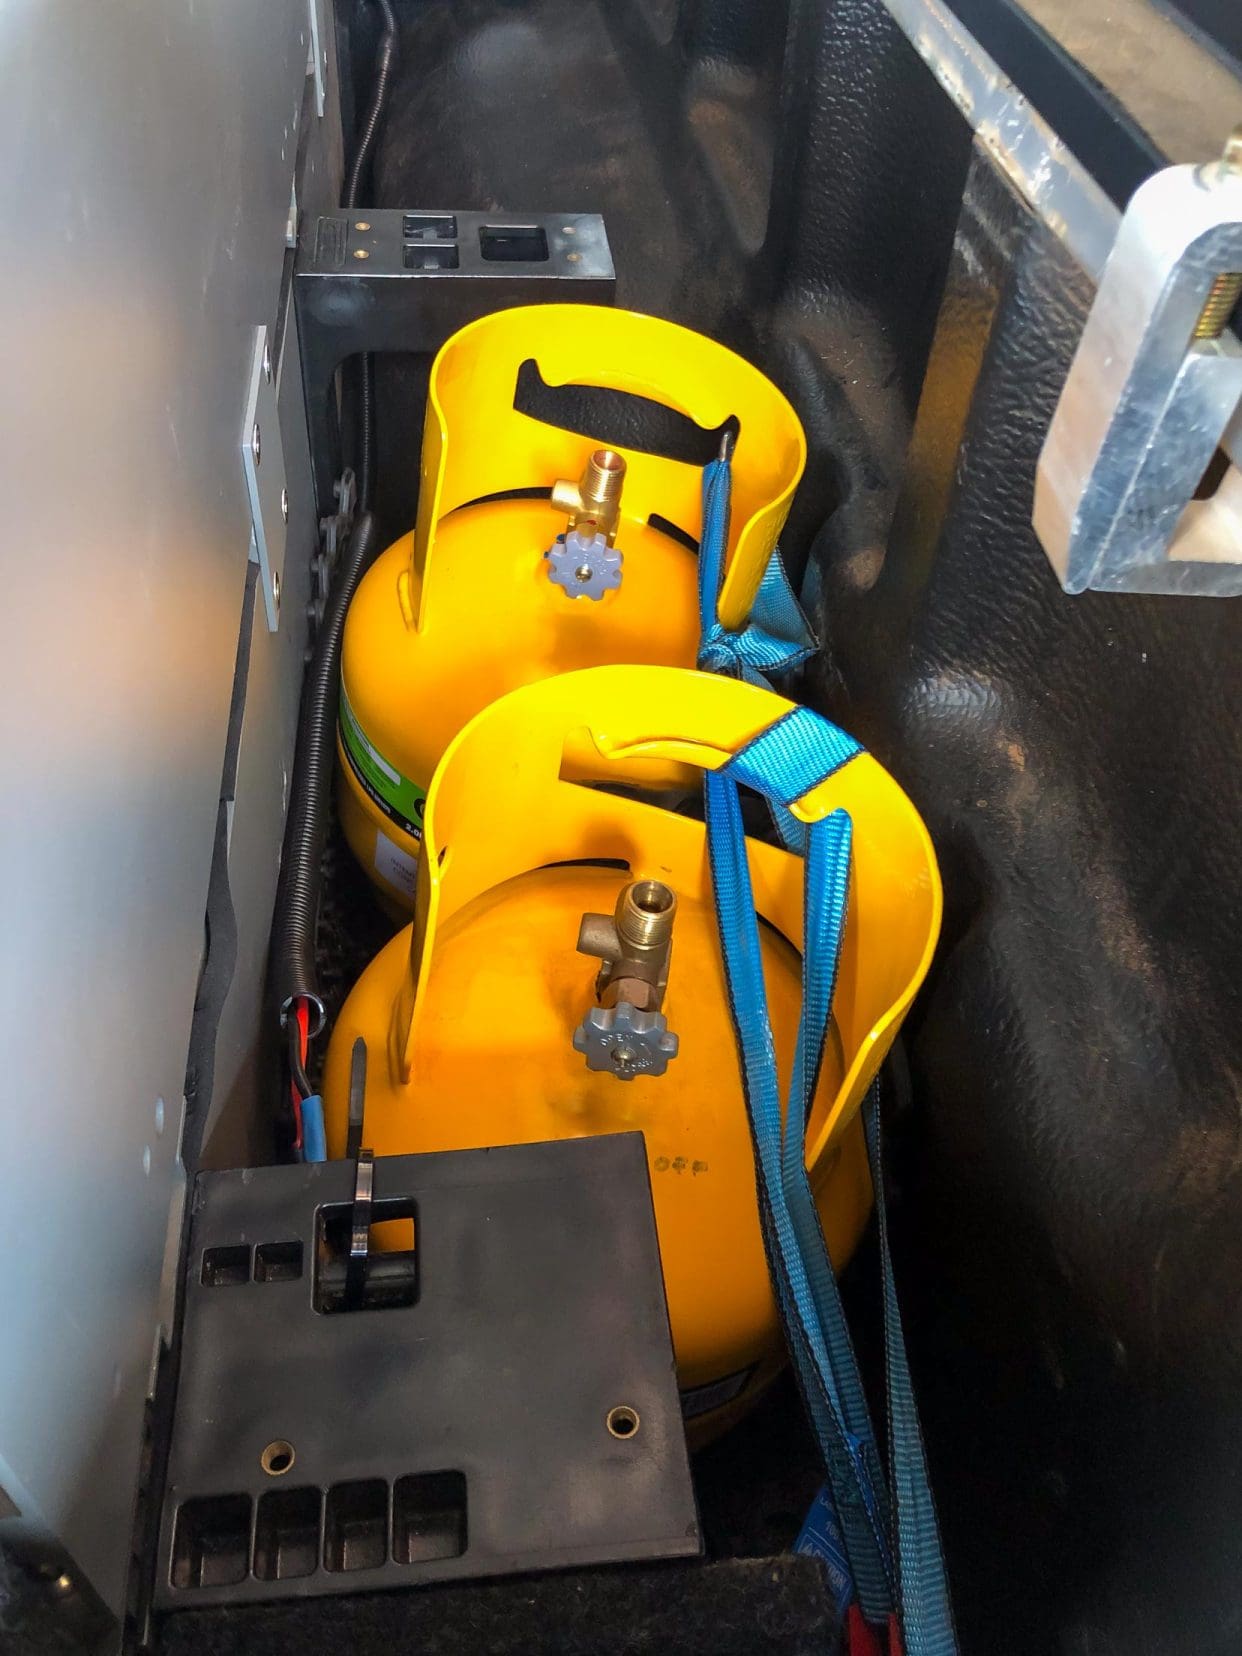
Gas Bottles
With the fridge slide, over-arch water tank, and double drawers now installed, there was just enough room to fit 2 x 2kg gas bottles close to the tailgate.
I also built in a small toolbox behind the bottles.
Shelf
I needed to address the storage of my other bits ‘n pieces. It really drives me nuts when things are just ‘stashed’ where they can fit rather than having their proper place.
To house the Kings 200W fold-out solar panel, I built a shelf over the fridge with 12mm marine plywood. This also acts as a shelf for the gas stove, making it readily accessible.
Down the track, I intend to build out a little more in the space above the fridge, but for now, it’s workable.
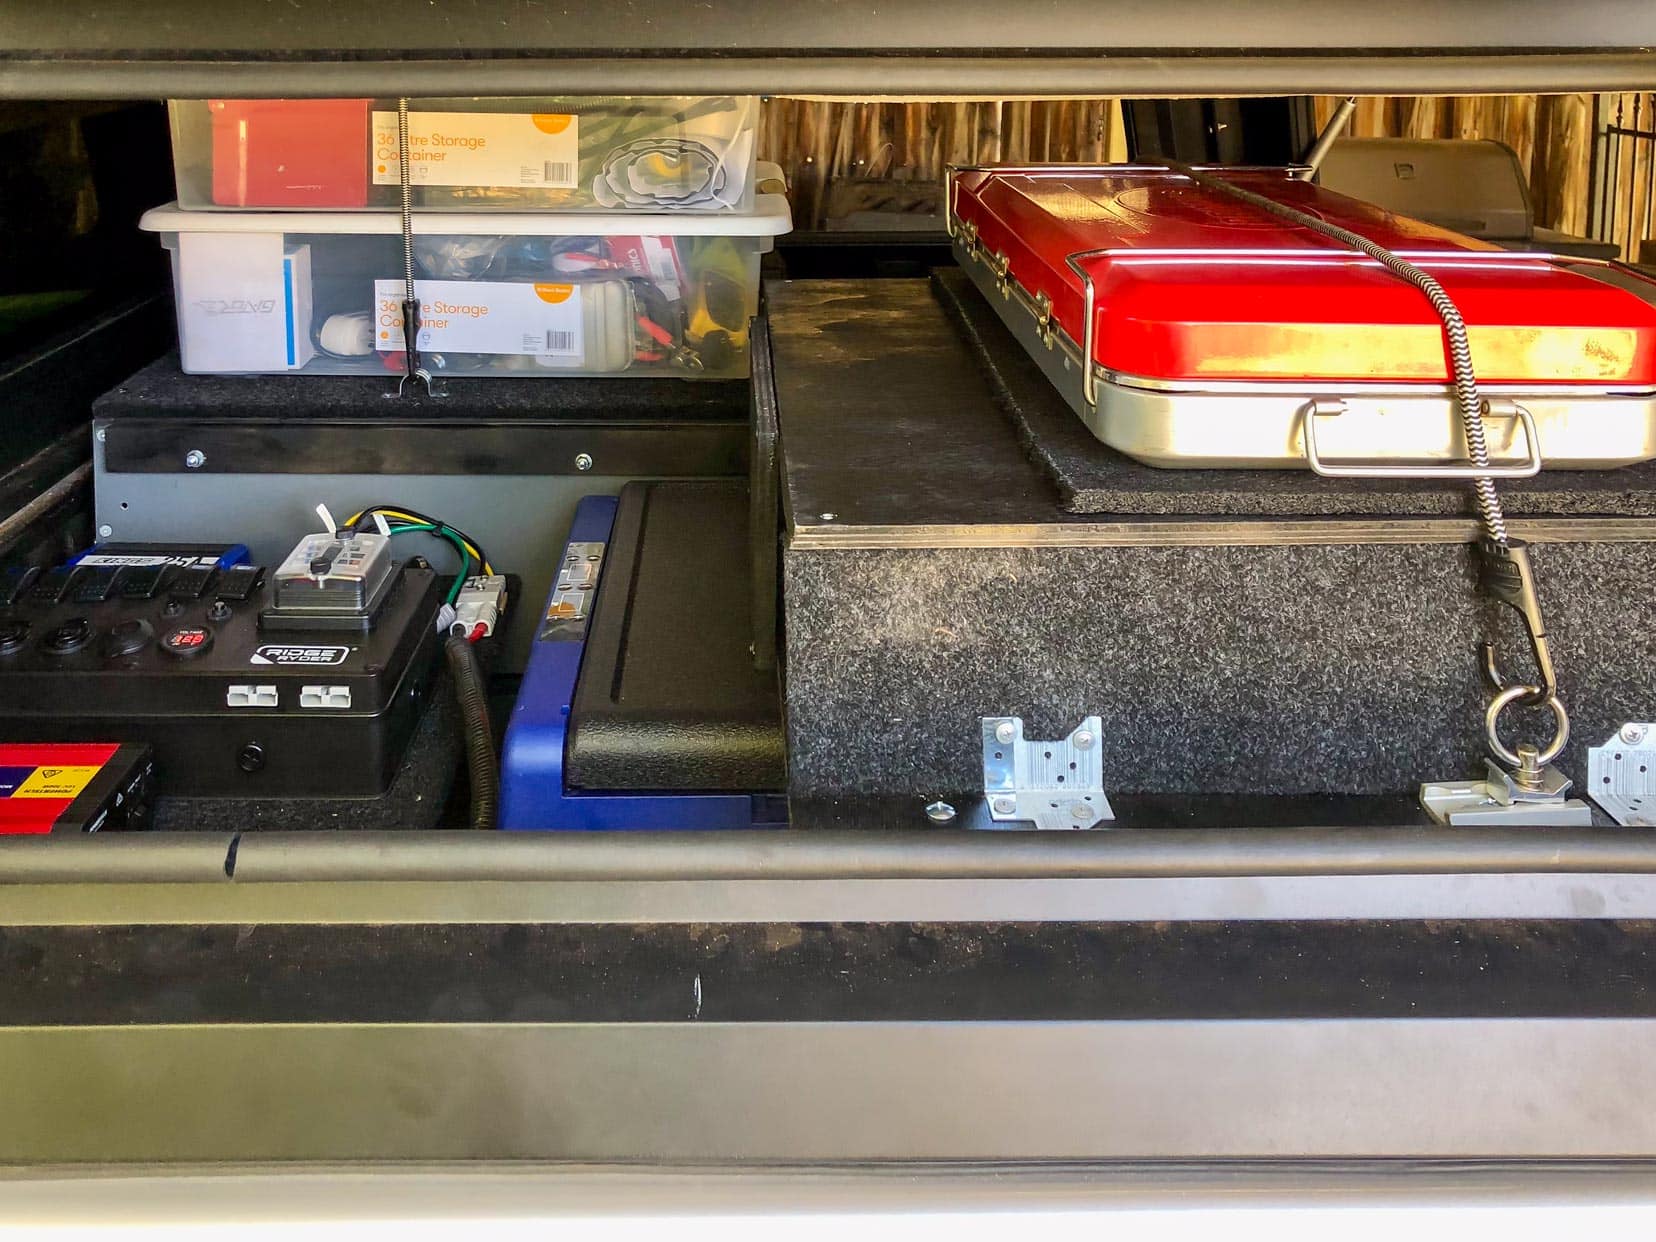
I’ve purposely kept the area above the drawers free so that we can store our portable plastic storage boxes and they can be easily removed.
Roof Basket
I have already mentioned the addition of a roof basket on the canopy.
Another win was tracking down a second-hand Rhino roof basket (90cm x 120cm) in mint condition for $100. Again, Facebook Marketplace came to the rescue.
This was a quick install on the canopy roof using the Rhino Vortex roof rails. I had the foresight to purchase the longer Vortex bars for the canopy so they could fit a pair of Tred GT recovery boards.
I picked up this pair for $180 at Autopro.
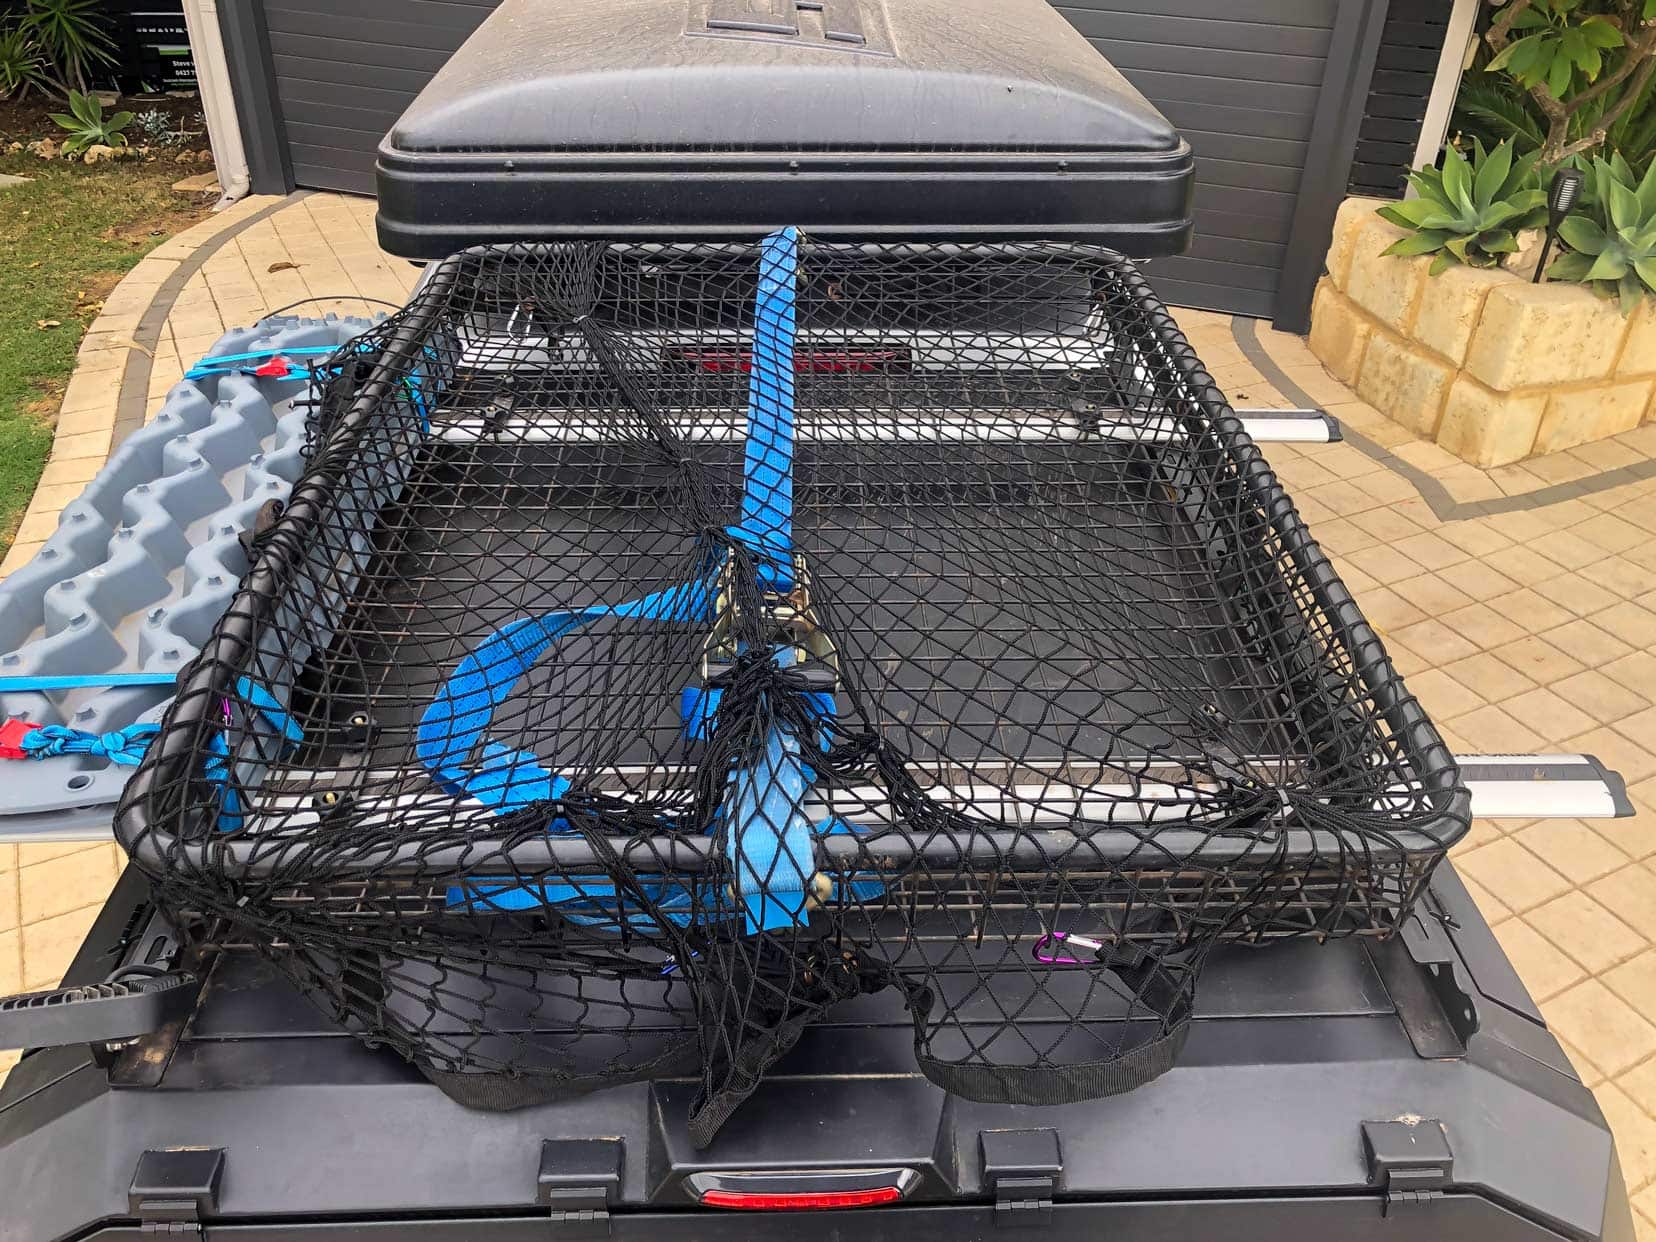
Rear Work Light
A rear LED work light is bolted to the canopy roof rail and switched from the power control box. See the image above—it’s just behind the basket.
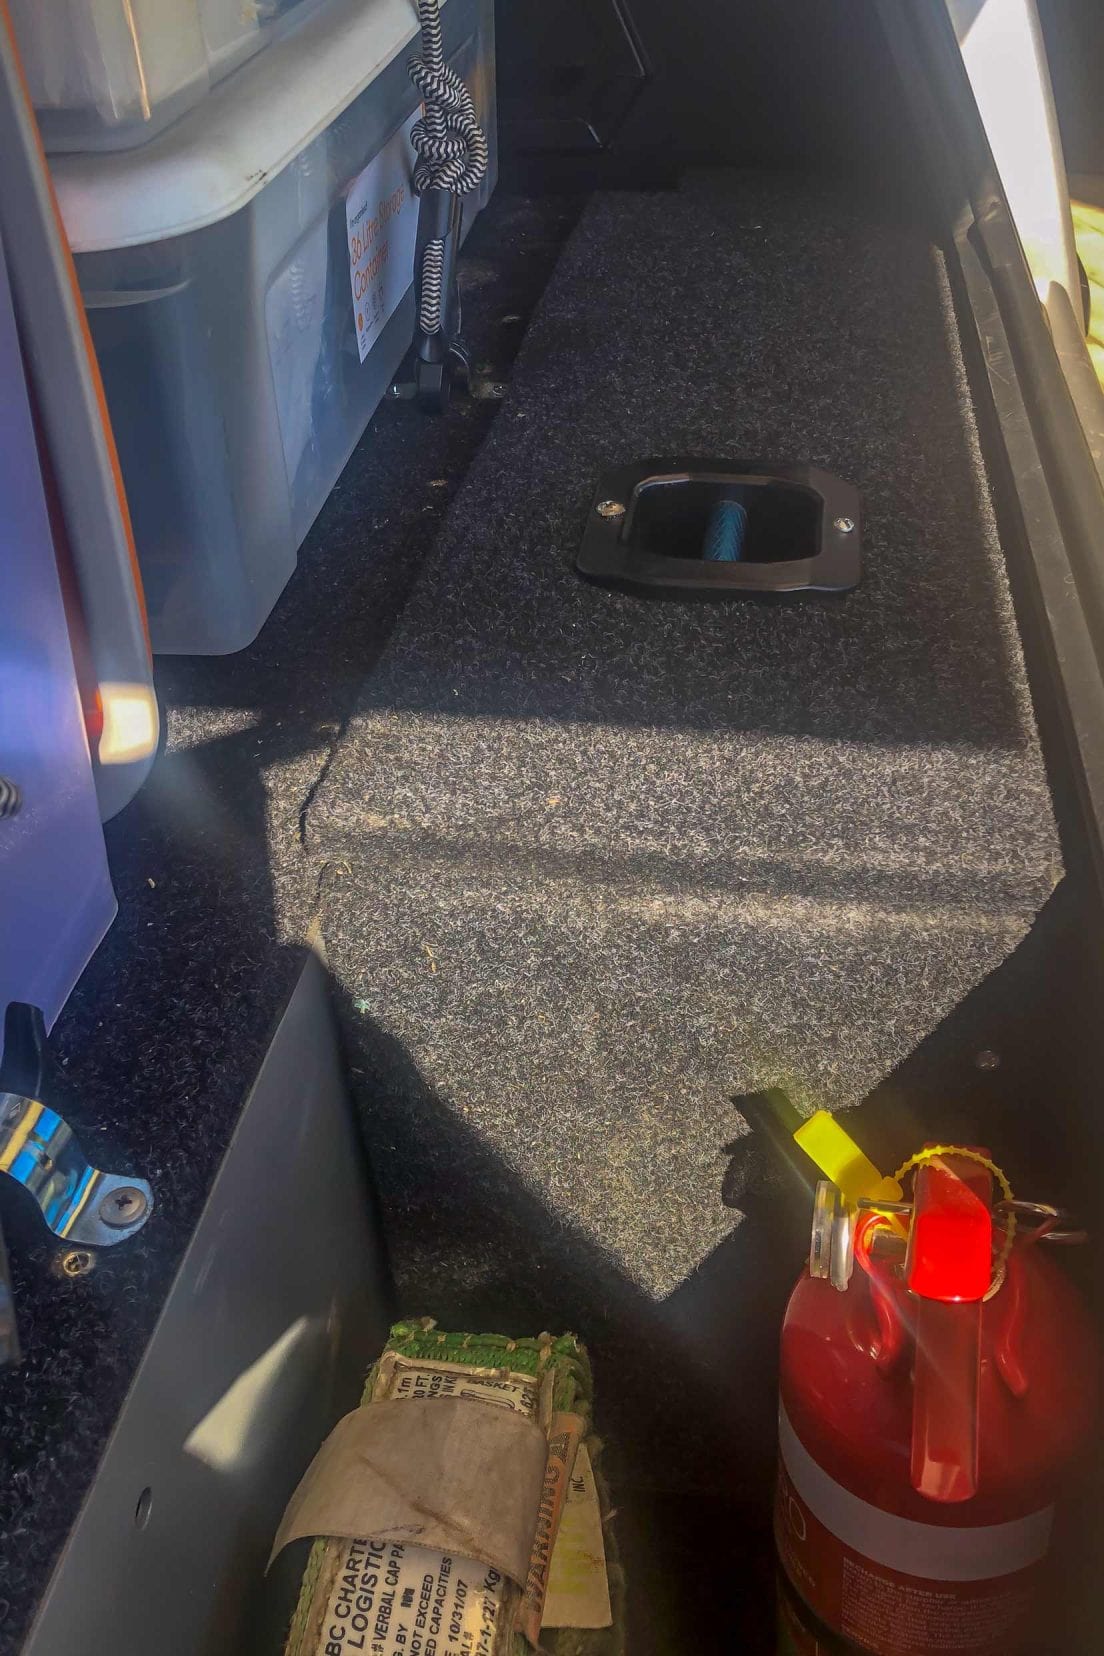
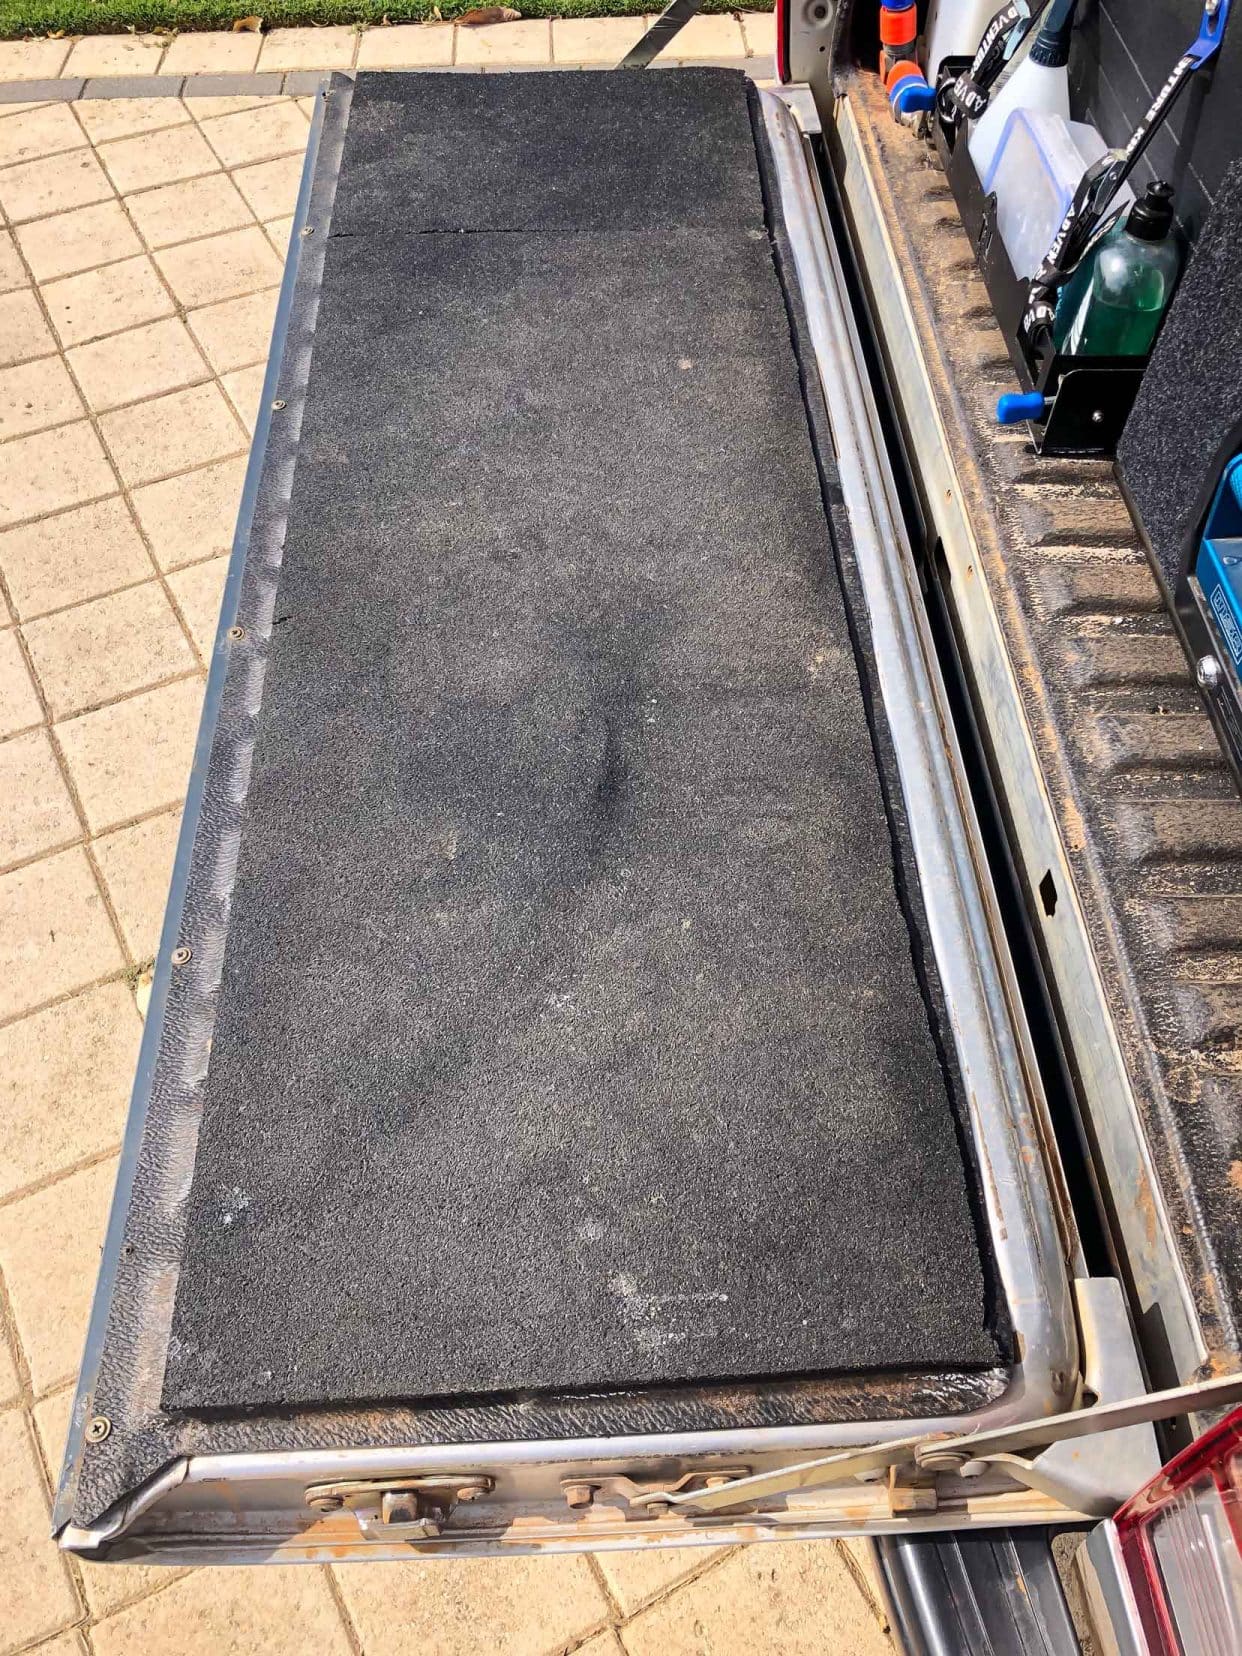
Tailgate Inner Lining
The tailgate’s corrugated inner lining was useless to me as it was. It was uncomfortable to sit on, slippery, and uneven. A cheap, weatherproof solution was to use liquid nails on a couple of pieces of 6mm reconstituted rubber matting.
It works really well, and I was out of pocket a whole $40:)
READ MORE: Check out our top ten Camping and off-road essentials here.
Isuzu Dmax Camping Fitout – Wrap Up
I hope you found this article on the camping fitout of my Isuzu Dmax somewhat interesting. It meets our build requirements with an eye on budget.
Each modification, from the power supply to storage solutions, has been implemented with practicality and durability in mind.
Our road-ready 2014 D-max is now transformed into a vehicle that’s ready for long, off-grid camping adventures.
Our recent shakedown trip to Israelite Bay, Lucky Bay and Wharton Beach confirmed that this is indeed an Isuzu Dmax off-grid camping setup that can work long-term.
Next up … we’ve set our sights on the remote Karijini region,in the north of Western Australia, later this year. I’m definitely a happy camper.
Explore more of our Western Australia Camping and road trips here.
Do you have tips or stories about your Isuzu Dmax camping modifications that you can share? I would love to hear about them.
Drop me a line in the comment section below.
Pin and save on Pinterest
Before You Go – Are You Planning Your Travels?
These are the travel resources we recommend and use when planning our trips.
- 🚘 Car Hire: We use DiscoverCars.com
- Motorhome/Campervan Rental: We highly recommend the Motorhome Republic
- 🪪 Order your International Driver’s Licence online here
- 🛏 Book Accommodation: We use Booking.com to find accommodation that suits our budget
- 🐶 Pet Sitting/Pet Sitters: Check Out TrustedHousesitters here (Use our Discount code: LIFEJOURNEY25 for 25% off. )
- Activities and Experiences: Get Your Guide and Viator
- Travel Insurance: Safetywing or World Nomads
- 🥾 Travel Gear and Accessories: Check out our top picks here — Lifejourney4two page on Amazon
For a more thorough list, visit our Travel Resources page here.
I love this article, very informative. I am just about to start building a Isuzu tourer for my partner and myself and this has given me some great ideas. I would love to know the name of the company for the canopy, exactly what I have been looking for. Hope you are enjoying your travels
Hi Chris,
Thanks so much and glad you enjoyed the article. I bought the canopy from ‘Oz Canopies & 4×4’ in NSW.
Here’s the link to the canopy:
The canopy so far has been fine. Enjoy the build and of you have some photos I’d love to see it all infold.
Regards,
Lars