
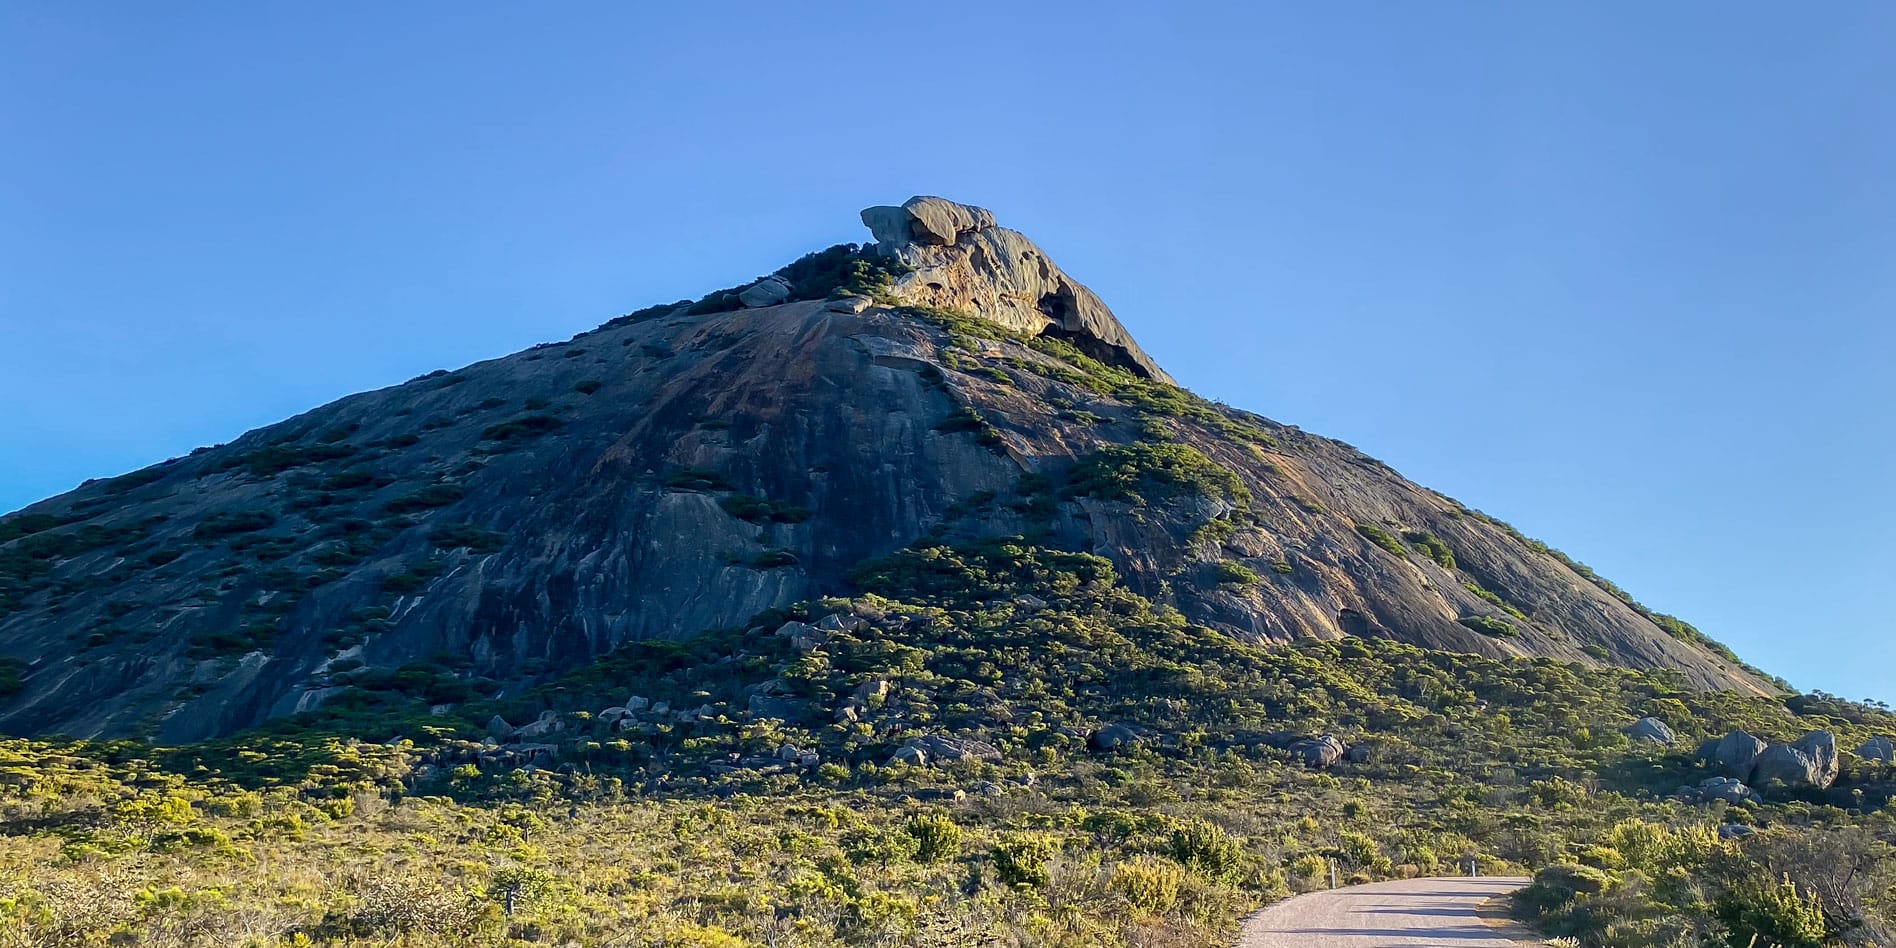
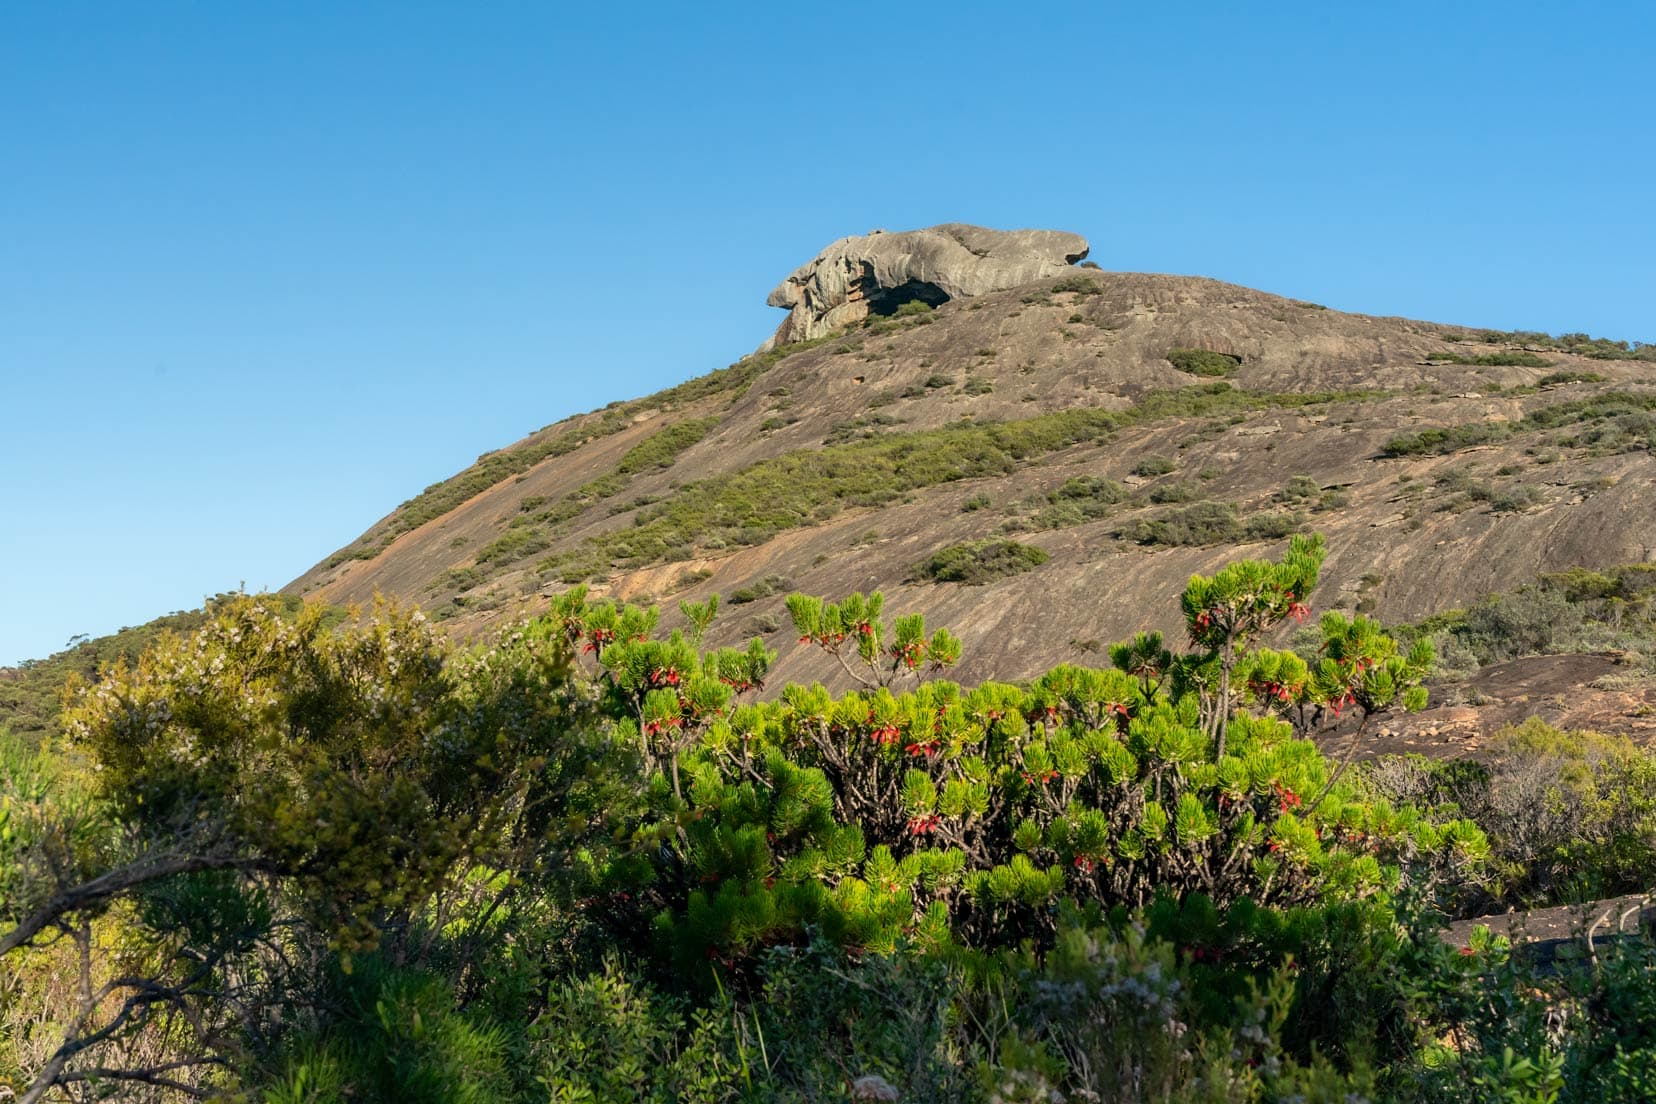
Ever found yourself standing on a peak, huffing and puffing, only to be swept off your feet by the view? That’s Frenchman Peak for you—not just a hike, but a full-scale negotiation between your legs and your will to reach the top.
And trust me, the summit’s panoramic scenes are well worth the effort.
Ready to lace up those hiking boots and see why this should be your next conquest?
Lars and I recently tackled Frenchman’s Peak, a rugged standout in Cape Le Grand National Park, Western Australia.
Lars, always eager for a steep challenge, takes to these climbs with glee. Me? Not so much! I approach more cautiously, mindful of our past adventures on challenging trails like Kjeragbolten and Preikestolen in Norway.
Rated as a Class 5 hiking trail, Frenchman Peak may sound daunting, but although I expected challenges, there weren’t any moments when I questioned my sanity.
I wouldn’t say it was a comfortable hike, but the views from the top?
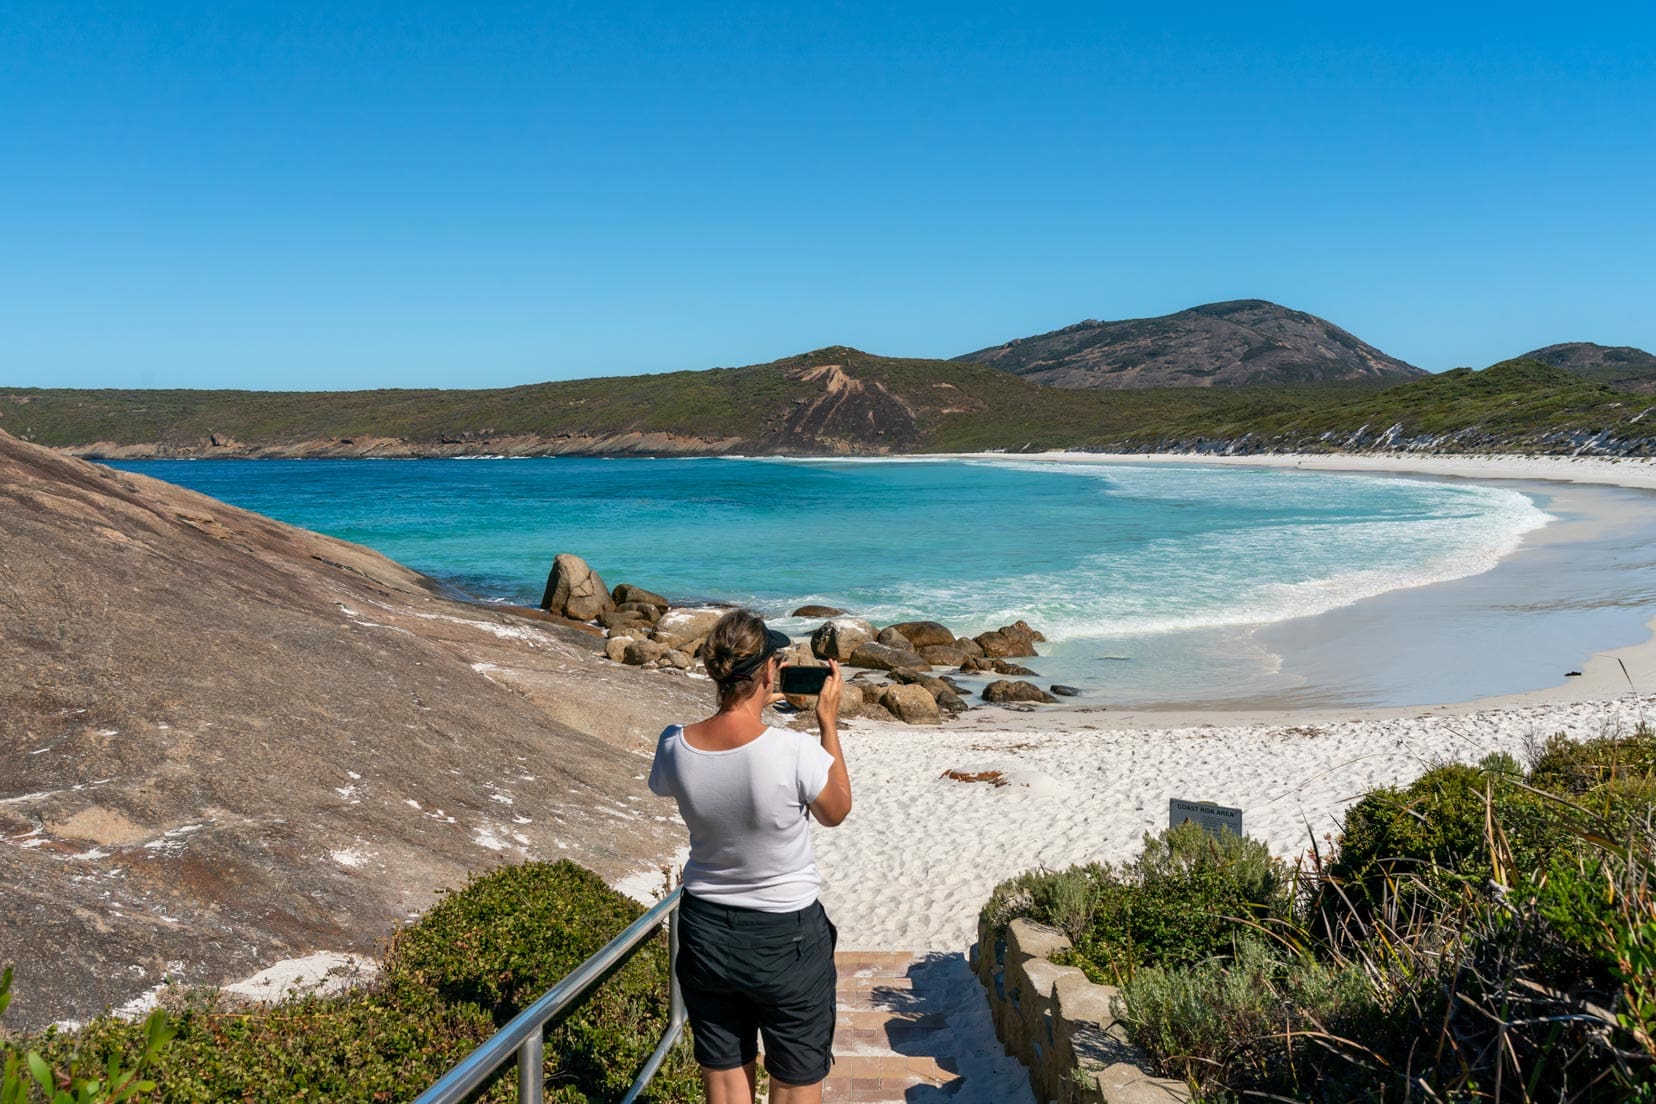
Absolutely worth it. The landscape unfolds in a breathtaking panorama, rewarding every step of your climb.
However, this trail isn’t for everyone. It demands a good level of fitness and sure-footed agility. Lars, with his mountain goat-like agility, may have zipped up and down easily, but the peak might pose a challenge for those not as accustomed to such rugged terrain.
For those of you ready to take it on, you’ll be rewarded with some of the most stunning views you can find.
⛰️ Frenchman Peak in a Nutshell
- Difficulty: Officially rated as a Class 5 hiking trail (Very Difficult), though in practice, it might feel more like a Class 3 or 4 for regular hikers, depending on your experience and fitness level.
- Height: The peak rises to 262 metres, offering expansive views that are well worth the climb.
- Distance: The trail is 3km return. Official guidelines suggest allowing 3 hours, but you might find it takes about 2 hours if you’re moving steadily and making brief stops to enjoy the scenery.
- Location: It is situated in the stunning Cape Le Grand National Park, which is in southern Western Australia and is known for its pristine beaches and rugged coastal scenery.
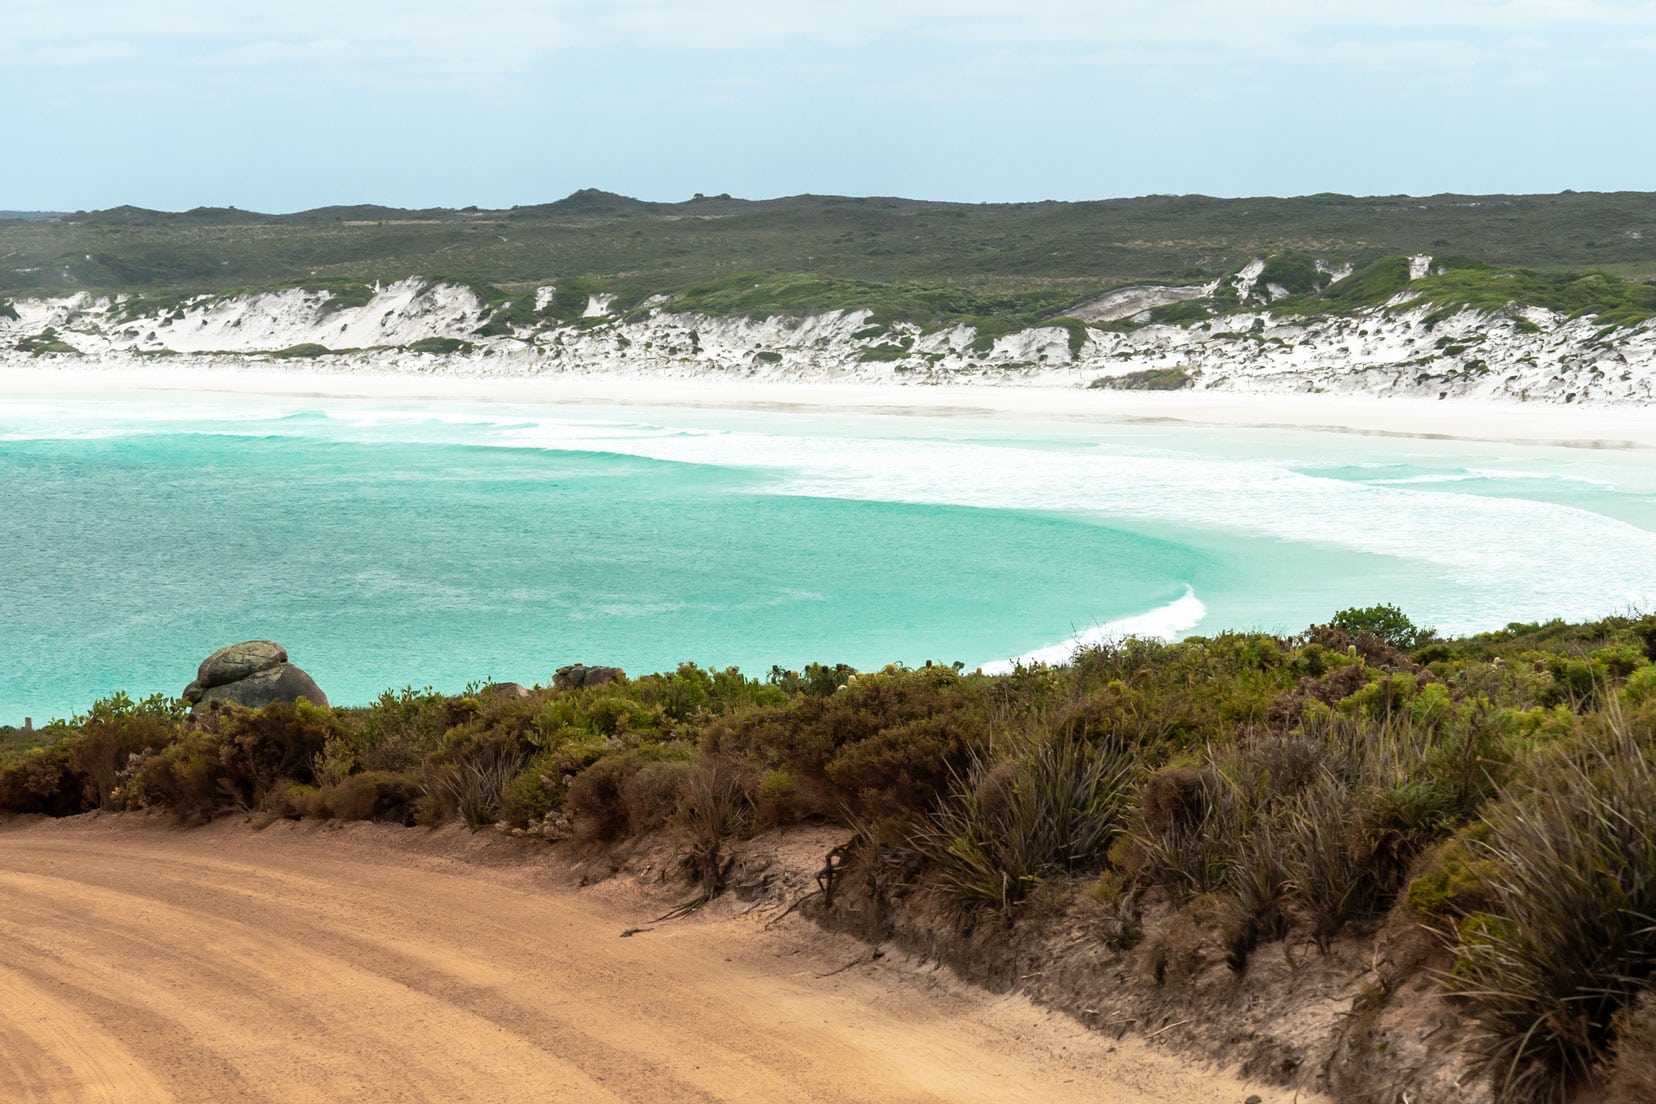
- Reason to Climb: The summit provides breathtaking panoramic views of turquoise bays, dramatic granite peaks, and the distant islands of the Recherche Archipelago. It’s a photographer’s dream and a rewarding challenge for hikers.
- Best Time to Visit: Considering the weather and hiking conditions, the best times to visit are spring and early autumn, when the temperatures are milder, and the visibility is usually better for photography. Don’t attempt if there is heavy rain or winds.
- What to Bring: Essential items include water, sunscreen, a hat, sturdy hiking shoes, and possibly a light snack. Don’t forget your camera for the views and extra clothing layers, as it can get breezy at the summit.
Frenchman Peak Map
This interactive map shows Frenchman Peak and the best route from Esperance. It also includes the walking trail that loops around the peak’s base.
You can click on the map to either show or hide the routes.
How do I get to Frenchman Peak?
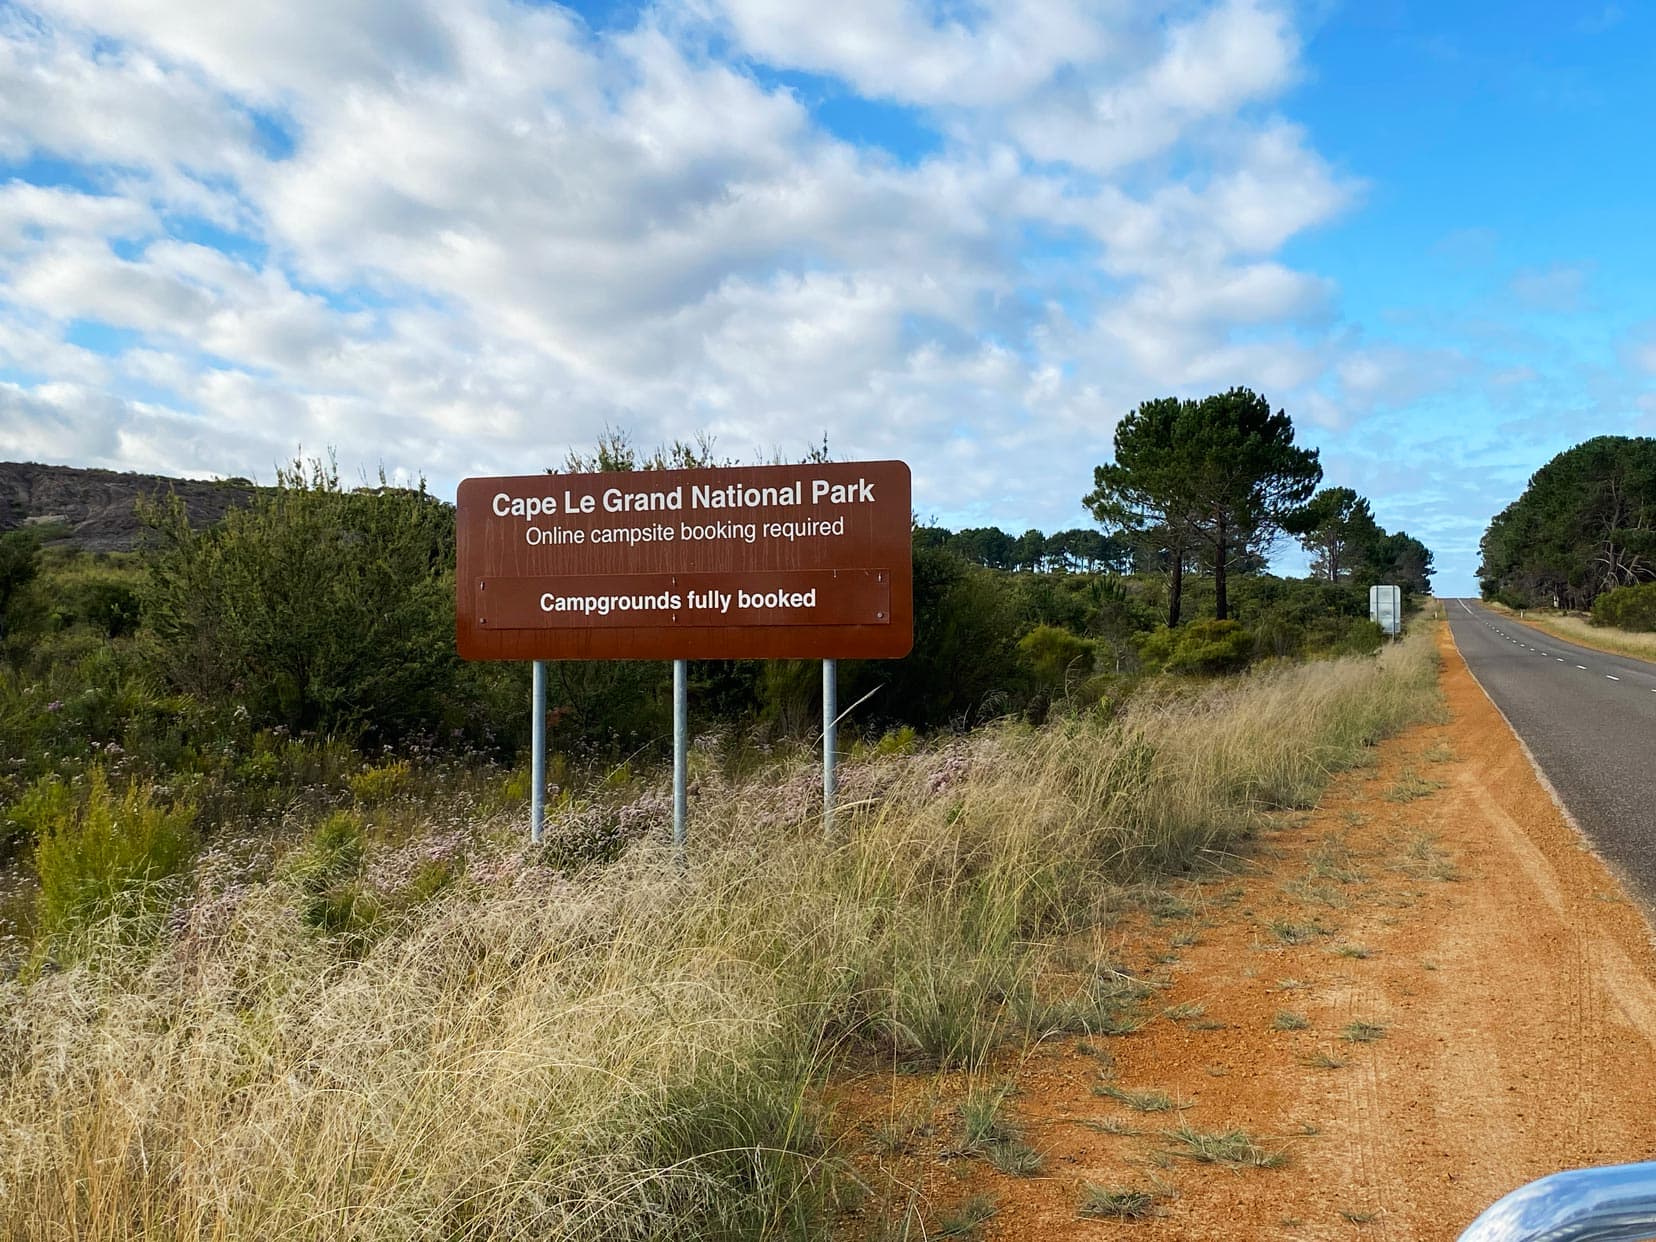
Getting to Frenchman Peak from Esperance is about a 45-minute drive, 55km. Take the main road out of Esperance, Fisheries Road, turn right onto Merivale Road and then right again onto Cape Le Grand Road. It’s on the same road you take to Lucky Bay, Esperance’s world-famous beach. You’ll then come to a sign for Frenchman Peak on the left.
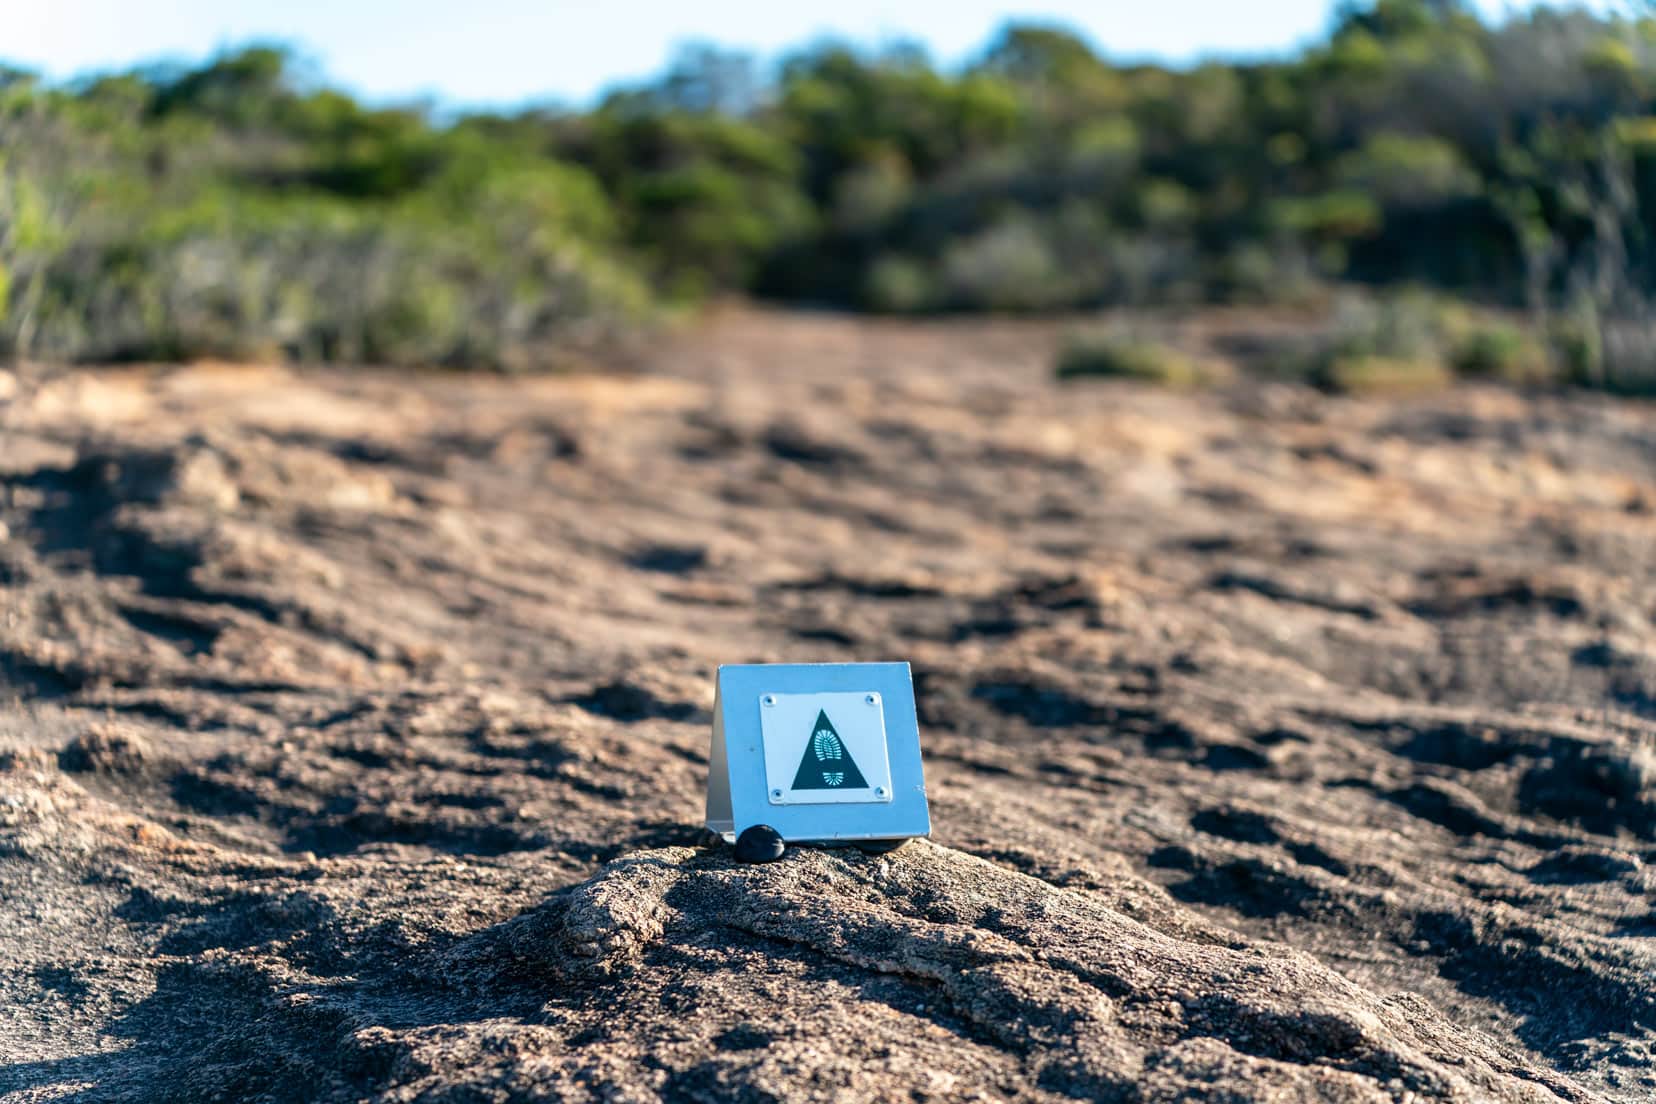
Once at the car park, there are clear signs and markers guiding your way to the top.
Our Frenchman Peak Experience
Let’s dive into our full adventure on Frenchman Peak, from our early morning arrival to the breathtaking views at the summit and our journey back down to the base.
Preparing for the Climb
We visited Frenchman Peak in mid-March, with the WA summer still giving us days in the high 20s and early 30s, unusually warm for the beginning of spring.
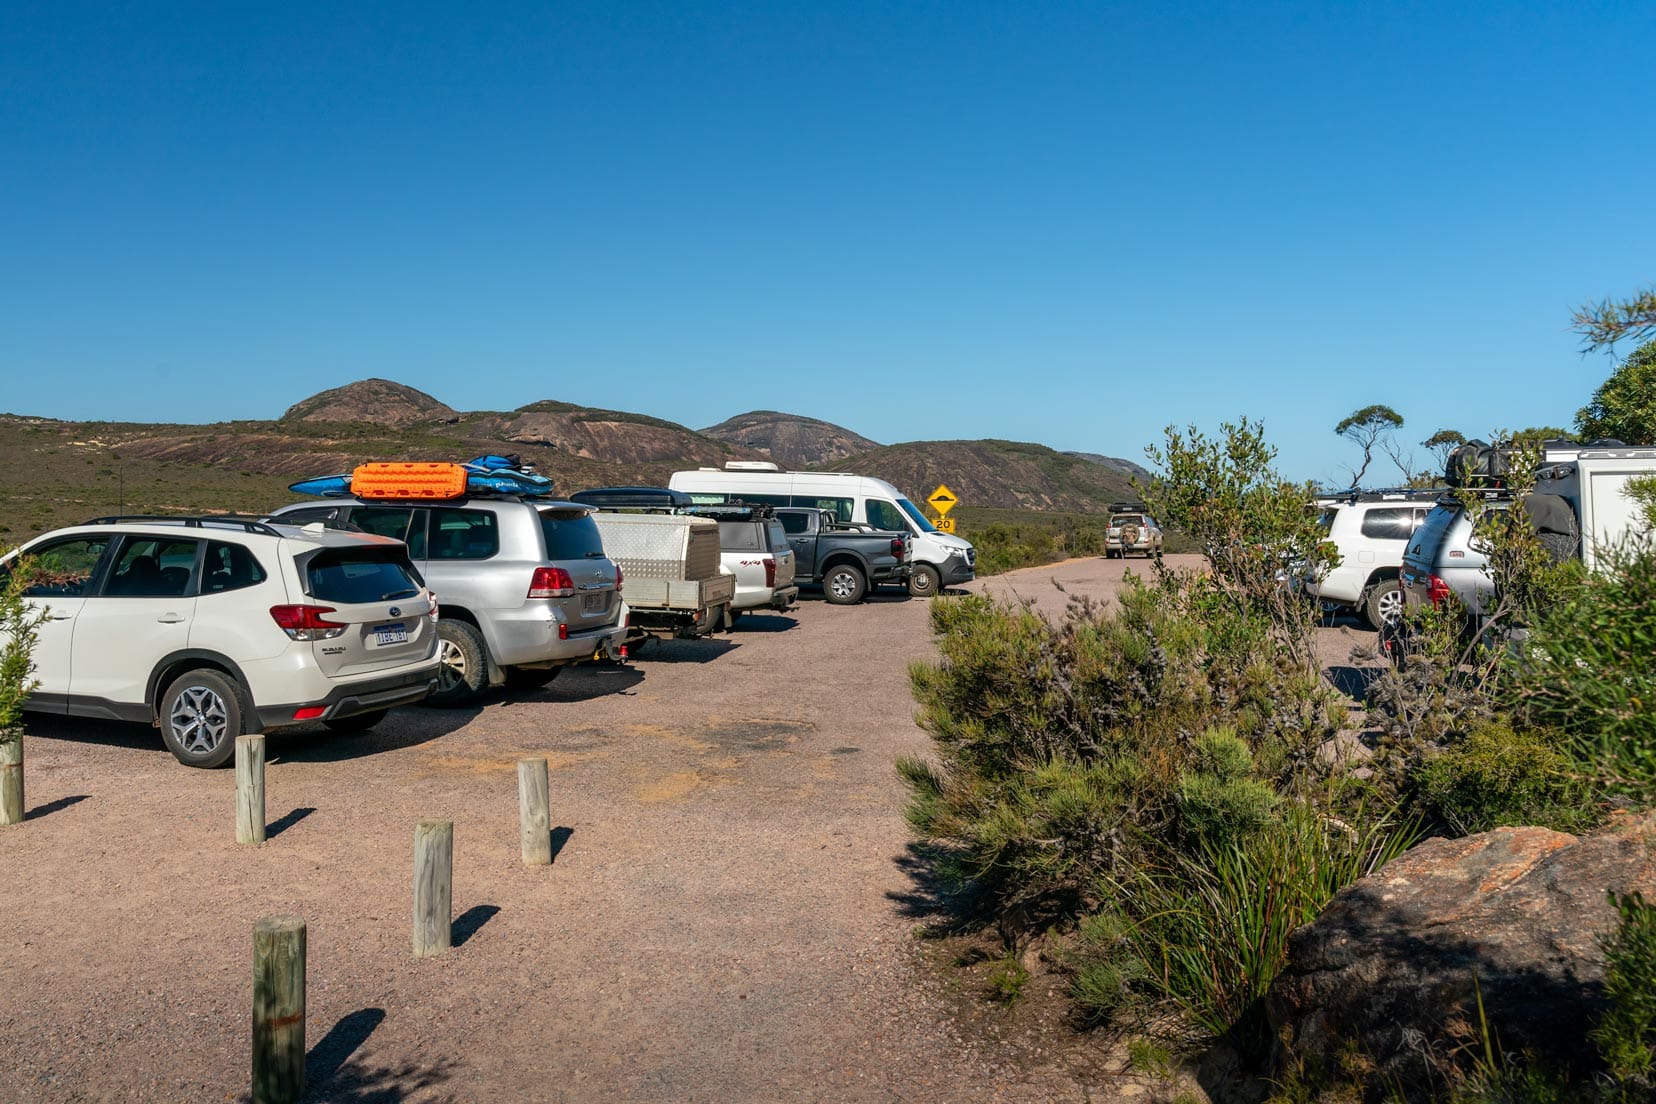
Eager to avoid the heat and the crowds, we set off from our camp in Esperance early. Arriving at Frenchman Peak at 7 a.m., we were pleased to find we were the first in the car park.
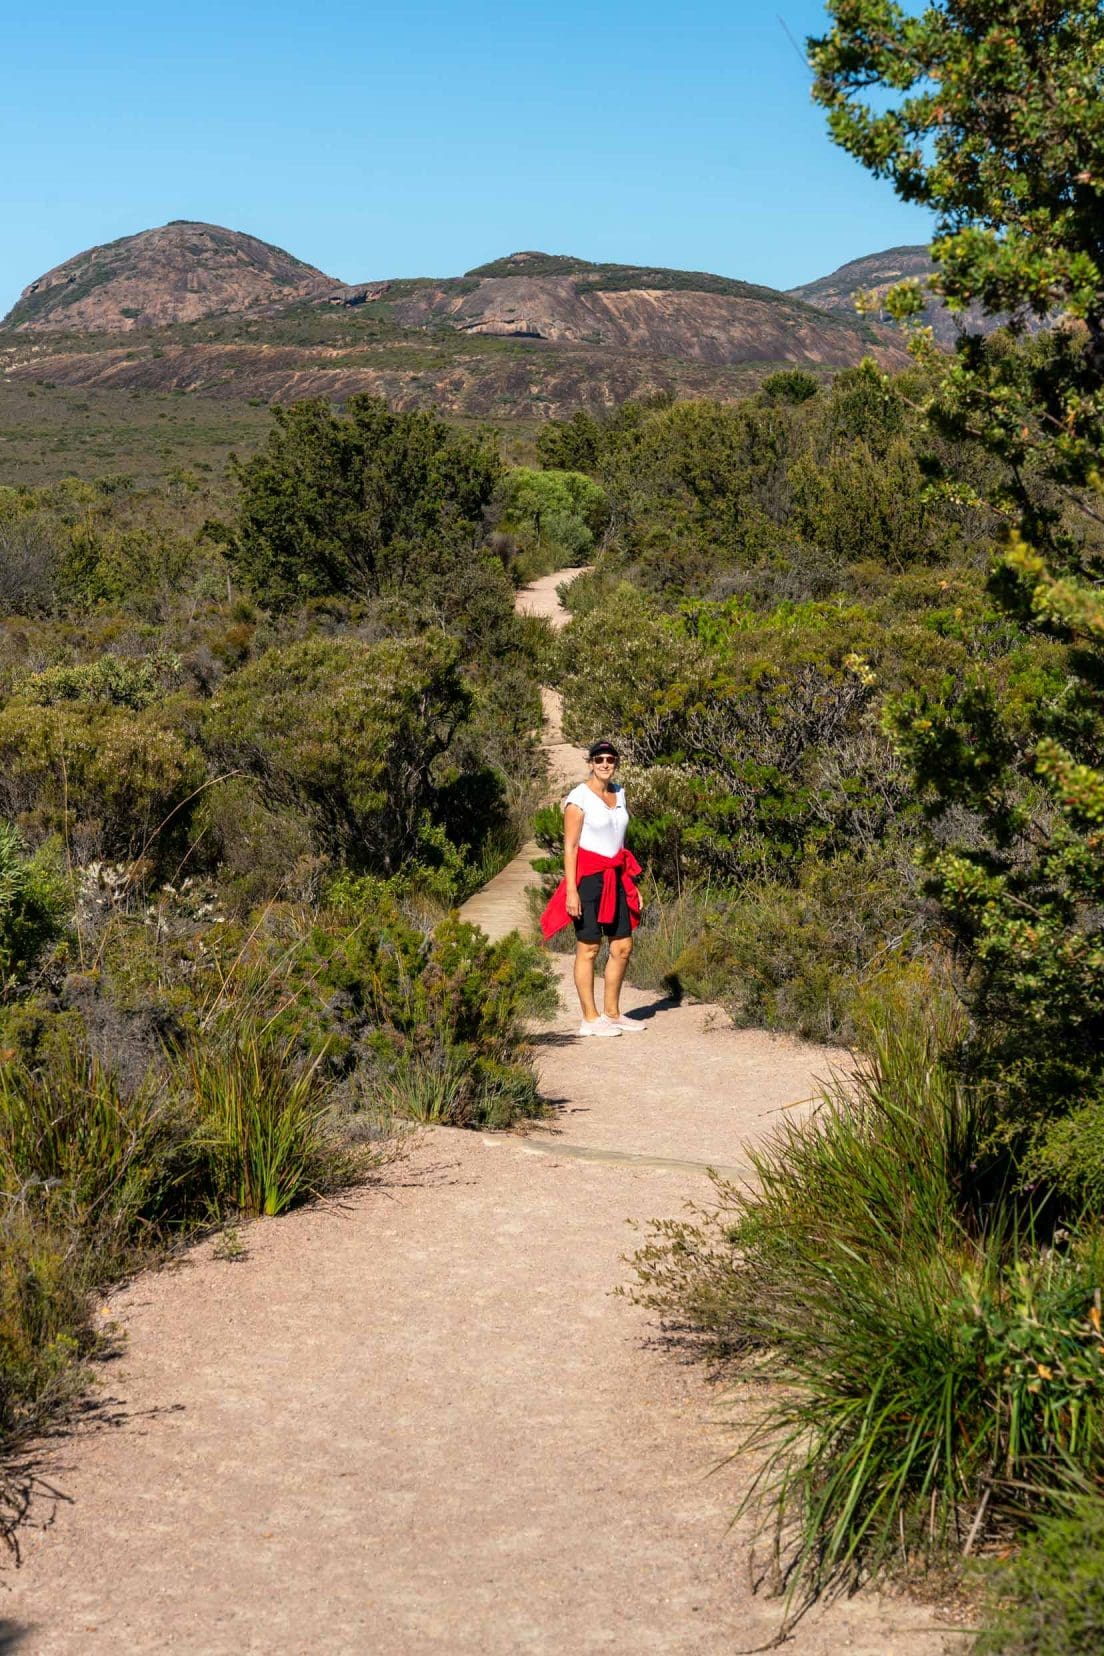
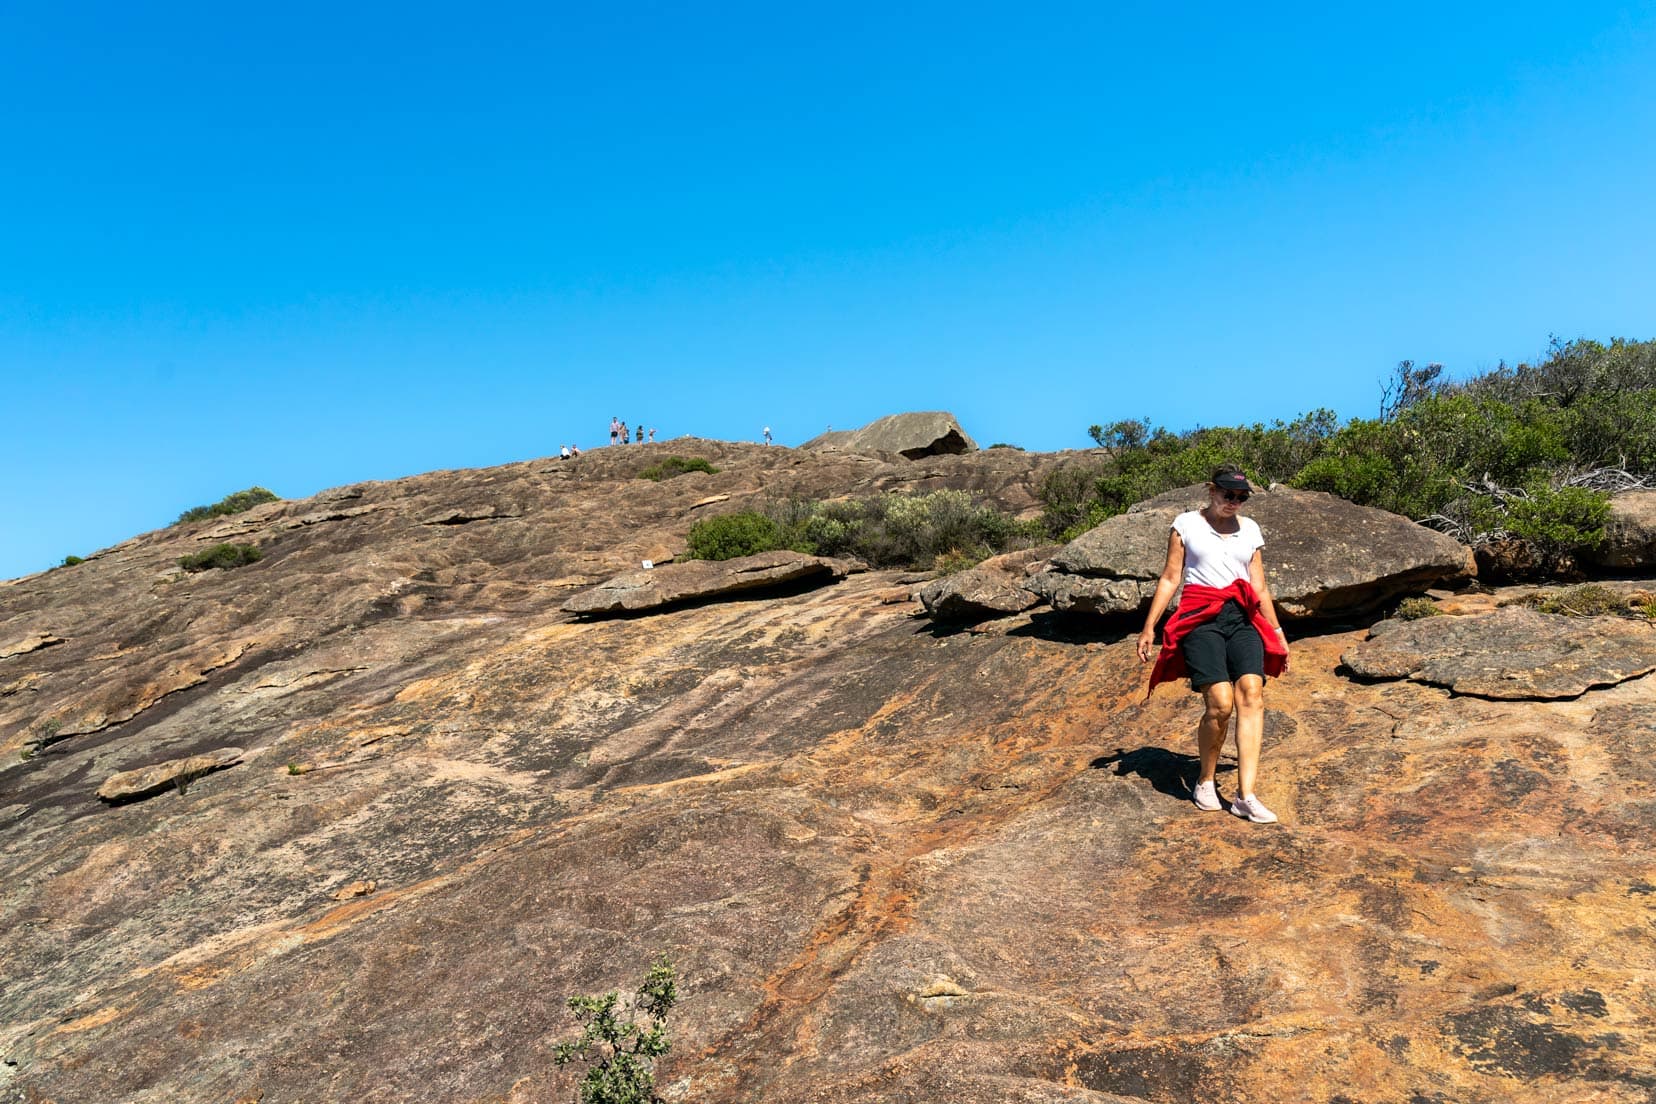
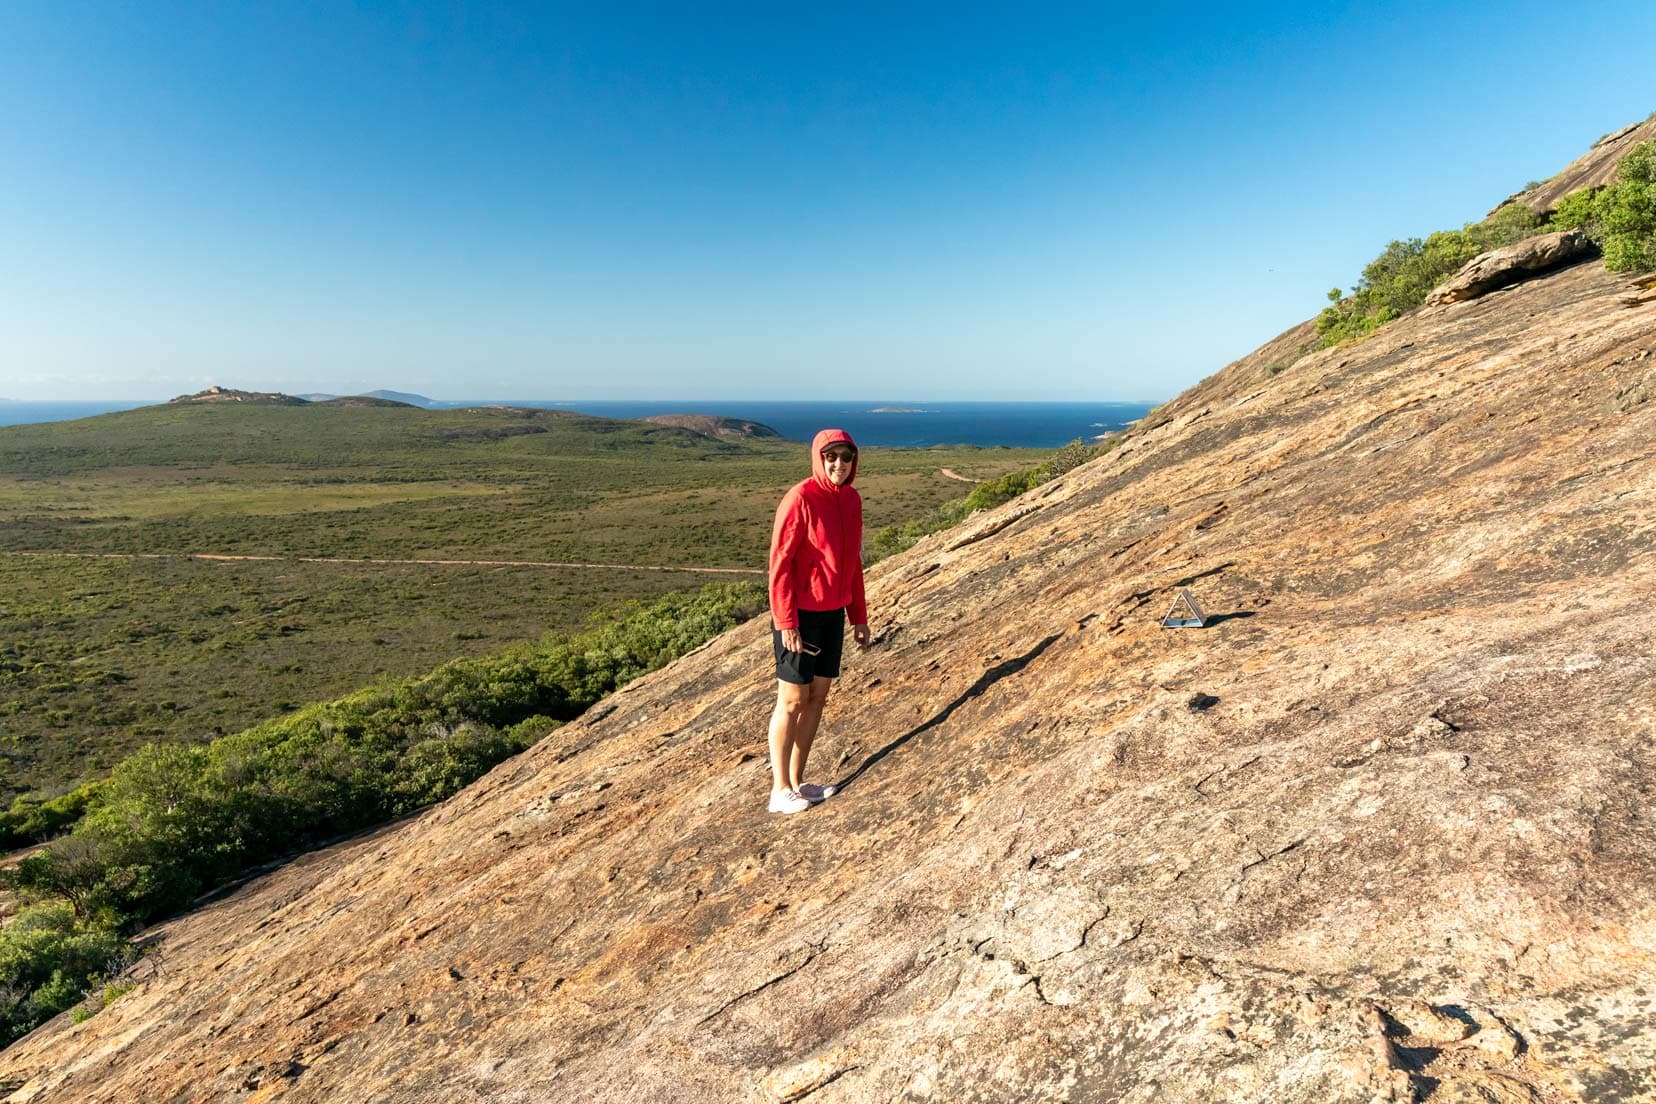
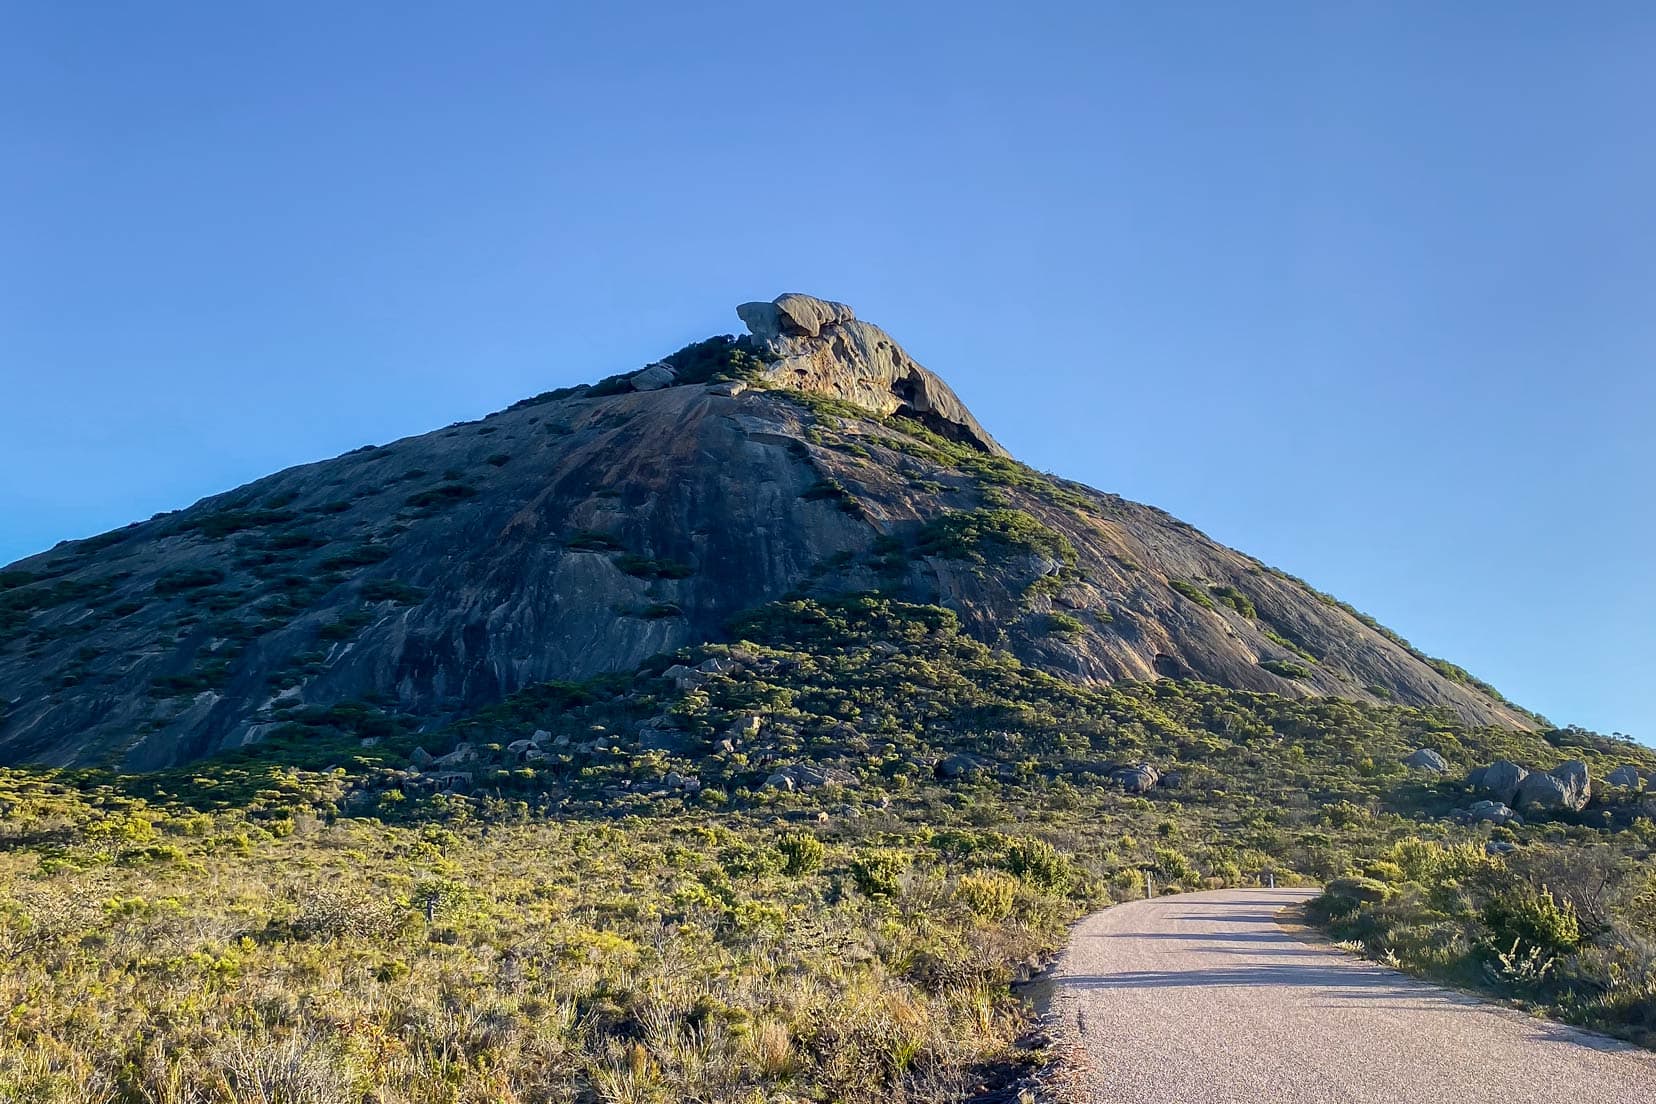
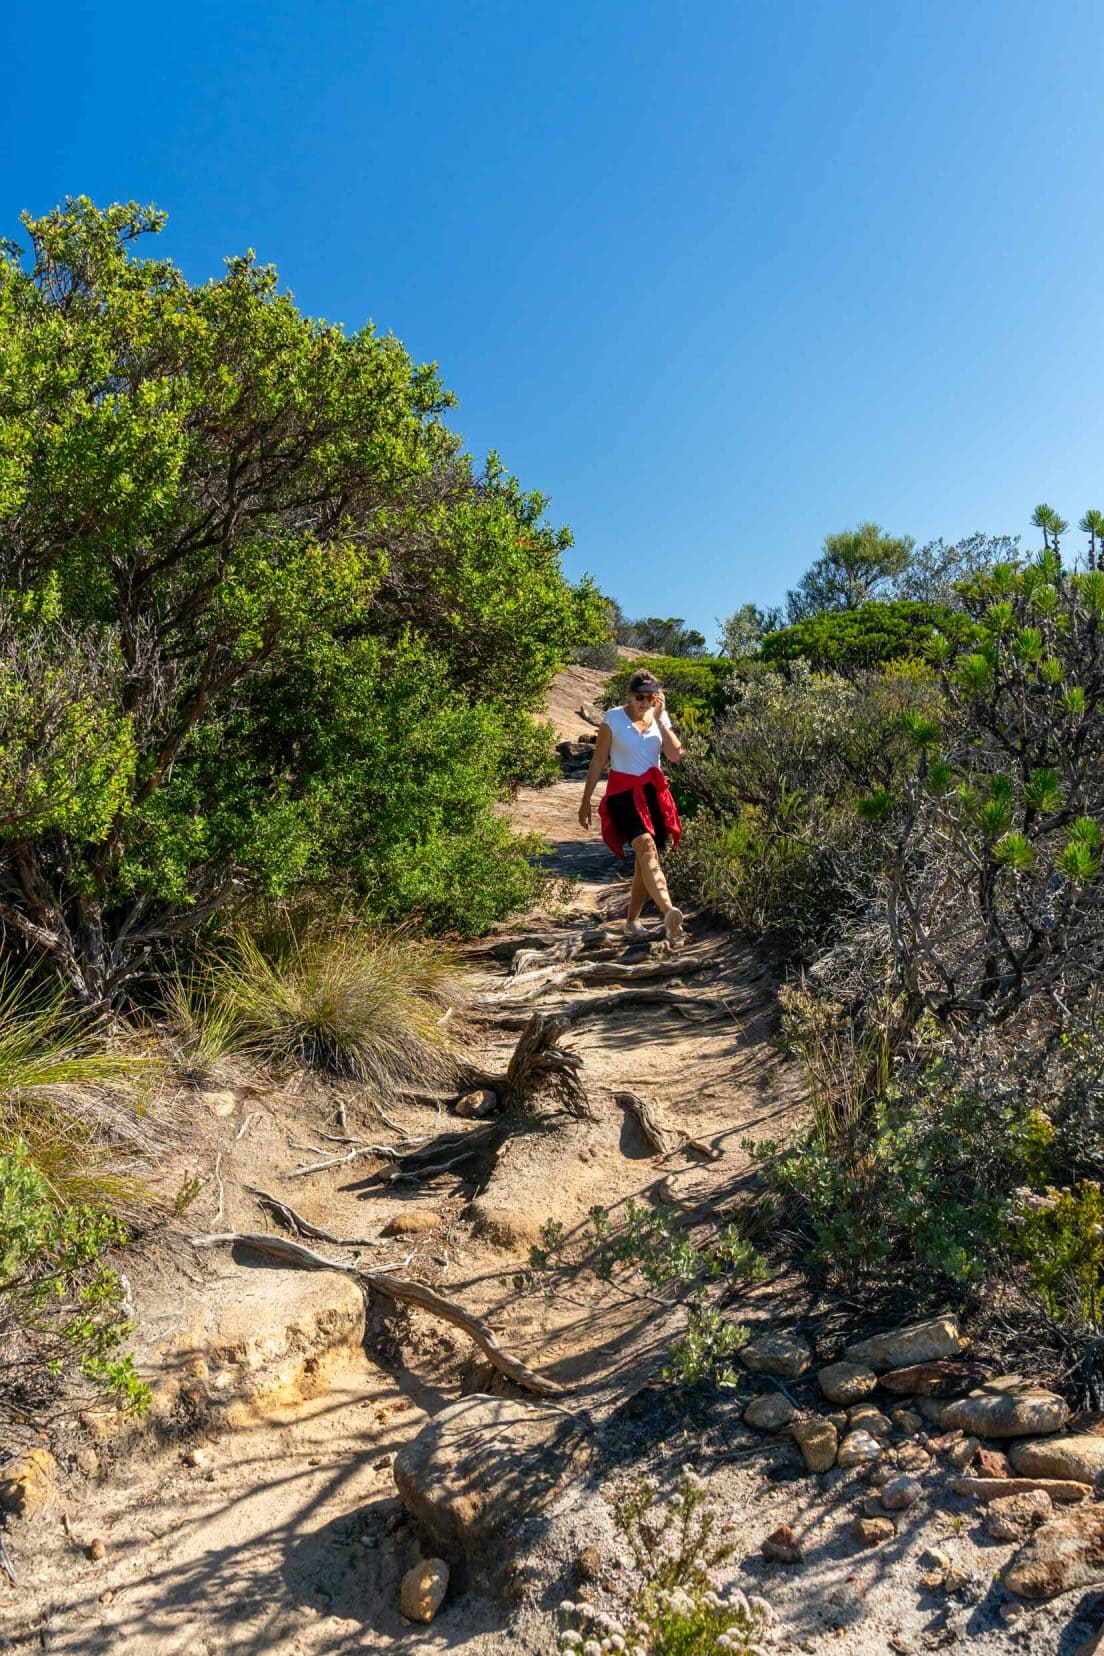
The Ascent Begins
The track starts off lovely and flat as you walk along the foot of the peak with a few information boards along the side of the gravel path.
Then you come to what Lars thought was the steepest part—I beg to differ and found lots of the trail equally steep. Maybe higher up, there are more footholds and less likelihood of slipping, so they feel less steep. You definitely wouldn’t want to walk this track in the wet.
Onwards and Upwards
This bottom part of the climb is a good test of stamina and probably the point where some decide it’s not for them. On the way back down, we passed a group debating whether to go higher, and one lady was staying right where she sat!
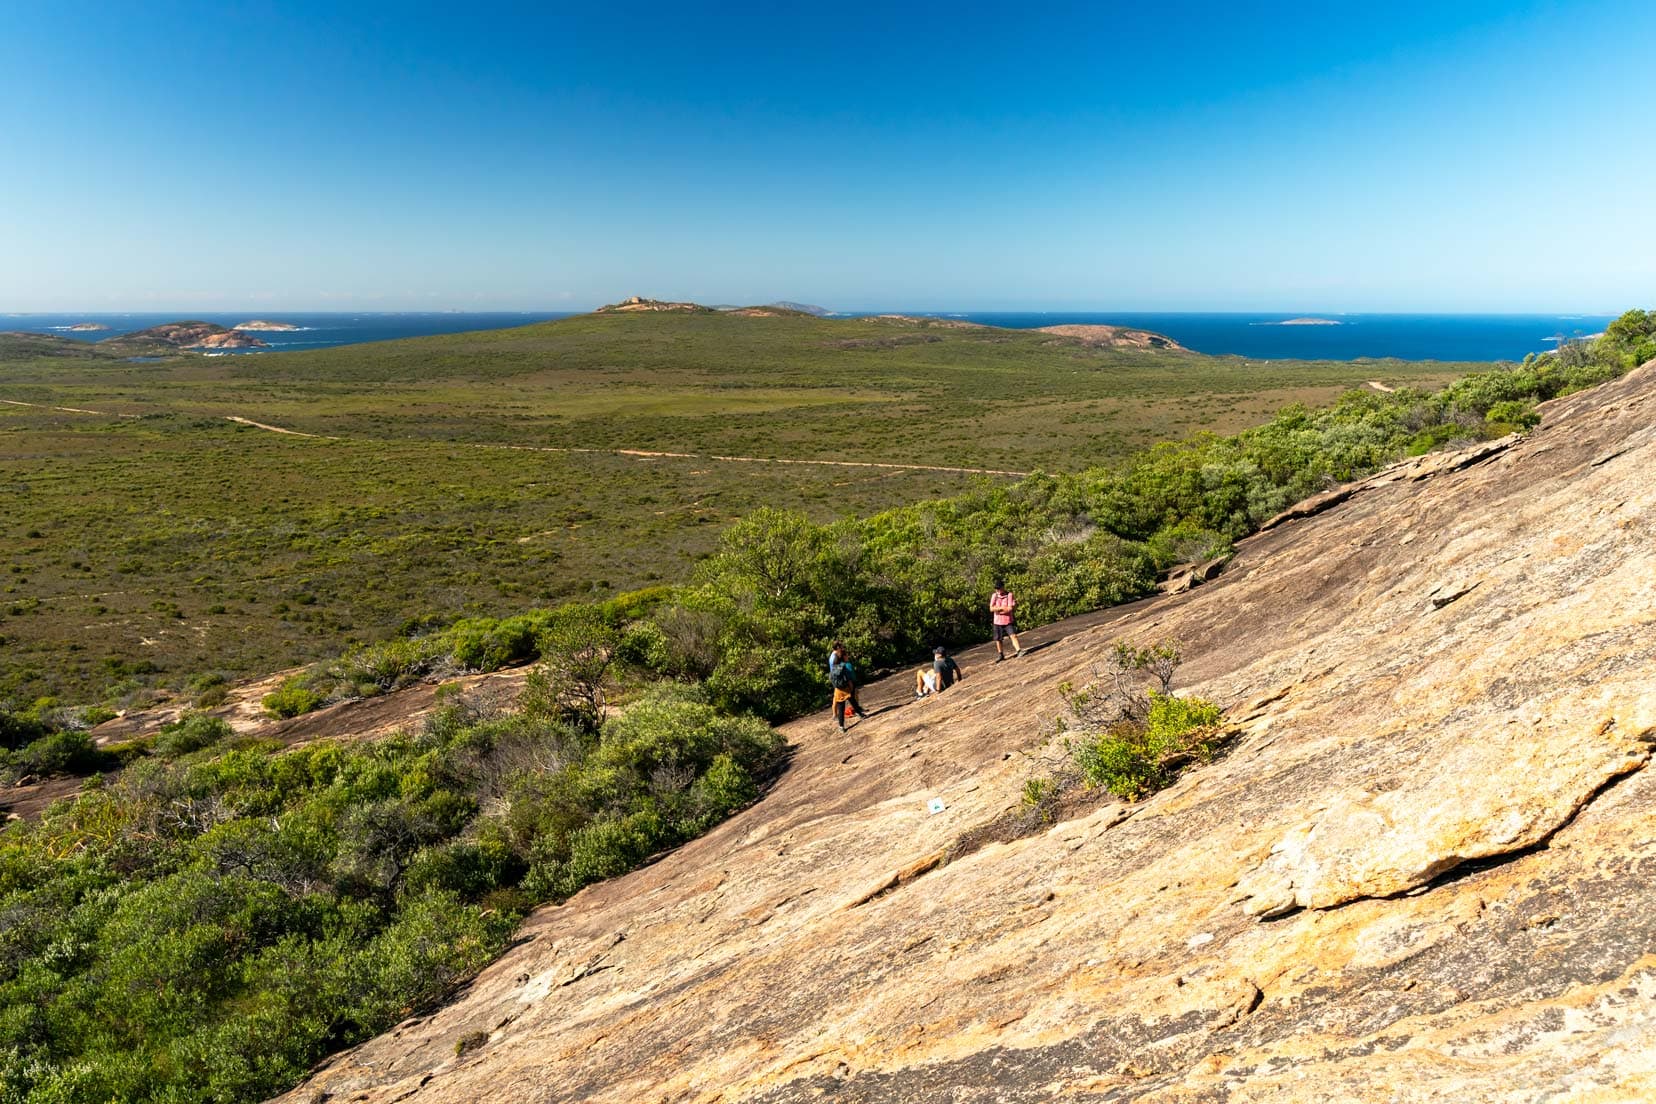
But before I put you off, we managed it fine. And although my nose felt like it was almost meeting rock at the steepest points, I never felt unsafe.
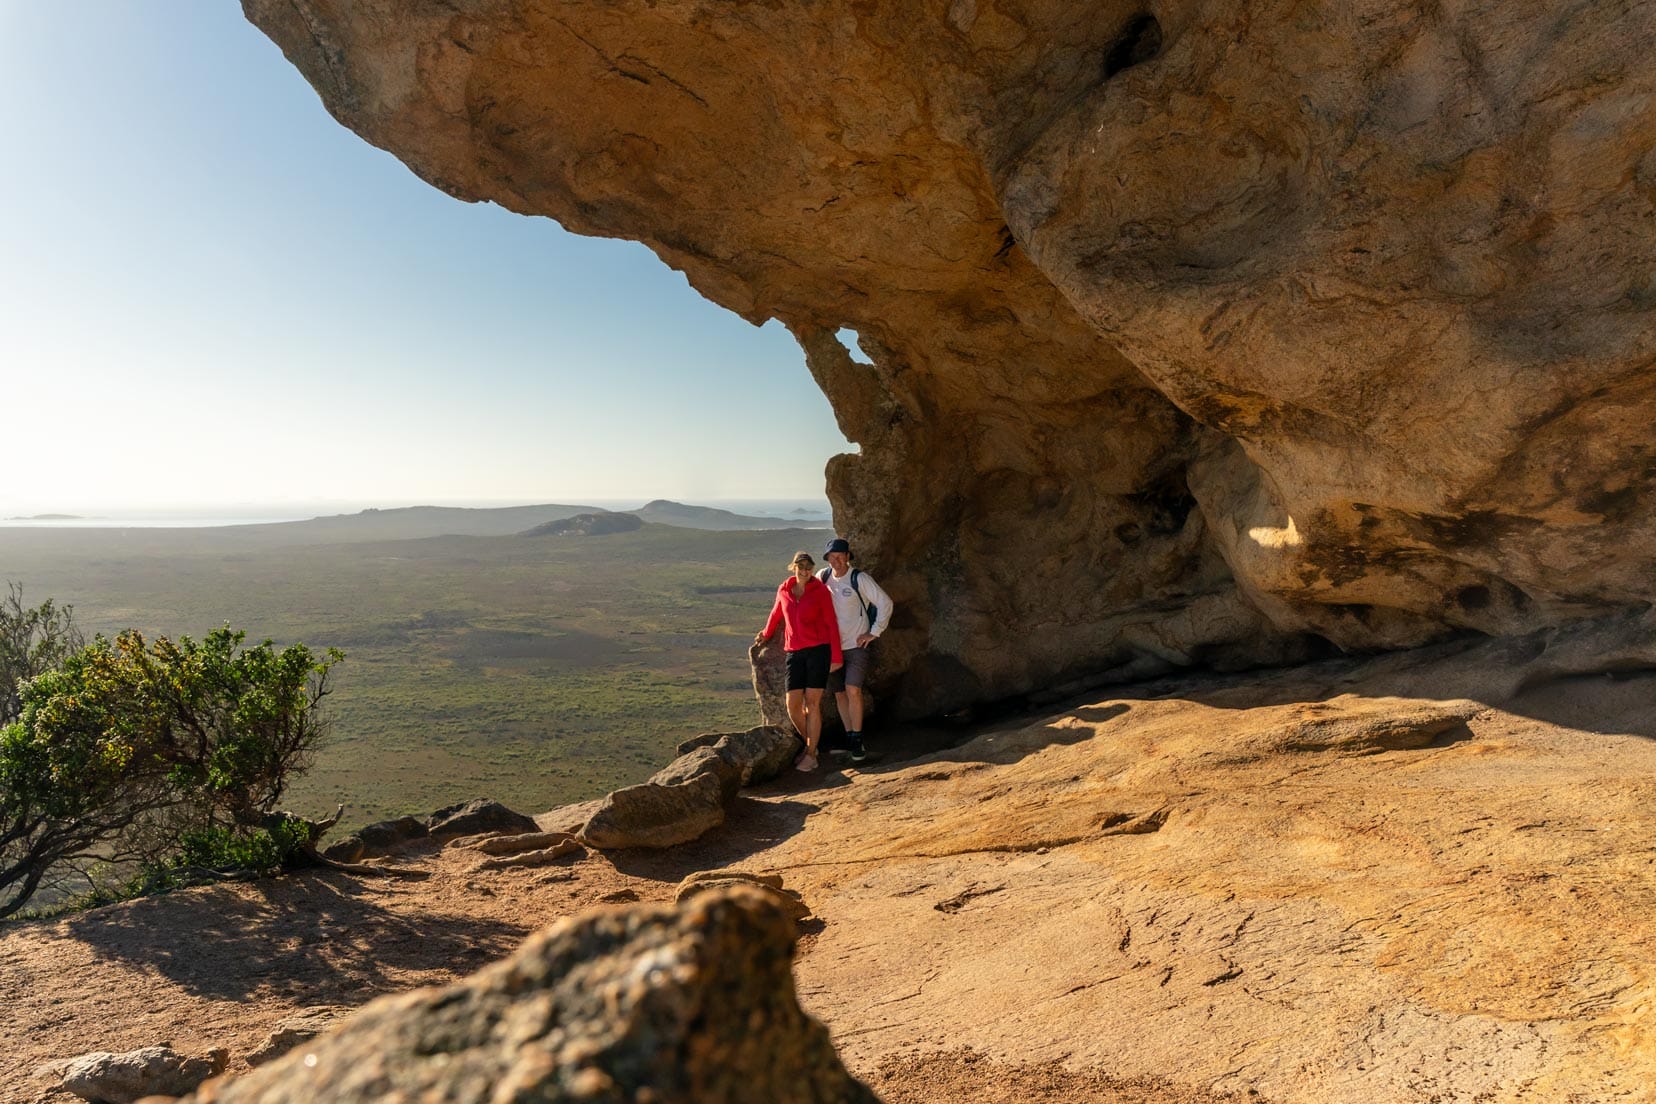
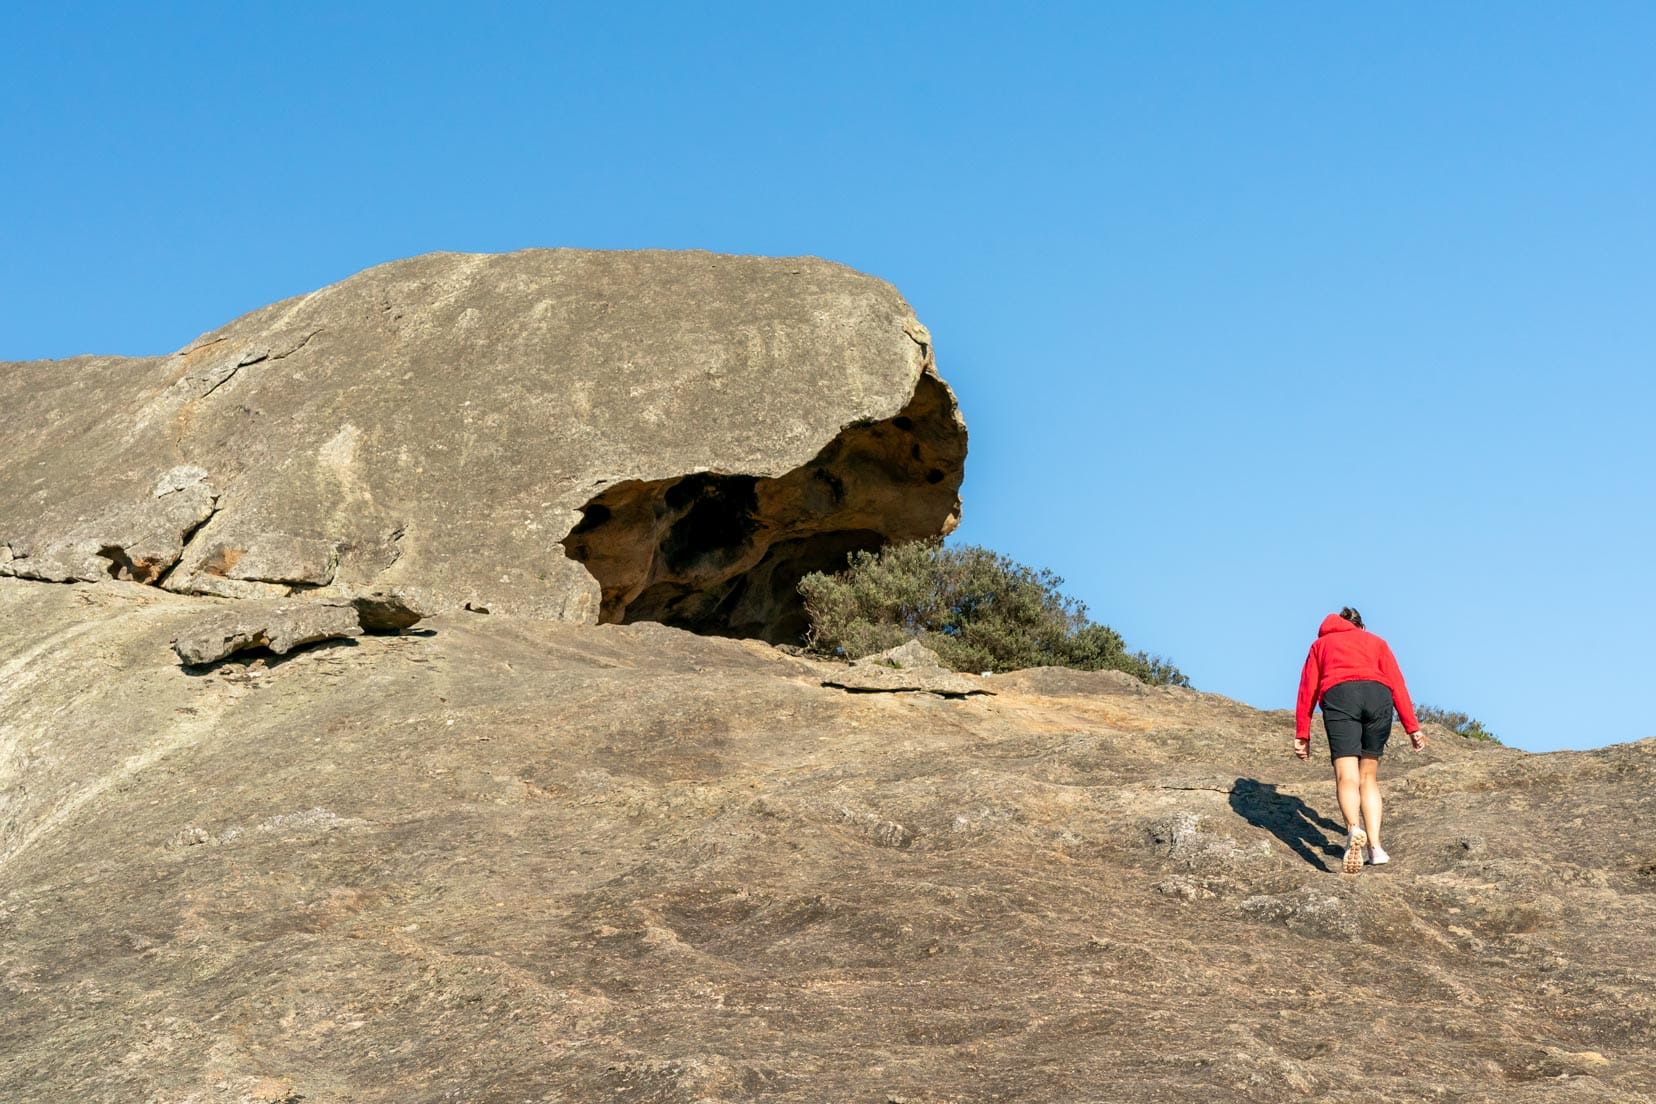
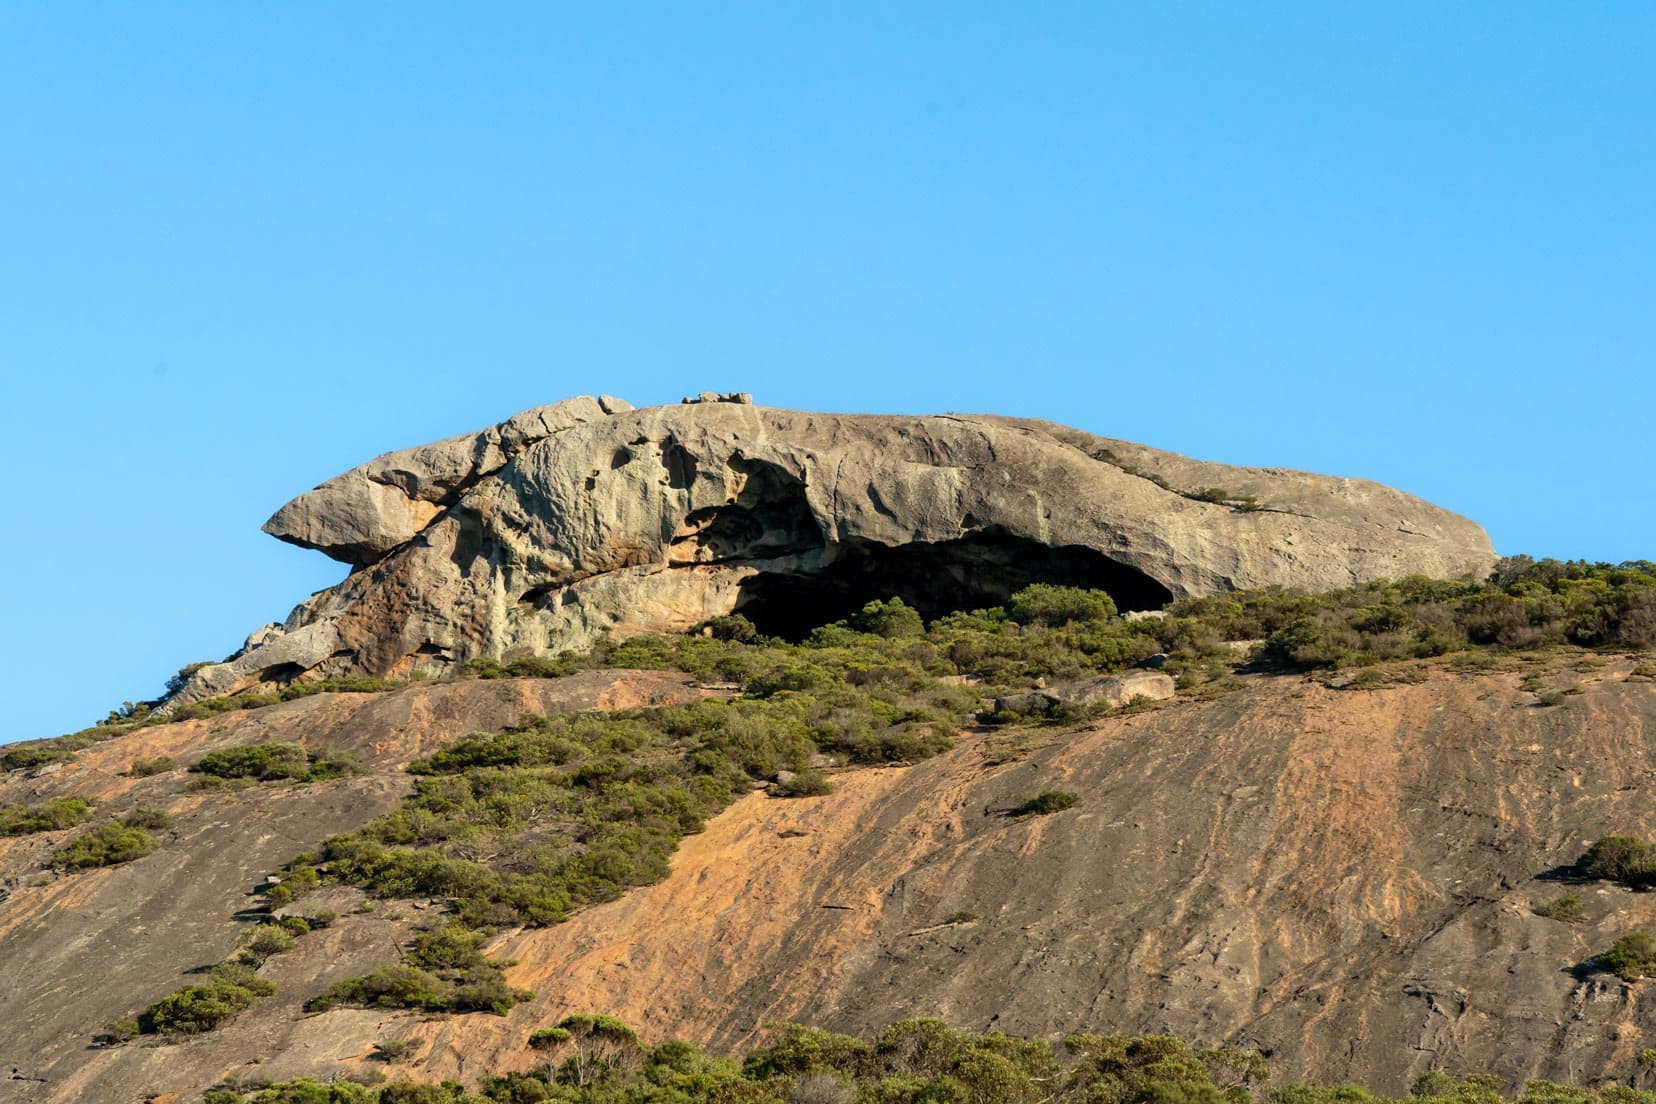
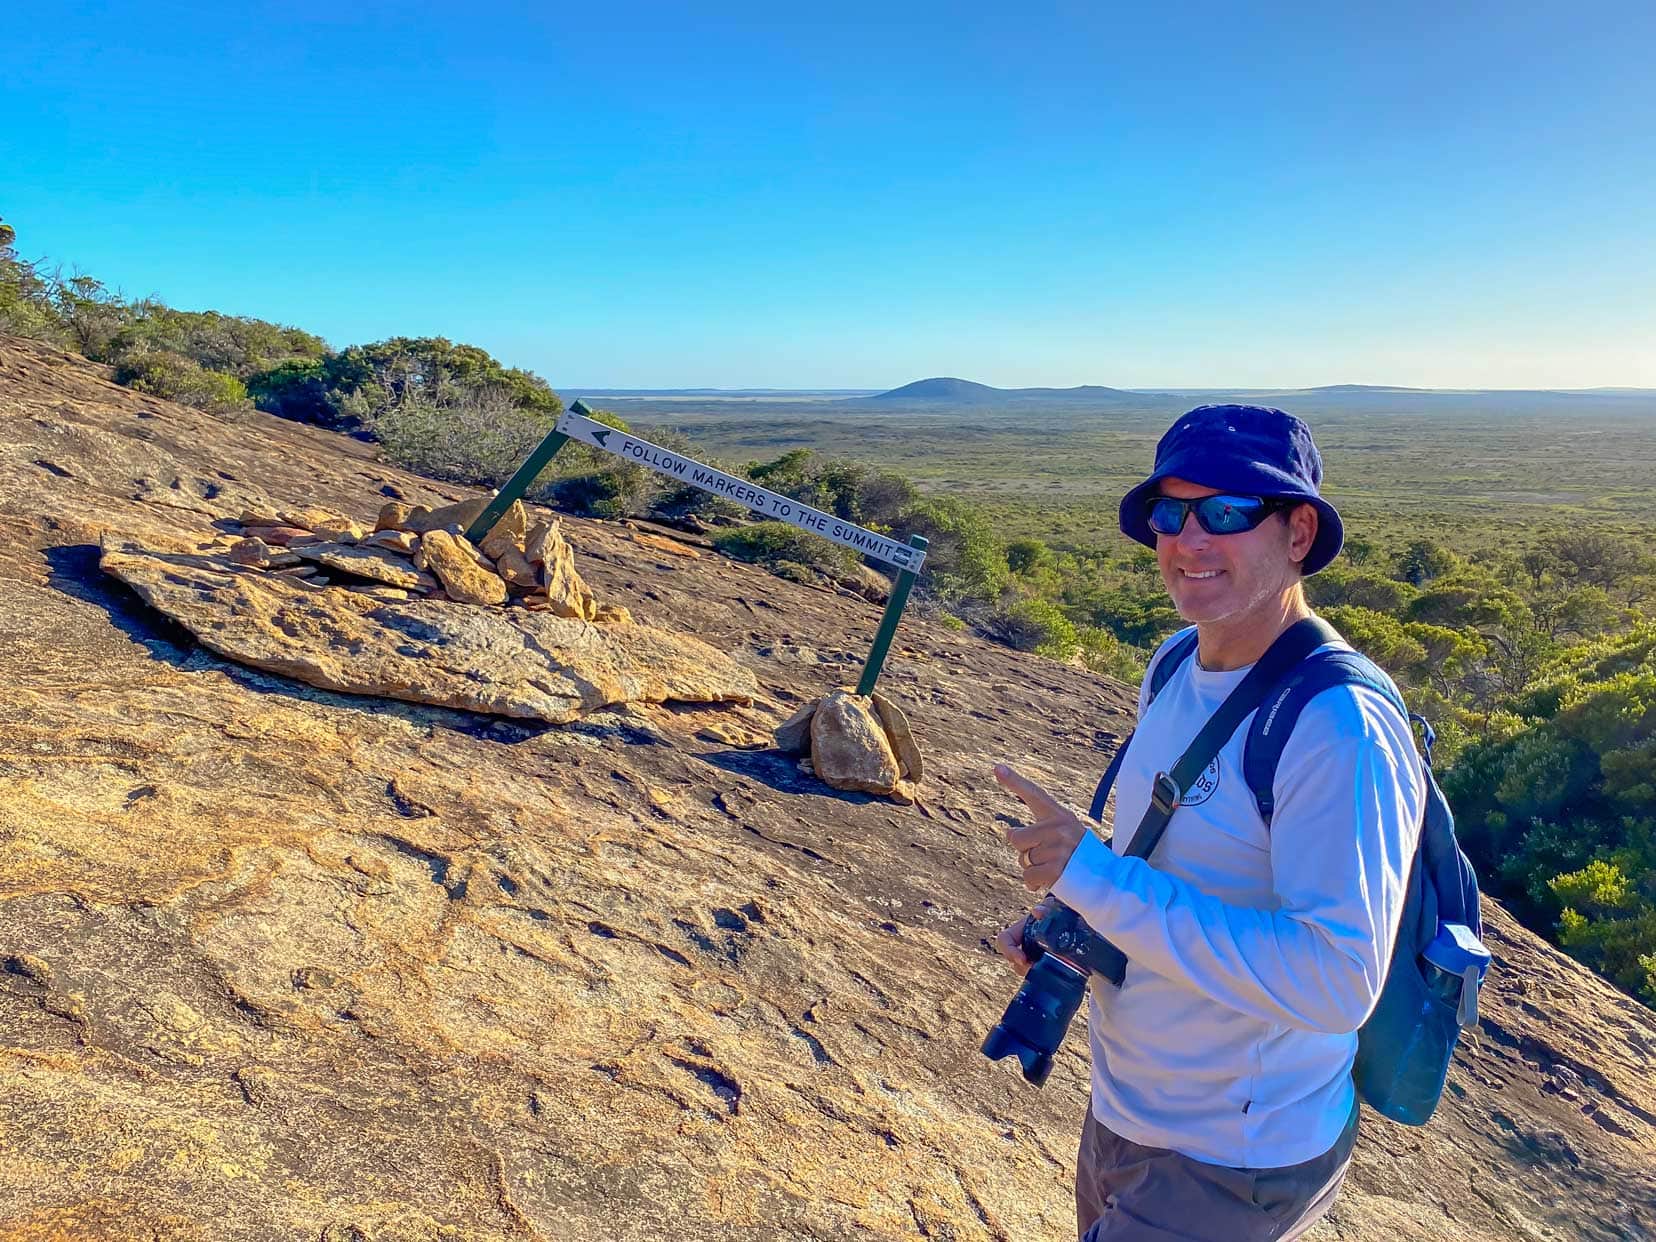
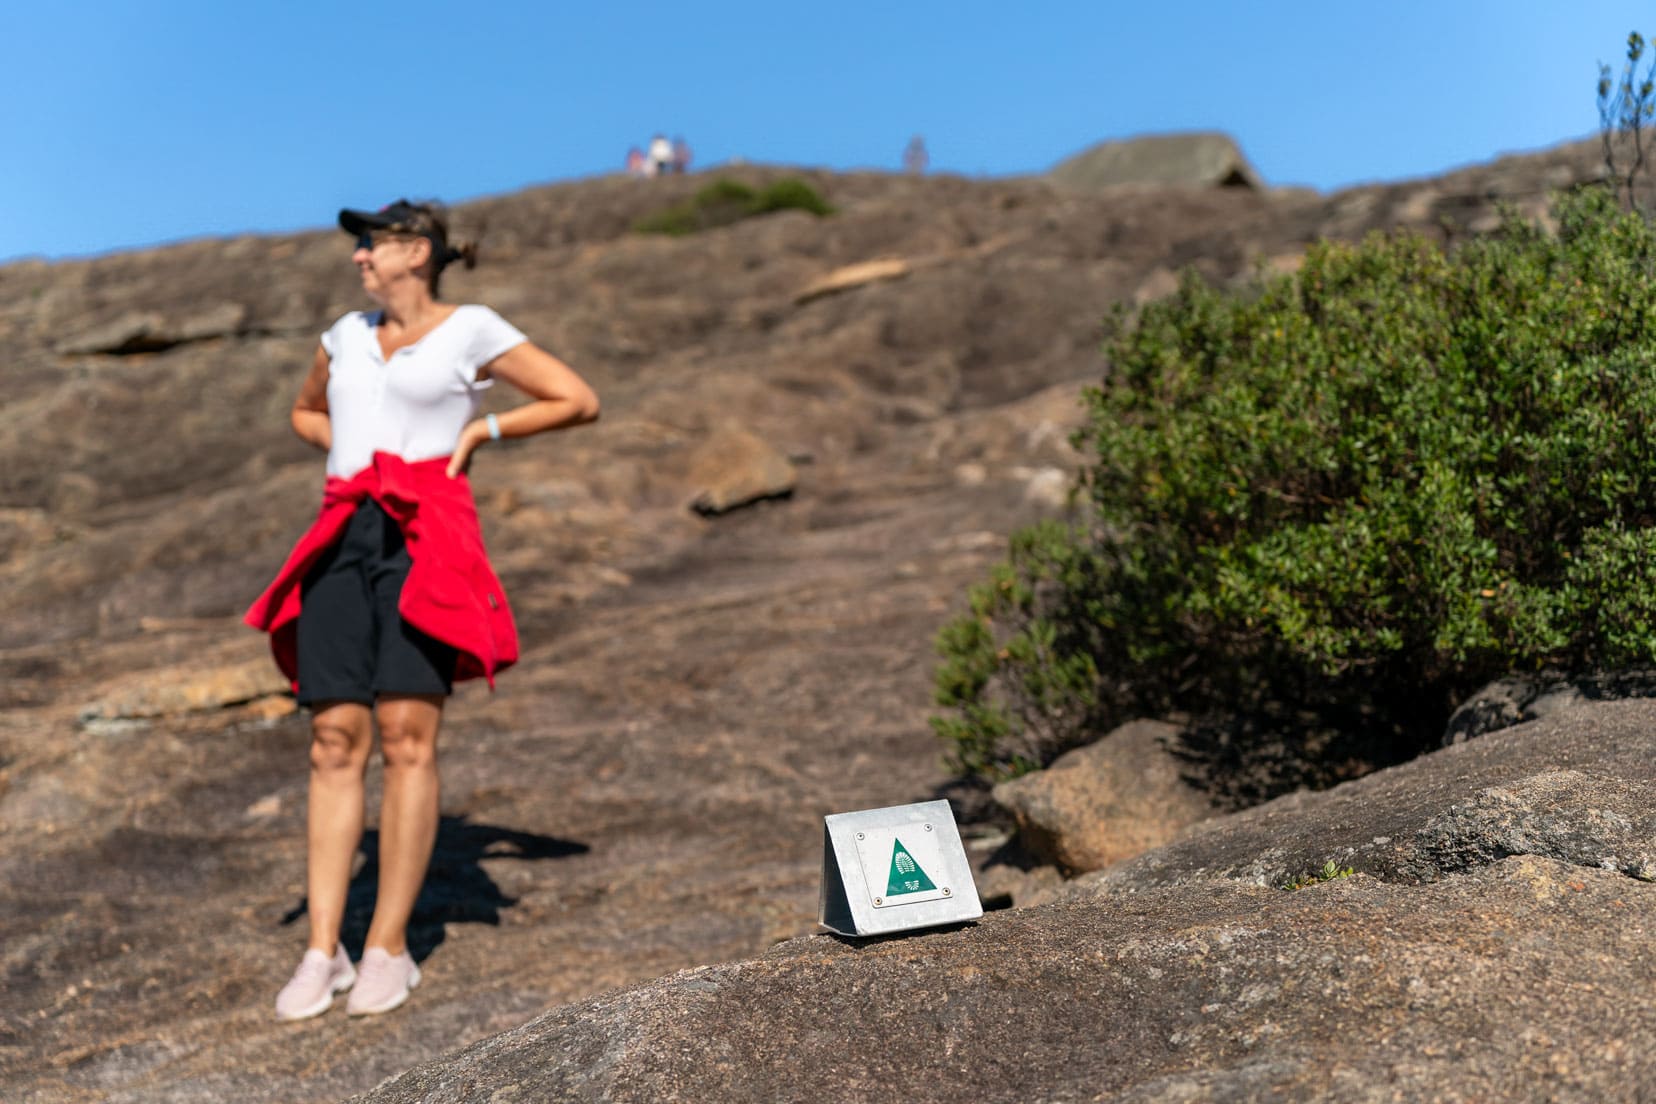
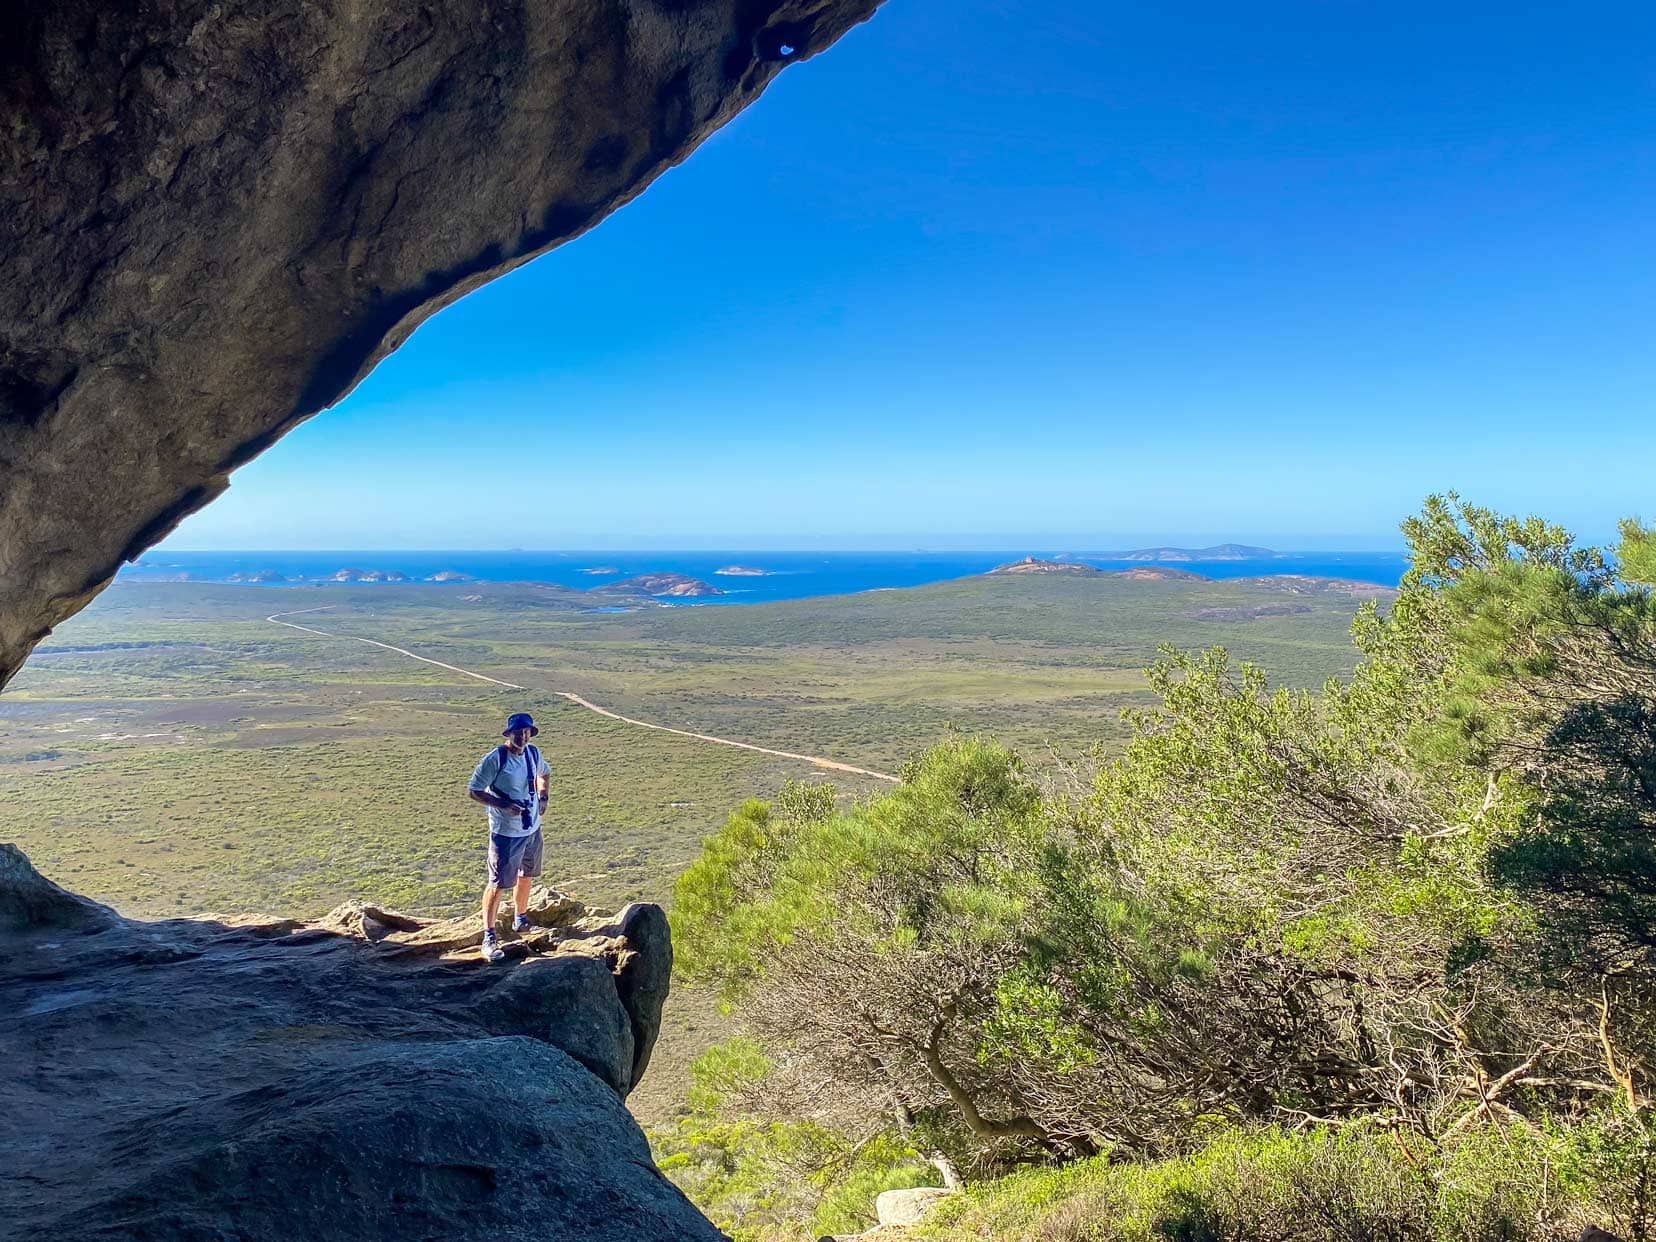
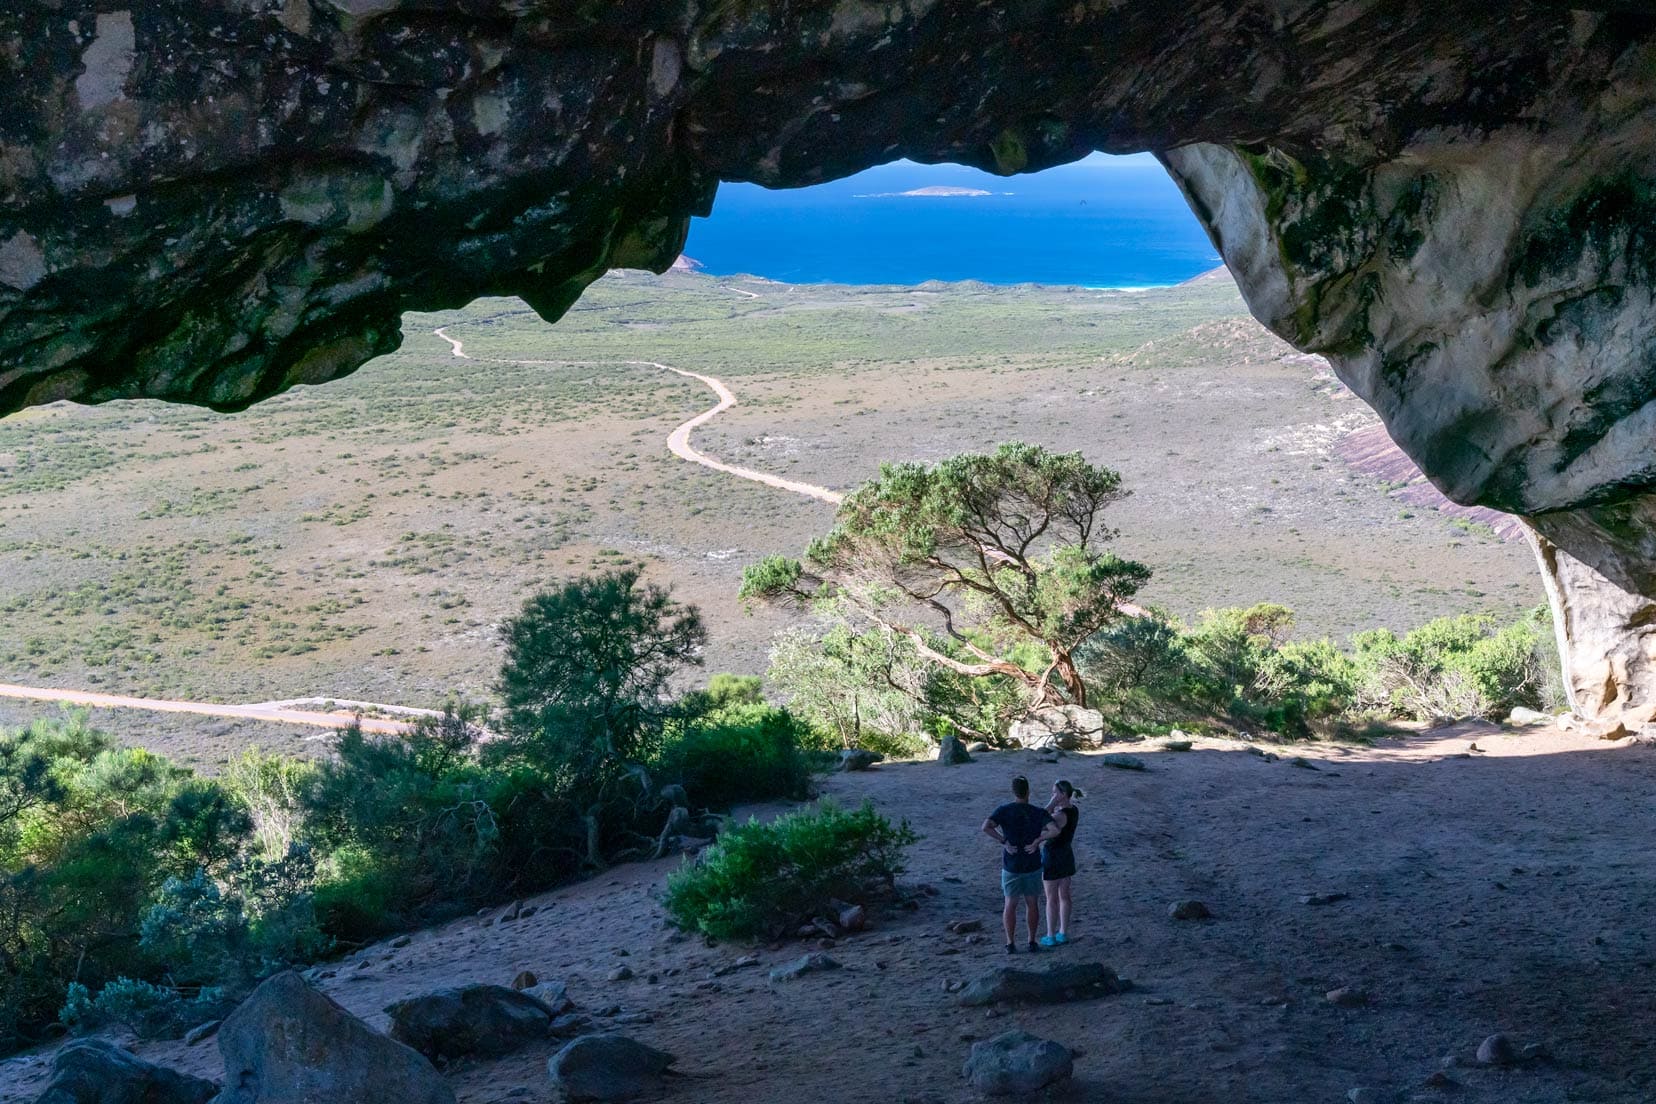
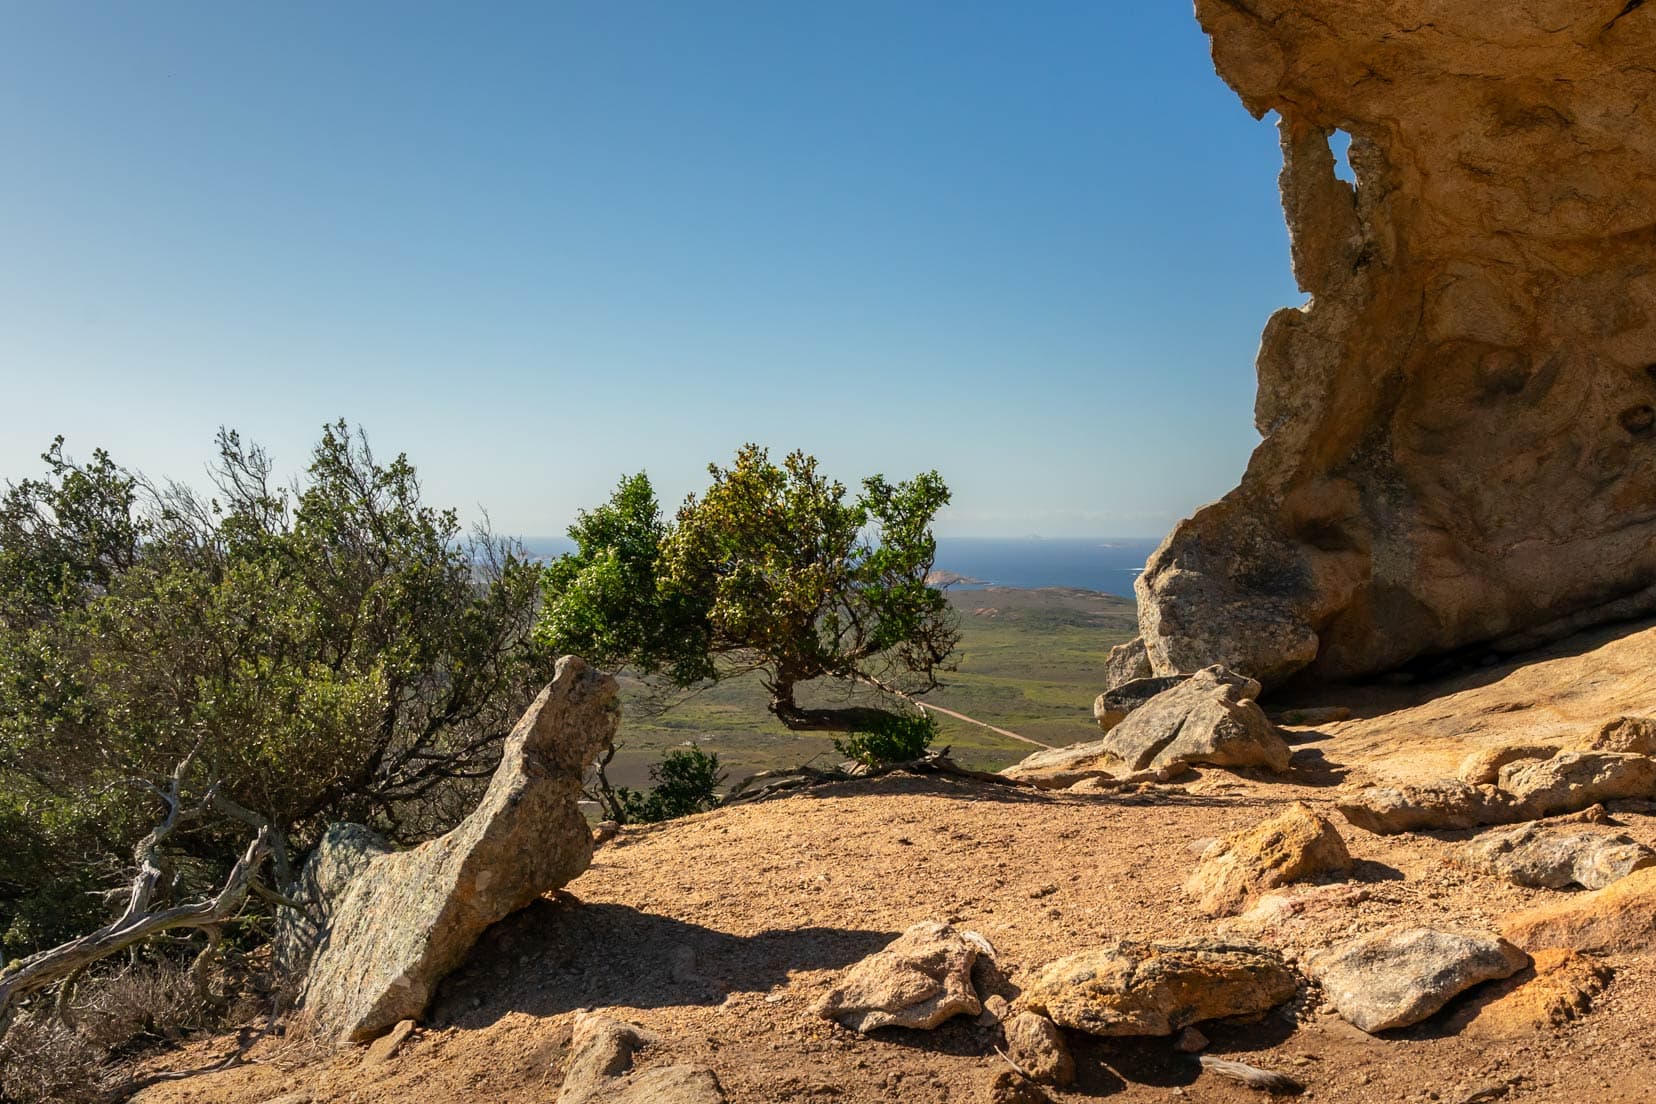
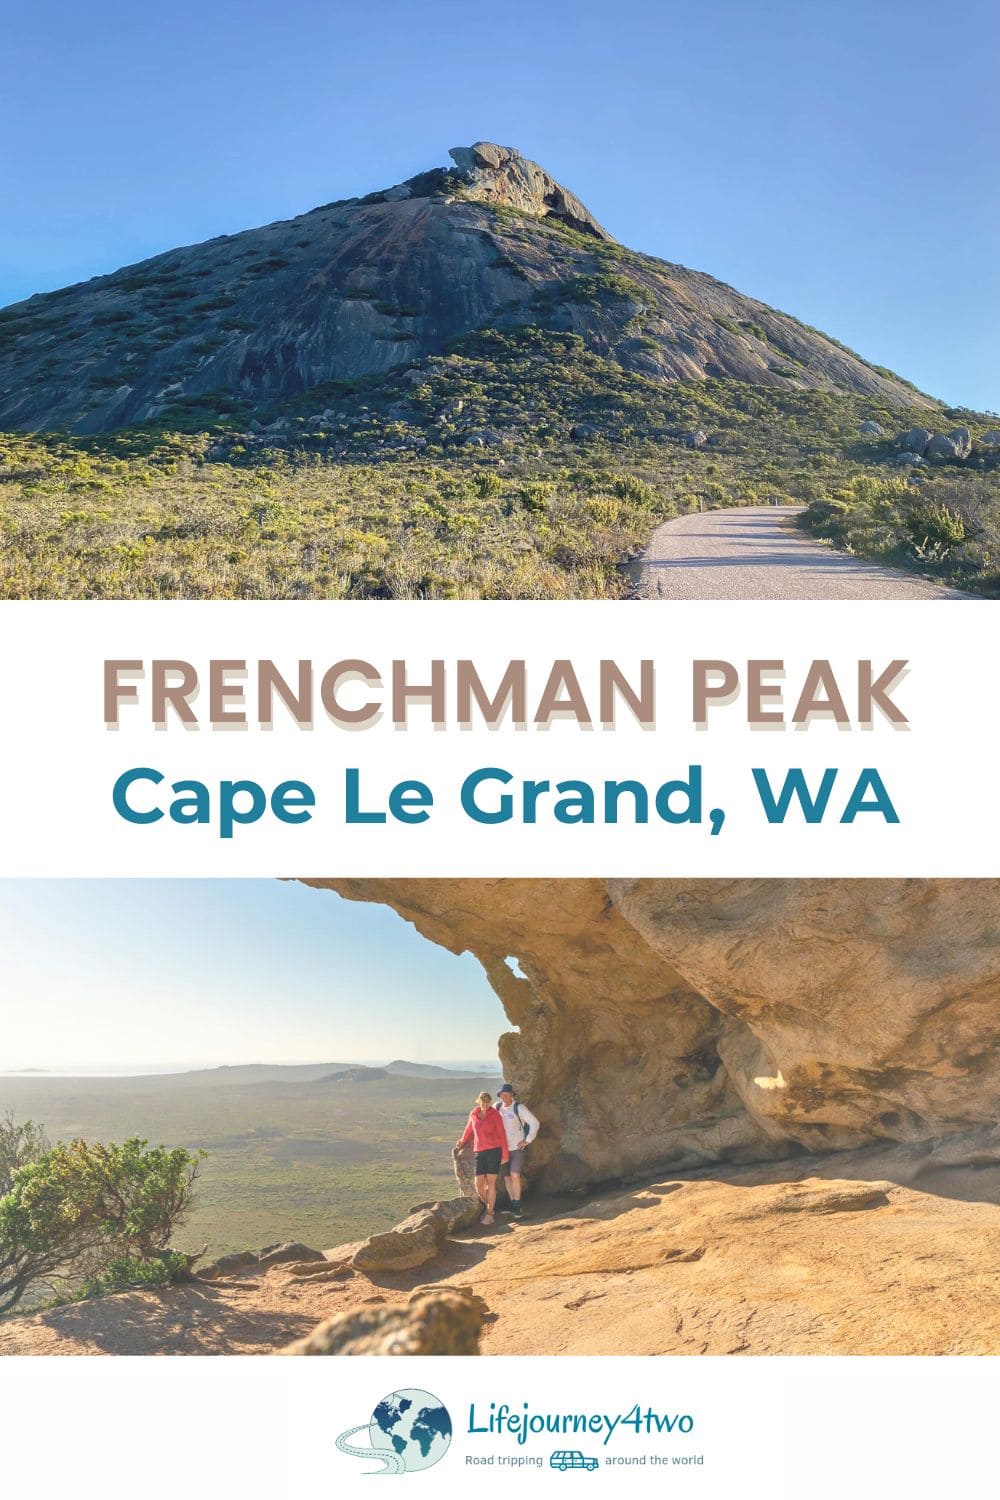
The markers in the rock lead you to the first overhang—which I mistakenly thought was the cave—and then, as you climb higher, you’ll see the back entrance to the cave on your left.
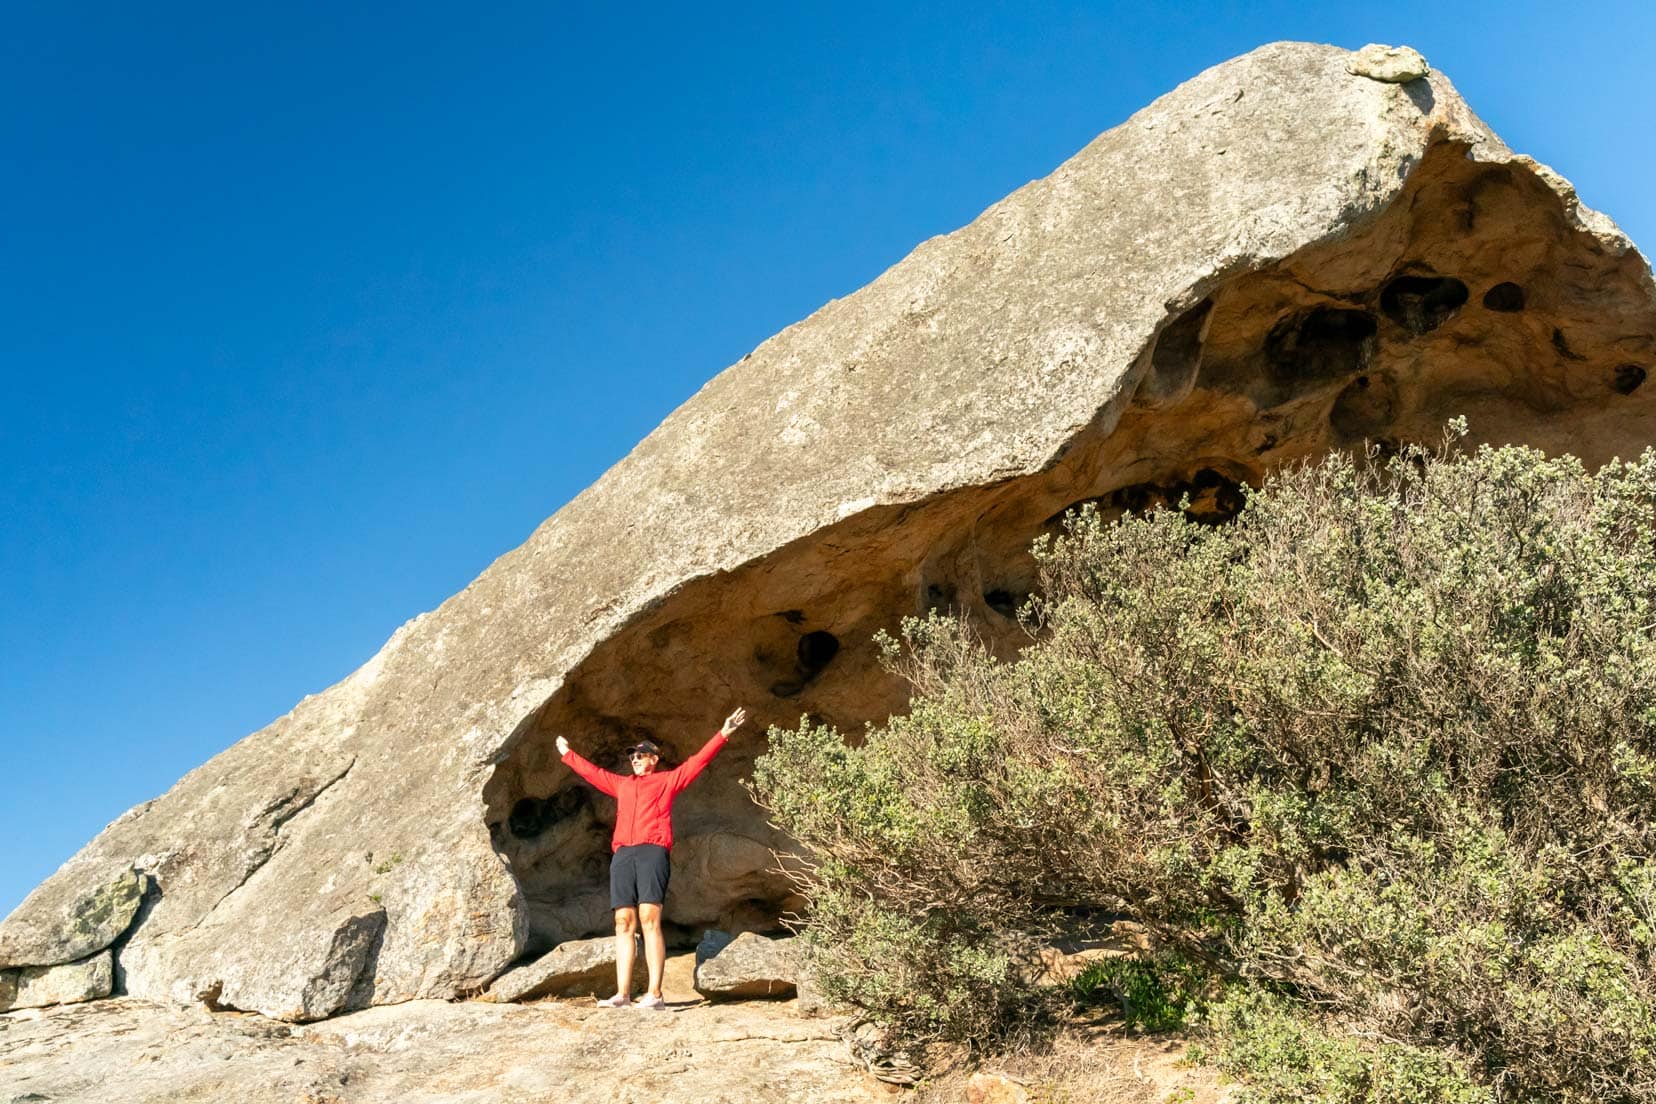
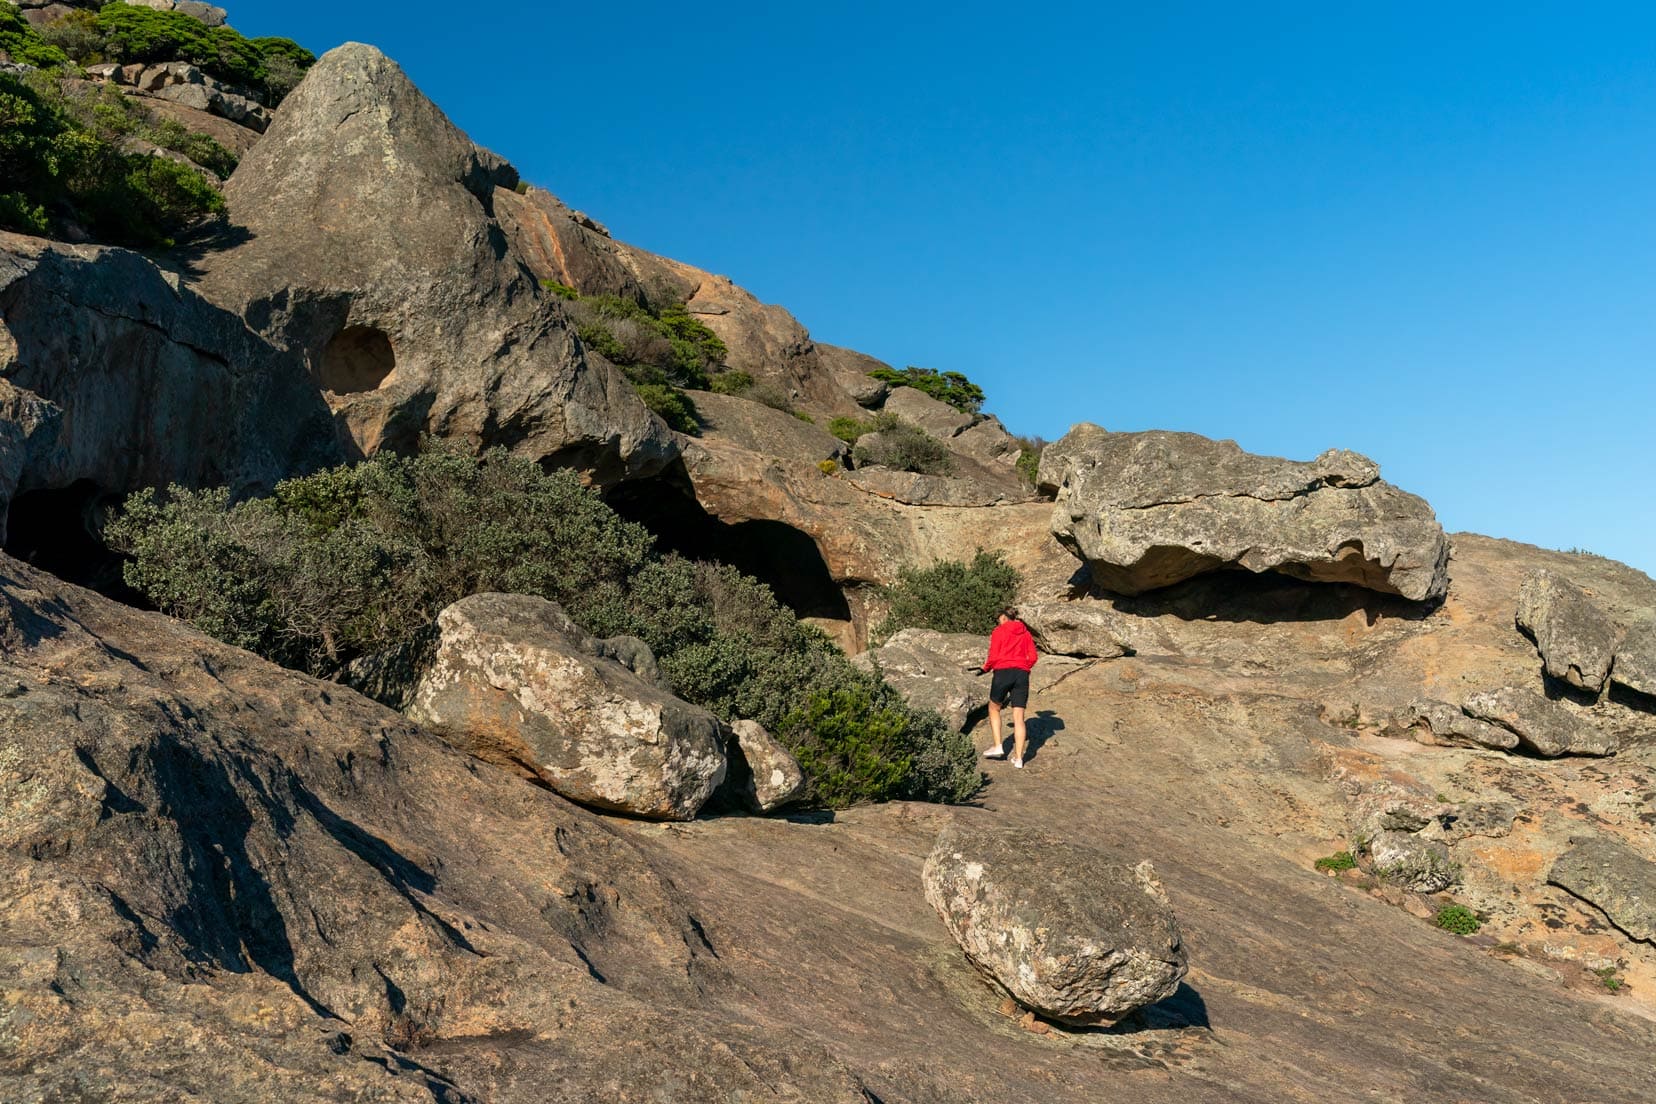
Reaching The Cave
It’s hidden a bit by bushes and rocks, and there isn’t a clear path down; you have to clamber over rocks and pick your way down carefully. Again, it’s so worth it.
While we were there, near the end of March, there were hundreds of nesting swallows or swifts—I always get confused—but there were loads in the small holes of the cave roof, flitting in and out.
This is a great spot to take photos; luckily, we had it all to ourselves.
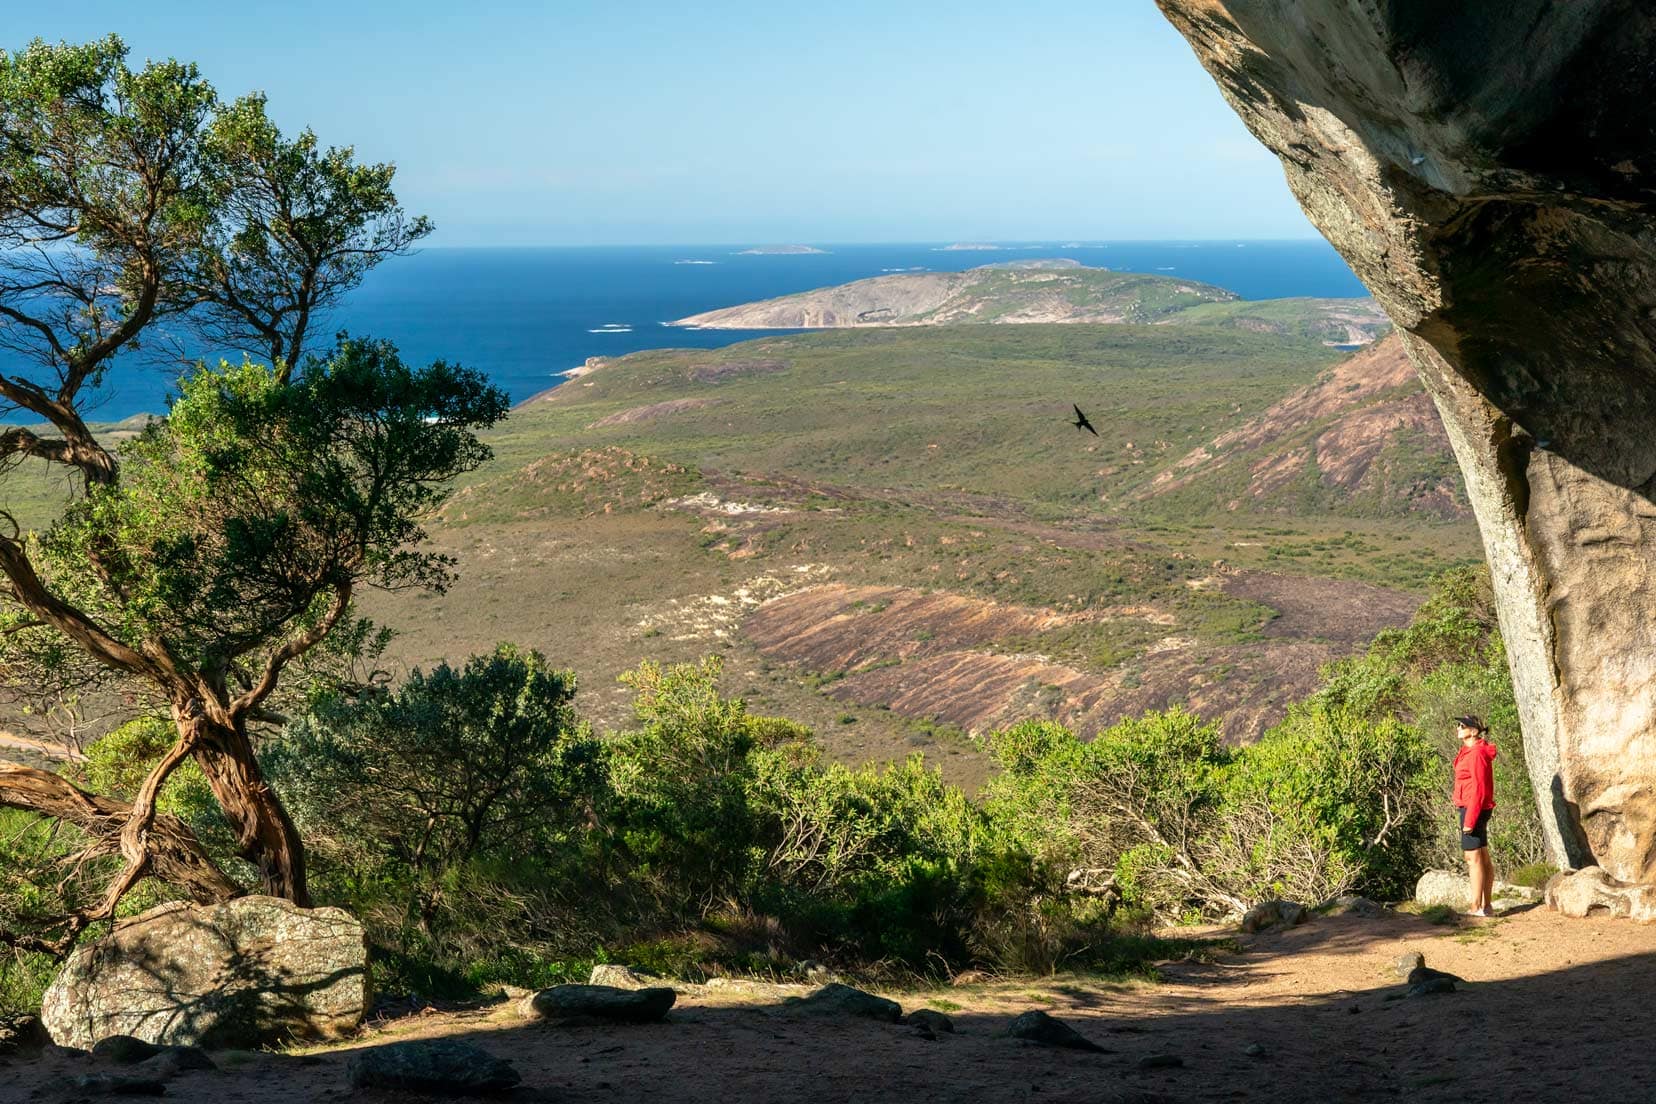
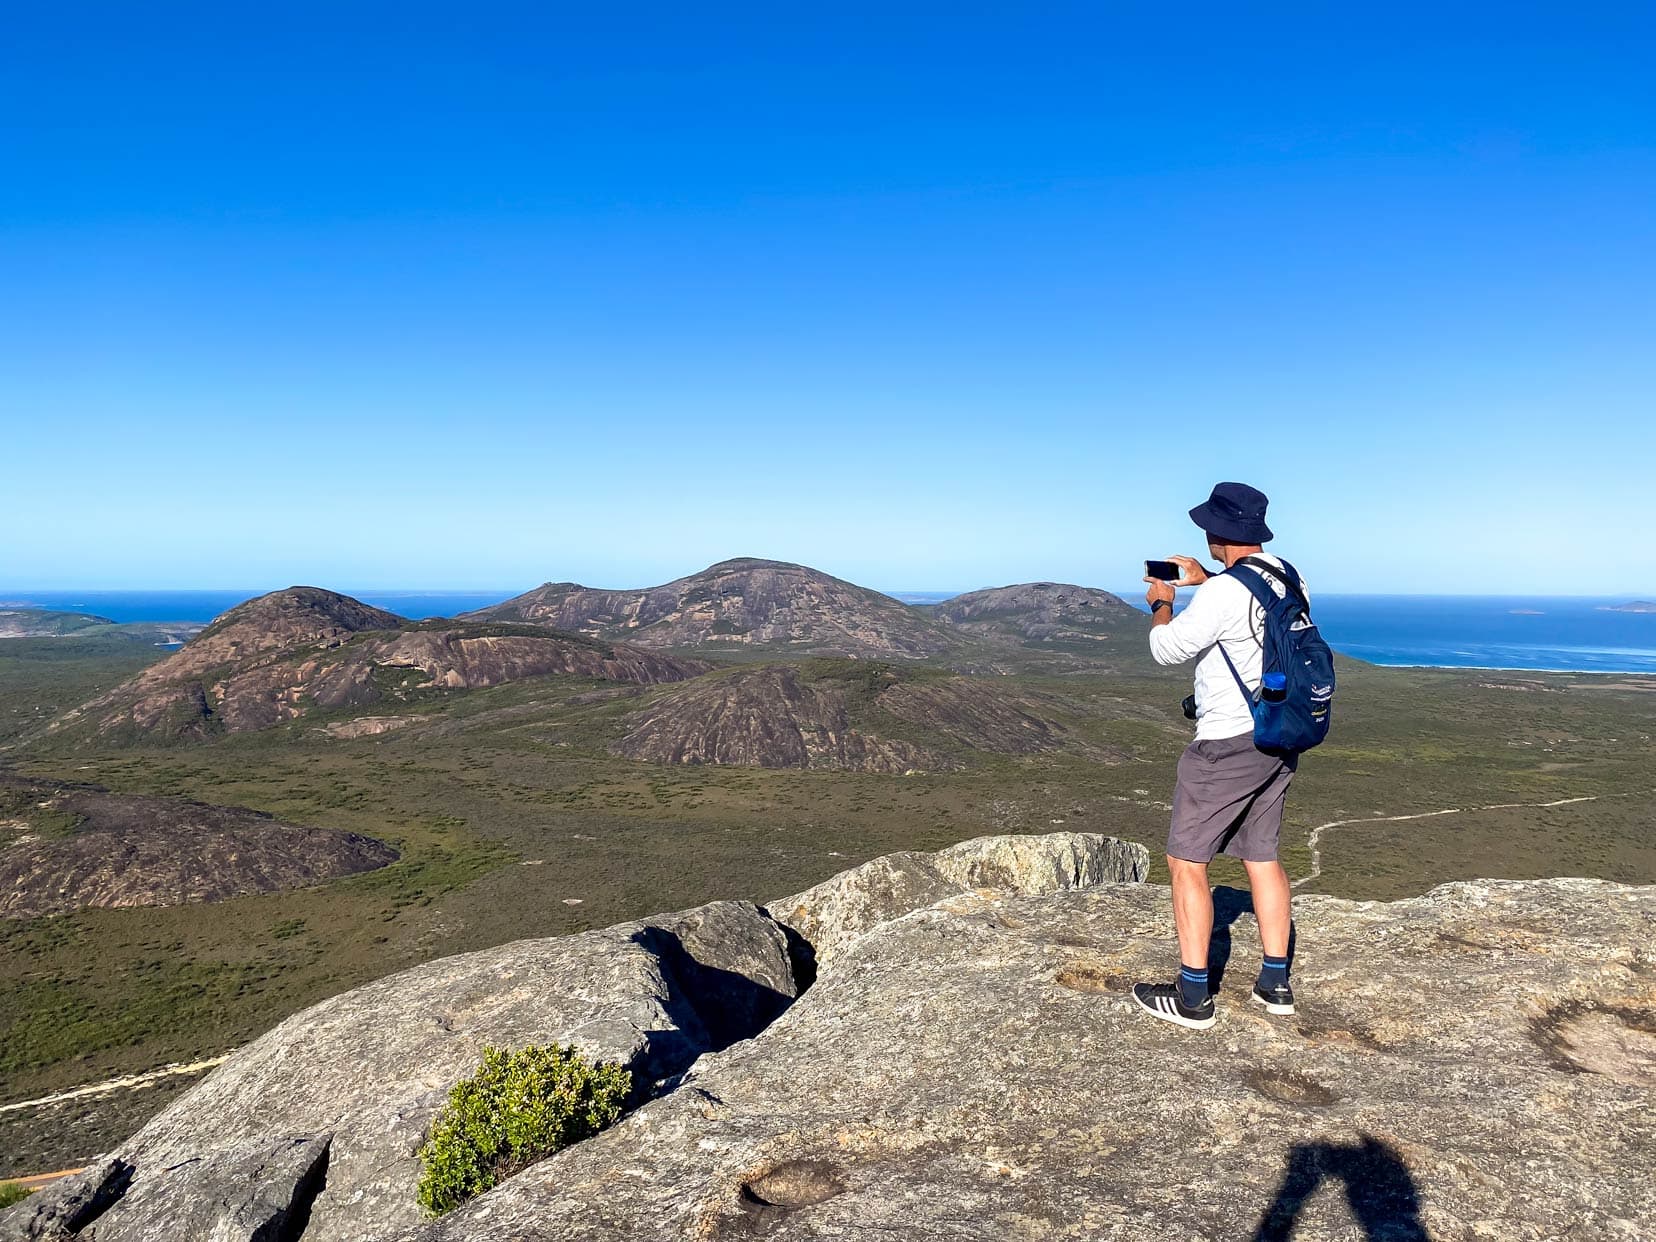
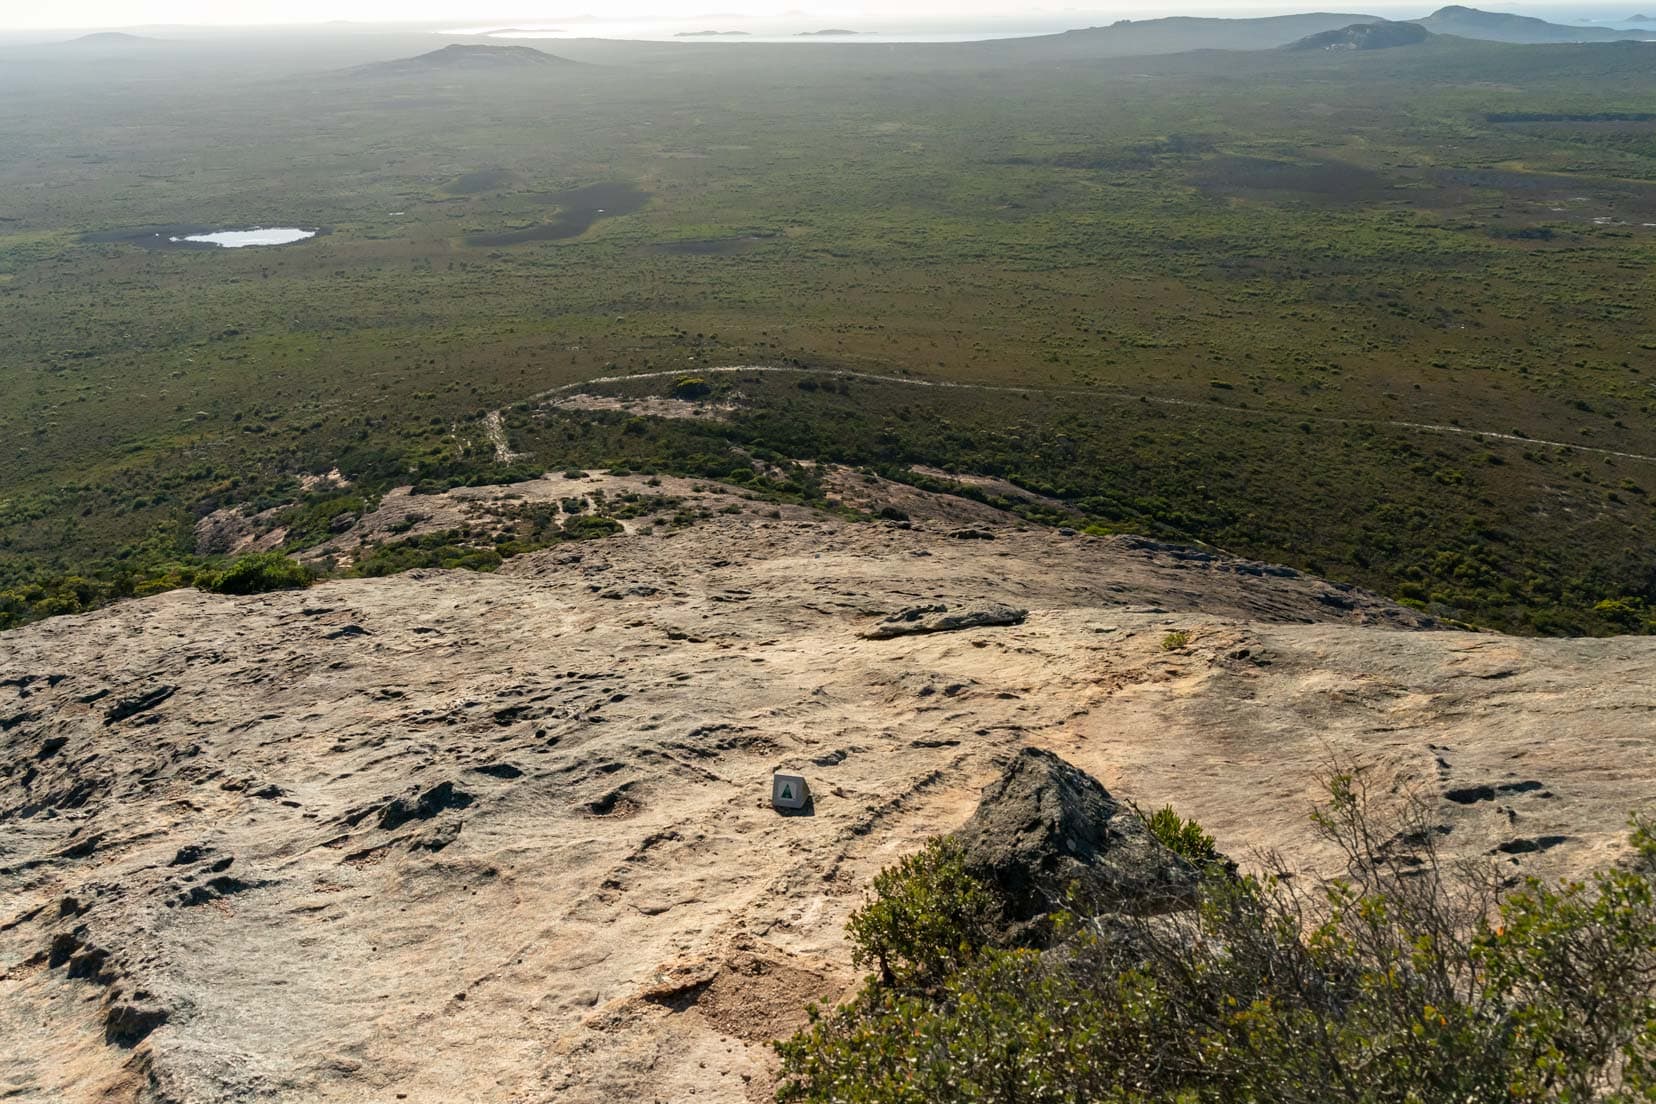
The Reward: Summit and Views
After another few minutes of climbing, you reach the summit. There’s no welcome marker to say you’ve made it, but the 360-degree views let you know you’ve arrived. It’s time to congratulate yourself on your achievement!
You still have to get back down, but let’s revel in getting up before we start worrying about the descent!
I would say I’m moderately fit, and Lars is very fit and we made it to the top in half an hour.
As we came back down, we passed families with five-year-olds in tow. I hope this puts the hike in context for you! It’s a strenuous hike, no doubt about it, but as long as you are relatively fit, it’s worth it for the views from the top.
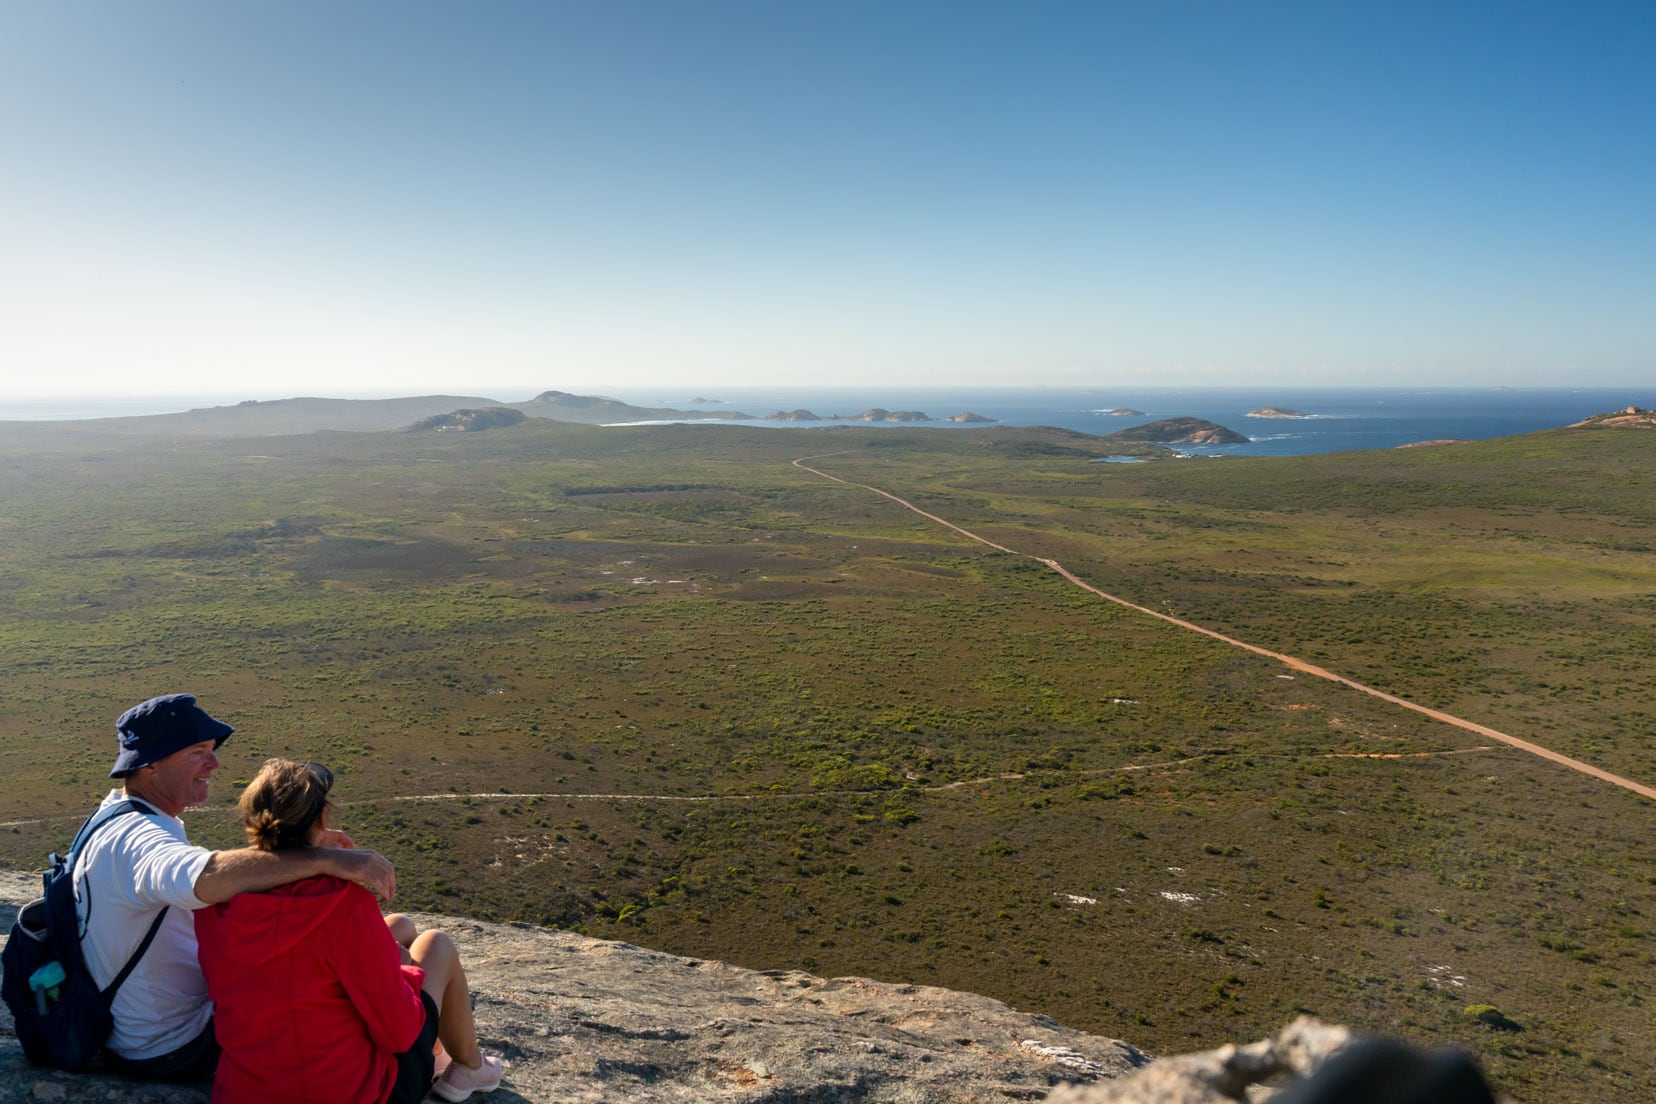
Enjoying the Views
While Lars was busy finding all those different angles a photographer loves to capture, I sat quietly, enjoying the warmth of the granite heated by the morning sun and a spot out of the wind.
The Descent: Reflections and Realizations
Due to the steepness on the way down, it was tricky in parts. I must admit, I relied on sliding down more than climbing down at certain steep sections!
That said, although I was walking with trepidation, I was fine, and there were no more moments when I questioned what on earth I was doing.
That’s always a good marker. There have been a few hikes and climbs on which I have questioned my sanity, like the aforementioned Kjergabolten and another time when we seemed to be walking along a cliff face with a hundred-foot drop beside me in the Slovenian Alps.
But Frenchman Peak wasn’t anywhere as challenging as those and will go down in the books as a worthwhile experience.
And hey, my Garmin Fit watch told me I’d climbed 58 levels. Go me!
After the Hike: The Crowds and Conversations
The previously empty car park was bustling when we reached the bottom around 9 a.m.
Engaging with a stream of arriving hikers, we shared our experiences—Lars with his usual optimism and myself with a candid recount of the steepness. Their reactions varied, offering us a glimpse into the diverse perspectives and expectations of Frenchman Peak’s climb.
Now that you’ve got a taste of what to expect let’s make sure you’re fully prepared to tackle Frenchman Peak yourself.
Planning Your Trip to Frenchman Peak
So, how can you get ready to hike Frenchman Peak? Let’s dive into some essential tips.
Before setting off on your climb, make sure you pack these essentials to enhance your experience and ensure safety:
- Good Walking or Hiking Shoes: The terrain is challenging, and suitable footwear is crucial.
- Clothing Layers: The wind can be chilly even on a warm day.
- Fly Repellent: In warm weather, arm yourself against the persistent March flies with a good repellent.
- Water, Sunscreen, and Hat: Stay hydrated and protected from the harsh Australian sun.
- Personal Locator Beacon (PLB): Carrying a PLB can be a lifesaver for unexpected emergencies. We always have one with us when we are anywhere remote, and a mobile signal isn’t a given.
Accommodation Options
Planning to extend your adventure in Cape Le Grand National Park? Consider these nearby accommodations:
- Lucky Bay Camp: Located within the national park, it’s an ideal spot for nature lovers.
- Cape Le Grand Camp: Offers comfortable facilities close to all the natural attractions.
- Esperance Accommodations: Various options are available in the nearby town of Esperance for those preferring urban comforts.
Park Entry Fees
Access to Cape Le Grand National Park is subject to the following fees:
- Standard Entry: $17 per vehicle.
- Concession Entry: $10 per vehicle. If you’re a frequent visitor to national parks, consider purchasing a park pass for better value. Please note that dogs are prohibited within the park to protect its natural environment.
- Driving Caution: Drive slowly, especially in the early morning, as wildlife like kangaroos are active and may cross roads unexpectedly. On five occasions, a roo jumped across the road in front of us on our way to Frenchman Peak.
- Trail Safety: Stay on marked trails and away from cliff edges to ensure your safety throughout the hike.
- Bee Awareness: If you are allergic to bees, be cautious and carry an EpiPen because signs warn of bees in the area.
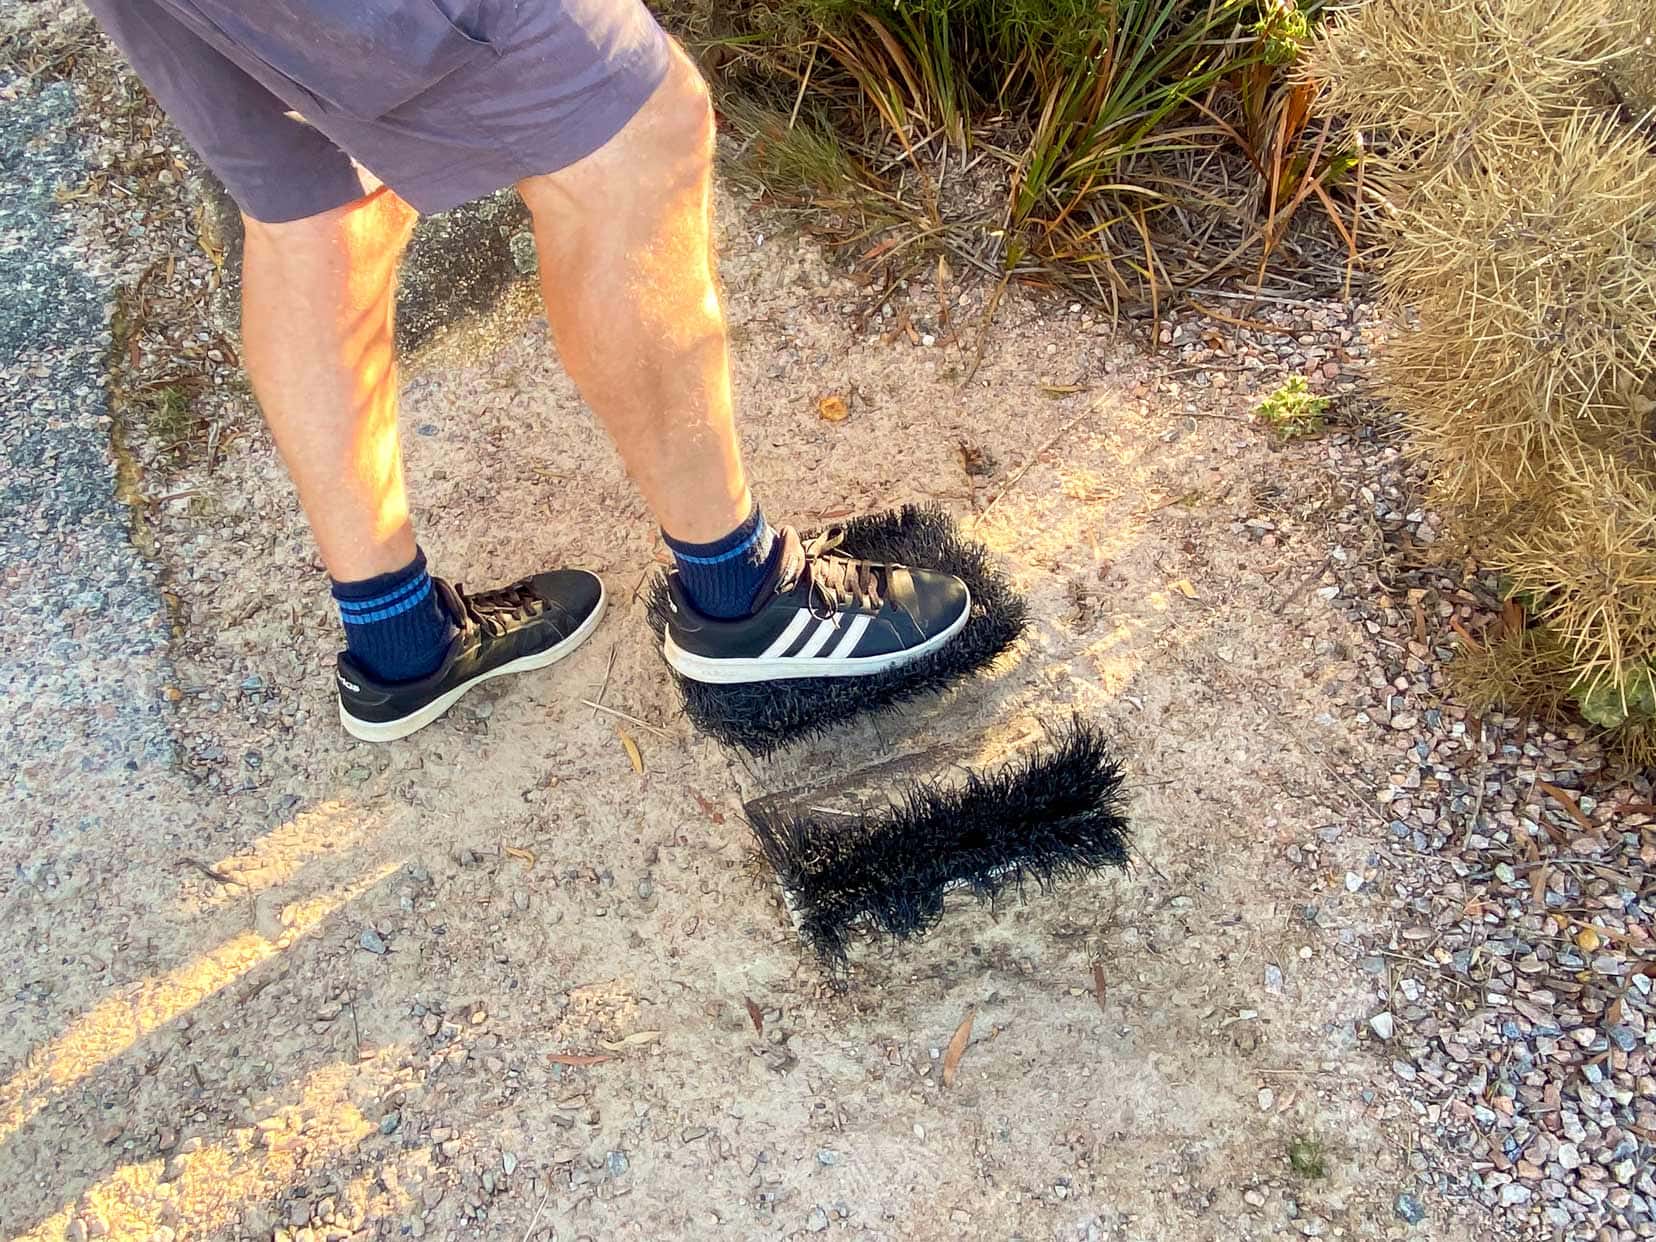
- Environment Care: Help preserve the natural beauty by taking all rubbish with you and brushing your shoes at the Dieback brush station to prevent the spread of Phytophthora.
Photography Tips at Frenchman Peak
Capture the rugged beauty of Frenchman Peak with these photography tips designed to help you bring home stunning images of your adventure:
Best Time for Photos
- Golden Hour: Arrive early or stay late to catch the golden hours—sunrise and sunset provide the best light for dramatic landscapes.
Key Photography Spots
- The Summit: Offers panoramic views of the surrounding bays and islands. Use a wide-angle lens to capture the expansive vistas.
- The Cave: This feature provides a unique geological interest near the summit. Experiment with different exposures to capture the texture of the rocks and the varying light.
- Local Wildlife: The area isn’t teeming with wildlife, but keep an eye out for birds, lizards, snakes (let’s hope you don’t see one while climbing!) or bounding kangaroos at the lower levels. A zoom lens is handy for these subjects.
Gear Recommendations
- Wide-Angle Lens: Essential for capturing expansive landscapes and the vast horizon.
- Telephoto Lens: Ideal for photographing wildlife and distant details of the landscape.
- Polarizing Filter: This filter enhances the blues of the sky and the sea and combats reflections and glare during sunny conditions.
📸 For more on the gear you might want to consider while road-tripping, check out what’s in our Photography bags.
Photography Etiquette
- Respect the Environment: While aiming for the perfect shot, follow marked trails to protect the natural habitat.
- Be Mindful of Wildlife: Use your zoom lens and keep a respectful distance from animals to avoid disturbing them.
With these tips, you can plan your visit to Frenchman Peak not just as a hiking adventure but as a photographic expedition. Whether you’re an amateur with a smartphone or a professional with a mirrorless camera, Frenchman Peak offers a multitude of opportunities to capture nature’s artistry.
Drone Photography at Frenchman Peak
For those looking to capture the sweeping landscapes of Frenchman Peak from above, it’s important to adhere to specific regulations to ensure the safety of wildlife and respect for other visitors:
Drone Usage Guidelines
You generally don’t need an approval from the department to use recreational drones in WA’s national parks, but you need to follow their guidelines. Check out the official WA Parks Drone Usage Page
Some of the guidelines include:
- In the Vicinity of Others: Never fly your drone closer than 30m to people or over or above them at any height. And always respect the experiences and privacy of other park visitors.
- Respecting Wildlife: Always operate your drone at a respectful distance from animals to prevent stress or disturbance to them. Be particularly cautious around nesting birds or resting wildlife.
Frenchman Peak History
Its Geology
The granite of Frenchman Peak extends thousands of metres underground and has stood there for millions of years.
The tunnels and caves near the summit were formed millions of years ago by wave action when the sea level was at least 250 metres above its current level.

How Did Frenchman Peak Get its Name?
Frenchman Peak got its name (as an alternative to the Aboriginal name, Mandoorboornup) when surveyor Alexander Forest travelled through the southwest of Australia looking for suitable pasture in 1870.
He called it Frenchman Peak because the peak resembled the hats worn by French troops in the 1800s.
Aboriginal Dreaming
The Noongar Aboriginal people tell the story that Frenchman Peak – or Mandooboornup, is the walich (eagle) keeping watch.
The story tells us that Walich came to Cape Le Grand and laid her eggs in a nest. A group of Aboriginals camped nearby and told the children to stay there while they went hunting. Two of the children disobeyed and went on a walkabout, stealing the eggs from the walich’s nest.
The mother walich returned and picked up the two children, dropping them out to sea. She picked them up again as they tried to swim ashore and returned them to the sea.
In the story, Frenchman Peak is the mother eagle, watching to ensure the children can’t return to shore. Interestingly, this story extends to two rocks of similar size just off the coast at Thistle Cove. The Dreaming story tells us that these are the two children who the walich is watching to make sure they never reach the shore.
Explore Beyond Frenchman Peak
Starting early also meant we still had the rest of the day to explore.
Frenchman Peak is not too far from Hellfire Bay, yet another gorgeous beach in Cape Le Grand National Park. And if you are looking for an even more secluded bay, you can take the trail from there to Little Hellfire Bay—about a 30-minute return walk.
A sign says it’s a 40-minute return, but we easily completed it in 30 minutes. There isn’t that much shade on the walk, though, so make sure you protect yourself from the sun.
After that, we headed to the famous Lucky Bay. Unlike our first cloudy visit there, today the sun was out, and even though it was a weekday, a Monday and not yet Easter school holidays, the beach was full of 4WDs and people fishing, swimming, and wandering about.
It was about 10.30 am by this time, so if you want to visit Lucky Bay and experience it at a more serene time, early morning will be your best bet. This is also the best time in the summer because the winds pick up in the afternoons, making for a rather blowy experience.
For a quieter affair, you might like to drive further to Wharton Beach, the local’s favourite, away from the crowds.
Frenchman Peak FAQs
Got questions about hiking Frenchman Peak? Here are some answers to the most commonly asked questions to help you plan your adventure.
1. How long does it take to hike to Frenchman Peak?
The hike to Frenchman Peak typically takes about 2 to 3 hours round trip. The distance is approximately 3km return. However, the time may vary depending on how long you spend at the summit enjoying the views or exploring the cave. Lars and I completed it in about 2 hours, including time spent taking photos and enjoying the scenery at the top.
2. Is Frenchman Peak hard?
Frenchman Peak is challenging, particularly if you are not used to steep, rugged trails. Although it is officially rated as a Class 5 trail, which suggests very difficult terrain, many might find it more akin to a Class 3 or 4 if they have some hiking experience. The path includes steep inclines and rocky sections that require good physical fitness and careful navigation.
3. What grade is the Frenchman Peak hike?
The Frenchman Peak hike is graded as a Class 5 trail. This grade indicates it is a very challenging hike suited for experienced hikers. The trail can be steep and rough in places, requiring both stamina and careful foot placement. Despite this, with adequate preparation and fitness, many hikers find it slightly easier than the official rating suggests.
Hiking Frenchman Peak … That’s a Wrap
As we wrap up our journey to Frenchman Peak, whether you were with us every step of the way, mentally planning your own adventure, or simply enjoying the scenic views from your cozy couch, Frenchman Peak offers a slice of Australia that stands out in any travel diary.
With its challenging slopes and panoramic views that reward every aching muscle, Frenchman Peak is worth the burn in those calves.
So lace up your boots, pack your camera, and don’t forget the fly spray—adventure awaits!
Interested in more adventures or tips for your next outdoor escapade? Check out all our other adventures in Western Australia here, or plan an epic road trip around WA’s southern coasts and inland to Wave Rock.
Planning a road trip? Don’t forget to sign up and download our Printable Road Trip Planner.
Ready to tackle Frenchman Peak yourself? We’d love to hear about your journey, so tag us @Lifejourney4two in your summit selfies or share your comments below.
Before You Go – Are You Planning Your Travels?
These are the travel resources we recommend and use when planning our trips.
- 🚘 Car Hire: We use DiscoverCars.com
- Motorhome/Campervan Rental: We highly recommend the Motorhome Republic
- 🪪 Order your International Driver’s Licence online here
- 🛏 Book Accommodation: We use Booking.com to find accommodation that suits our budget
- 🐶 Pet Sitting/Pet Sitters: Check Out TrustedHousesitters here (Use our Discount code: LIFEJOURNEY25 for 25% off. )
- Activities and Experiences: Get Your Guide and Viator
- Travel Insurance: Safetywing or World Nomads
- 🥾 Travel Gear and Accessories: Check out our top picks here — Lifejourney4two page on Amazon
For a more thorough list, visit our Travel Resources page here.