
Ever wondered how to photograph the ethereal beauty of a blood moon?
You’re not alone. Armed with a camera and a sense of adventure, many of us find ourselves chasing these rare lunar moments. As an experienced photographer and avid Sony user, I’ve tackled the challenge head-on during a memorable trip to Norway.
In this guide, I’ll share the essential Sony a6000 moon settings and tips to capture the moon and improve your astrophotography. Whether you’re a beginner or a seasoned shutterbug, this post will equip you with the tools and knowledge to take breathtaking moon shots.
Join me as we explore the secrets to capturing the night sky’s most captivating spectacle.
🔭 What’s Included in this Sony Shooting the Moon Article?
Below, you’ll find a quick guide to the contents of this comprehensive article, which covers everything from basic setup to advanced techniques in moon photography using the Sony a6000, along with insights into Sony a6000 night photography and transitioning to the more advanced Sony a7III.
Interested in the versatile Sony Alpha 6000 (Sony a6000) with its 24MP APS-C sensor? 📸 Check out the reviews on Amazon 📸
Sony a6000 Setup for Moon Photography
Capturing the moon’s mystique with a Sony a6000 doesn’t require an extensive kit, just a few key pieces of equipment. Here’s what you’ll need to start shooting right away:
- Camera:
- Type: Mirrorless — ideal for astrophotography due to real-time feedback on exposure adjustments.
- Recommendation: Sony a6000 APS-C mirrorless camera. Its compact size and advanced features make it a top choice for both beginners and seasoned photographers.
- Lens:
- Requirements: For moon shots, a lens with a focal length of at least 200mm is essential to capture detailed close-ups.
- Recommendation: Sony E 55-210mm f/4.5-6.3 OSS — offers a versatile range and optical stabilization, perfect for long exposures of the night sky.
- Tripod:
- Needs: A sturdy tripod with an adjustable head is crucial for stabilising your setup during long exposures.
- Recommendation: 3 Legged Thing Punks Travis — known for its reliability and includes a quick-release plate for easy camera attachment.
- Quick Release Plate:
- Function: Facilitates swift and secure camera mounting to the tripod.
- Note: Included with the 3 Legged Thing Punks Travis, enhancing setup convenience.
By starting with this fundamental setup, you’ll be well-equipped to take on the challenge of moon photography and capture great lunar details with your Sony a6000.
Understanding Moon Photography
Moon photography is a fascinating pursuit, but it also comes with its own set of unique challenges and opportunities. When you aim your lens at the night sky, you’re engaging with a distant celestial body.
Here’s what you need to know to get started:
Lighting Variability
Unlike most subjects, the moon’s lighting can dramatically change in a matter of minutes, especially during events like a lunar eclipse. This makes understanding and anticipating light changes crucial.
Distance and Detail
The moon is about 384,000 km away from Earth. Capturing its surface details requires not just a good camera and lens, but also a solid understanding of the right settings to use.
Movement
As the Earth rotates, the moon moves across the sky. This apparent movement can blur your shots if the exposure time is too long or without proper tracking.
Atmospheric Effects
Atmospheric conditions can greatly affect your images. Clear skies are ideal, but atmospheric turbulence can soften the details of the moon’s surface.
By recognizing these, you’ll be better prepared and can make the necessary adjustments.
Sony a6000 – The Right Decision?
Why choose the Sony a6000 for moon photography?
Compact and robust, the a6000 is an exceptional travel camera that excels across various photography genres and is perfect for astrophotography requirements.
Here’s why it stands out:
- Compact and Feature-Packed: Ideal for on-the-go photography, with its quick set-up memory functions. Its comprehensive feature set, combined with a very reasonable price point, makes it a great choice for photographers of all levels.
- Versatile Lens Options: The Sony 55-210mm telephoto lens and the Sony 16-50mm zoom lens were purchased as a bundle. This combination provides the flexibility needed for detailed lunar images and wider celestial scenes, ensuring cost-effectiveness without compromising on quality.
- Extended Battery Life: Knowing the importance of extended shoots, particularly in remote locations for moon photography, I invested in extra batteries and a reliable 12V charger, allowing uninterrupted shooting.
- Adaptability Across Genres: The Sony a6000’s adaptability is fantastic, from portraits and landscapes to the intricate details of the moon’s surface. It performs as a great all-rounder where precision and responsiveness are so important.
These features make the Sony a6000 a versatile tool for any photographer, especially for moon photography.
Planning a Trip Away?
- 🚗 Hiring a car? We recommend getting a quote from DiscoverCars
- 🚐 Hiring a Campervan? We recommend Motorhome Republic
- ⛑ Arranged your Travel Insurance? Compare quotes from World Nomads & Safetywing
- 🪪 Order your International Driver’s Licence online here
- 🐾 Is someone petsitting for you? 🐾 We use and love TrustedHousesitters. (Get 25% off at checkout for new memberships with our discount code: LIFEJOURNEY25)
The Location for this Sony a6000 Astrophotography Shoot
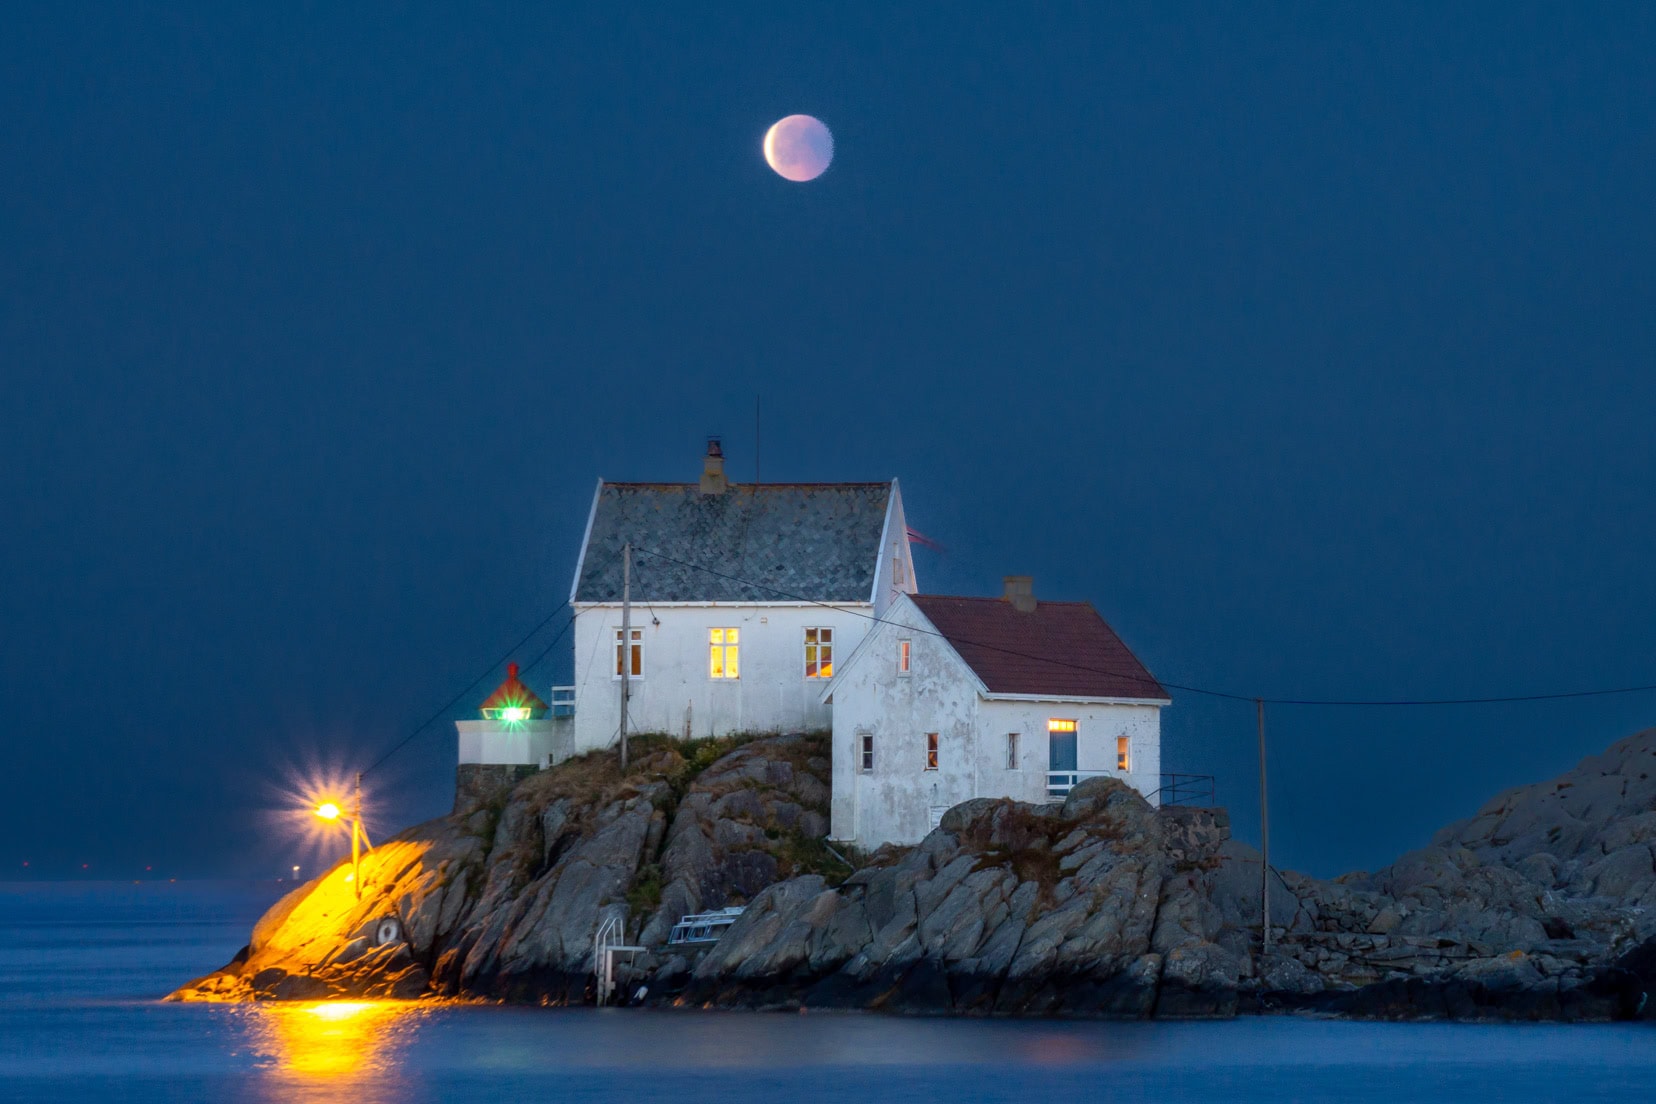
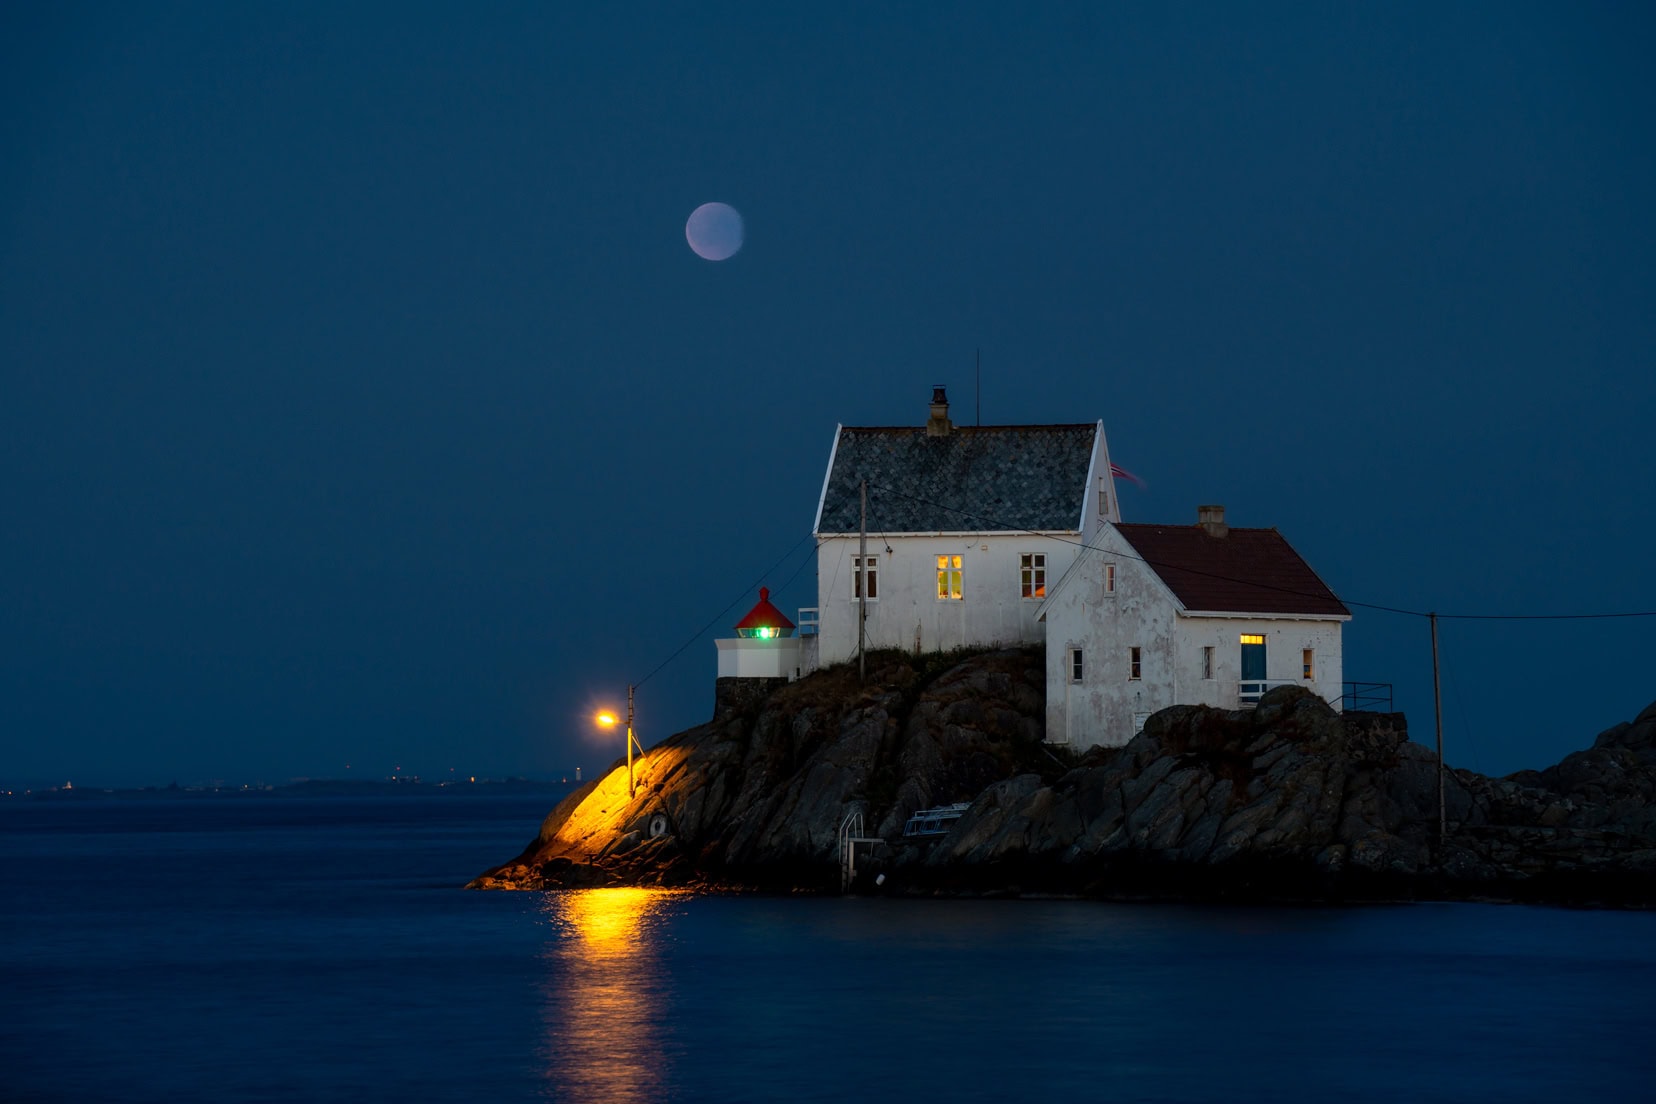
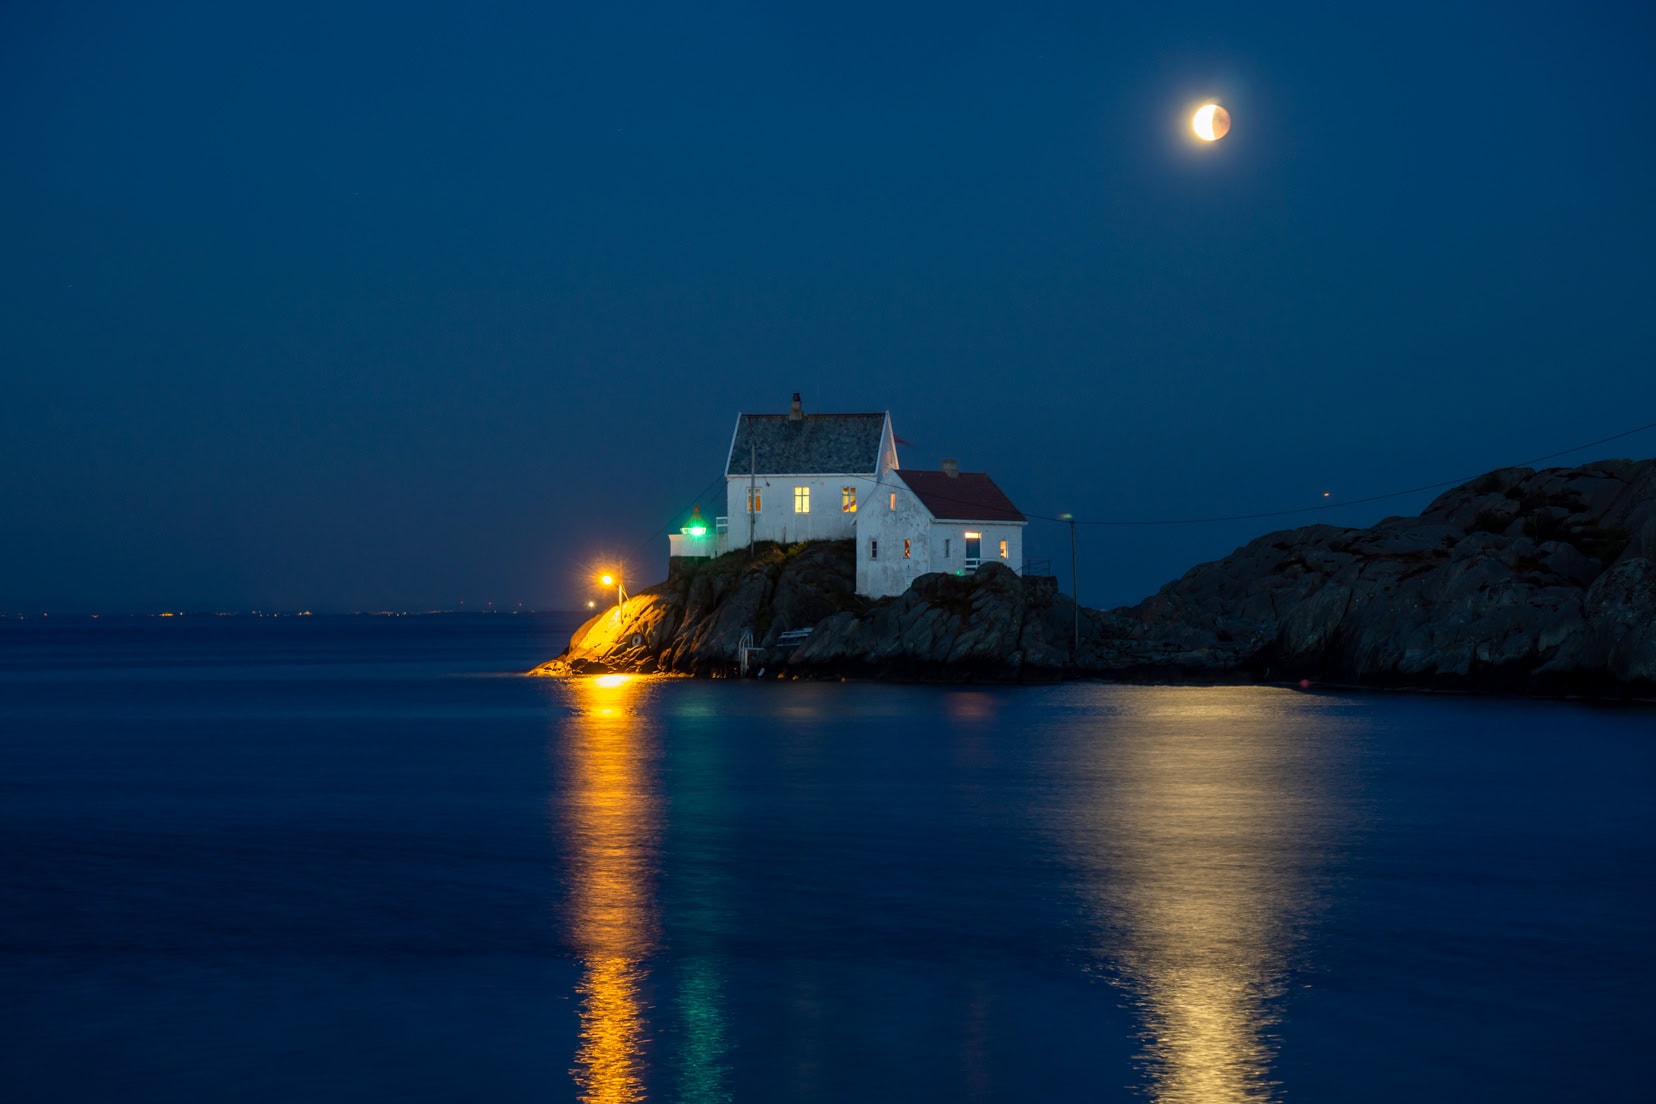
We were staying in the iconic Norwegian village of Skudeneshavn. I was poised to capture the rise of the blood moon over the Vikeholmen lighthouse, set against the backdrop of beautiful and mystical Norway.
Having already taken daytime shots of the lighthouse at different times of the year, I knew this was a great location which gave me an idea of what to expect for the nighttime shoot. I’ve included the Sony a6000 camera EXIF data for each relevant image.

Equipment for Sony A6000 Moon Photography
Camera and Lens Setup
For capturing the Blood Moon, I chose the Sony a6000 paired with the Sony SEL 55-210mm telephoto lens. While this lens isn’t a super-telephoto, it handles the moon’s colour transitions and due to its variable focal length, allows for perfect framing—capturing both the lighthouse and the moon without needing to crop the image.
Tripod and Stability
I used a tripod, which is crucial for stability during long exposures. By ensuring the tripod was vertically aligned, I was able to pan smoothly to follow the moon’s trajectory across the sky.
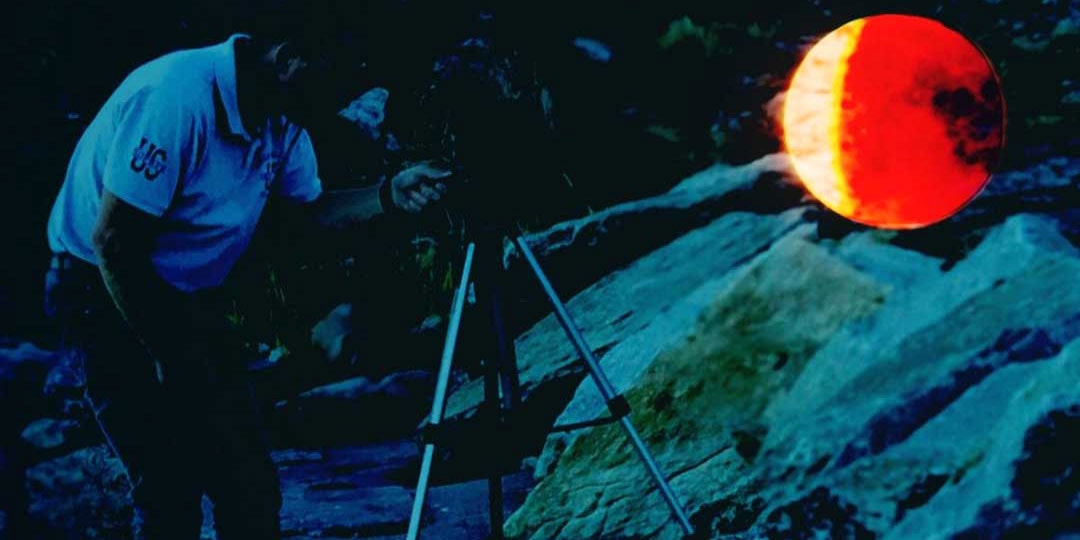
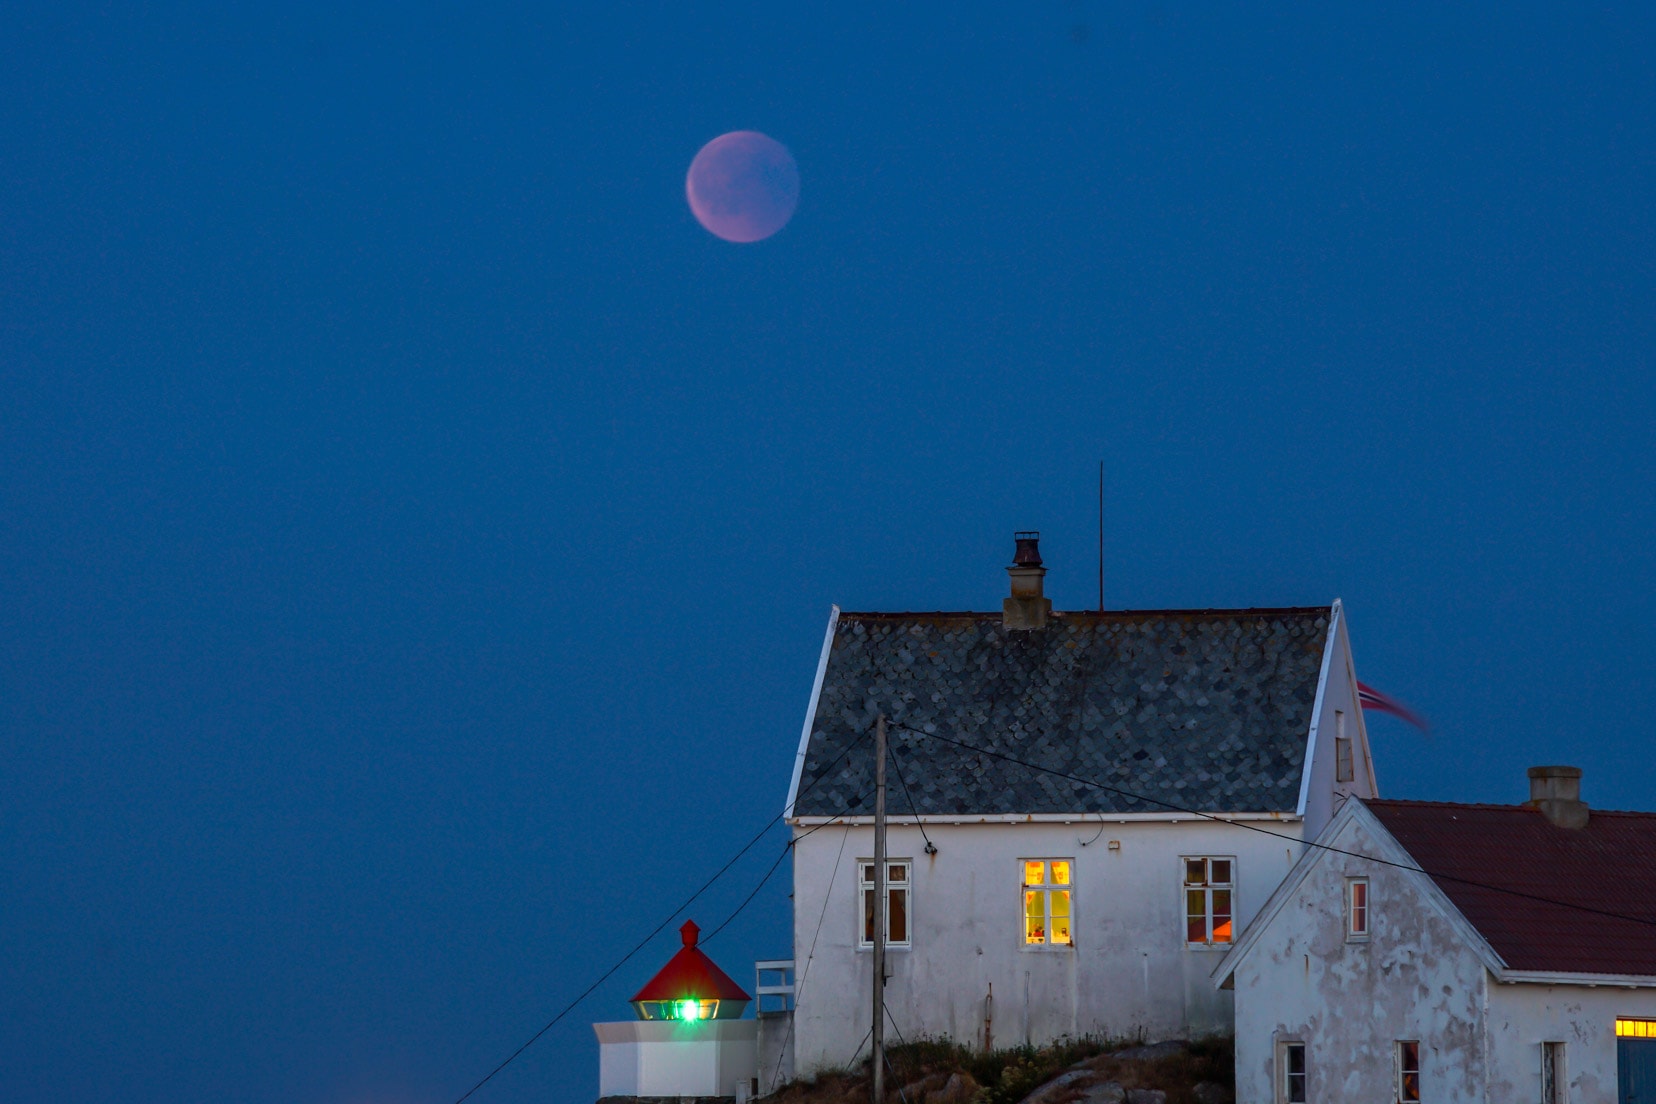
Understanding the Blood Moon
A blood moon occurs during a lunar eclipse when the Earth casts its shadow on the moon, diffusing all direct sunlight except for the red wavelengths bent by the Earth’s atmosphere, creating the moon’s vivid red colour.
Capturing the Scene
The setting was perfect: Skudeneshavn, Norway, with its iconic Vikholmen lighthouse. The Samyang 2.0/12mm lens provided a wide field of view at sunset, effectively capturing the distance from the tripod to the lighthouse.
However, I would capture the blood moon using the Sony SEL 55-210mm lens as I needed to zoom in to the Vikholmen lighthouse.
Remote Triggering
I used a wireless shutter release to minimize vibrations, which is crucial for maintaining image sharpness during long exposures. The camera’s back LCD was used to track the moon and keep it within the frame as it moved.

Sony A6000 Moon Settings: Behind-the-Scenes Planning
To make the most of my shoot, I didn’t just aim for moon shots. I wanted an engaging foreground to give a sense of place. I scouted the immediate area and found a fitting location, the Vikholmen lighthouse, an area with minimal light pollution. \
At this spot, I would be shooting over an expanse of still water, which meant I might also get some nice effects in the water.
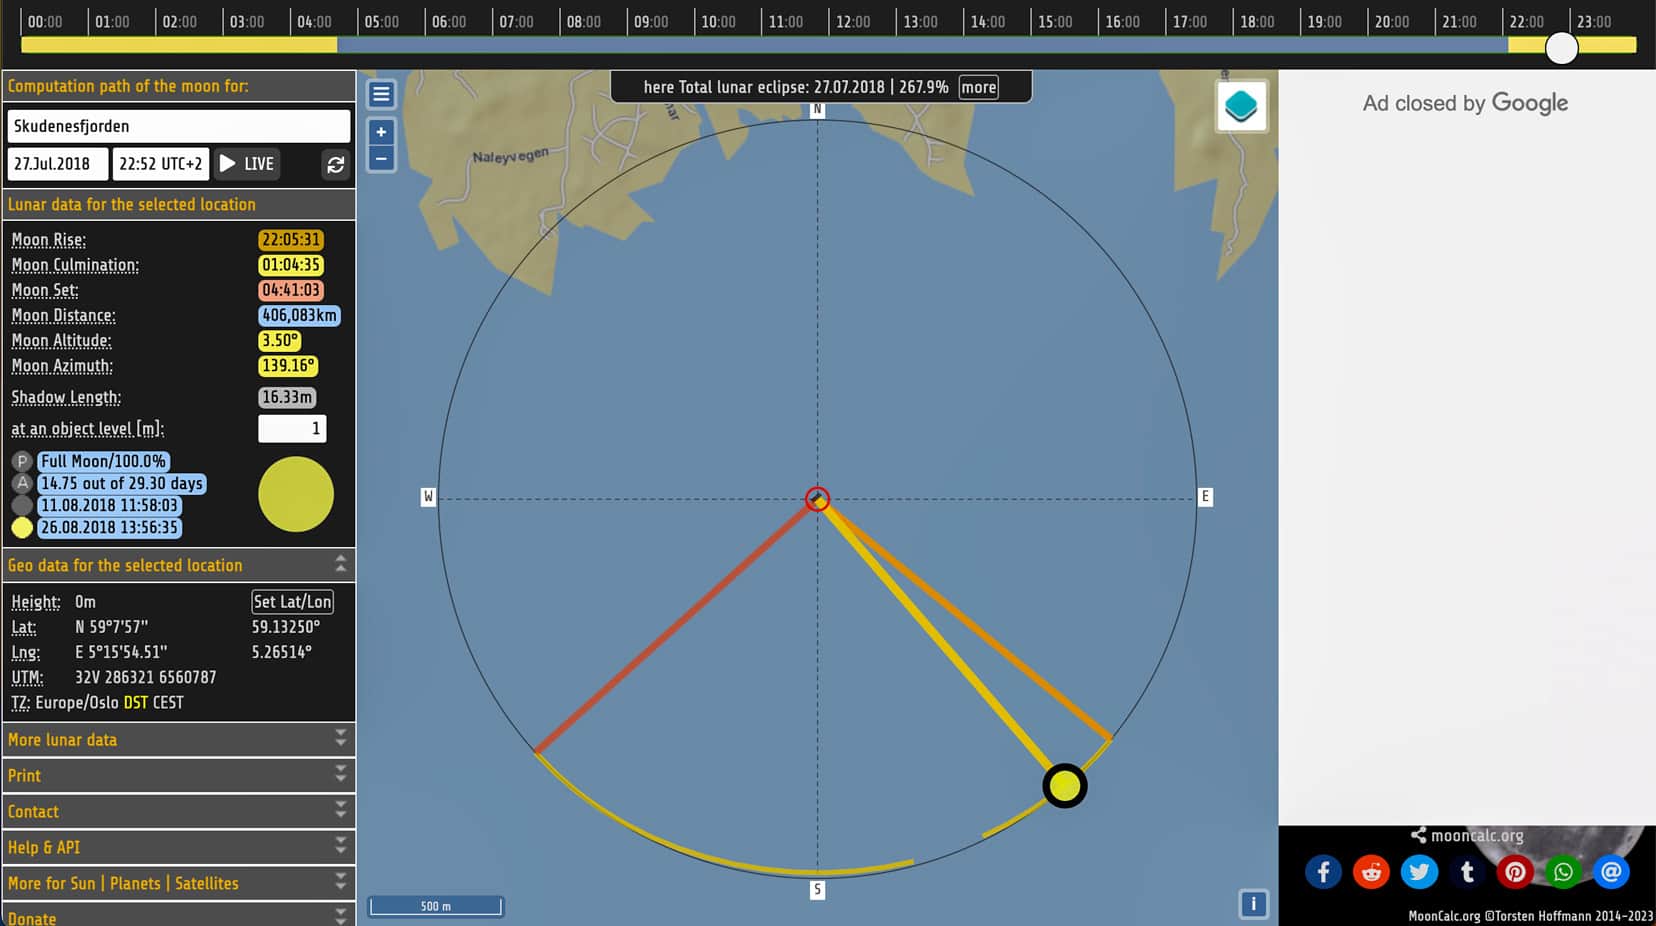
The moon’s trajectory and timing were calculated using the MoonCalc website, which provided the azimuth and elevation necessary to position my tripod accurately.
I marked the azimuth with a stone on the ground to ensure the lighthouse remained a constant in my composition.
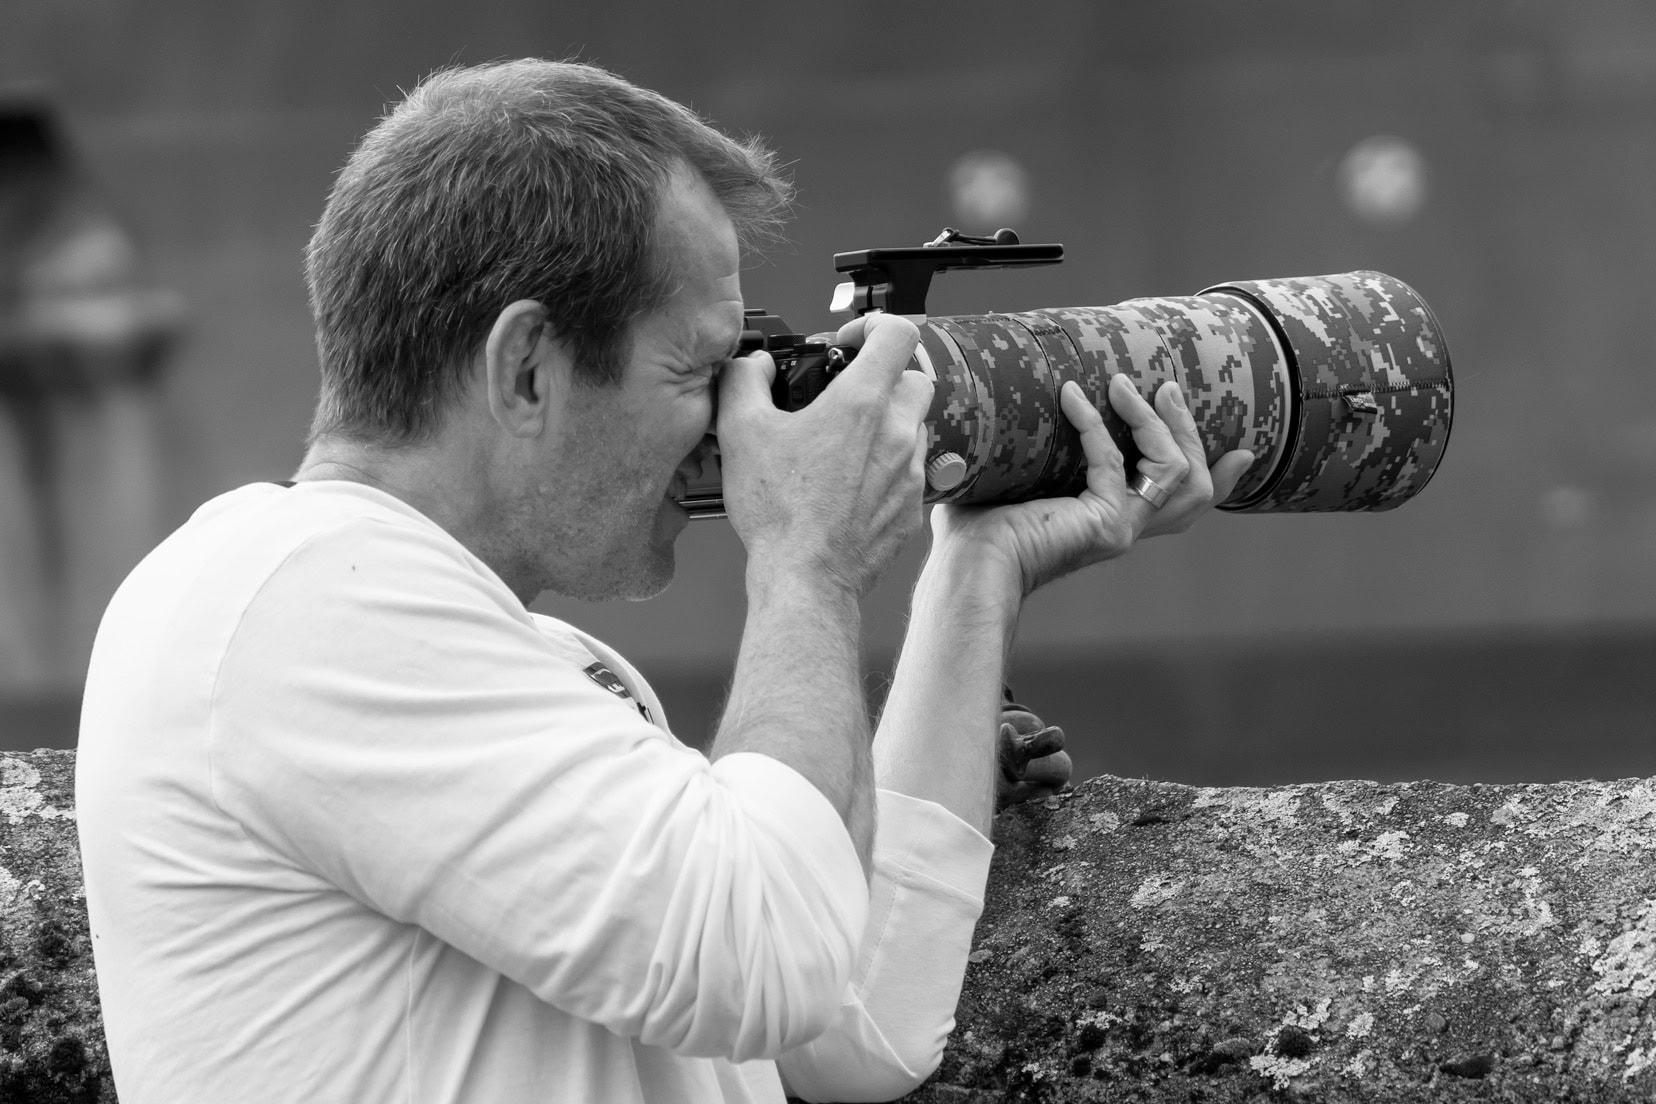
Visualizing the Setup
Here’s a glimpse of how I set up my camera, showcasing the attention to detail needed to perfect the composition and settings for astrophotography.
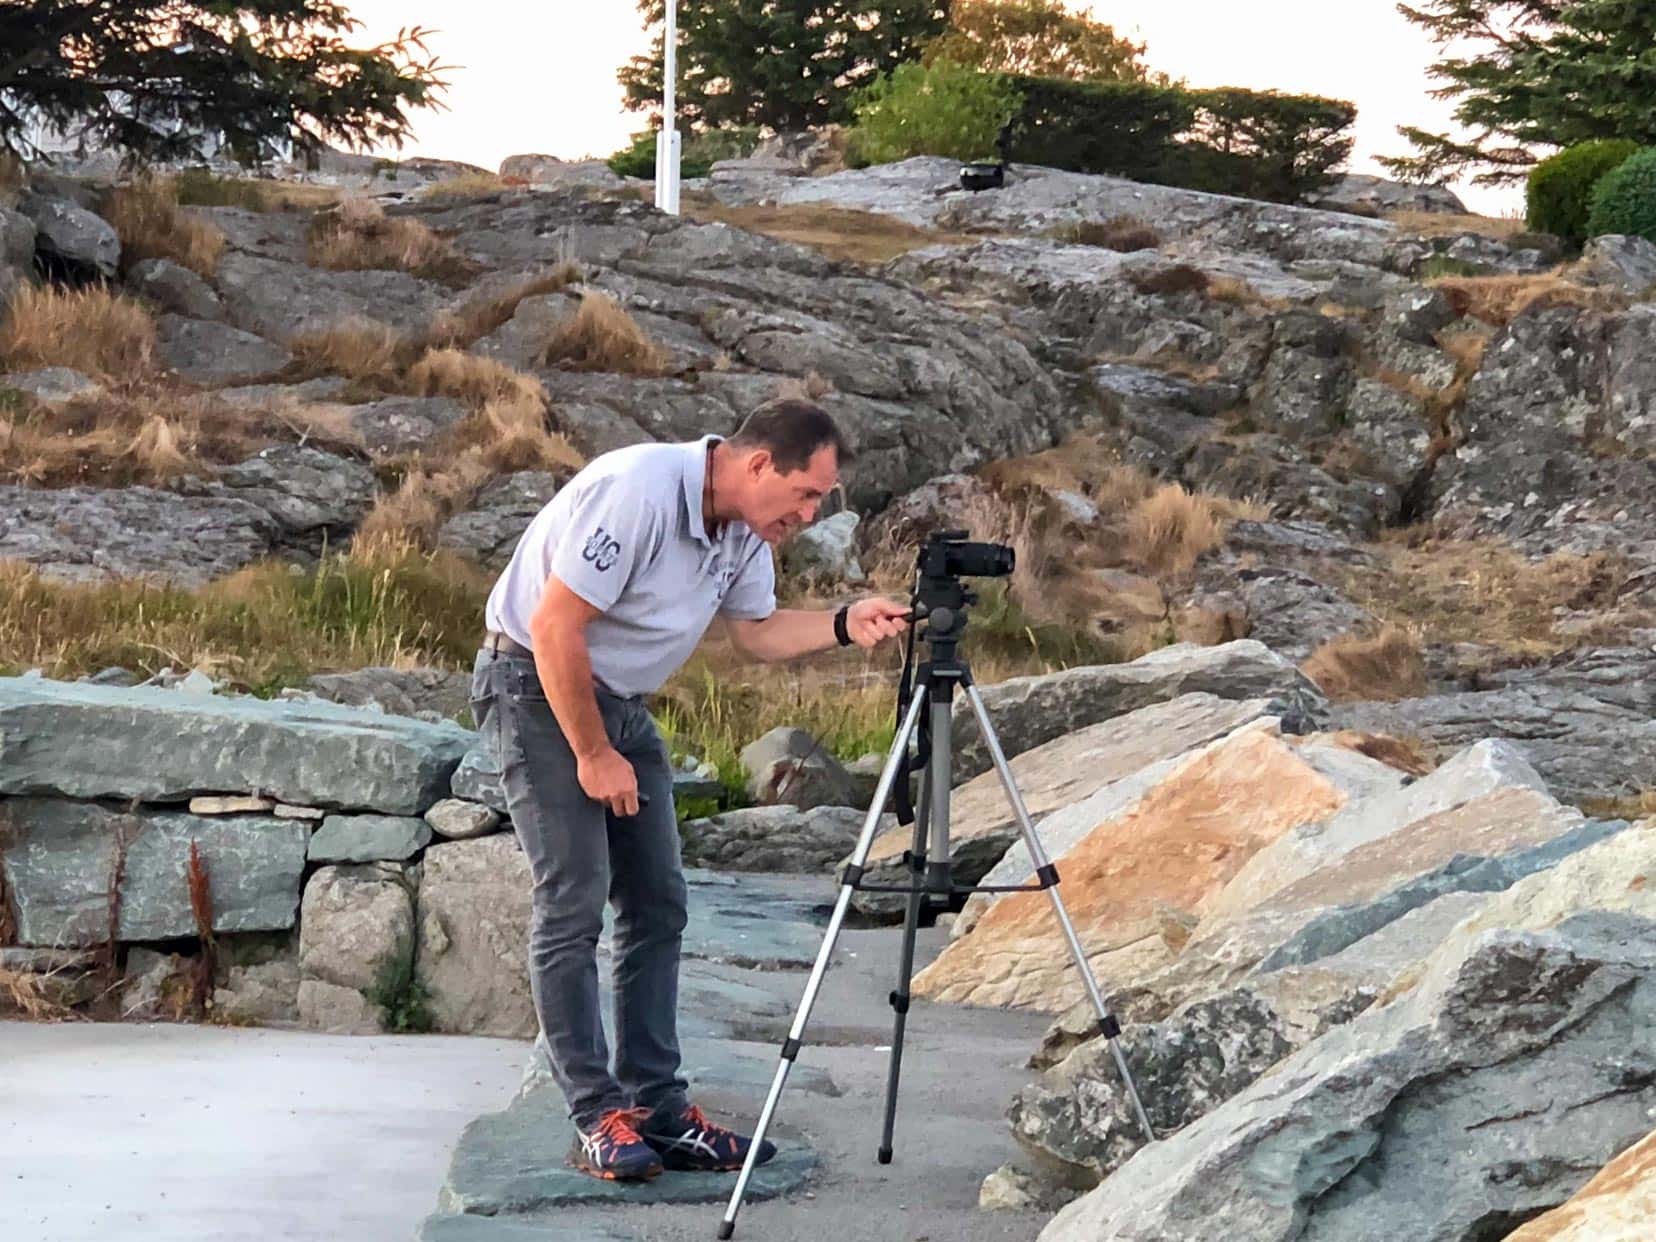
With thorough planning and accounting for the adjustments that I would need to make on the fly, I captured the moon images with a pleasing foreground.
Sony A6000 Moon Settings: Behind-the-Scenes Planning
Setting the Scene for Moon Photography
My goal was to capture more than just the moon; I wanted a scene that told a story. I chose the Vikholmen lighthouse in Skudeneshavn, Norway, as it offered a picturesque backdrop with minimal light pollution.
The calm waters around the lighthouse provided a perfect reflective surface for the moon, adding depth to the shots.
Understanding the Blood Moon’s Trajectory
Accurate prediction of the moon’s path was essential. I used the MoonCalc website to determine the moon’s azimuth and elevation times. Positioning my tripod, I marked the azimuth directly on the ground with a stone as a reference point to maintain the correct shooting angle throughout the night.
Utilizing MoonCalc for Precise Planning
I cover this in detail below.
Optimal Camera Settings for Lunar Photography
For this shoot, I planned to capture the moon in varying stages of a lunar eclipse, from a dark, shadowed moon to a brightly illuminated full moon.
I selected Manual Focus as this allowed fine adjustment of the exposure settings via:
Exposure: I started with long exposures to capture as much light as possible and reduced the time as the moon became brighter.
ISO: Kept low (no higher than ISO640) to reduce noise but fast enough (< 20secs) so no star trails were introduced. With increased reflected sunlight from the moon, I reduced the ISO.
Aperture: Varied from f/8 to f/13 to maintain a deep depth of field across the changing light conditions.
Focus: Manual focus on the lighthouse, about 500m away, using the camera’s magnifier to refine focus without altering the focus ring during shooting. More on this below.
The Art of Manual Focusing on Stars with the Sony A6000
Manual focusing is vital in astrophotography to ensure sharpness. Using a camera’s autofocus in a dark night sky is unreliable – the camera lens hunts for focus. Instead, set the camera to manual focus (MF) where you can adjust for precise focus.
If there are stars in the sky, you can use these to manually focus on them to find infinity for a given focal length. Or, you can pick a distant object on the ground and use it to refine your infinity focal point setting on the lens.
Here’s the process:
Set the lens to focus at ‘infinity’ (look for the infinity mark)—this is just a starting point. In the Live View setting, you will use the camera’s rear LCD screen to check focus on the stars.
Point the camera towards the brightest star in the sky and focus manually so that the star is sharp, bright, and without colour. If the star has a magenta fringe, bring the focus closer. For a green fringe, push the focus further away.
Once you’ve found the focus sweet spot, don’t move the focus ring. Securing the ring with tape or marking this position is recommended, as even the smallest bump will shift focus and cause the final image to lose sharpness.
How to Use MoonCalc
Here’s a quick guide on how to input values into MoonCalc and interpret its outputs:
- Accessing the Site: Open the MoonCalc website.
- Setting Location and Date: In the table at the top left, enter your location and the date you want to photograph the moon. The table will then update automatically to show moon information, including rise, culmination, set times, and distance.
- Understanding the Display:
- The data you’ve selected will appear as coloured lines on the map. For example, moonrise is indicated by a light orange line at 22:05, while moonset appears as a dark orange line at 04:40.
- Use the slider at the top of the map to change the hour of the day. Adjusting the slider updates the Moon Azimuth and Moon Altitude, showing the moon’s position at different times.
- Interpreting MoonCalc Data:
- Moon Azimuth: This value is measured as an angle from 0 to 360 degrees (N, S, E, W).
- Moon Altitude: This value ranges from -90 to +90 degrees.
- Focus on the azimuth value where the moon rises just above the horizon. For instance, the image shows the moon above the horizon at an azimuth of 140 degrees and an elevation of 3.5 degrees at 23:00 hours.
- It’s crucial that the Moon’s Altitude is positive, indicating that the moon is above the horizon and visible.
- Timing Your Photography:
- To capture when the moon is fully shadowed by the Earth, consult additional sources such as Google.
This method ensures you utilize MoonCalc effectively to plan your moon photography sessions accurately.

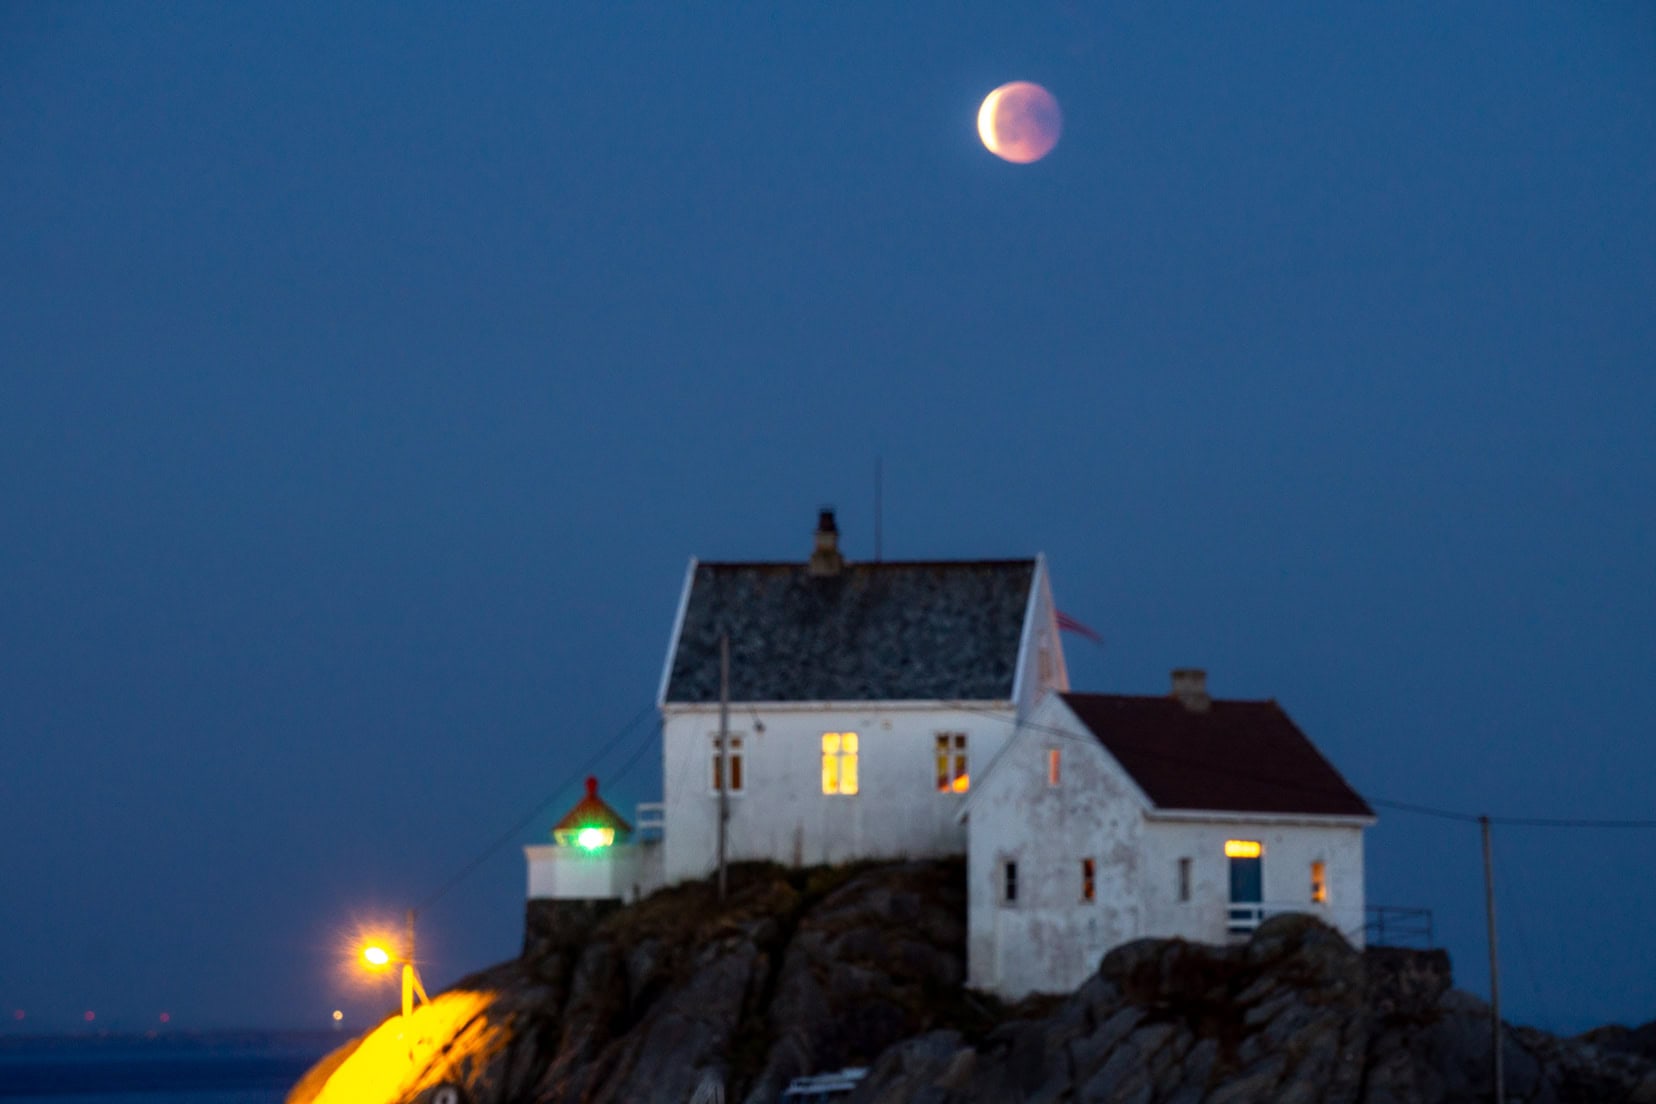
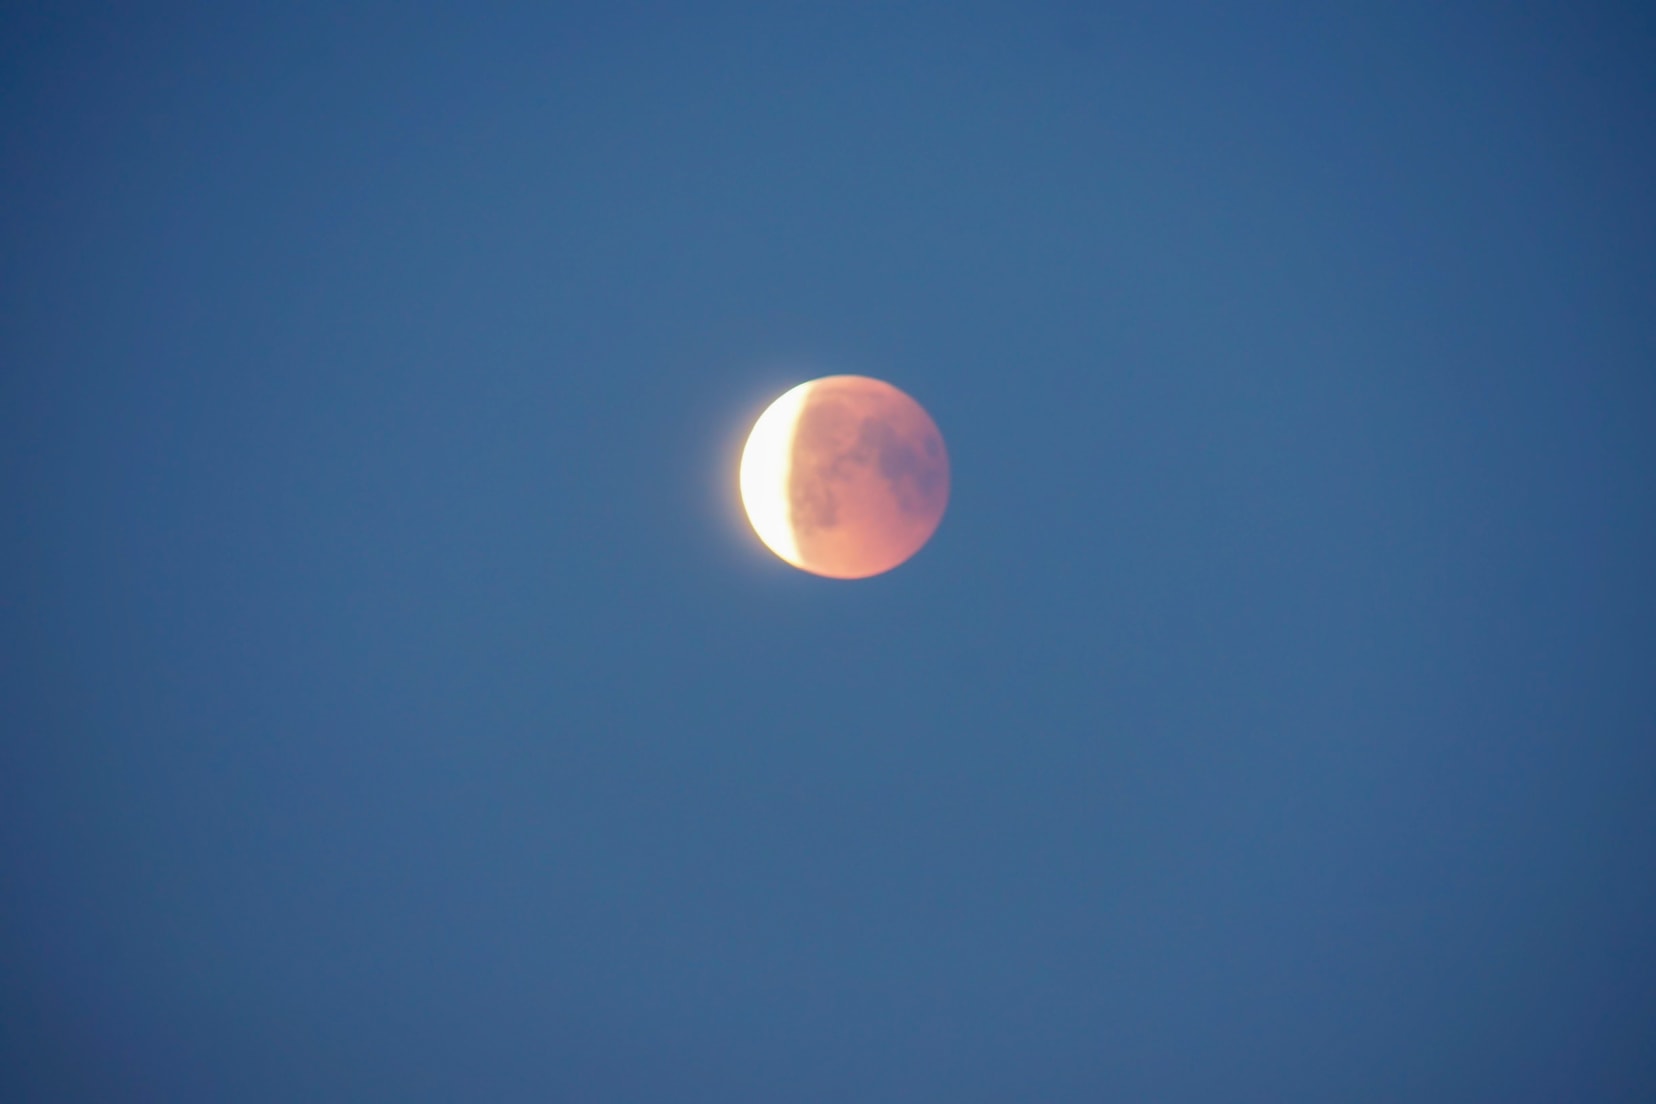
Capture the Shot: First Glimpse of the Blood Moon
The predicted time of the moon’s rise was 10:05 p.m., but due to horizon cloud cover, made a late entrance at 11:00 p.m. By the time I had a visual, the elevation and azimuth had already placed it over the lighthouse.
The shots below show that I had only a short time to photograph the moon before the eclipse began to recede.
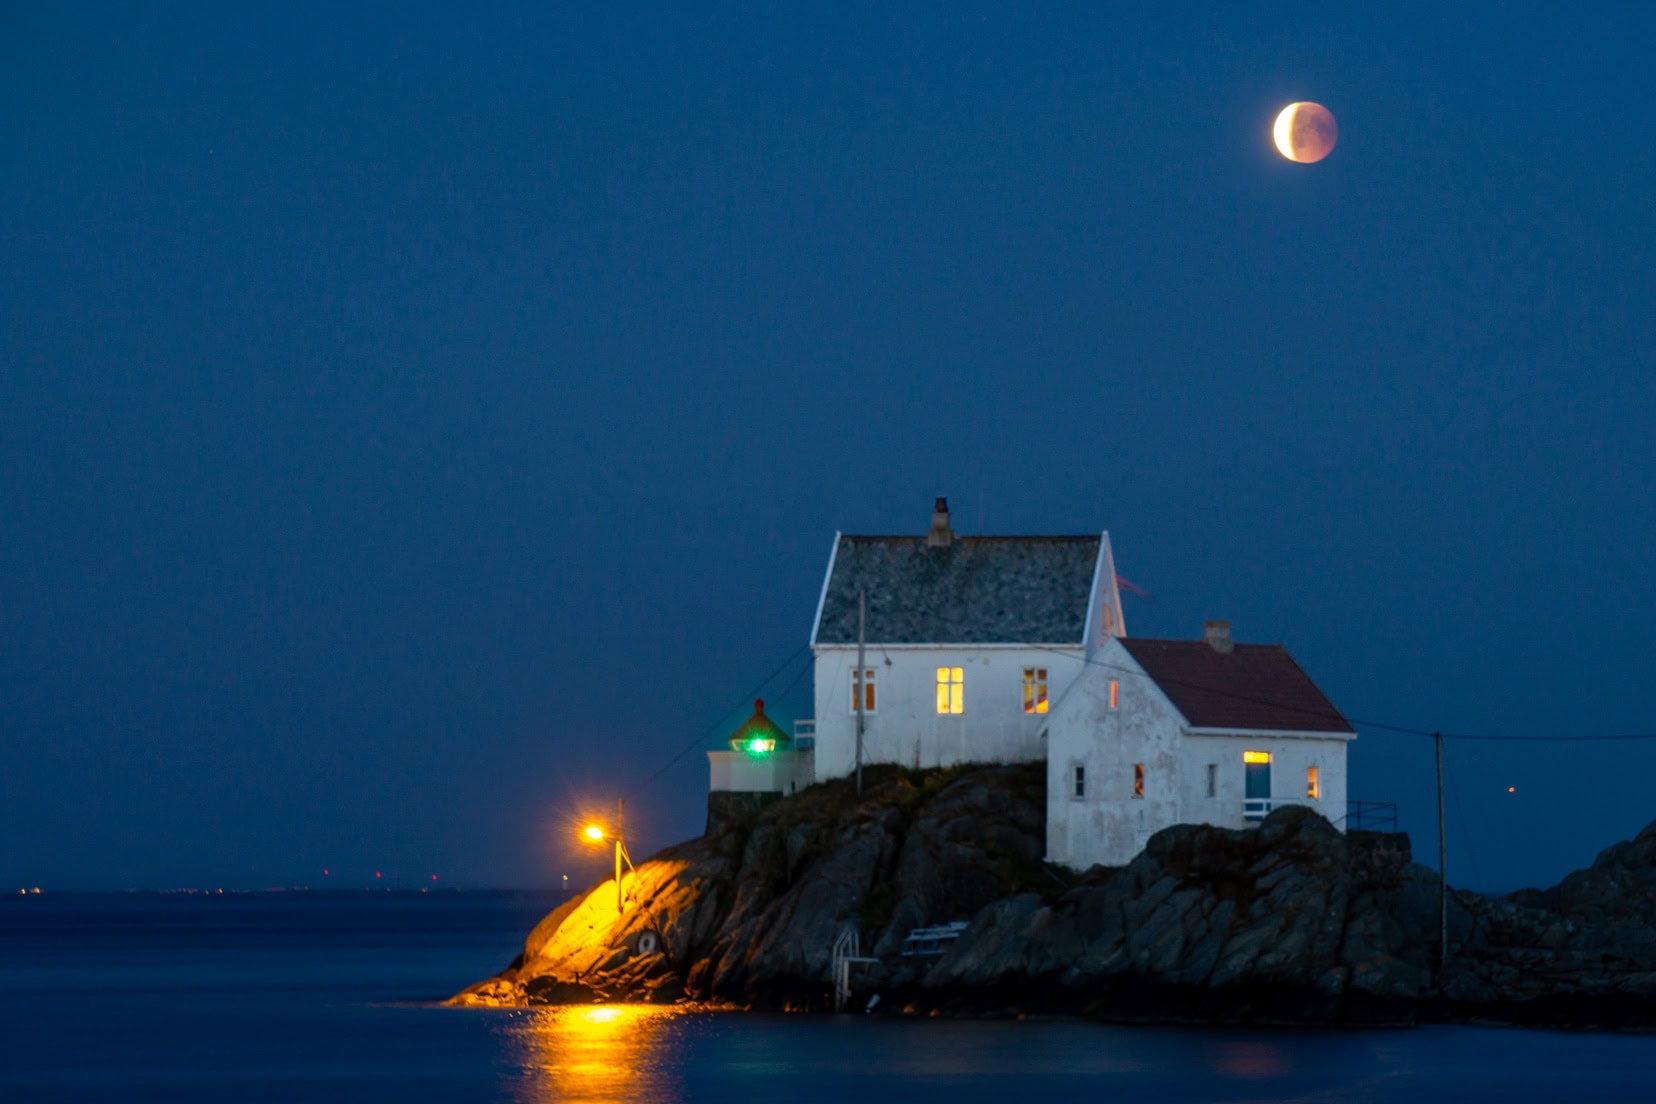
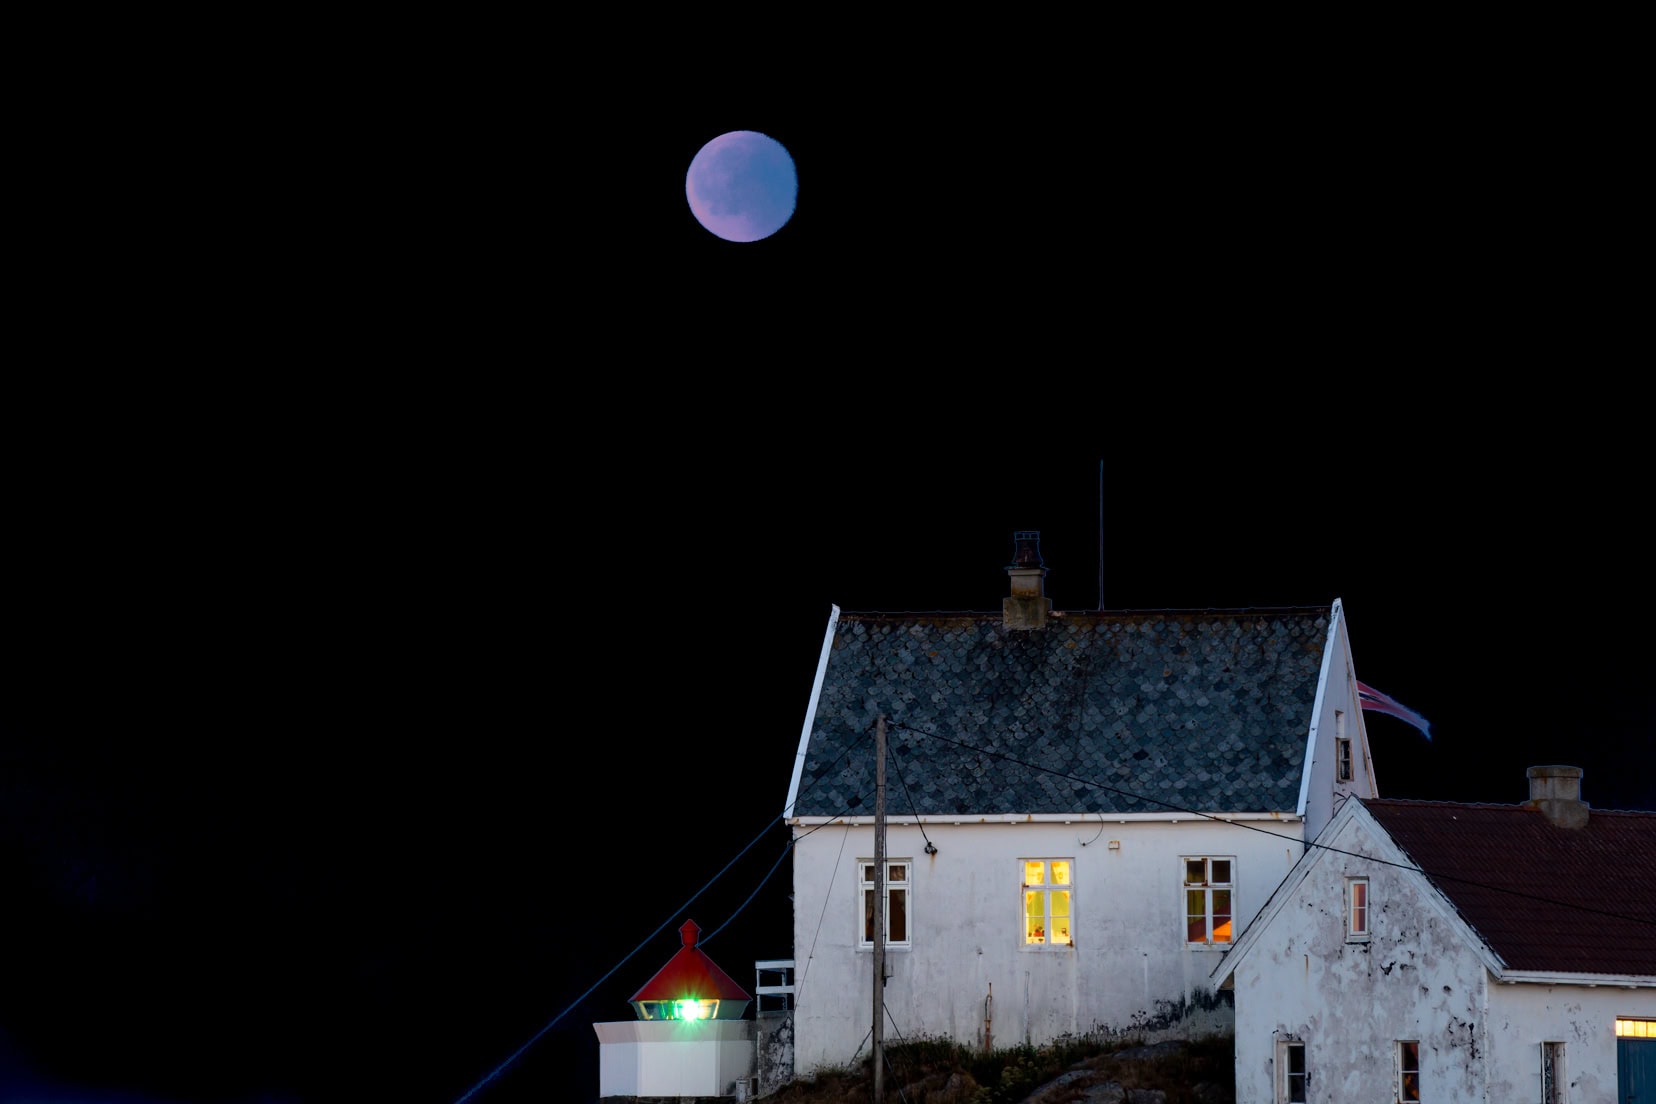
Over the next two hours, we watched the moon transition through its lunar eclipse. Even Mars shrugged off any initial shyness to join us on this auspicious occasion.
If you look at the image below, just to the right of the building is a small reddish speck of light — that’s Mars.
I played with different settings with the aim of keeping the focal length between f/8.0 and f/13.0 and ISO low (<ISO 500) to avoid undue noise in the image.
What I’d do Differently— Sony A6000 Moon Photography Settings
- I would use tape to fix the focus ring on the lens in the infinity position, which prevents the lens from moving if bumped. Although marking the lens at the infinity position is fine, it doesn’t prevent the focus ring from shifting.
- In Manual Mode, for the duration of the shoot, I would have fixed my focal length from f/9.0 to f/11.0 and only varied my ISO and shutter speed. Then, I would have adjusted only the ISO (up to a max of ISO 6400) and kept a constant shutter speed.
It is difficult to compare the effect of setting changes when all three are variable and none are constant.
- Once the moon reflected more light, I could have used the Moony 11 rule for better exposure instead of trying different combinations shutter speed/exposure time/ ISO. For this rule, you set the camera aperture to f/11, choose your desired ISO, and then adjust the shutter speed to 1/ISO.
- As the moon exited the eclipse and reflected more sunlight, I should have selected ISO 100, stopped down (increased my focal length), and decreased the shutter speed so the blood moon was not overexposed.
- The Sony a6000 has its best ISO range between 1600 and 6400 for low light photography where noise is least visible in an image. (A comparison is made in this article by LonelySpeck). It would have been better when the moon was completely shadowed by the Earth that I increased the ISO into this range.
- For post-processing of the image, I used Photoscape, a free imaging processing software. I’ve since upgraded to Adobe Lightroom, which has a fantastic de-noising algorithm.
- Using a professional lens would deliver better optical performance to improve image quality and sharpness.
Transitioning to the Sony A7III for Moon Shots
While this post began with a focus on the Sony a6000, I have since upgraded to the Sony A7III. This transition was driven by my desire to explore more advanced features and achieve higher-quality images in astrophotography.
The Sony A7III offers enhanced low-light capabilities, greater dynamic range, and more comprehensive autofocus coverage, making it an ideal choice for capturing detailed moon and Milky Way shots.
Below I share my experience using the Sony a7III for Astrophotography.
Mastering the Moon: Astrophotography with the Sony A7III and FE 200-600mm Lens
After many successful shoots with the Sony a6000, I have now upgraded to the Sony A7III. This camera has proven to be a real workhorse, suitable for any type of shooting.
Its appeal lies in its low ISO wide dynamic range, rapid autofocus speed, fast burst shooting rate, and extensive autofocus coverage, spanning 93% of the sensor. The Sony A7III’s combination of features makes it a standout at a reasonable price.
A great camera deserves an equally impressive lens. The Sony FE 200-600 f5.6/6.3 G OSS lens, though hefty at 2.1kg, offers exceptional quality.
Its internal focusing is fantastic as the lens does not extend when focussing takes place. Plus, it takes just a quarter turn of the focus ring to push the focal length from 200mm to 600mm.
Optimizing with After-market Accessories
To manage its weight and improve handling, I’ve attached a Peak Design carry strap connected via a 3/8″ D-ring to the Kirk Replacement footing. If you have a choice of straps, go for the Peak Design Slide Lite over the Slide because it rolls into a travel-friendly ball and maintains a generous 90kg load rating.
This setup not only makes it easier to carry but also facilitates quick use while trekking. The neoprene cover on the Sony 200-600mm lens is made by LensCoat.
🎞️ Want to know what photography we travel with? You’ll want to read our travel photography gear article.


Astrophotography with the Sony A7III
The first night with the Sony A7III was dedicated to moon photography using the Sony 200-600 lens. I captured the moon hand-held at 600mm, ISO 640, with a shutter speed of 1/1,600, using spot metering and direct manual focus.
I was impressed with the results, showcasing the camera and lens capabilities under these conditions. The Sony 200-600mm is also a fantastic lens for safari wildlife photography.
For some photo inspiration, you can check out our African digital prints here.

For a detailed moon image, I used a tripod and bracketed three shots (-1, 0, +1 EV), which were merged into an HDR image in Lightroom.
🚙 If you’re on the road and looking for photography ideas, we’ve got you covered –
take a browse of our road trip photography article.

Venturing into Milky Way Photography with the Sigma 16mm APS-C Lens
Milky Way photography was equally ambitious, captured with the Sigma 16mm APS-C lens at a 20-second exposure and f/1.8. Post-processing in Lightroom enhanced the image.
The focus was razor-sharp on these stars.

Transitioning to the Sony A7III has opened up new possibilities in astrophotography, allowing me to capture the big night skies with greater clarity and detail. While there’s always room to refine techniques and settings, the journey with this new setup so far has been rewarding.
Sony a6000 Moon Settings … That’s A Wrap
From the mystical landscapes of Norway with the Sony a6000 to explorations with the Sony A7III, this journey through astrophotography has been as enlightening as it has been rewarding.
Photography is about experimenting and trying new things to get different results. It’s about honing skills, building confidence, and becoming more familiar with your equipment. The great images will follow.
I hope you’ve found this article helpful and if you have helpful advice, I’m all ears. The photography journey continues.
Thanks for reading; happy shooting.
Pin and Save for Later
Read more:
- Road Trip Photography: Great Tips for Taking Photos on the Road
- Northern Lights Photography: Unveiling the Northern Lights: Norway/Sweden
Planning Your Travels?
These are the travel resources we recommend and use when planning our trips.
- 🚘 Car Hire: We use DiscoverCars.com
- Motorhome/Campervan Rental: We highly recommend the Motorhome Republic
- 🪪 Order your International Driver’s Licence online here
- 🛏 Book Accommodation: We use Booking.com to find accommodation that suits our budget
- 🐶 Pet Sitting/Pet Sitters: Check Out TrustedHousesitters here (Use our Discount code: LIFEJOURNEY25 for 25% off. )
- Activities and Experiences: Get Your Guide and Viator
- Travel Insurance: Safetywing or World Nomads
- 🥾 Travel Gear and Accessories: Check out our top picks here — Lifejourney4two page on Amazon
For a more thorough list, visit our Travel Resources page here.
Wow, those pictures are amazing!
Thank you, getting plenty of practice on our travels ?
What beautiful pics – sadly, we didn’t see the moon at all due to the stormy weather. Though the sheet lightning flickering around the sky was blood red.
Thanks so much for taking the time to comment 🙂 We were very lucky with the weather that’s for sure – though it sounds like you had a spectacular display with the lightning!
Wow, those photos are gorgeous. I loved reading about the planning that went into your final shots. And when you mentioned the planet next to the house I muttered, “Sooo cool!”
Thanks Marnie! I was dipping my toe into the water for the first time with those moon photos. Nature did a good job of helping me out too. Lars.
Lars, these photos are excellent and I’m sure you were chuffed to get them. I’ve been taking photos most of my adult life, and from the standpoint of gear, it’s been a pendulum swing from super simple to as many bells and whistles as I could afford. I even had a home darkroom for a while. After all these years and struggles to get the best shot, I’ve learned a couple of truths: no matter how fancy the gear, nothing can compensate for bad compostion, and thank God for the digital format. Really good photos. ~James
Well thanks for the positive feedback James. I was happy after I got to see the images on the big screen as viewing them on the rear camera display doesn’t give you much of an idea of what you have captured. I agree with you 100%, composition is no.1 priority and all the post-event tricks can’t compensate for that. My learning curve is steep but I really do enjoy the challenge. I think photography is a lot like golf; everything has to be just right to get that perfect shot. Great to hear from you.
I love photography and seeing the beautiful photographs that others take. I am not the best photographer myself though and I could learn a lot from you on this subject.
I’ve come to love photography since we’ve been travelling, I’ll be posting as we go and sharing what I learn. Also, hope to hope to hear tips from others. Thanks and keep clicking!
Lars