
The Lofoten Northern Lights danced and shimmered across the night sky in a complex, choreographed sequence. Teasing and tantalising, moving in waves.
First appearing just above us … then retreating. As quickly as they appeared, they would dim and disappear, only to reappear in another part of the sky.
That was our treat of Lofoten September Northern Lights.
The lights are a true marvel of nature that has enthralled and been revered by people through the centuries. There is little wonder that the northern lights are on many bucket lists — and rightly so.
In this guide on Northern Lights in Lofoten, I’ll share not only the awe-inspiring beauty of these lights but also practical tips on how to swing the odds in your favour for great sightings and remove a lot of the guesswork.

Northern Lights in Lofoten: Essential Information
Best Time to Visit: The optimal months for witnessing the Northern Lights in Lofoten are from September to April, with September, October, and March offering the best conditions due to darker skies and statistically higher activity.
Prime Locations:
- Reine and Henningsvær: These locations offer stunning backdrops for viewing and photographing the Northern Lights. Seek spots away from town lights to avoid light pollution.
- Darker, Remote Areas: Choose locations with minimal artificial light for the best visibility.
Viewing Tips:
- Timing: Nights are best. The Northern Lights are typically most active between 10 PM and 2 AM.
- Weather Conditions: Clear, cloudless skies offer the best viewing opportunities. Use local weather apps to track cloud coverage.
Photography Tips:
- Equipment: Use a tripod and a camera capable of long exposures. Wide-angle lenses are ideal.
- Settings: Manual mode is crucial. Focus manually at infinity, use a remote shutter release or timer, and experiment with ISO settings (start around 600).
Quick Facts:
- The Northern Lights, or Aurora Borealis, result from solar particles colliding with atmospheric gases, creating bright waves of colour, primarily green, pink, and violet.
- The lights can appear suddenly and vanish quickly, making each sighting breathtaking.
Planning Your Visit:
- Check local travel resources and consider guided tours if unfamiliar with the area.
- Always dress warmly, as nights can be cold, even in early autumn.
Chasing the Northern Lights in Lofoten in September
We had heard many a story describing the beauty of the Northern Lights. Now that we were actually here on our 7-day Lofoten road trip, there was a real chance we would see the Northern Lights.
It was late September, so our timing was right, but we’d have to leave the rest to Mother Nature.
Best Time and Places to See Lofoten Northern Lights
Witnessing the Northern Lights in Lofoten is a truly magical experience. Choosing the right time and place for viewing is crucial to maximise your chances.
Best Time to See Northern Lights in Lofoten Islands
Plan your visit to Lofoten for the Northern Lights between September and April. September, October, and March are particularly favourable for the Northern Lights, with darker skies and statistically higher activity chances.
However, be mindful that the weather in Lofoten during the winter months (December, January and February) can be bleak, with constant strong wind and rain.
Lofoten’s minimum winter temperatures hover around 0º due to the warm Gulfstream waters that lap her coastline, yet phenomenal sightings of the Northern Lights have occurred here.
Between the months of May and August, there is just too much light in the sky for the naked eye to see them, even though the Aurora may be blazing away above you.

Where to View and Photograph the September Lofoten Northern Lights
We travelled across Lofoten in Autumn, from west to east, spending two nights at each accommodation stop. Our trip timing coincided with the beginning of the Northern Lights season.
Both Reine and Henningsvær, the locations of our overnight stops, provided great backgrounds for our Northern Lights sightings and, more importantly, the photographing of them.
Being close to the towns meant the images were susceptible to artificial light, but I had to accept this. For the best viewing of the Loften Northern Lights. , you’ll want a dark sky.
Timing is all-important, and being in the right place at the right time is special.
I remember when I was living in the traditional Norwegian village of Skudeneshavn and shooting the blood moon over Vikholmen lighthouse. My timing and choice of location was spot on.
Increasing the Odds of Seeing Lofoten’s Northern Lights
There are a few things that will swing the chances for good sightings of the Northern Lights in your favour:
- Arctic Circle: You should be north of the Arctic Circle (latitude 66°33’N), putting you in the Aurora Borealis target-rich environment. That’s not to say you won’t see the lights just south of the Arctic Circle, but the sightings won’t be as impressive, and the opportunities are fewer due to latitude.
- Months: As mentioned, plan your visit between September and April.
- Dark sky: Avoid bright light sources such as town lights or a full moon by choosing a location as dark as possible and monitoring the moon phase.
Let’s Shine a Bit of Light on Exactly What Is the Aurora
The aurora form when charged particles from the sun are blown by the solar wind and strike the Earth’s atmosphere (remember this for later when we talk about predictions). Most are repelled by the Earth’s magnetic field.
However, the magnetic field is weaker at the North Pole, allowing some of the sun’s charged particles to penetrate our atmosphere. These collide with gas particles in the atmosphere resulting in emitted light or, as we know it, the Northern Lights.
The different colours of light are due to the type of gas particles colliding.
- The common green colour is produced by low-altitude oxygen collisions at around 60 miles of altitude
- The red colour is produced by high-altitude oxygen collisions at around 200 miles altitude and
- The purple-blue colour indicates collisions with nitrogen
The Aurora activity ranges from about 50 miles above the Earth’s surface all the way up to 400 miles altitude. Although the Northern Lights are renowned, the Aurora Australis or Southern Lights also appear in the night skies.
Did you know Aurora Borealis is Latin for ‘northern goddess of the dawn‘, whilst Aurora Australis is named the ‘southern goddess of the dawn‘?
Map – September’s Northern Lights Sightings in Lofoten
Planning a Trip to Norway?
- 🚗 Hiring a car? We recommend getting a quote from DiscoverCars
- 🚐 Hiring a campervan? We recommend Motorhome Republic
- ⛑ Arranged your travel insurance? Compare quotes from World Nomads & Safetywing
- 🪪 Order your International Driver’s Licence online here
- 🏩 Booked your accommodation? We use Booking.com to find the best deals
- 🐾 Is someone pet-sitting for you? 🐾 We use and love TrustedHousesitters
- (Get 25% off at checkout for new memberships with our discount code: LIFEJOURNEY25)

September Sky: Preparing for Your Northern Lights Adventure
Are you able to see the northern lights in Lofoten? Absolutely!
Lofoten is located at 68°10’N, well within the Arctic Circle, which sits at latitude 66°33’N. So, if you’re already in Lofoten, your chances of seeing the Northern Lights are much improved.
Travelling further north will give you longer periods of darkness, increasing your window of opportunity. Generally, the lights seem to be most active between 1700 and 0200.
We’ve had our best sightings just after sunset.
- The Right Location: OK, we mentioned this before. ✅ Tick.
Avoid strong light and look for naturally dark locations. If you intend to photograph the Northern Lights, consider a location with a picturesque foreground or background, and visit the location during daylight hours to familiarize yourself with it. - The Right Month: Pick a month to visit between September and March. Statistics point to September, October and March as the best viewing months in Lofoten.
- Dress Appropriately: It’s essential to wear warm clothing and sturdy hiking boots. The reason? While chasing the best Northern Lights views, you might find yourself moving across varied terrains and night-time temperatures will be cold.
- Weather: You’ll need a good weather app that provides forecasting. See the suggested apps below.
- Solar Activity: Solar activity such as solar flares that trigger magnetic storms resulting in beautiful auroras. The KP Index indicates the disturbances in the Earth’s magnetic field and ranges from 1 to 9, with 9 being the highest probability of seeing auroras.
- Photography Equipment: Shooting long-exposure images using a tripod guarantees the best results of northern lights. A wide lens will help to include as much of the night-time view as possible.
- Bring a Torch: When moving between locations at night, a head torch is super handy as it frees up your hands to carry your photography gear.
Even though the KP index indicates a low value, don’t discount the possibility of good sightings. This happened to us.
The forecasted KP was 2, which would not indicate a high probability of the lights appearing, but we witnessed a fantastic display. KP is just a prediction; Mother Nature has the final say.
Weather conditions change constantly and open up windows of opportunity. The waiting game can pay off.
Essential Apps For Forecasting the Northern Lights
- Weather app: YR This is a local Norwegian weather app that is really accurate, and you can rely on when wanting to view the Northern Lights.
- Aurora and KP Index Forecasting Apps: AuroraAlerts, My Aurora Forecast and AuroraNow. I used all three apps to check one against the other.


Lofoten’s Night Sky in September: A Photographer’s Dream
Capturing the Northern Lights requires more than just a good camera; it necessitates the right techniques and equipment. Here’s what you’ll need for successful Northern Lights photography in Lofoten:
- Tripod: a sturdy tripod that holds the camera still and won’t blow over in the wind.
- Wide-angle fast lens: You will want to capture as much of the night sky as possible and a wide lens of a focal length of 12mm to 24mm with an aperture in the range of 1.4 to 2.8 is ideal. Shoot with the lens wide open.
- Remote shutter release: This remote option prevents inducing any camera vibration when pressing the shutter button, or you could manually trigger the shutter and use a 2-second timer.
- Shoot in Manual Mode: Manually adjusting your exposure time and ISO quickly as the intensity and movement of the Aurora changes are easily achieved when shooting in Manual mode.
- Manual Focus to Infinity: Manually focus your lens to infinity or the furthest distant object that the lens can focus on sharply then mark this focus position using tape or a white mark in case the lens moves. Don’t rely on the lens infinity mark unless you know it is true.

Looking for road trip photography ideas and techniques, we’ve got you covered. This post walks you through everything you need to know.
6. ISO: Select a starting ISO of 600 and begin to vary exposure time. Look at the image in the camera. If the intensity of the aurora is low, the image will not be particularly bright, so marginally increasing the ISO will help brighten the image, however noise in the image will also increase.
Increasing exposure time will allow an increase of aurora intensity.
7. Exposure Time: Manually adjusting exposure time while slightly varying ISO gives great results. When the Aurora is moving quickly, typical exposures are between 5 to 8 secs whereas slow-moving Auroras might have exposure times more than 10 seconds.
Exposure times and ISO values will vary depending on the aurora intensity and movement.
Post-Processing Images of the Northern Lights
You’ll need to post-process your raw images to some extent to get them looking good. I use Adobe Lightroom however there are quite a few software packages that will achieve a similar result.
I used to use DxO Pure Raw 2 as my denoising program, but Lightroom now does just as good a job so I have stopped using DxO. My processing flow is solely achieved through Lightroom modules.
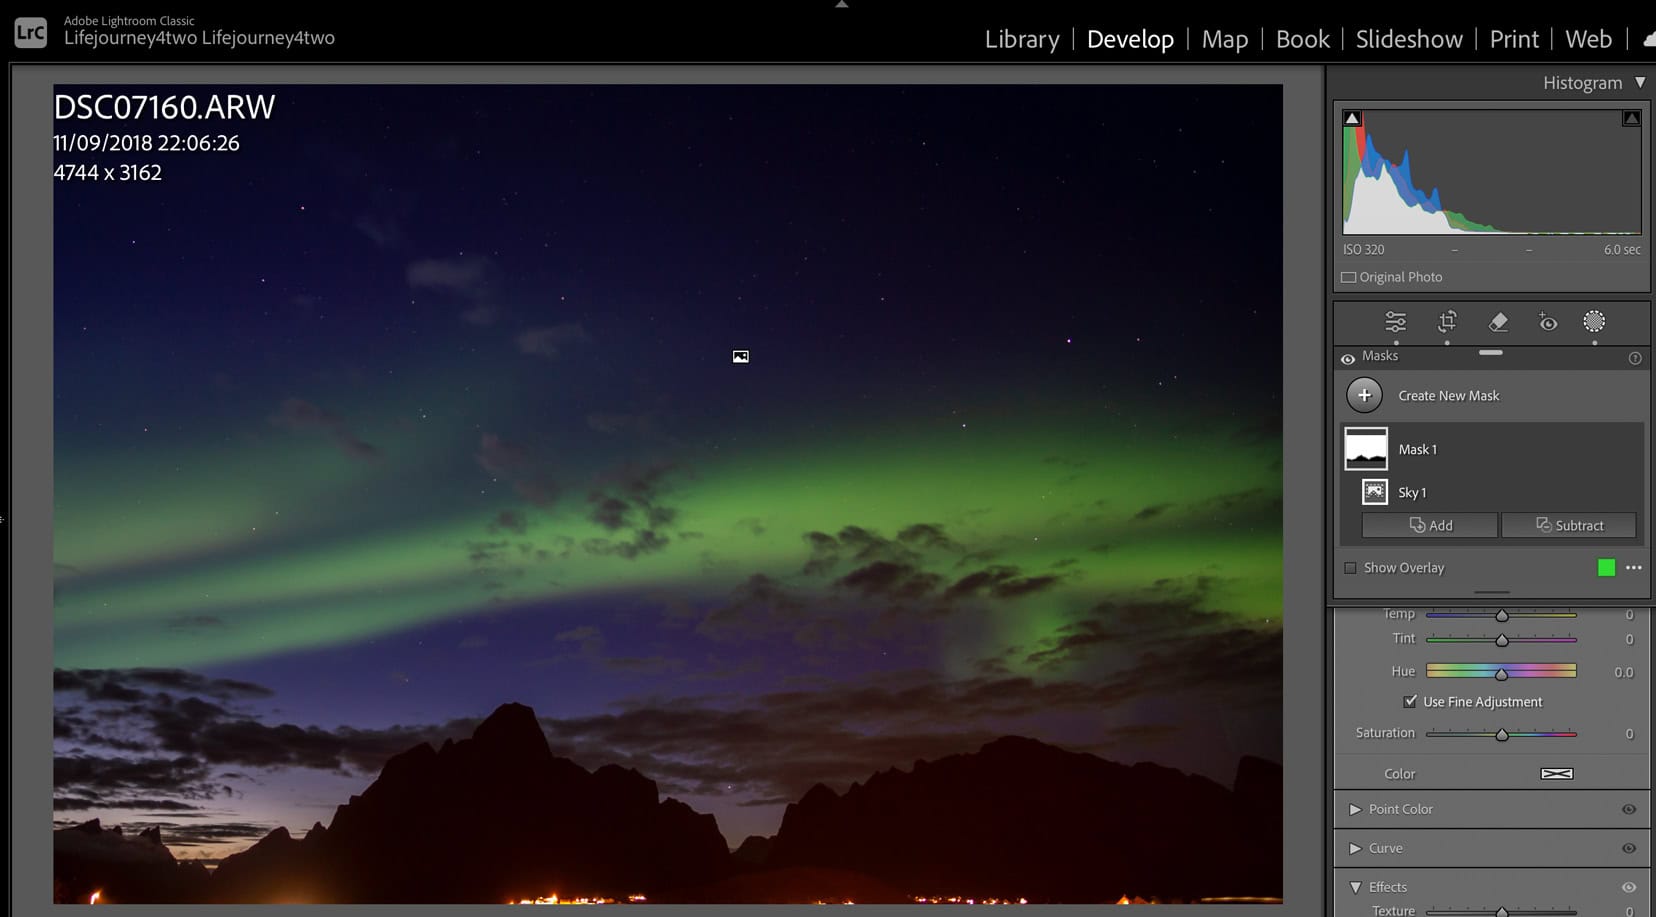
These are my Lightroom’s Develop Module settings used for processing the Northern Lights:
- Auto: quickly gives me a starting point.
- Vibrance slider: I may gently apply this and normally no more than 15.
- Saturation slider: I leave at 0.
- Shadow slider: Increase the Shadow setting to add exposure to an interesting foreground and lighten the sky. However this may cause over exposure of bright light. Play with this setting to get the ‘feel’ you want.
- Exposure slider: Apply selectfully to the image without blowing out the sky.
- Clarity slider: This is my secret weapon. I increase the Clarity to target and lift the Northern Lights.
Personal Stories from September Nights Under the Loften Sky
Our September trip to Lofoten offered unforgettable nights under the Northern Lights and a surprise. Here are our standout experiences and stories.
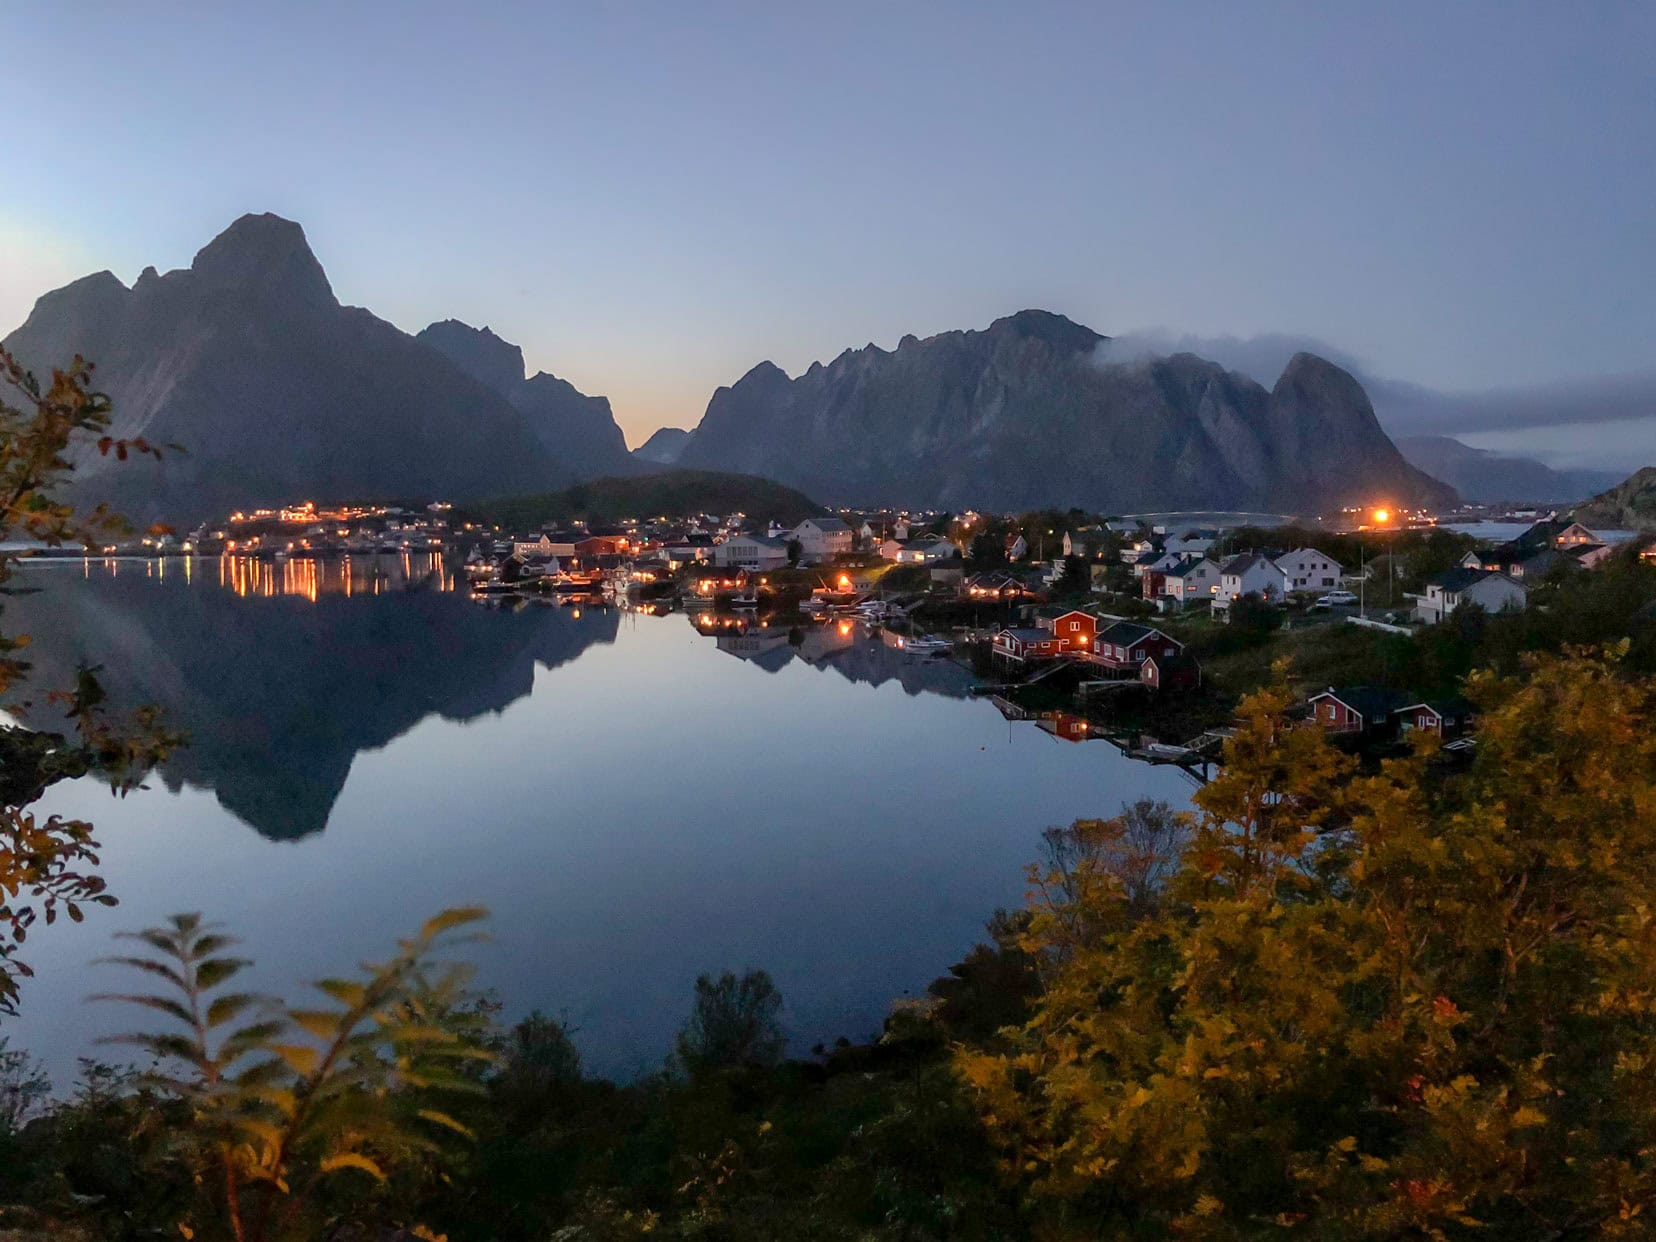
Reine: Stop 1
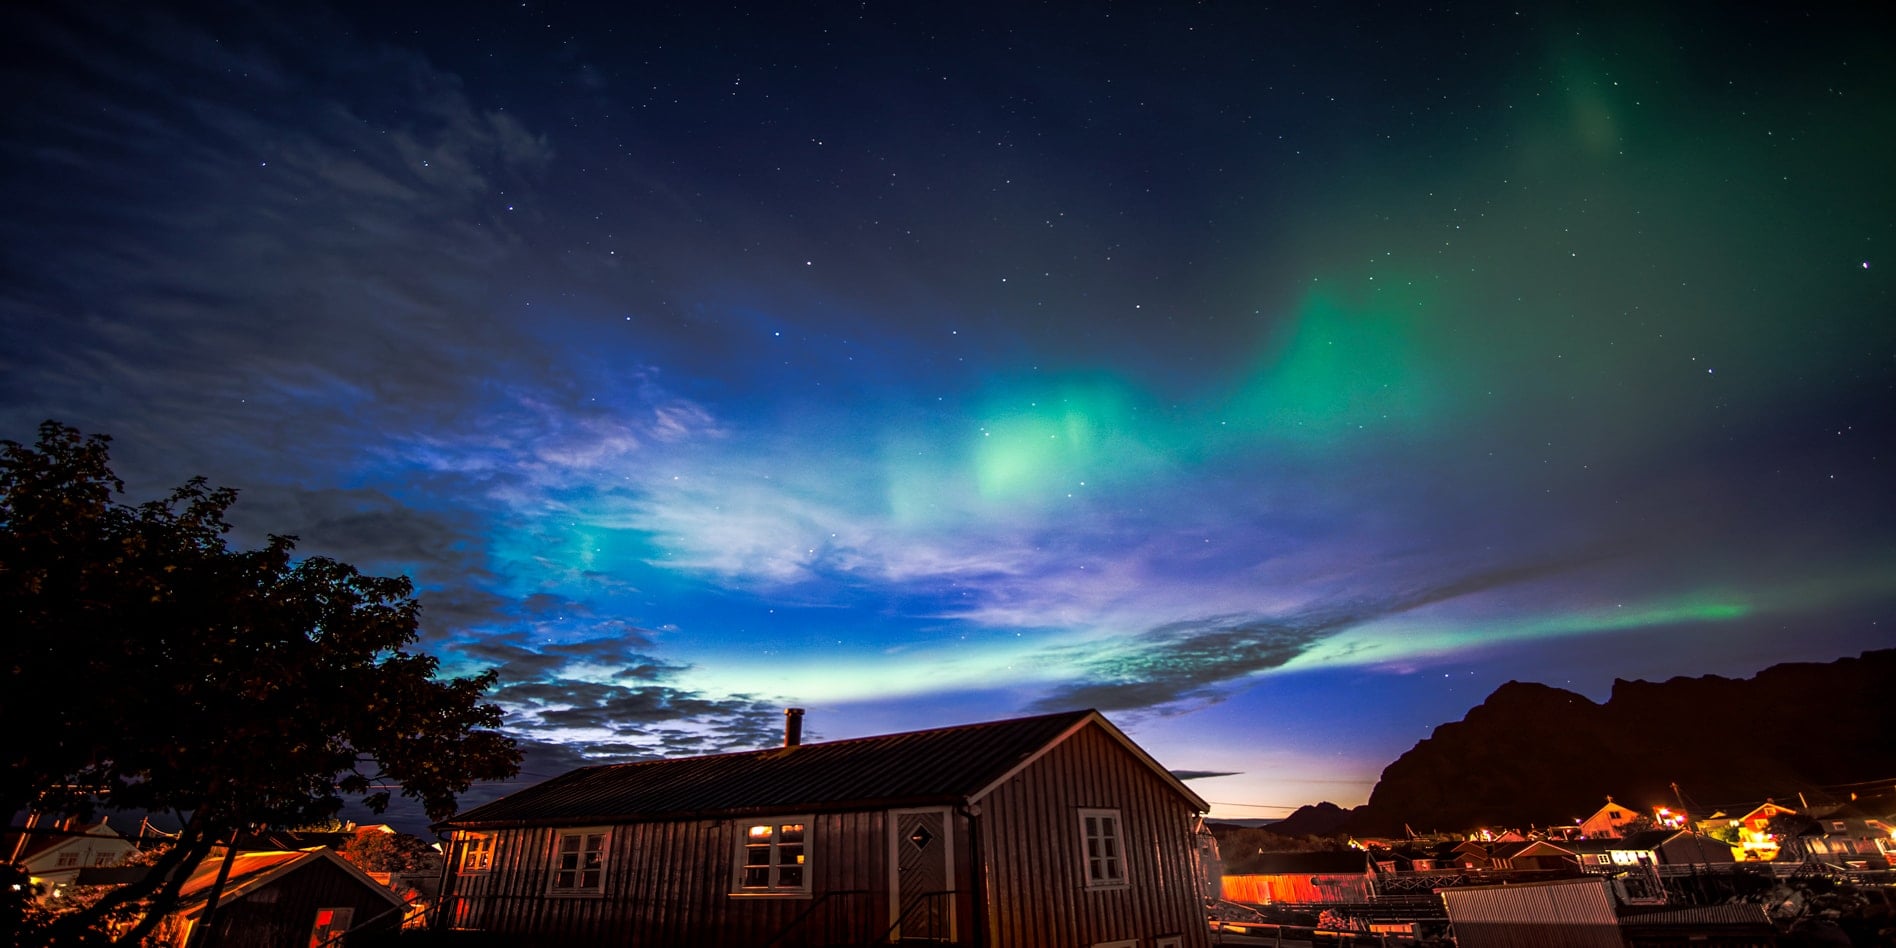
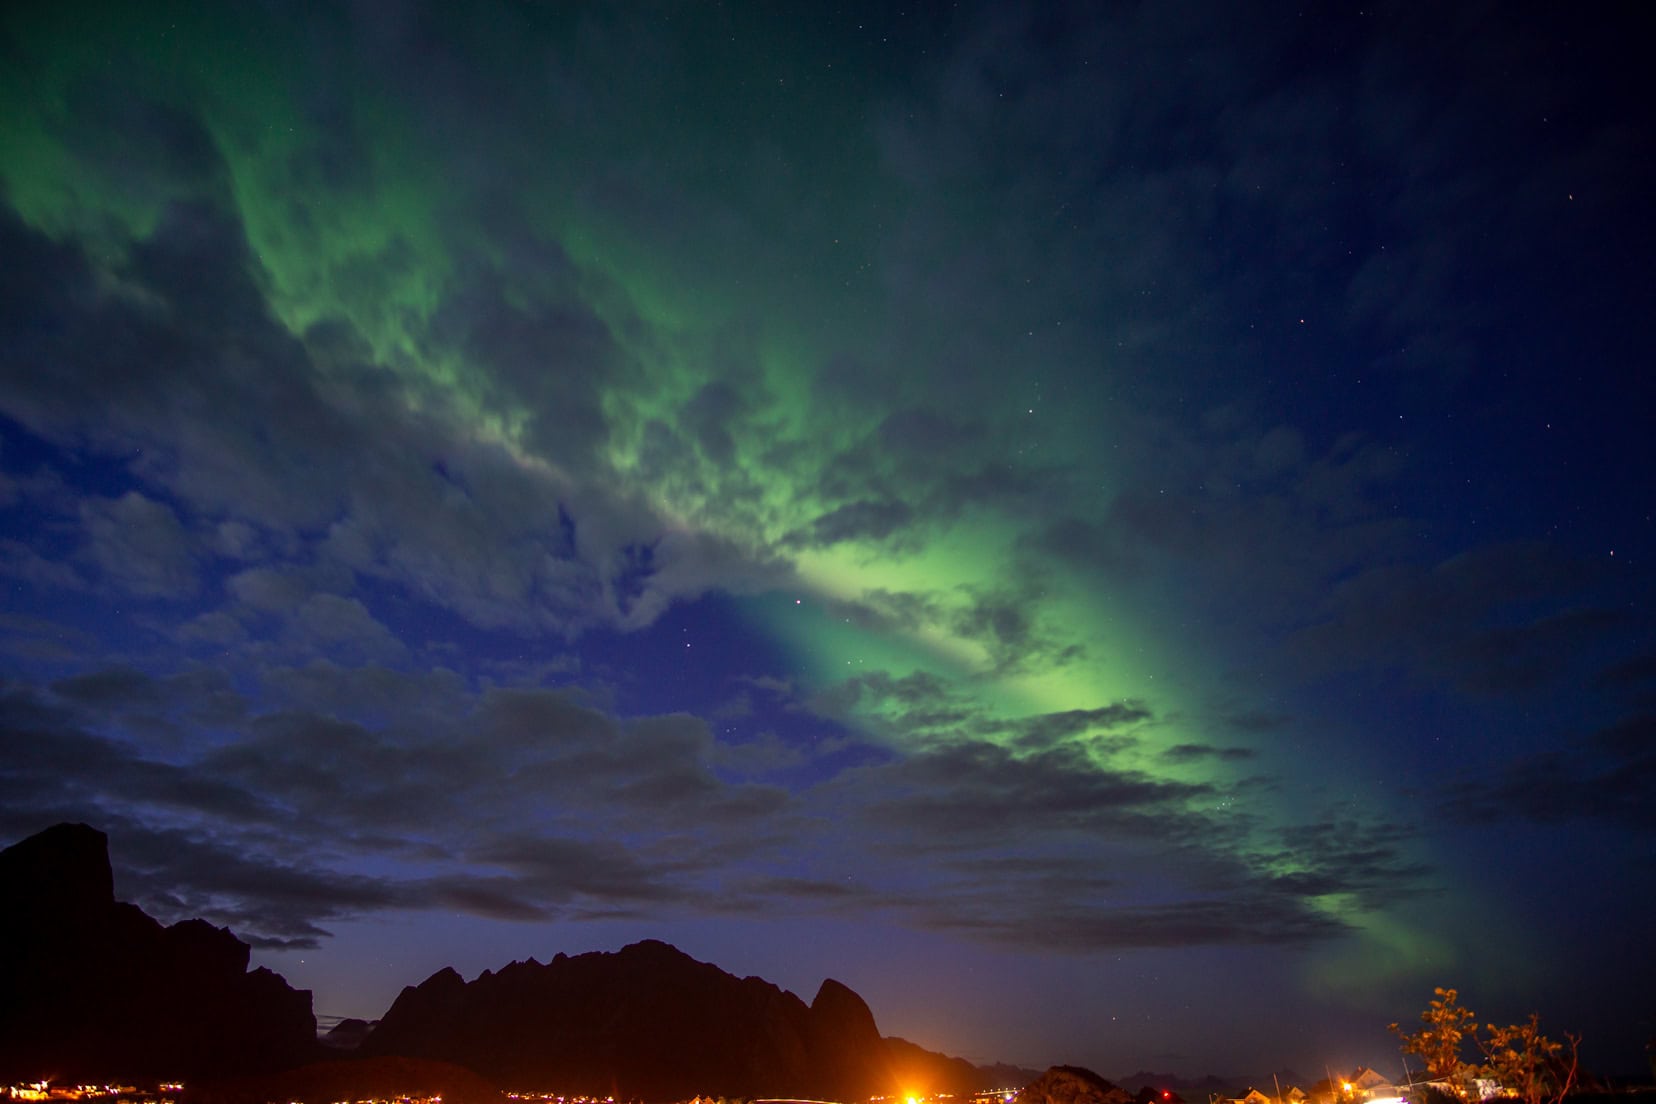
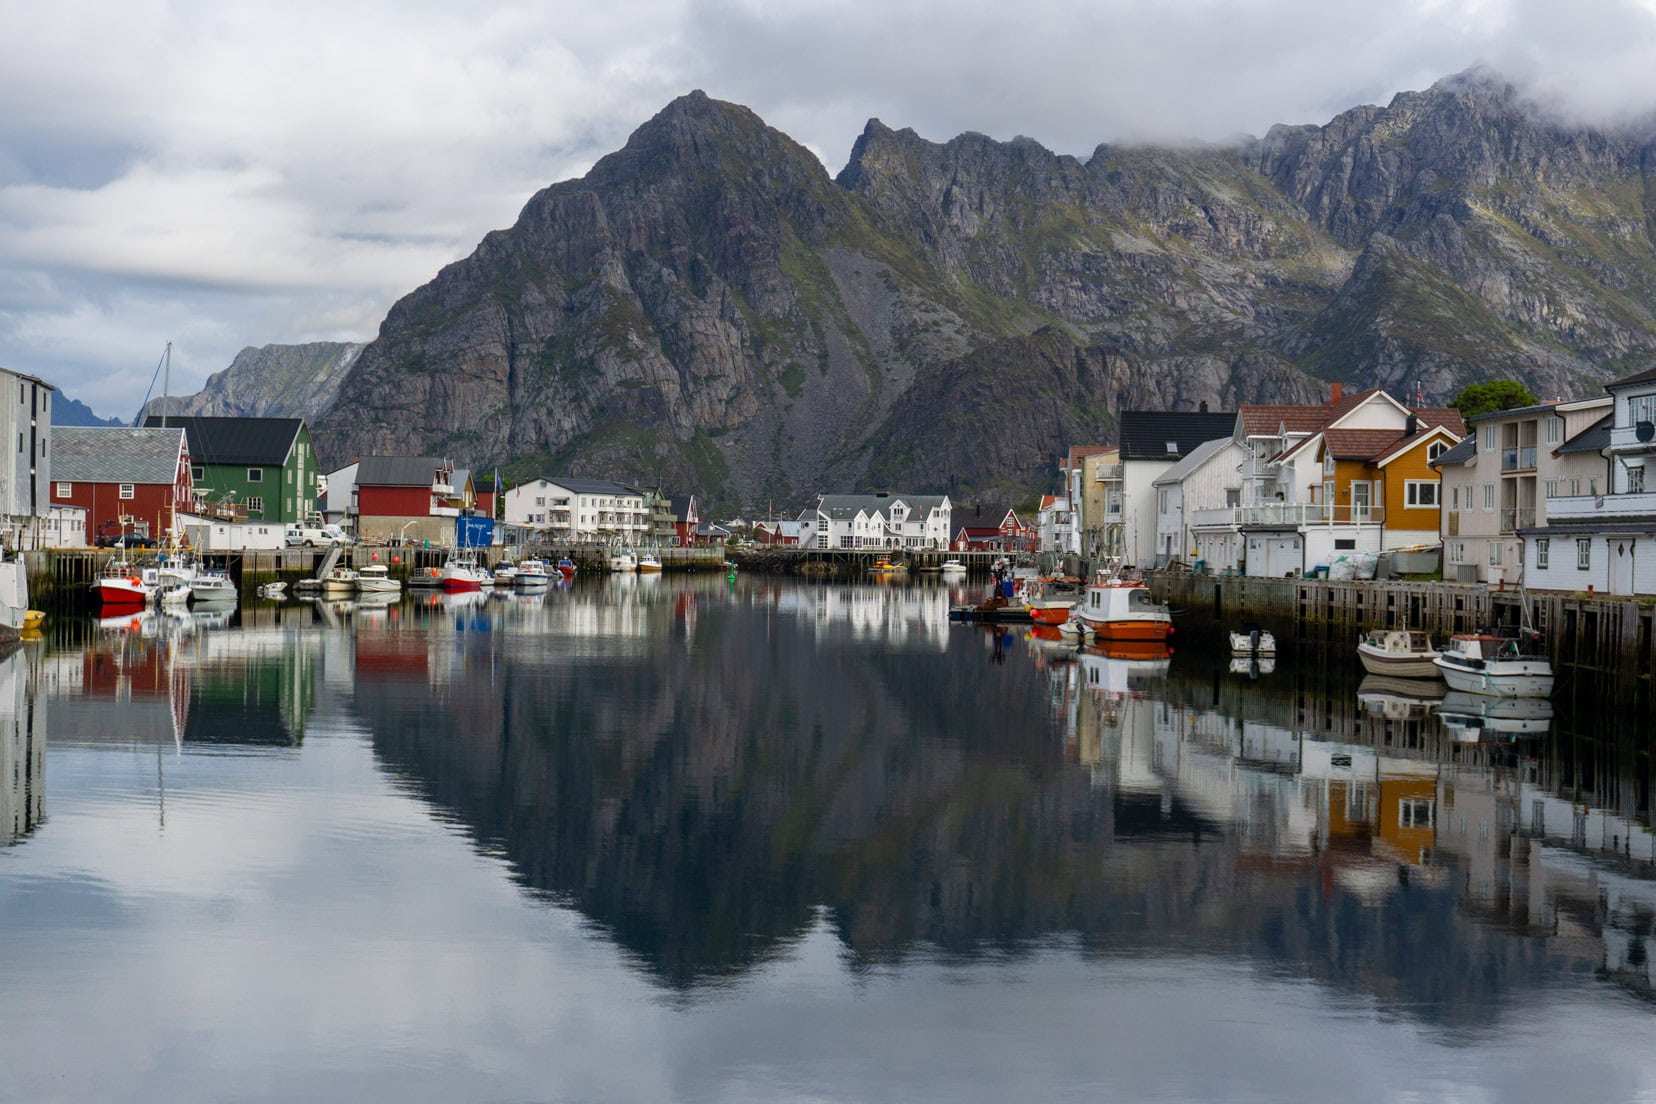
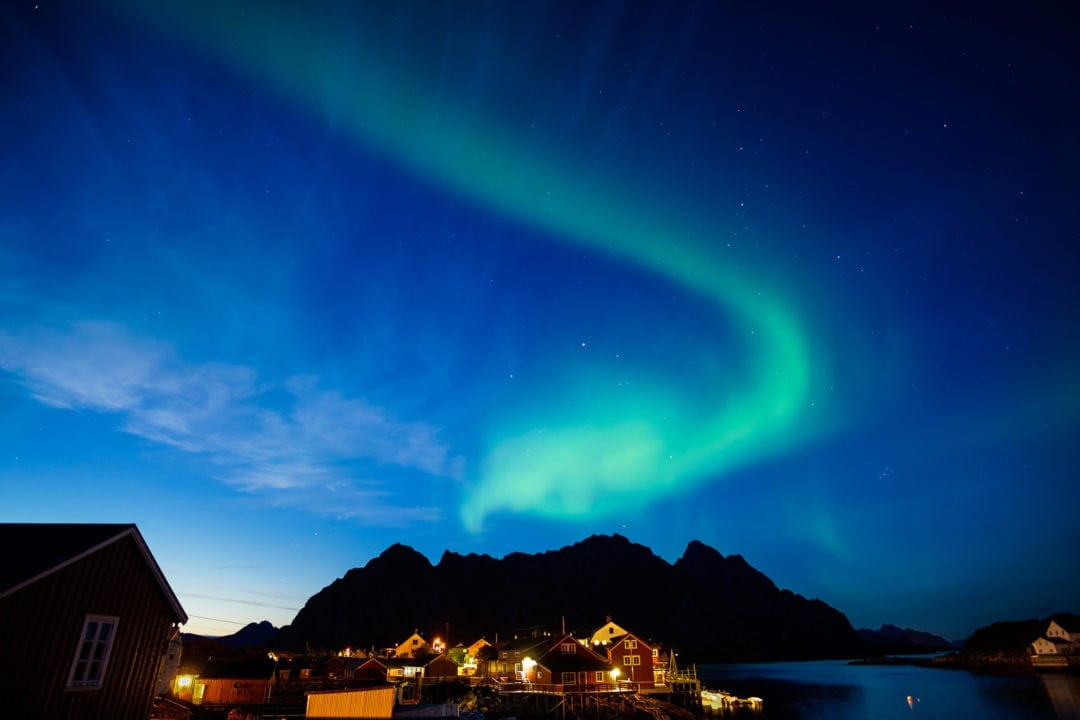
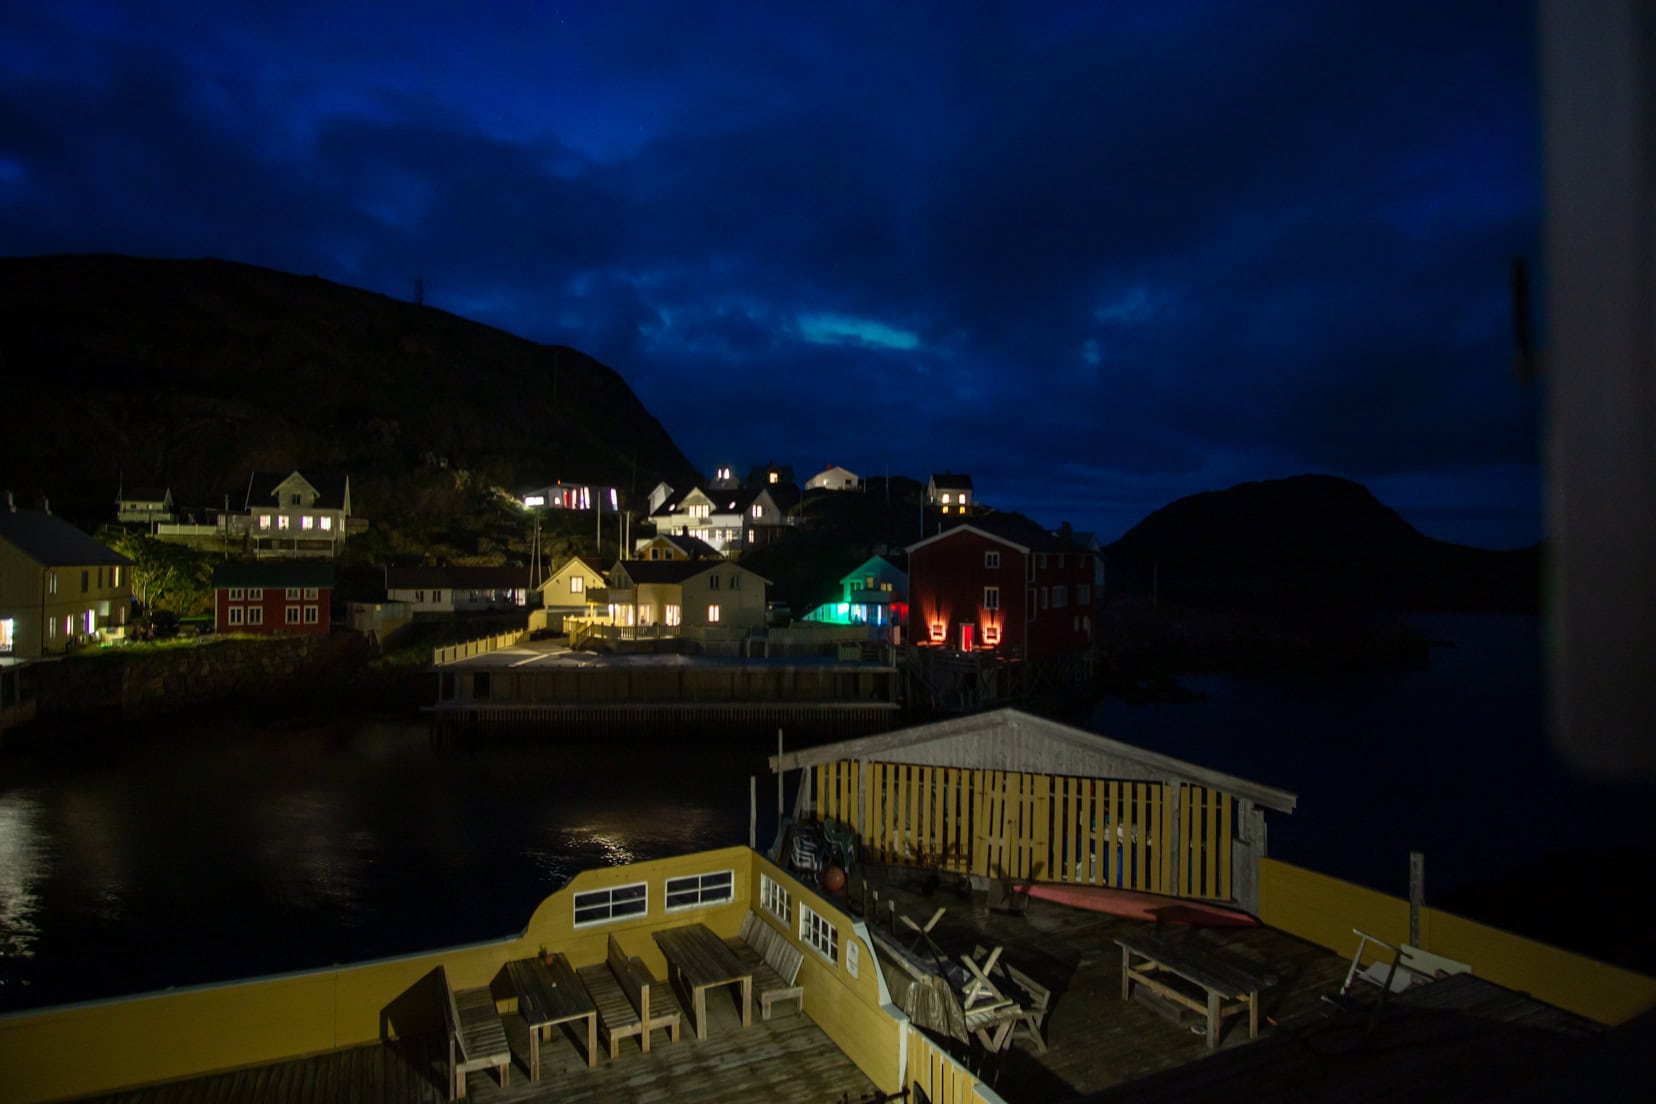
Our first accommodation was in Reine, a fishing village on the westernmost island of Moskenoy. We scouted some possible vantage points during our daytime excursions and settled on a car park that was only a few hundred metres from our accommodation. Too good!
We would overlook Reine with the sheer mountains forming the perfect, contrasting backdrop. Light pollution was always on my mind.
However, on this occasion, these artificial lights can sometimes add another element to your image. The coloured light reflections in the below image, I think aren’t too bad.

I had researched the KP index, (the predicted value of geomagnetic activity between 1 and 9) and the odds were in our favour with an expected KP of 6 not long after sunset.
All signs were indicating a great show ahead.
An hour after sunset, about 9.30 pm, with a few scattered clouds peppering the sky, the curtains drew back, and the northern light show began. We spent the next two hours watching in amazement.
Finally, two hours later, the lights lost their will to impress, faded and bade goodnight.
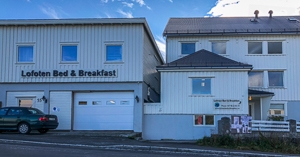
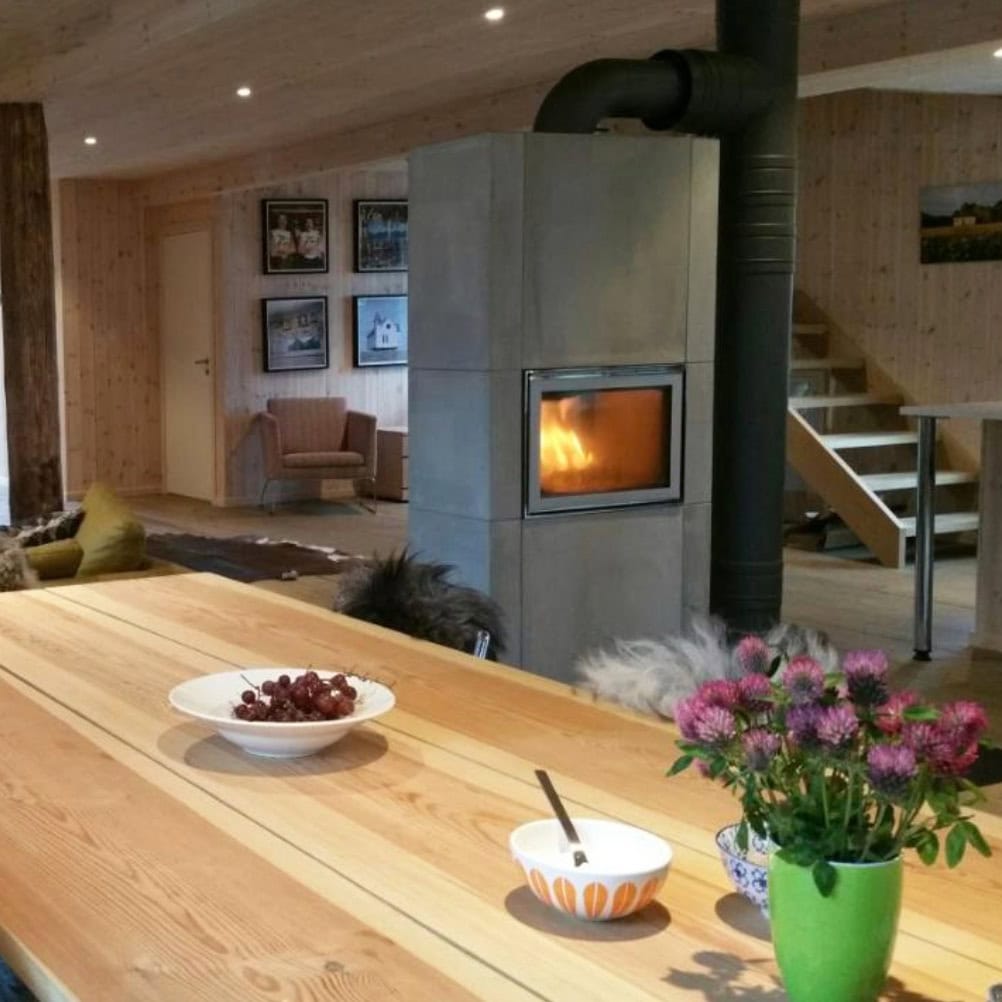
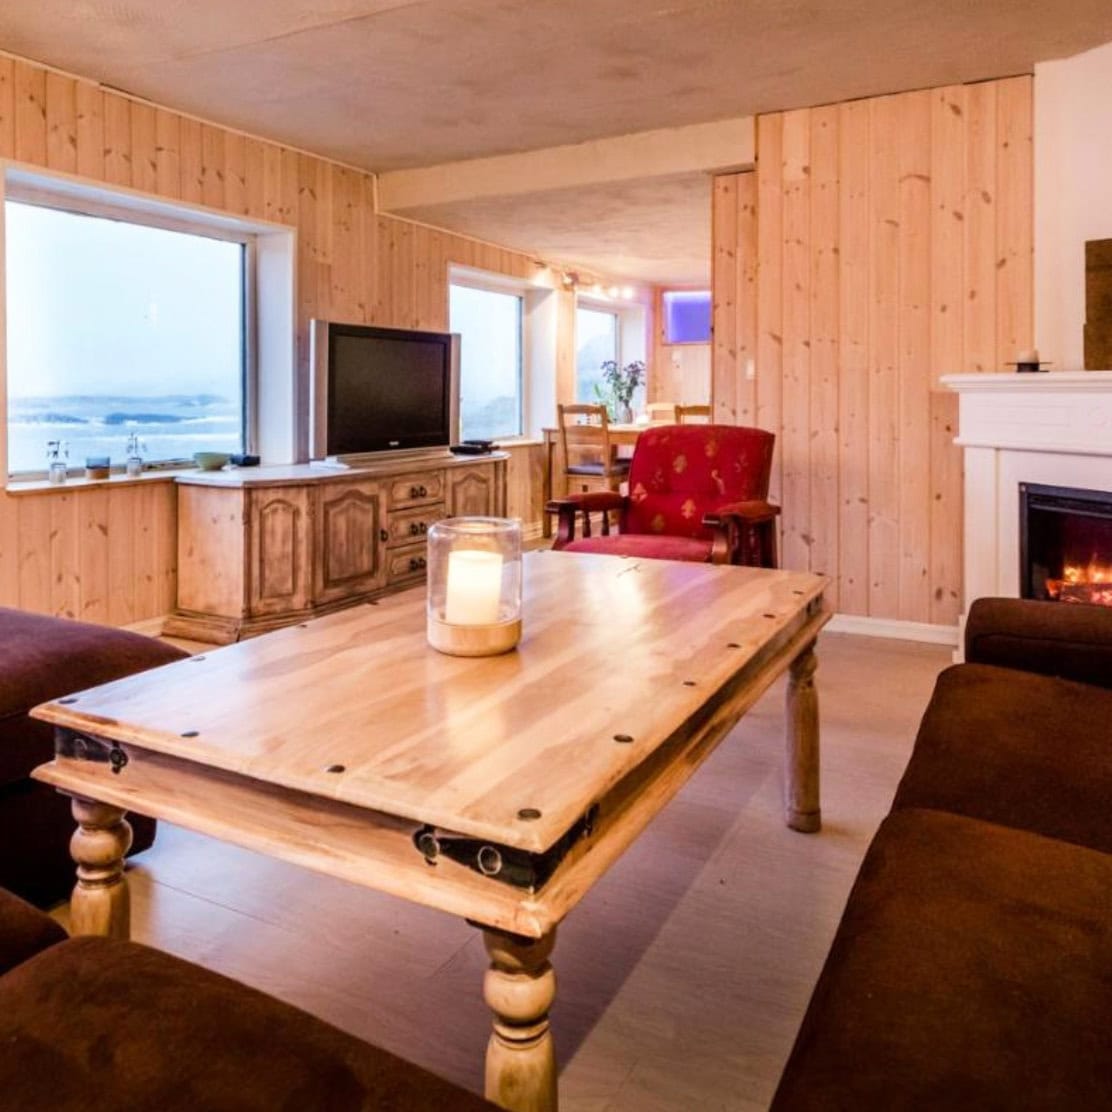
Our Reine Accommodation:
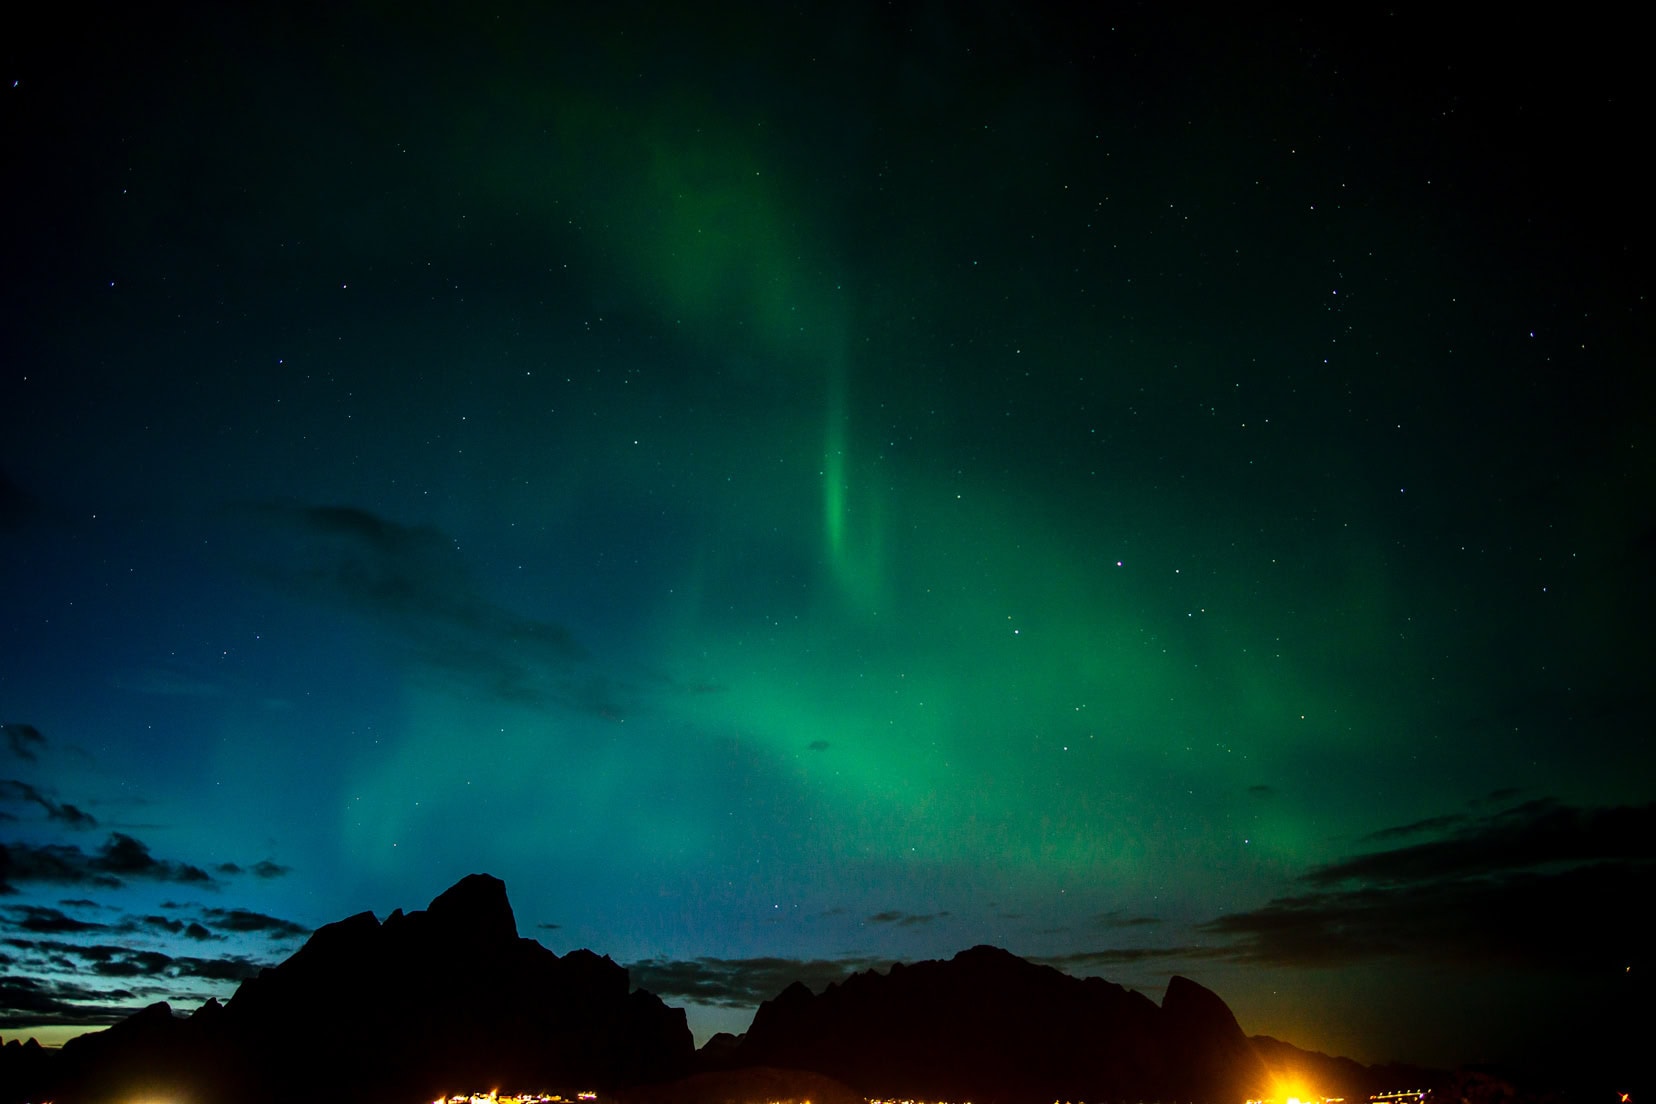
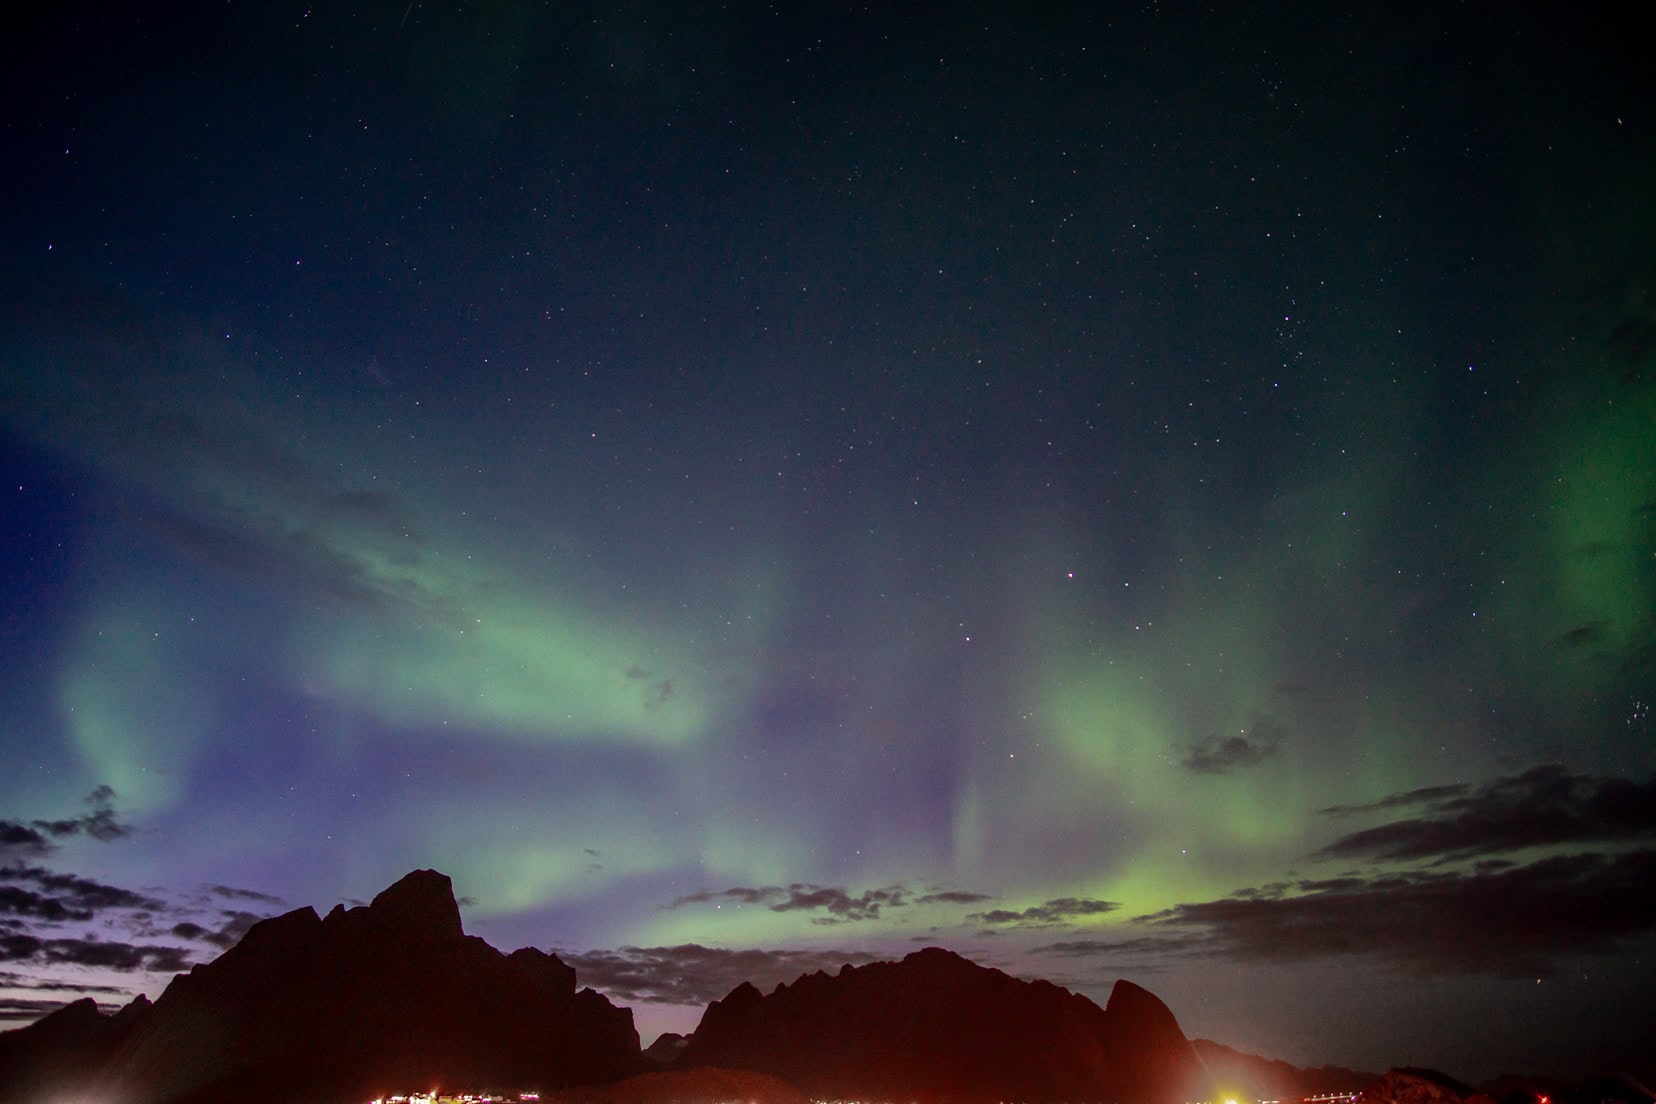
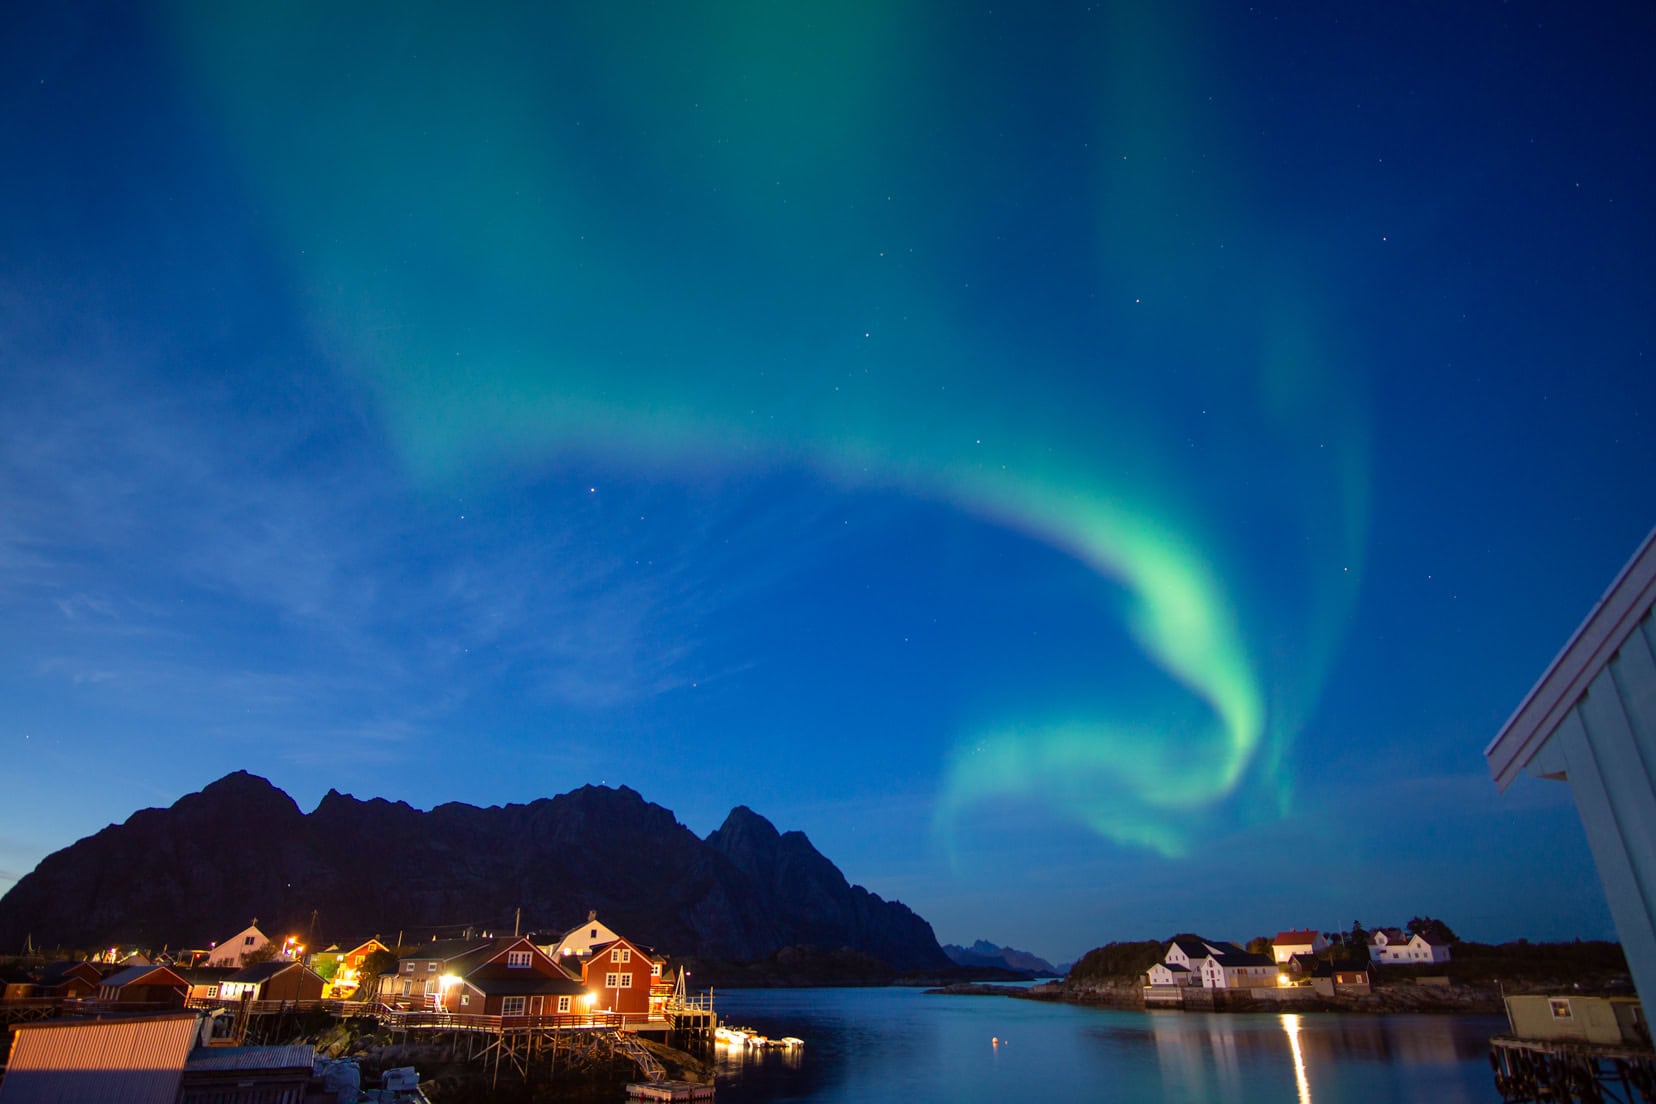
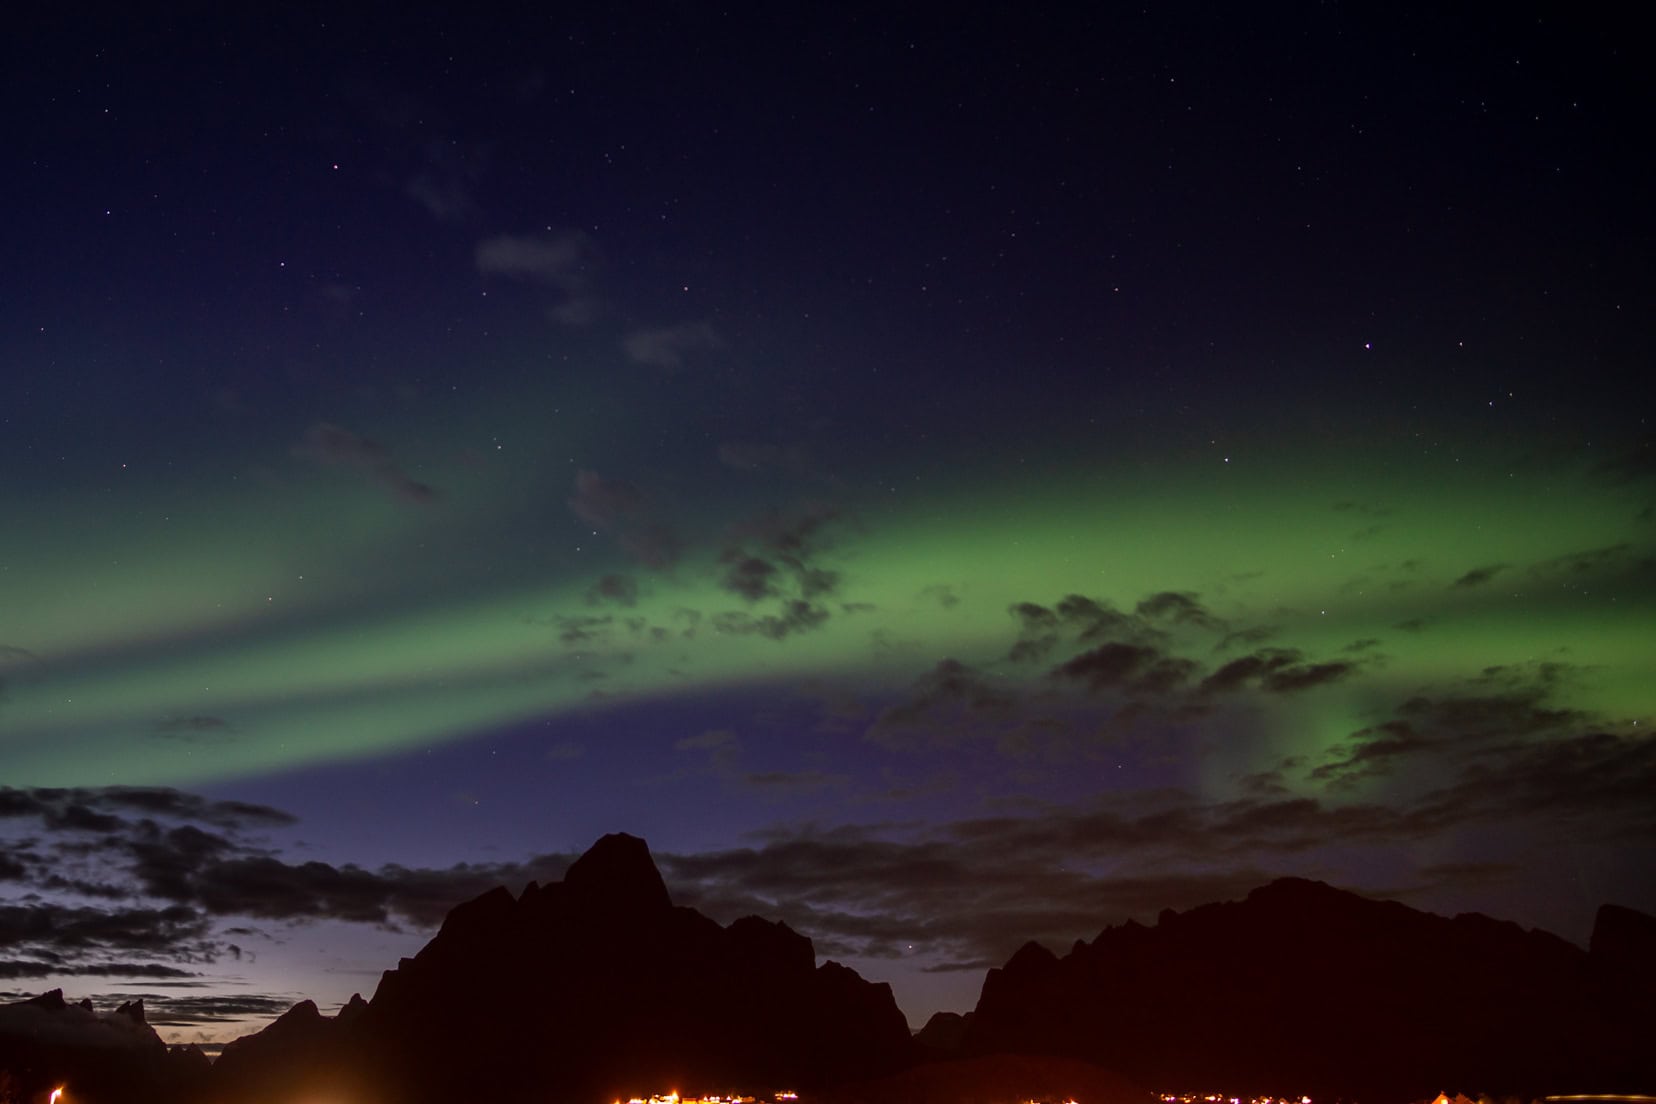
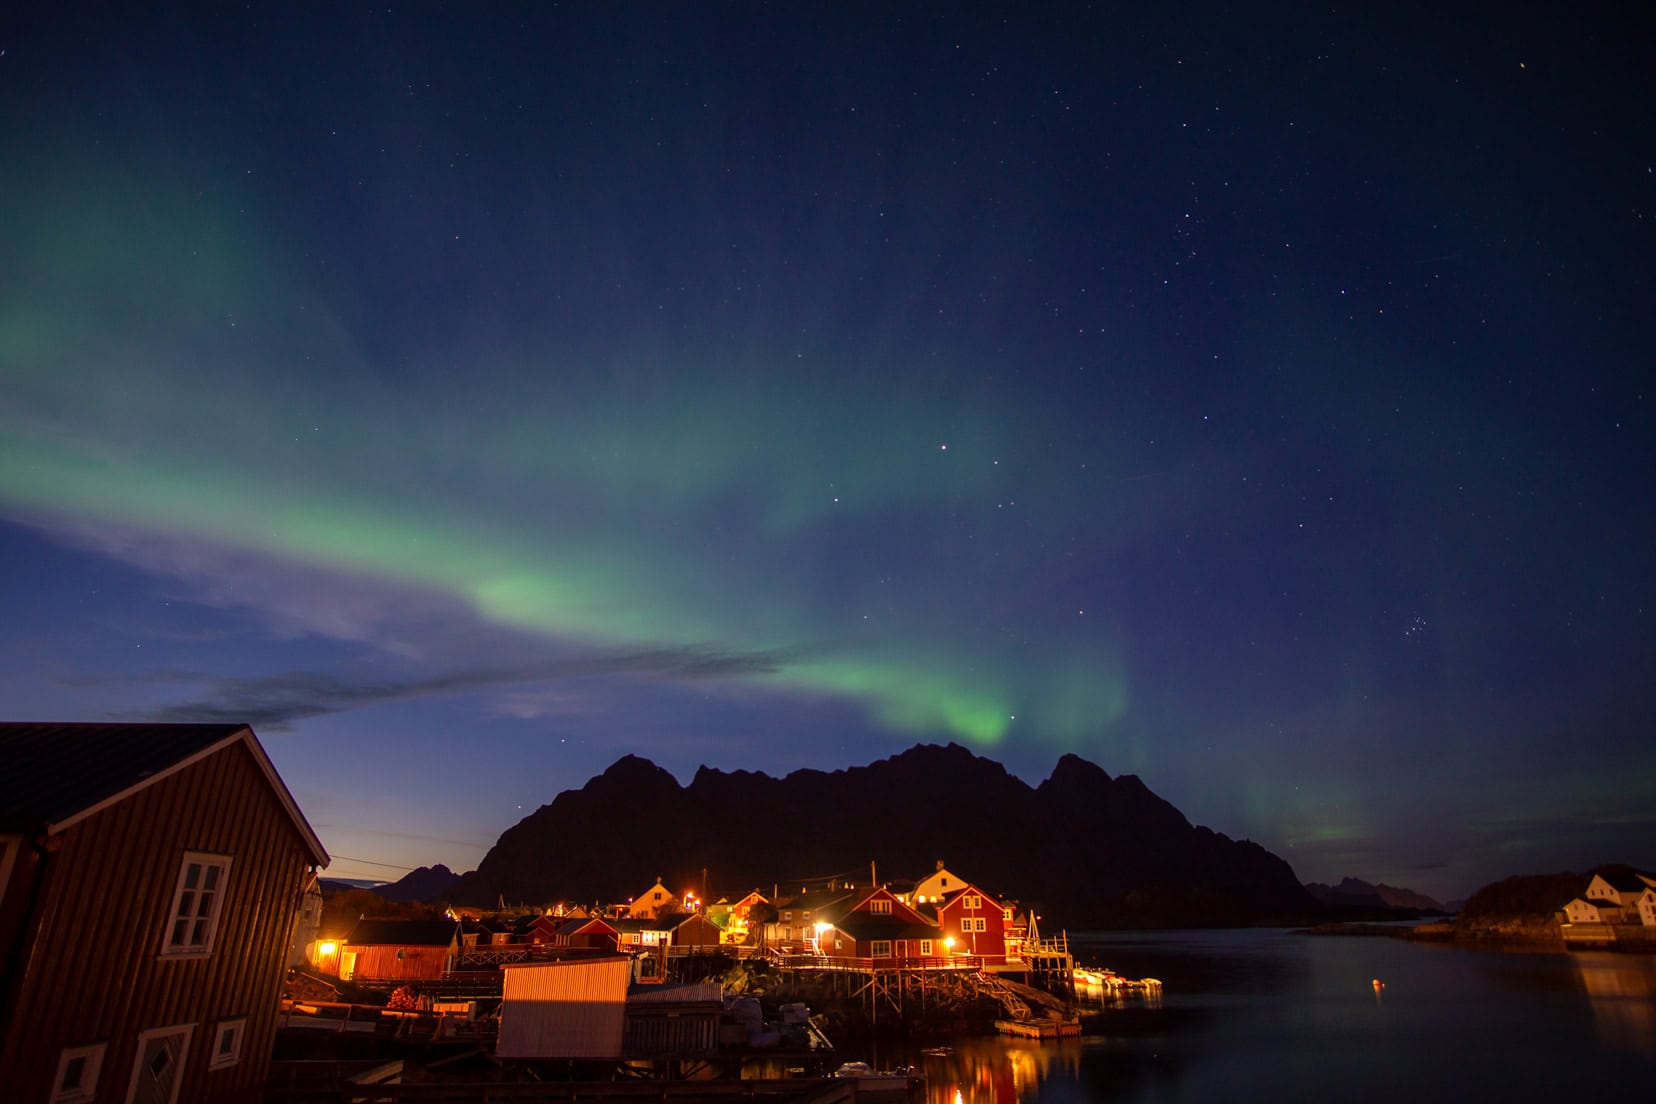
Henningsvær: Stop 2
Leaving Reine, we drove east to our next destination, Henningsvaer, on the island of Austvagoy. Fortuitously, our bed and breakfast verandah was north-facing, with an unobstructed view.
It was slightly cloudy with a predicted KP value of 3, so thought that it wasn’t going to be our night. How wrong I was.
The northern lights must have been attuned to our anticipation. As we were still marvelling at the last vestiges of a beautiful sunset, the lights materialised in waves right above our heads.
The complex, choreographed sequence of lights enthralled us. As quickly as they appeared, they swirled, dimmed and faded away, only to re-appear elsewhere. A unique form of beauty.
The lights began to finally fade, leaving the stars to continue the celestial performance.

Our Henningsvær Accommodation:
Nyksund: Stop 3, A No Show
Departing the Lofoten Islands, we drove north, to arrive at Nyksund, the northernmost part of Langøya, in Vesterålen, Lofoten’s neighbour.
We had positive indicators for a Northern Lights show: No cloud cover and a KP index of 3. After our KP 2 sightings we were expecting big things again.
However, the Norse Gods were not favouring us that night. Even with textbook conditions, we weren’t treated to any sort of sighting whatsoever.
This just goes to show that there is no guarantee that you’ll see the Northern Lights even when the predictions look positive.
If you’re going to Nyksund consider hiking Dronningrutta, The Queen’s Route. After Lofoten, the peace and quiet here will invigorate your soul.
Our Nyksund Accommodation:
Frequently Asked Questions
1. Is September a good time to visit the Lofoten Islands?
Yes, September is a great time to visit Lofoten Islands as it coincides with the less-expensive and less-busy shoulder season. The weather is still good and it’s possible to see the Northern Lights.
2. Is September a good time to see the Northern Lights in Norway?
Most definitely, September heralds the start of the Northern Lights season with September having generally good weather.
3. What month is best for the Northern Lights in Lofoten?
September is the best month for the Northern Lights in Lofoten as the winter weather has not yet set in.
4. Is it possible to see Northern Lights in September?
Yes, it’s possible to see the Northern Lights in September with better opportunities if you’re inside the Artic Circle.
Northern Lights Lofoten September … That’s a Wrap
We witnessed some unbelievable displays of the Northern Lights in Lofoten. Was it just luck? Partially, but arming ourselves with the right knowledge definitely tilted the odds in our favour.
This adventure was absolutely worthy of any bucket list and has left us with memories that will last a lifetime. Would we do it all again? In a heartbeat.
Have you experienced the Northern Lights? What feeling did it give you? Where was your most memorable sighting?
I’d love to hear what you thought about the experience. Drop a comment below.
🇳🇴 More Information for Your Trip to Norway
NORWEGIAN FJORDS AND HIKES: Begin your adventure with our comprehensive guides to Norway’s best hikes. Discover the breathtaking views from Ryten in Lofoten, the thrill of Kjeragbolten, or the iconic Pulpit Rock. Each guide offers essential tips and stunning locations to explore.
LOFOTEN ISLANDS: Plan an unforgettable road trip through the Lofoten Islands with our Lofoten Road Trip Guide. Learn about each must-visit spot and how to make the most of your journey in this picturesque region.
CULTURAL EXPERIENCES: Exploring ancient stave churches in our Stave Churches Guide.
CITY EXPLORATIONS: Discover Norway’s urban charms by visiting its beautiful cities. Whether you’re strolling through Trondheim or exploring Bergen, start with our guides to Trondheim to Bodø and the vibrant city life in Stavanger.
EXTENSIVE ITINERARIES: If you are beginning to plan your journey, take a look at our Two-Week Norway Itinerary for diverse ways to experience the country, from the fjords to the northern lights.
For a full exploration of what Norway has to offer, visit our comprehensive Norway Travel Guide.
Pin and Save for Later
Planning Your Travels?
These are the travel resources we recommend and use when planning our trips.
- 🚘 Car Hire: We use DiscoverCars.com
- Motorhome/Campervan Rental: We highly recommend the Motorhome Republic
- 🪪 Order your International Driver’s Licence online here
- 🛏 Book Accommodation: We use Booking.com to find accommodation that suits our budget
- 🐶 Pet Sitting/Pet Sitters: Check Out TrustedHousesitters here (Use our Discount code: LIFEJOURNEY25 for 25% off. )
- Activities and Experiences: Get Your Guide and Viator
- Travel Insurance: Safetywing or World Nomads
- 🥾 Travel Gear and Accessories: Check out our top picks here — Lifejourney4two page on Amazon
For a more thorough list, visit our Travel Resources page here.
Always wanted to visit this beautiful city and wanted to explore northern light sout there but never got a chance to visit them but luckily I will be going to Norway soon in this summers and cant wait to explore and complete my bucket list
Hi Kanika – thanks for dropping by! You’ve made a great decision to visit Norway – it’s a beautiful country and I’m sure you’ll have a fantastic time. I’m not sure when you intend to travel but the Northern Lights can be seen in the colder months of September through to March generally speaking. Good luck, enjoy the lights and have a great trip.
Lars
Wow! Gorgeous photos! Wish we could witness this someday too…
Thanks so much – let’s hope that wish comes true 🙂
Great post, and love the fabulous photos, wow!! Ms B & I have ventured near the Arctic Circle several times, but each and every time we miss those beautiful Northern Lights. I guess, good in a way, as that (and everything else) keeps us coming back to those regions.
Thanks so much Stefan, we were so lucky to see them and have heard many stories of people chasing them without joy. We are off to Iceland in September, so hope to see the Icelandic version;) We hope you get to see them someday; they’re one of nature’s awe-inspiring visions.
5
Stunning photos. I am hugely jealous after 3 failed attempts myself. I think you have to deserve to see the Green Majesty and one day I will! Wilbur.
Oh Wilbur, we do hope you see them. How frustrating that the Green Majesty didn’t grace you with her presence. We’ve heard she can be very elusive! We were lucky enough to be in the right places at the right time:) I’m sure you deserve to see her and that you will;)