
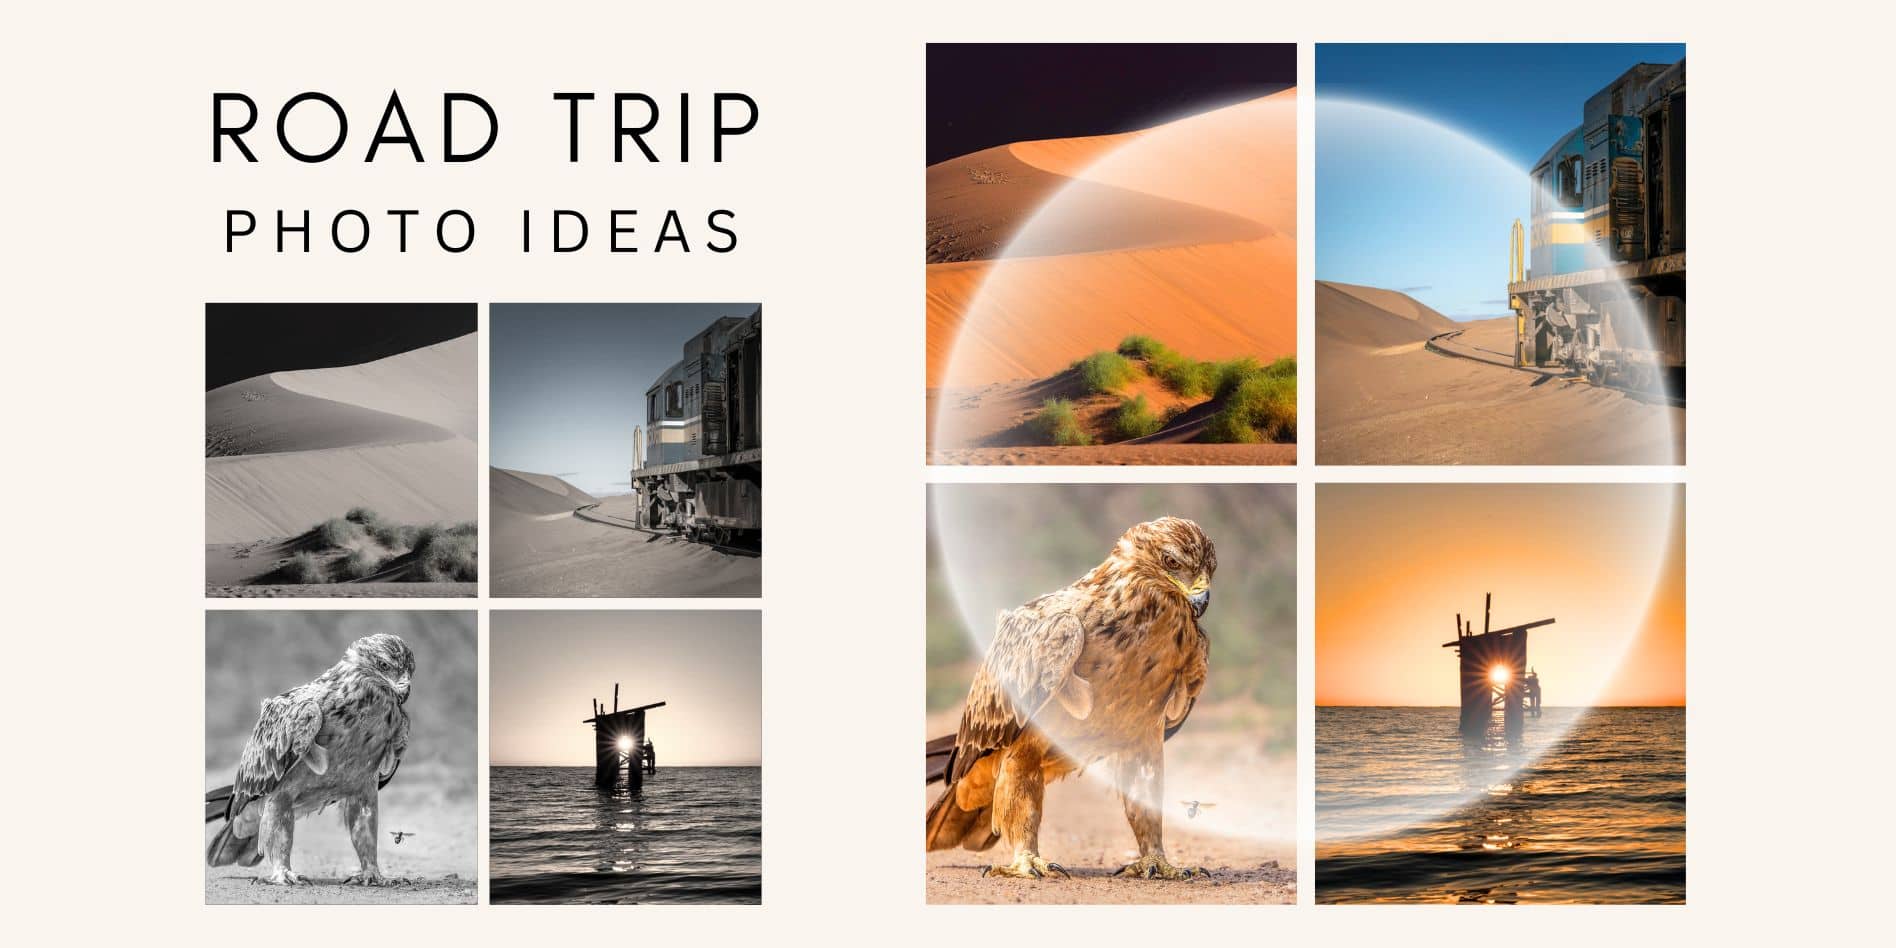
Imagine road trips as vibrant canvases, each waiting for you to capture its unique stories through your lens.
Since we hit the road in 2017, every trip has been packed with photo ops. Honestly, when you’re as snap-happy as we are, every road trip turns into a photography road trip!
Renowned publications, including Africa Geographic, have recognised us for our photographic expertise. Our work, like the award-winning wildlife shot in African Eagles, showcases the quality and impact of our photography.
Every turn and trail has brought us something special to frame—and believe me, we’ve taken quite a few turns!
For photographers, road trips are a treasure trove of endless opportunities to capture the open road, stunning landscapes, and one-of-a-kind moments.
Top Tips in This Post:
- Creative and practical tips for capturing landscapes and candid moments.
- Advice on using the right gear, inspired by our extensive road-tripping experience.
- Techniques to make the most of every photo opportunity on the road.
This guide will inspire you with numerous ideas for composing and capturing stunning road trip photos and equip you with essential tips and techniques to enhance your photography skills.
Every great photo begins with the right approach and ends with the right equipment. Check out our guide on road trip photography gear for detailed information on the equipment needed to capture your road trip photos.
Let’s dive into the world of roadtrip photography, where every turn brings a story to tell!”
🥜 Road Trip Photography Ideas in a Nutshell
Discover essential tips and creative techniques to transform your road trip photos from ordinary to extraordinary with a plethora of road trip picture ideas.
1. Road Trip Photo Ideas: Photography Rules
Master the basics of composition with rules like leading lines, the rule of thirds, and framing to enhance the impact of your photos.
2. Capturing Landscapes on Your Road Trip
Explore how to capture breathtaking landscapes, from iconic landmarks to hidden gems, ensuring your road trip photos are as memorable as the journey itself.
3. Road Trip Photo Ideas: Creative Compositions
Dive into advanced techniques like reflections, silhouettes, and intentional camera movement to add creativity and dynamic elements to your shots.
4. Road Trip Photo Ideas: Fun and Quirky
Inject fun and spontaneity into your travel album with quirky roadside attractions and playful posing shots.
5. Getting Ideas from Social Media
Utilize social media to inspire fresh angles and innovative ideas for capturing engaging and eye-catching road trip photos.
6. Night-Time Road Trip Photography
Learn the intricacies of night photography to capture stunning night skies and illuminated landscapes with techniques like long exposure and manual focus.
7. Capturing People on the Road
Focus on candid moments to capture authentic expressions and spontaneous interactions that tell a story.
8. Planning Your Road Trip Photography
Strategically plan your photography stops, scout scenic routes, and remain flexible to adapt to the unexpected for the best photographic outcomes.
9. Essential Road Trip Photography Gear
To handle any photographic situation on the road, equip yourself with the right gear, from the best cameras and lenses to essential accessories like tripods and ND filters.
10. Editing Your Road Trip Photography
Refine your photographs with basic adjustments and advanced editing techniques to bring out their best qualities and capture the essence of your road trip.
11. Sharing Your Road Trip Photos
Share your adventures and connect with a wider audience through various platforms like social media, photo books, and photography contests.
So, how do you take good pictures on the road? Let’s dive into that in detail.
1. Road Trip Photo Ideas: Photography Rules
Capturing unique shots during your road trip can set your photos apart and make your memories even more special.
Here’s a quick guide to essential techniques and settings for capturing stunning travel photos:
- 🛤️ Leading Lines: Use roads, pathways, or natural elements to guide the viewer’s eye through the scene.
- 🎯 Rule of Thirds: Position key elements along the grid lines to balance the composition.
- 🖼️ Frame Your Subject: Utilize elements like tree branches or windows to frame the main subject, reducing negative space.
- 🌅 Golden Hours: Aim for photos during sunrise or sunset to leverage the soft, warm light.
- 📖 Tell a Story: Capture various shots to convey the journey’s narrative—wide-angle views, close-ups, and unique details.
- 📸 Camera Settings: Adjust aperture, shutter speed, and ISO according to the scene to get the best out of your photos.
- ⚡ Break the Rules: Don’t be afraid to centre your subject or use unconventional angles for dramatic effect.
Here are some tried and tested photography techniques for road trips to help you achieve this:
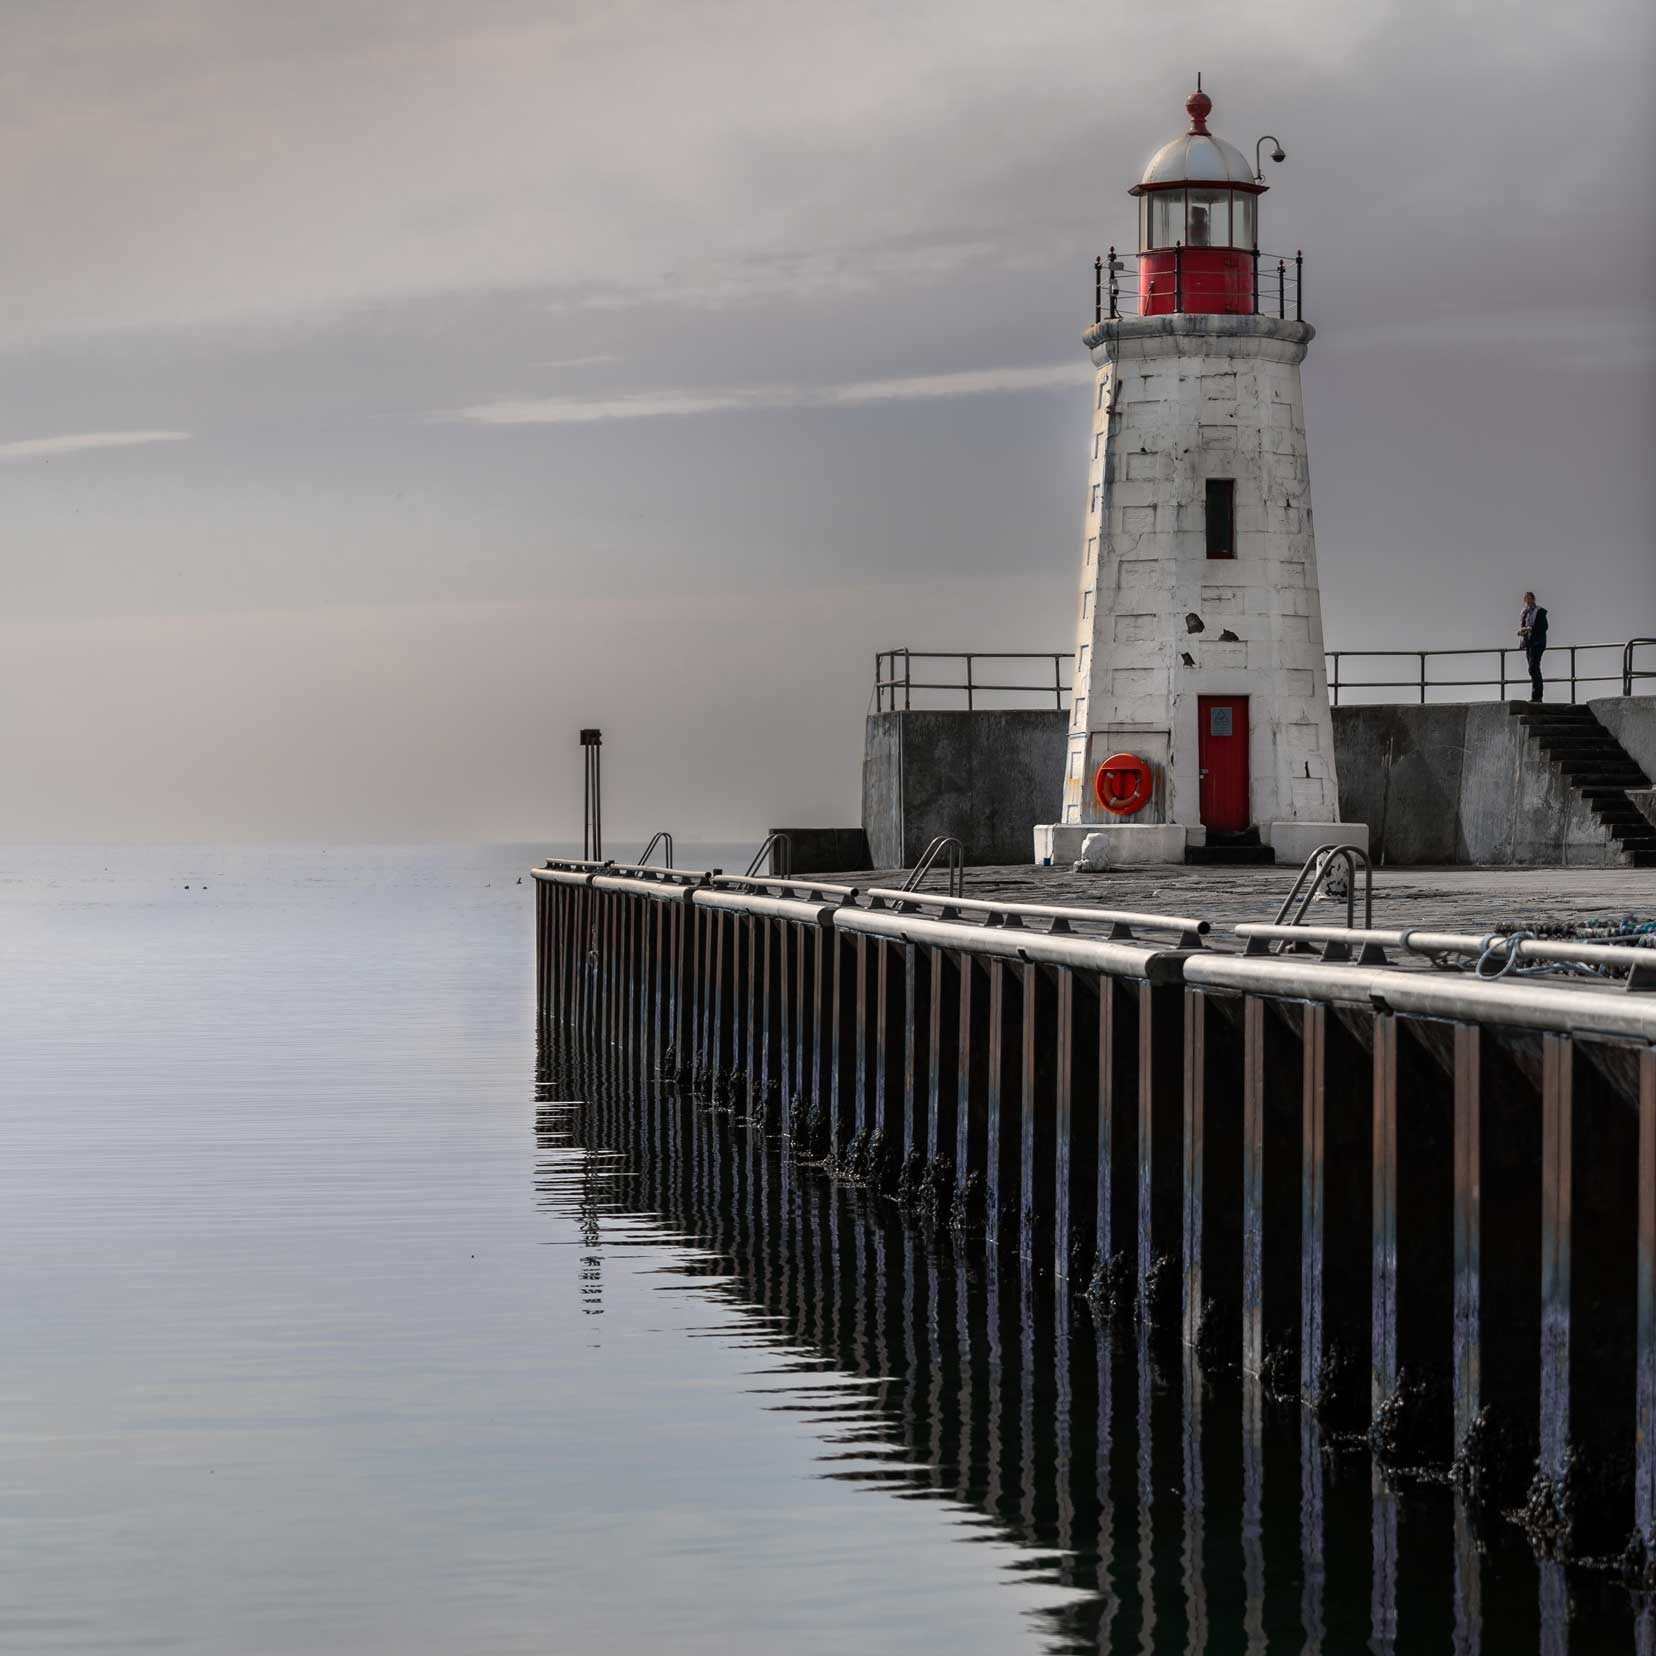
1. Leading Lines
Leading lines direct the viewer to a particular part of the image. They guide the viewer’s eye through the photo and can create a sense of depth and movement.
You can create leading lines using roads, pathways, rivers, fences, or natural elements. There’s no rule book, they can be wavy, angled or straight lines.
Position these lines to lead towards or away from your main subject, enhancing engagement and visual appeal. Having more than just the subject for the viewer to look at makes the image interesting.
Here’s an image I took of Lybster lighthouse in Scotland. The leading line of the jetty disappears out to the distant waters, just like the light from a lighthouse.
2. Rule of Thirds
The rule of thirds is a fundamental composition technique in photography. In this technique, the frame is divided into nine equal segments by two vertical and two horizontal lines.
By placing the main subjects or points of interest along these lines or at their intersections, you can create a more balanced and engaging photo.
For road trip photography, use the rule of thirds to position landmarks, horizon lines, or your vehicle in a way that naturally draws the viewer’s attention through the scene.
3. Frame your Subject
If you want the feeling of space, you can try shooting with big skies to reflect this. However, an empty sky is sometimes referred to as negative space; nothing is filling it, and therefore, nothing of interest much of the time.
If you want to avoid this, frame your image. This will minimise negative space. You could use a tree branch, a car window, or anything else.
Framing can be visually attractive if it doesn’t overtake the subject for the eye’s attention.
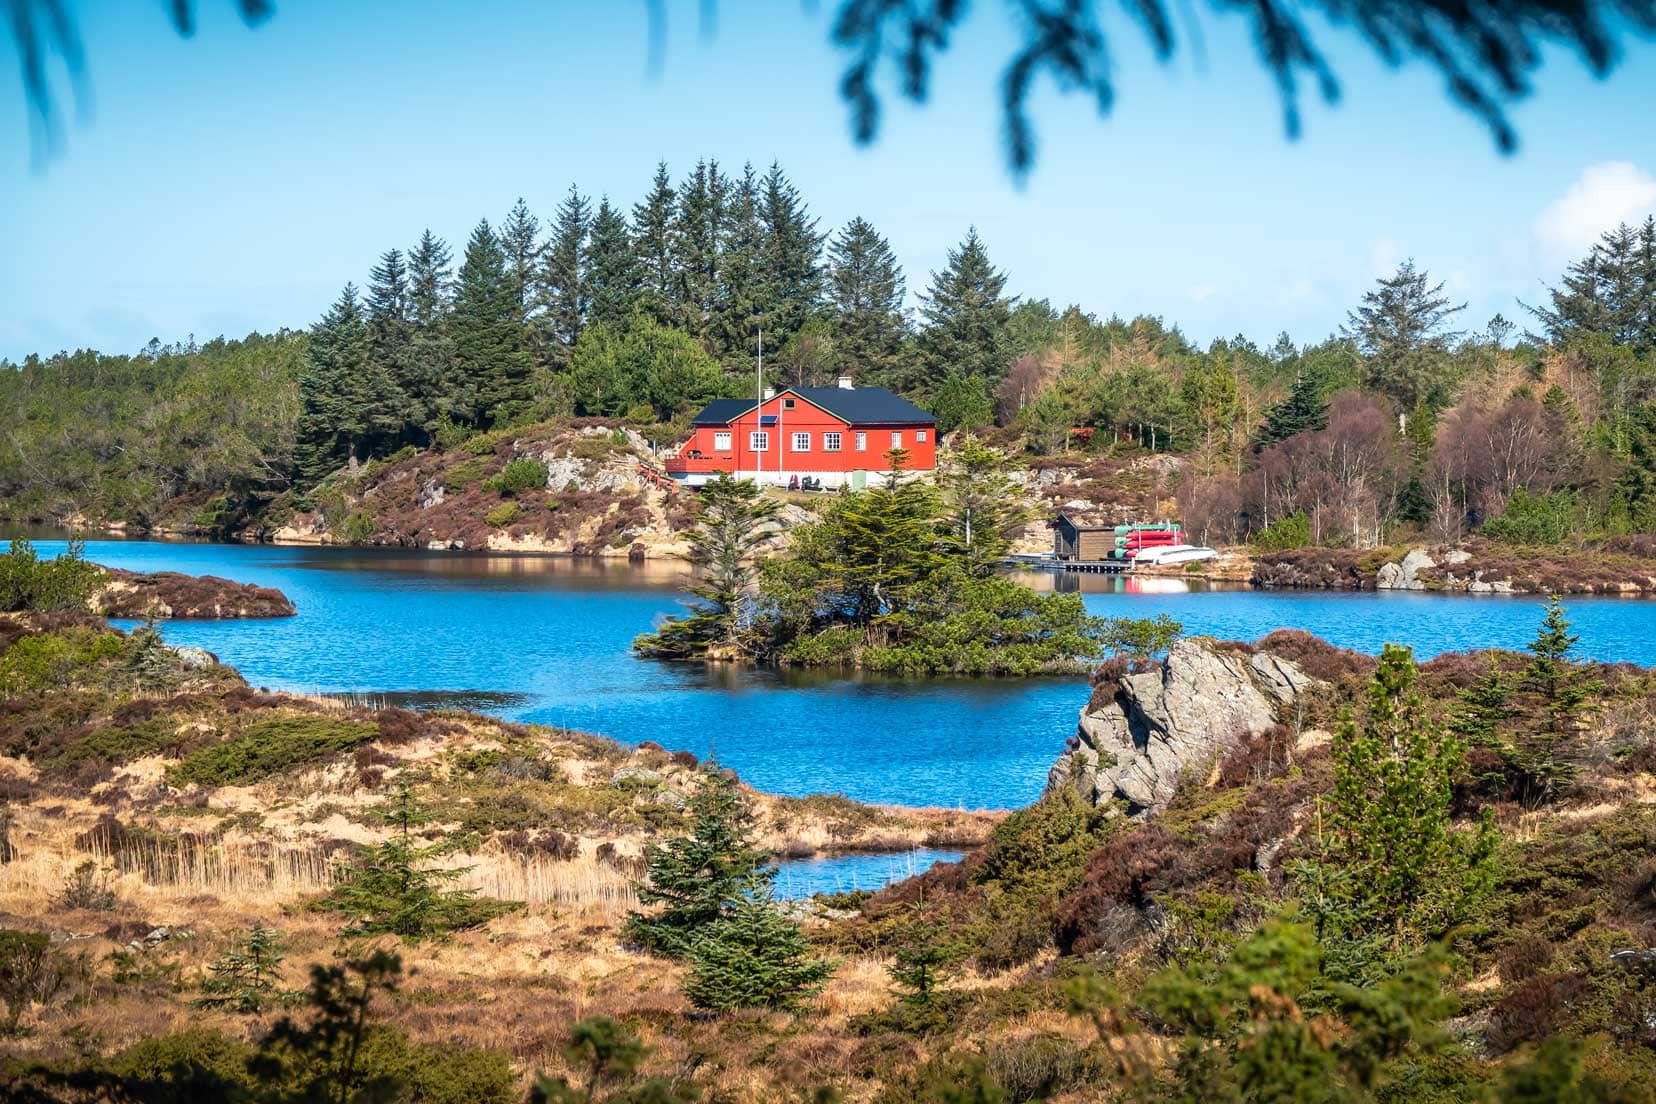

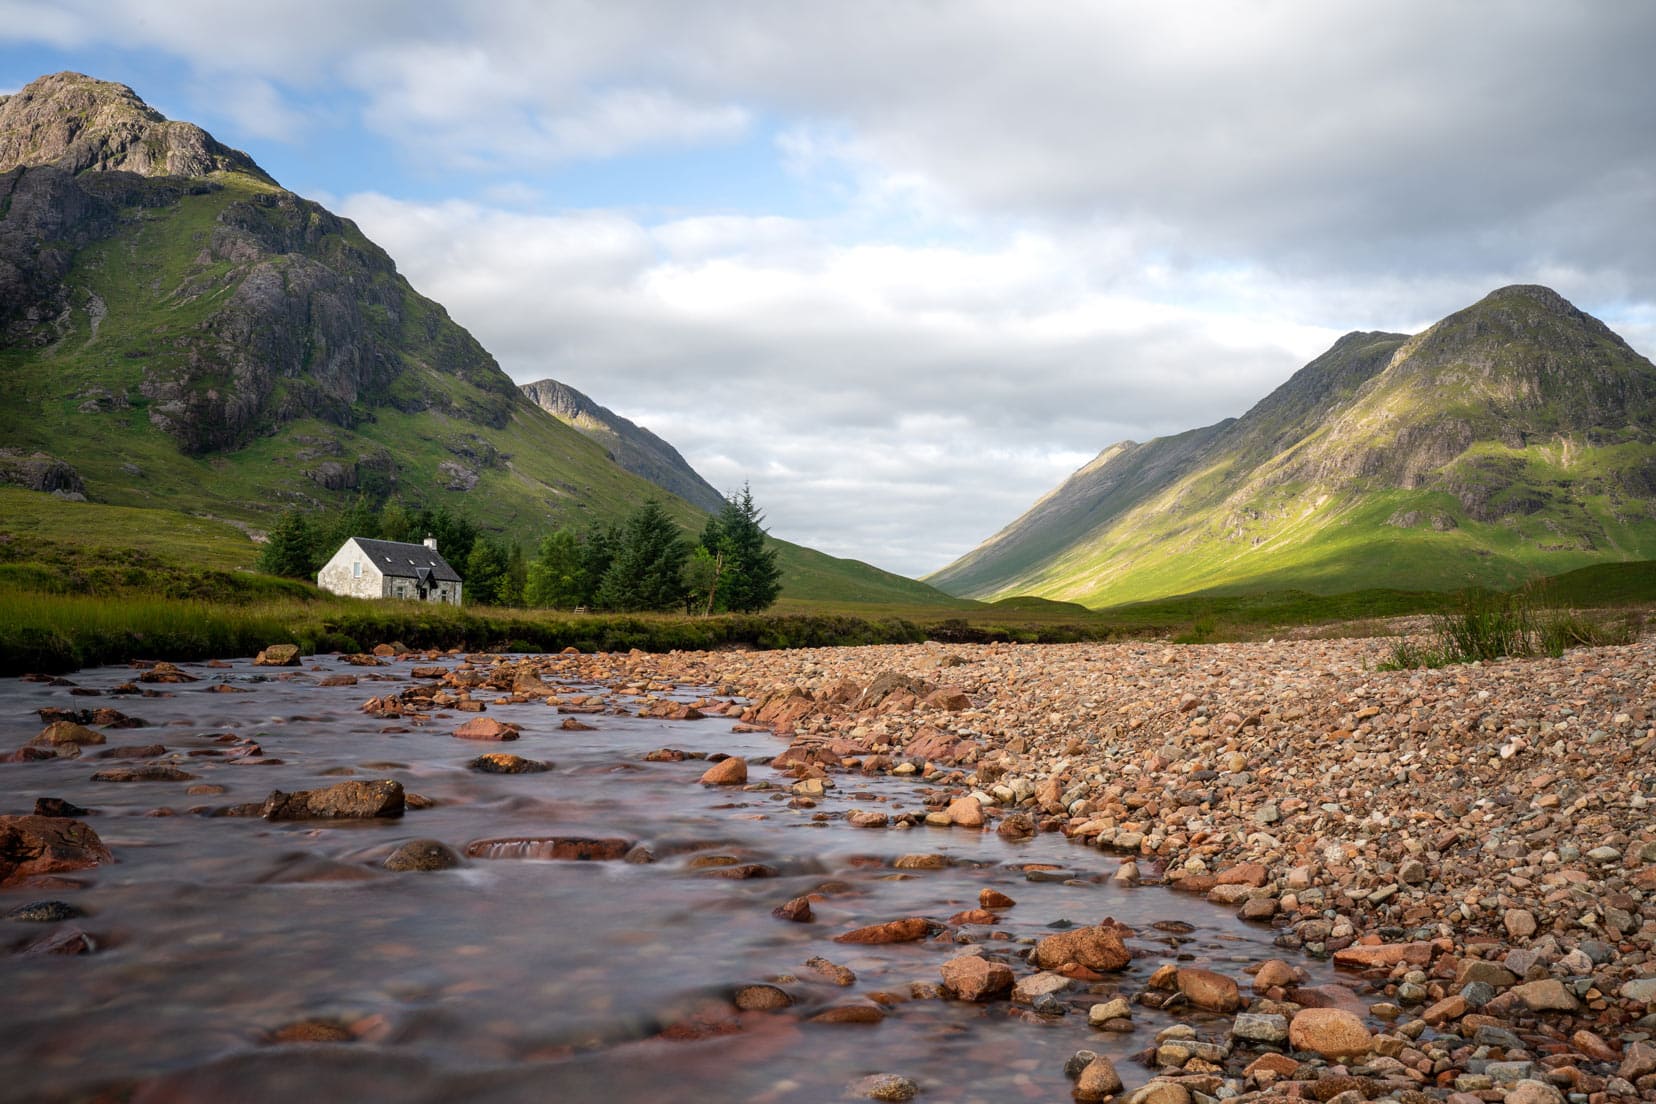
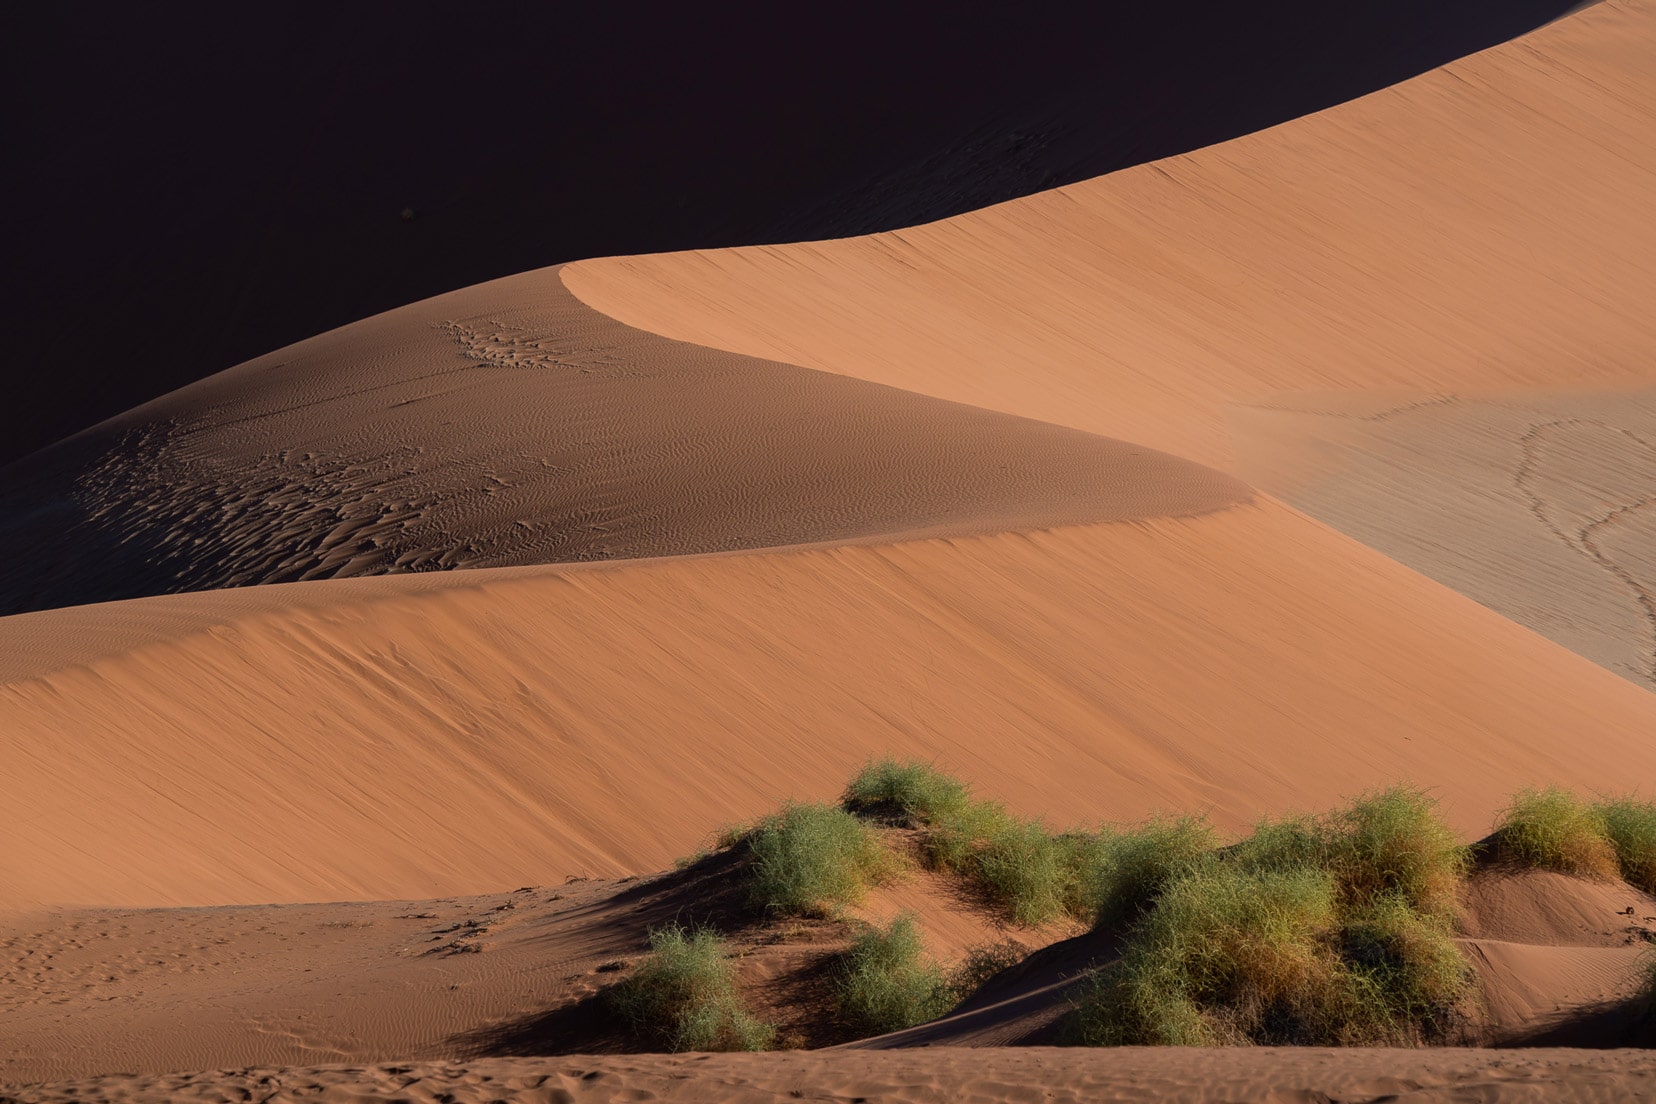
4. Embrace the Golden Hours
The golden hours—shortly after sunrise and before sunset—offer the best natural lighting for photography. The soft, warm light creates beautiful shadows and highlights, enhancing the overall look of your photos.
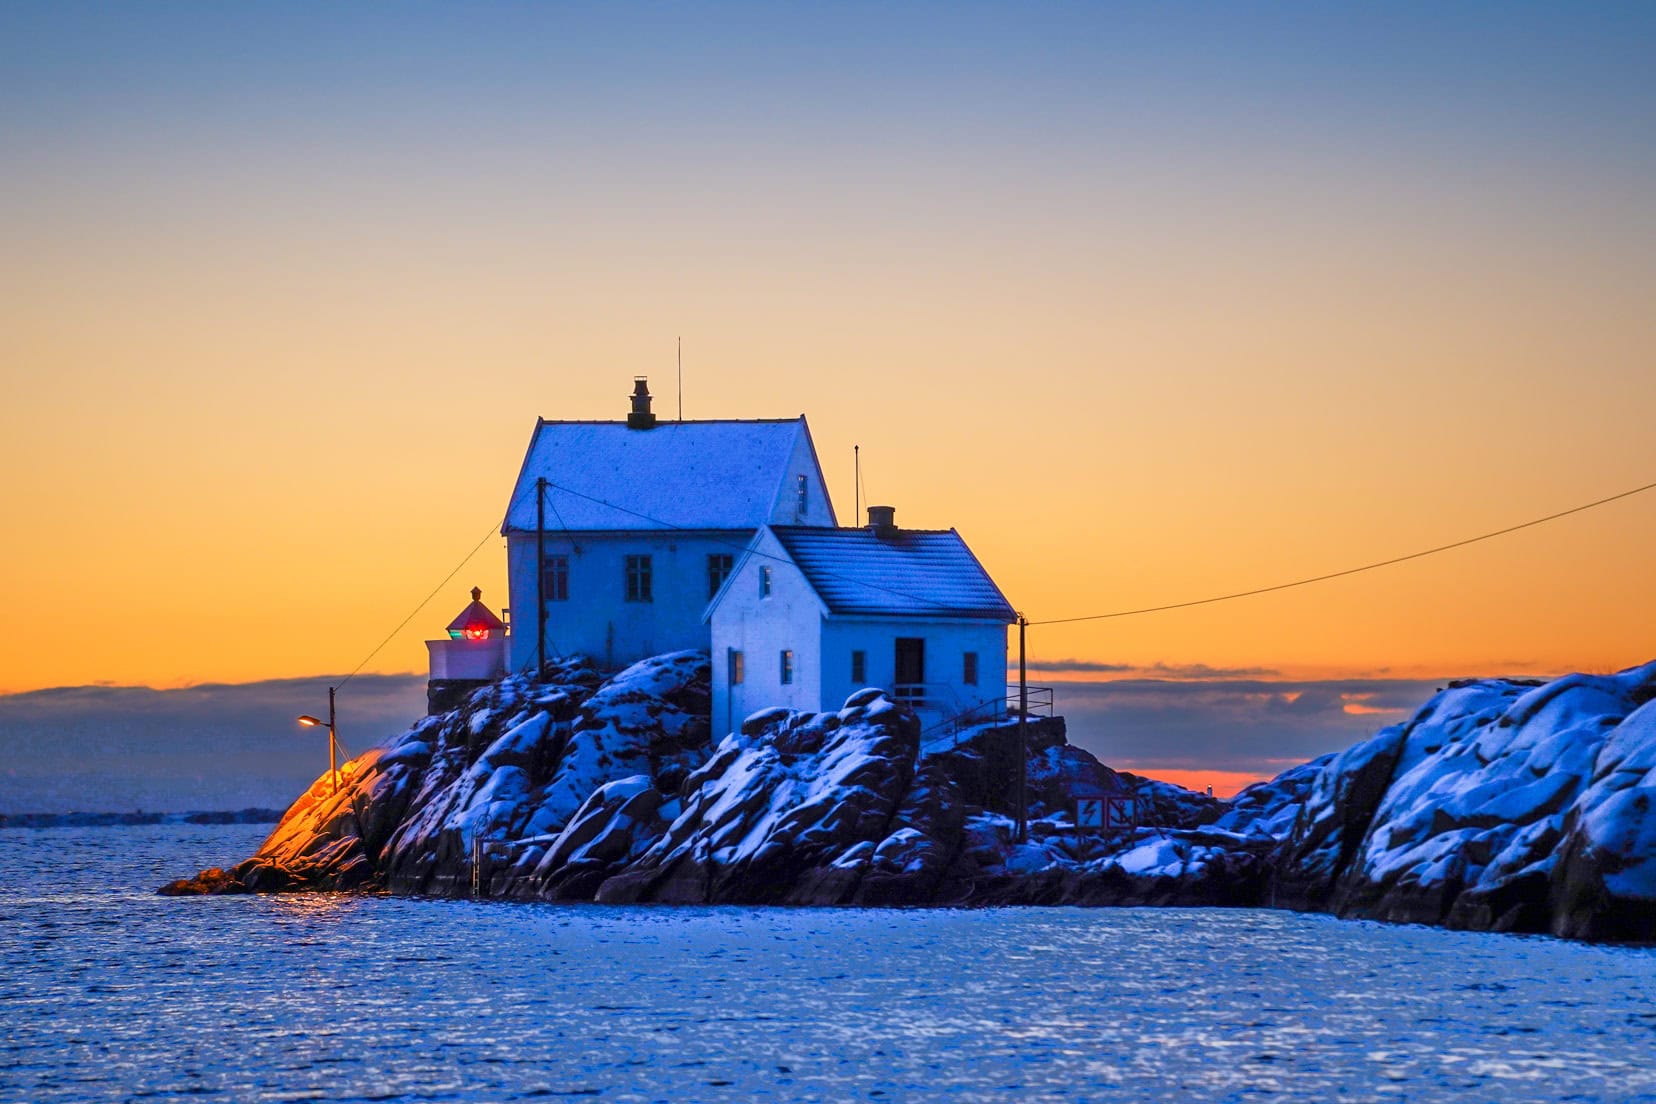
Having an interesting subject in the foreground with a beautiful background makes for a compelling photo.
We lived in Norway, in the traditional village of Skudeneshavn on the west coast, and I captured this sunrise over the village’s snow-covered lighthouse, Vikholmen.
Ideally, plan your location where you want to shoot from and arrive with time to spare.
5. Tell a Story
Every photo you take should contribute to the story of your journey. Think about how each image fits into the larger narrative of your road trip.
Whether it’s the excitement of setting off, the serenity of a quiet morning, or the joy of discovering a new place, your photos should convey the emotions and experiences of your adventure.
Try capturing a wide-angle shot of a scene, a close-up shot, and then capturing something unique to that location or event.
6. Camera Settings for Road Trip Photography: Quick Guide
Aperture Settings
- Landscapes: Use a small aperture (high f-number) to ensure everything from the foreground to the background is in focus.
- Portraits: A large aperture (low f-number) will blur the background and highlight your subject.
Shutter Speed
- Capturing Motion: Use a faster shutter speed to freeze fast-moving subjects, such as wildlife or passing vehicles.
- Creating Motion Blur: Use a slower shutter speed to capture the movement of clouds or streams.
ISO Settings
- Bright Conditions: Keep ISO low (100 or 200) to minimize noise.
- Low Light: Increase ISO as needed to capture clear images without a flash.
7. Breaking The Rules
While following photographic rules can greatly enhance your images, knowing when to break them can create stunning effects.
For example, placing your subject directly in the centre can emphasize its importance or symmetry, adding a dramatic impact.
Don’t hesitate to experiment with unconventional compositions or angles, especially when they can more powerfully convey a story or emotion. Remember, the most memorable photos often come from bending the rules!
2. Capturing Landscapes on Your Road Trip
Capture Iconic Landmarks and Scenic Vistas on Your Road Trip
Scenic Viewpoints
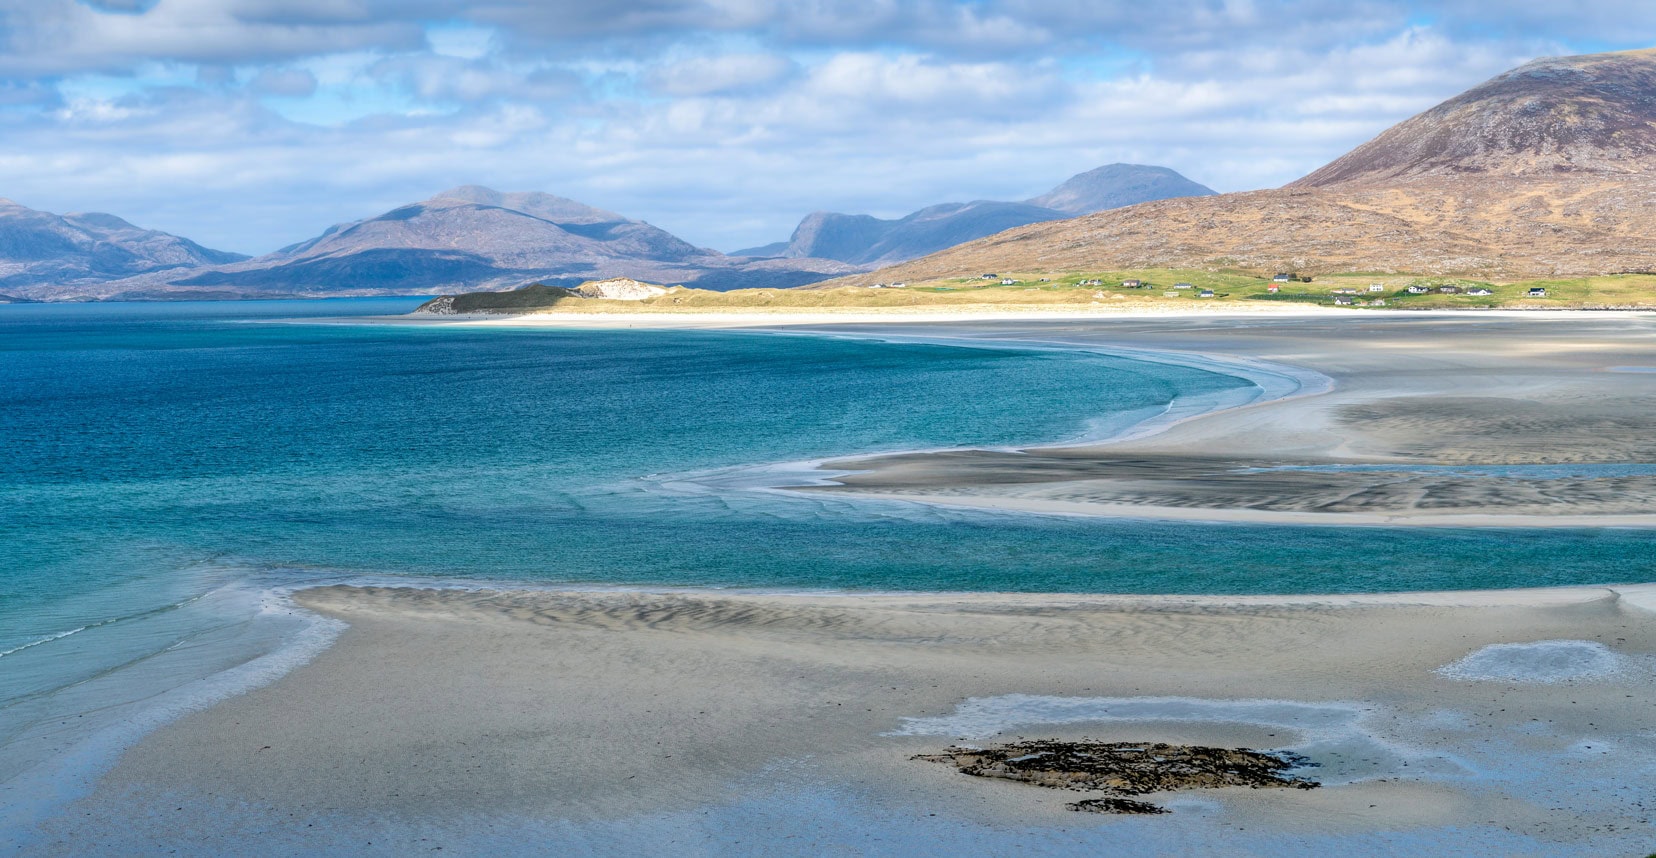
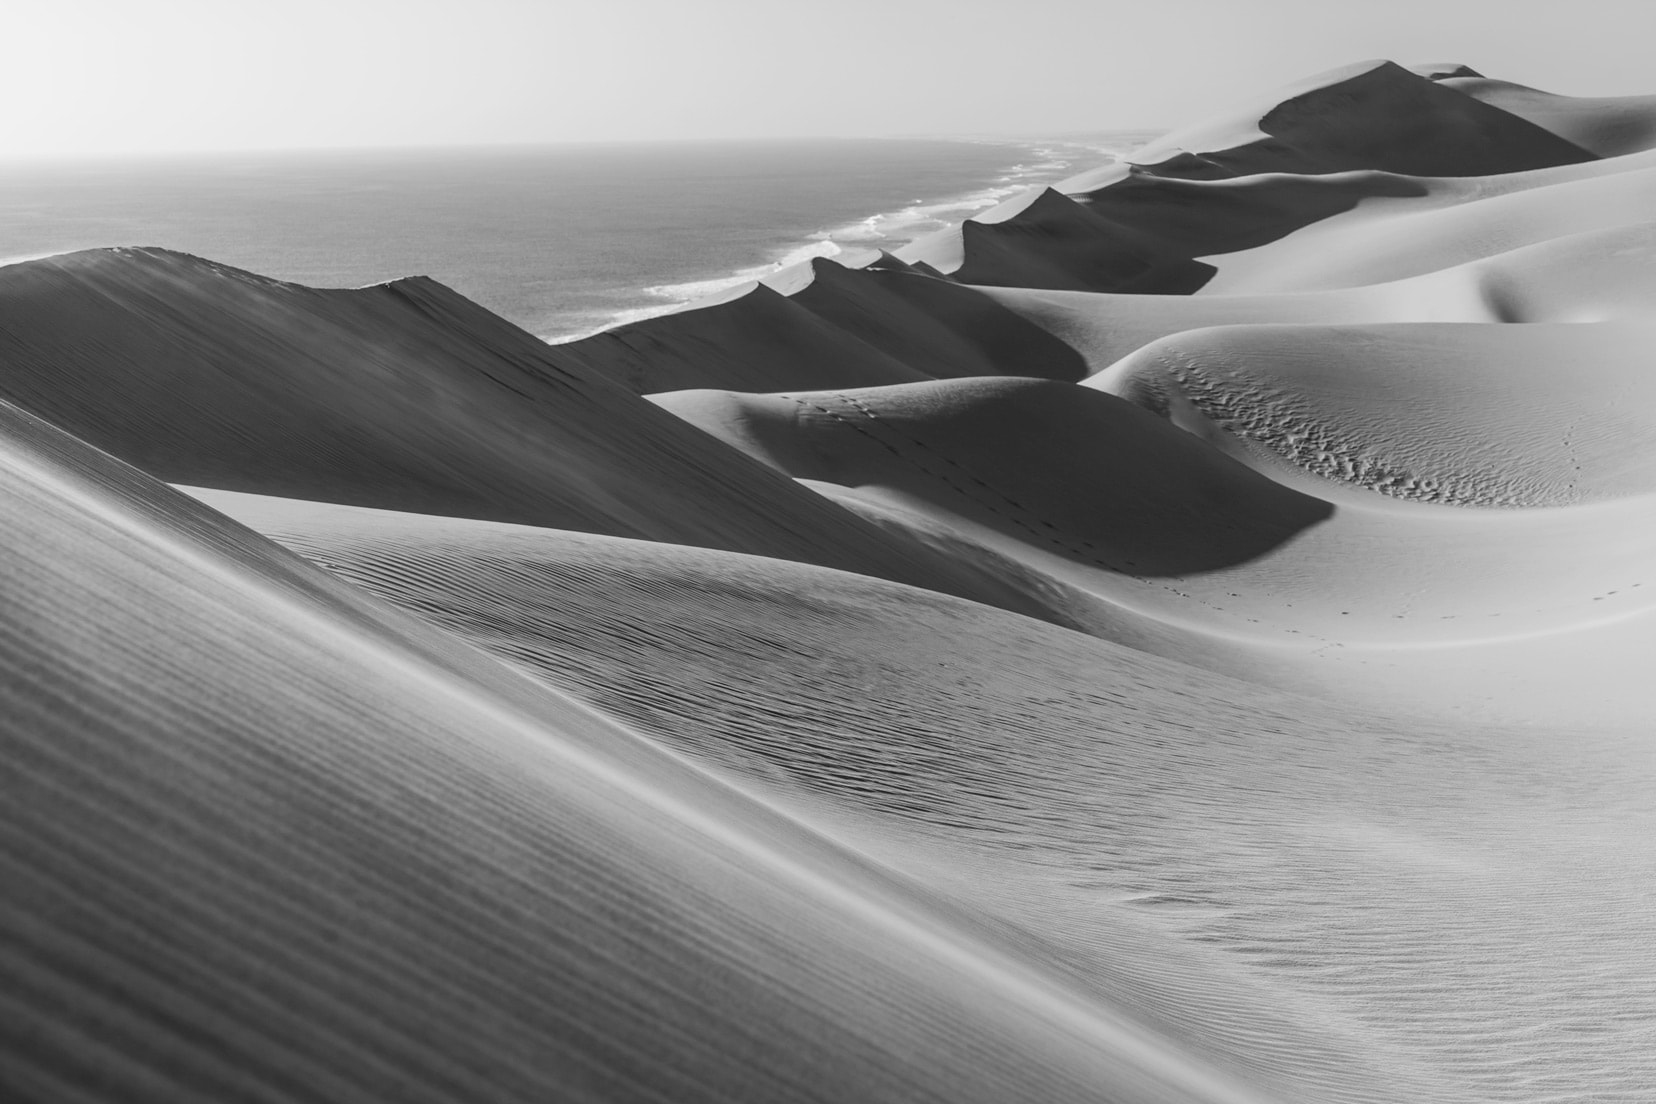
Pull over at scenic viewpoints and capture the expansive views. Coastal cliffs, mountain ranges, and vast deserts offer breathtaking backdrops.
Consider using panoramic shots to capture the full beauty of these landscapes. This image below is a five-image ‘panorama’ photo stitched together as a final image in Lightroom.
Off-The-Beaten Track Locations
Search for lesser-known spots that could offer some unique photo opportunities. Researching and talking to locals can help you find these special places.
Famous Landmarks
Snap the well-known landmarks along your route, but think about doing it differently. These iconic sites make for impressive photos but try to capture something different from the standard image.
The challenge will require thinking about perspectives, light, movement, composition, reflections and introducing people to draw a laugh.
3. Road Trip Photo Ideas: Creative Compositions
When the landscape alone doesn’t capture the magic, it’s time to think outside the box. Here are some creative composition techniques to transform even the most mundane scenes into captivating photographic art:
- Reflections
- Silhouettes
- Intentional Camera Movement
- Experiment with angles and perspectives
- Play with Light and Shadow
- Action Shots
- Focus on Details
- Themed Photos
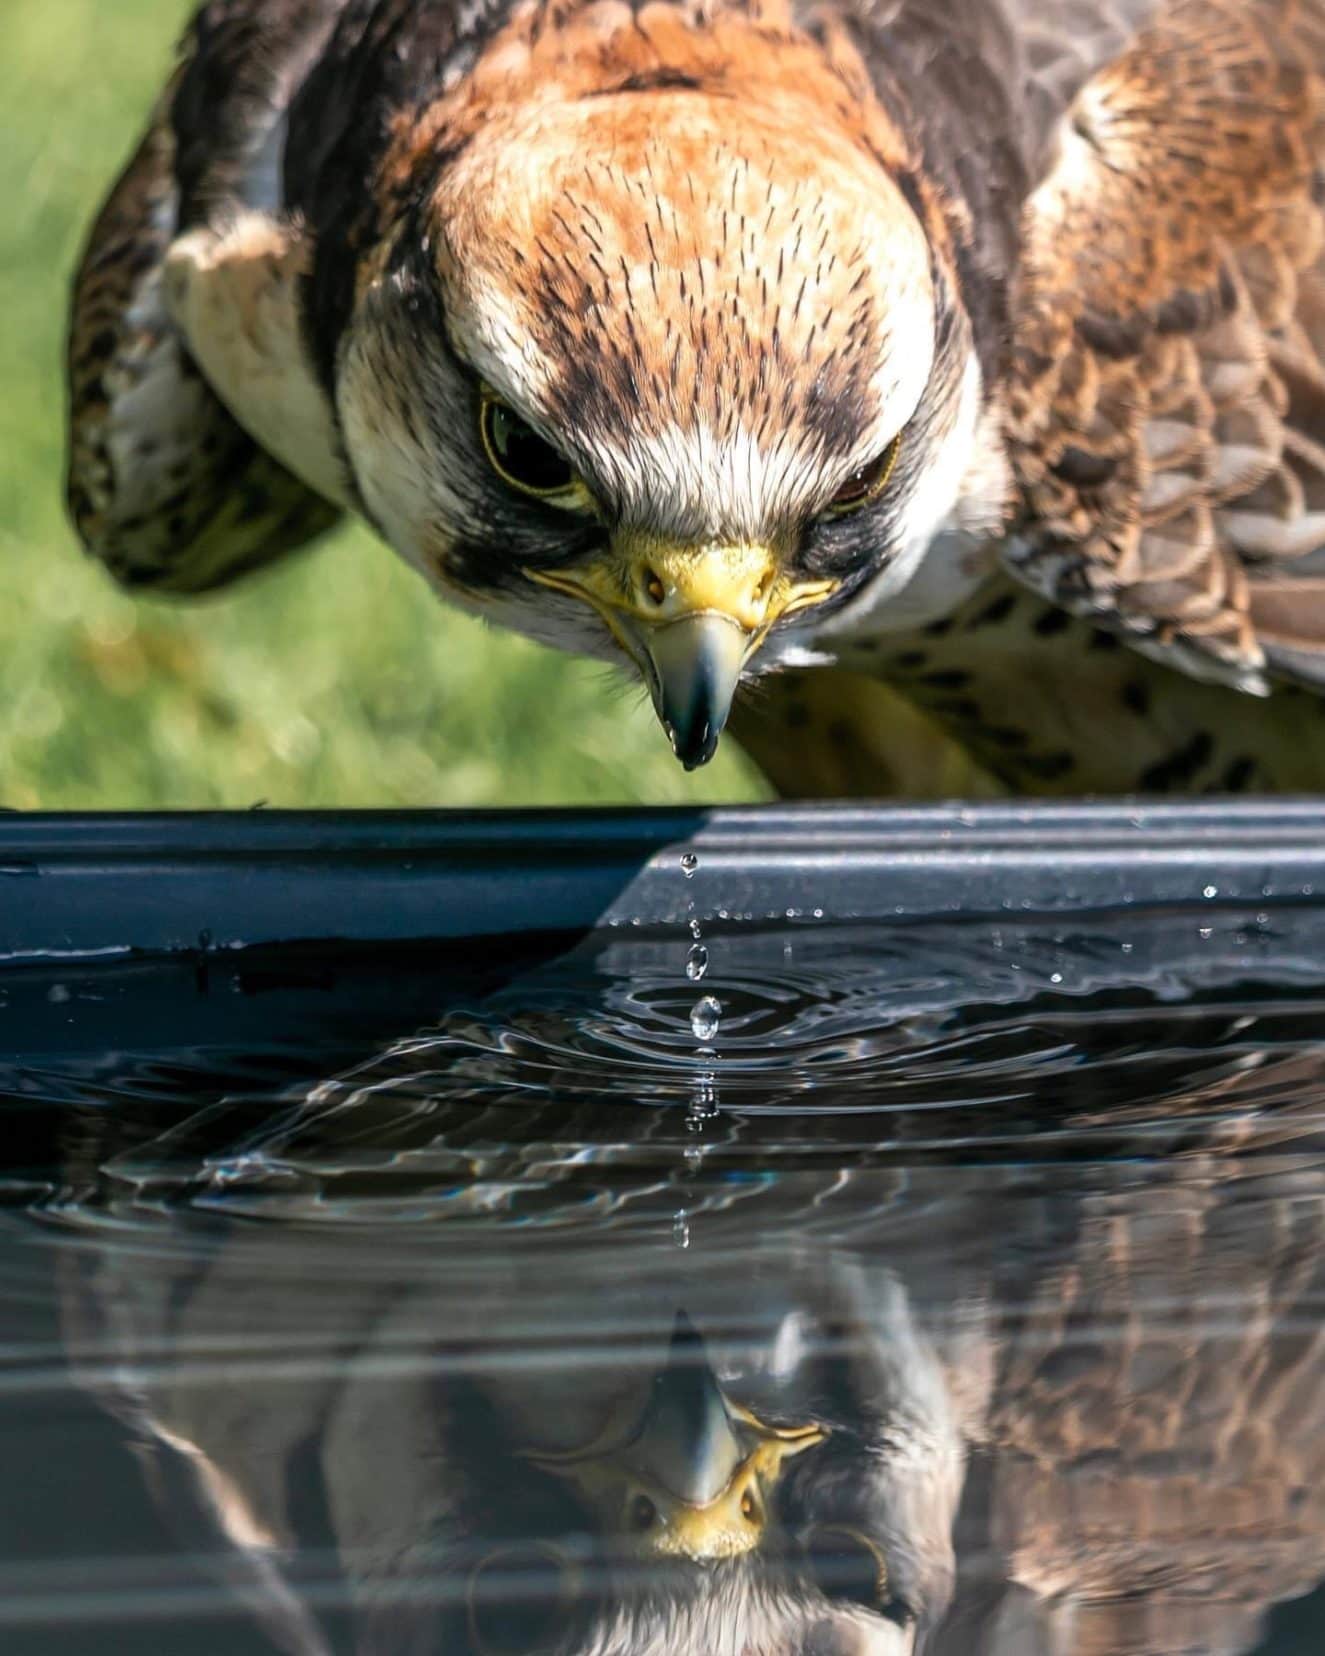
1. Reflections
Find reflections in lakes, puddles, or mirrors to add a surreal, artistic touch to your photos.
And you don’t always have to search for water to create these special shots. Get creative and make your own puddle from a water bottle.
We visited Dunrobin Castle in Scotland to view these tethered birds of prey, which was interesting, but the shot I was chasing needed to be different.
I waited until the bird started drinking before snapping this shot.
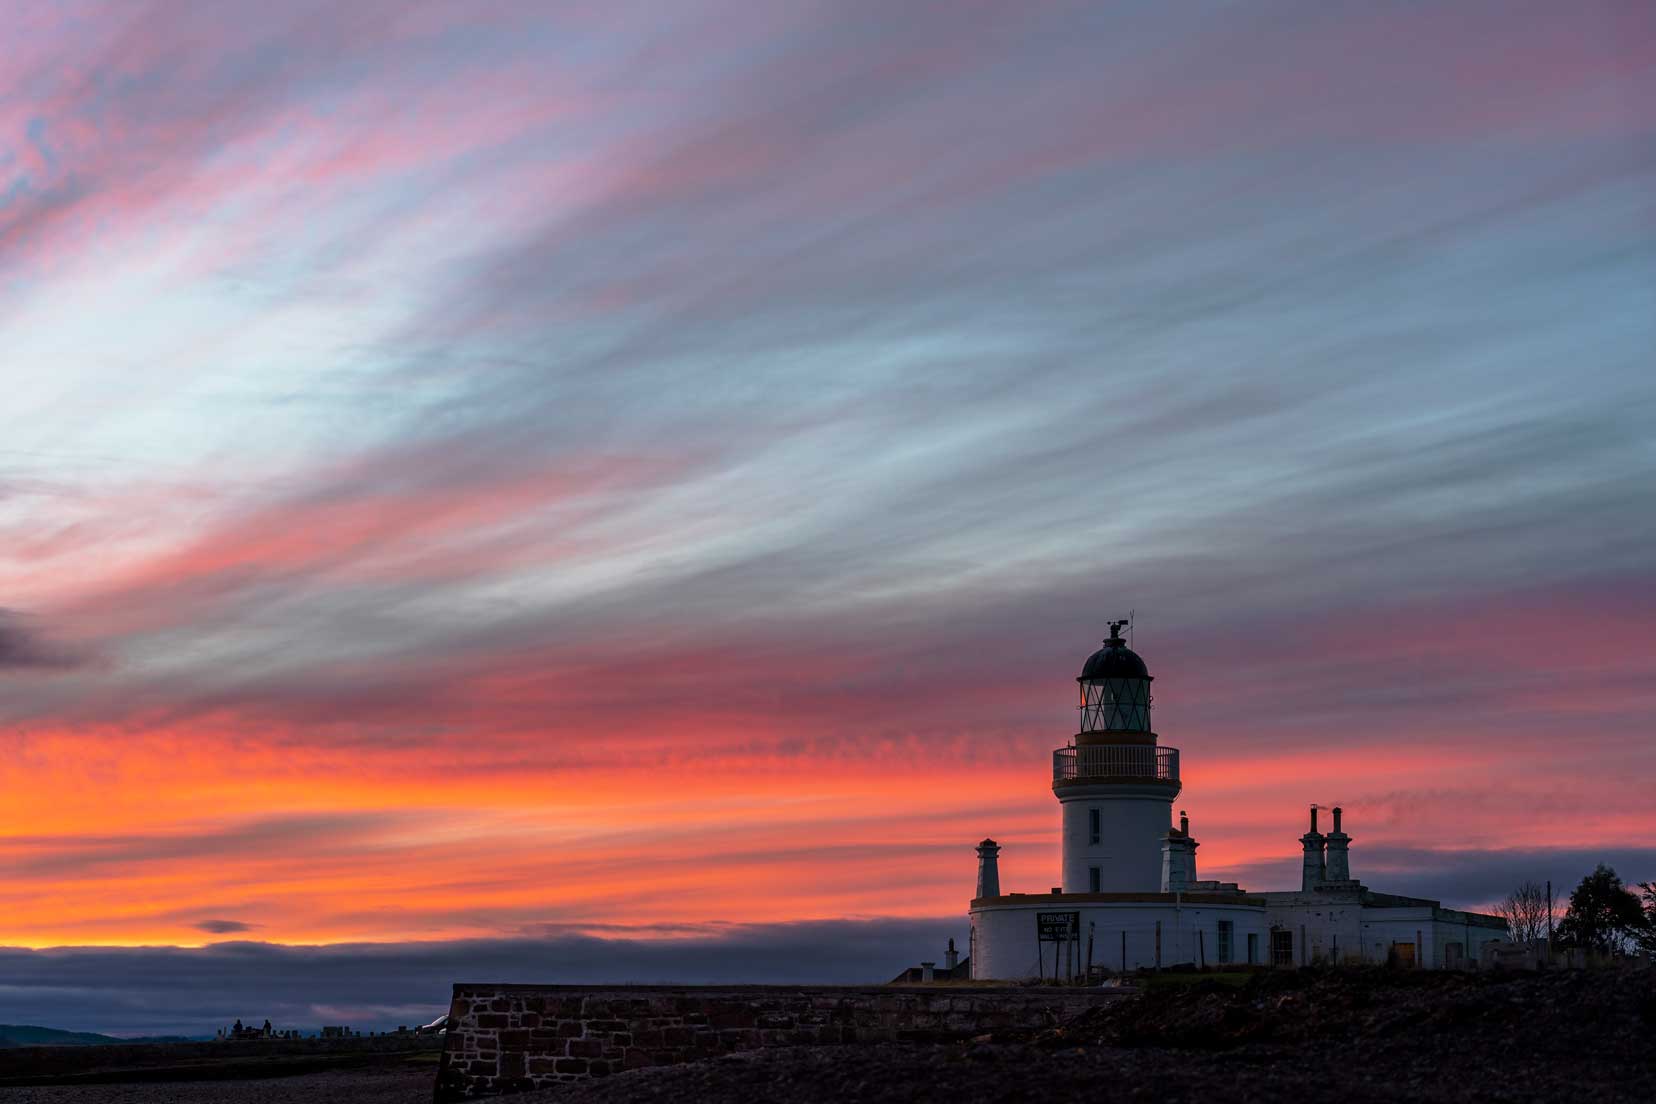
2. Silhouettes
Shoot silhouettes against dramatic sunsets or sunrises. Silhouettes add a sense of mystery and highlight shapes and forms. For me, a good silhouette shot needs to account for:
- Time of day: the quality of light plays a big part in the ‘feeling’ an image portrays. Harsh vs soft light is very different.
- Subject versus environment: The subject should fit the environment so the story you are telling through the image is clear.
- Sky: a moody image might better suit an overcast and darker sky.
This statue of a human figure gazes out to a Scottish loch. The subject is off-centre, shot at the waterline, devoid of colour, with a brooding sky.
For me, it portrays a feeling of loneliness.

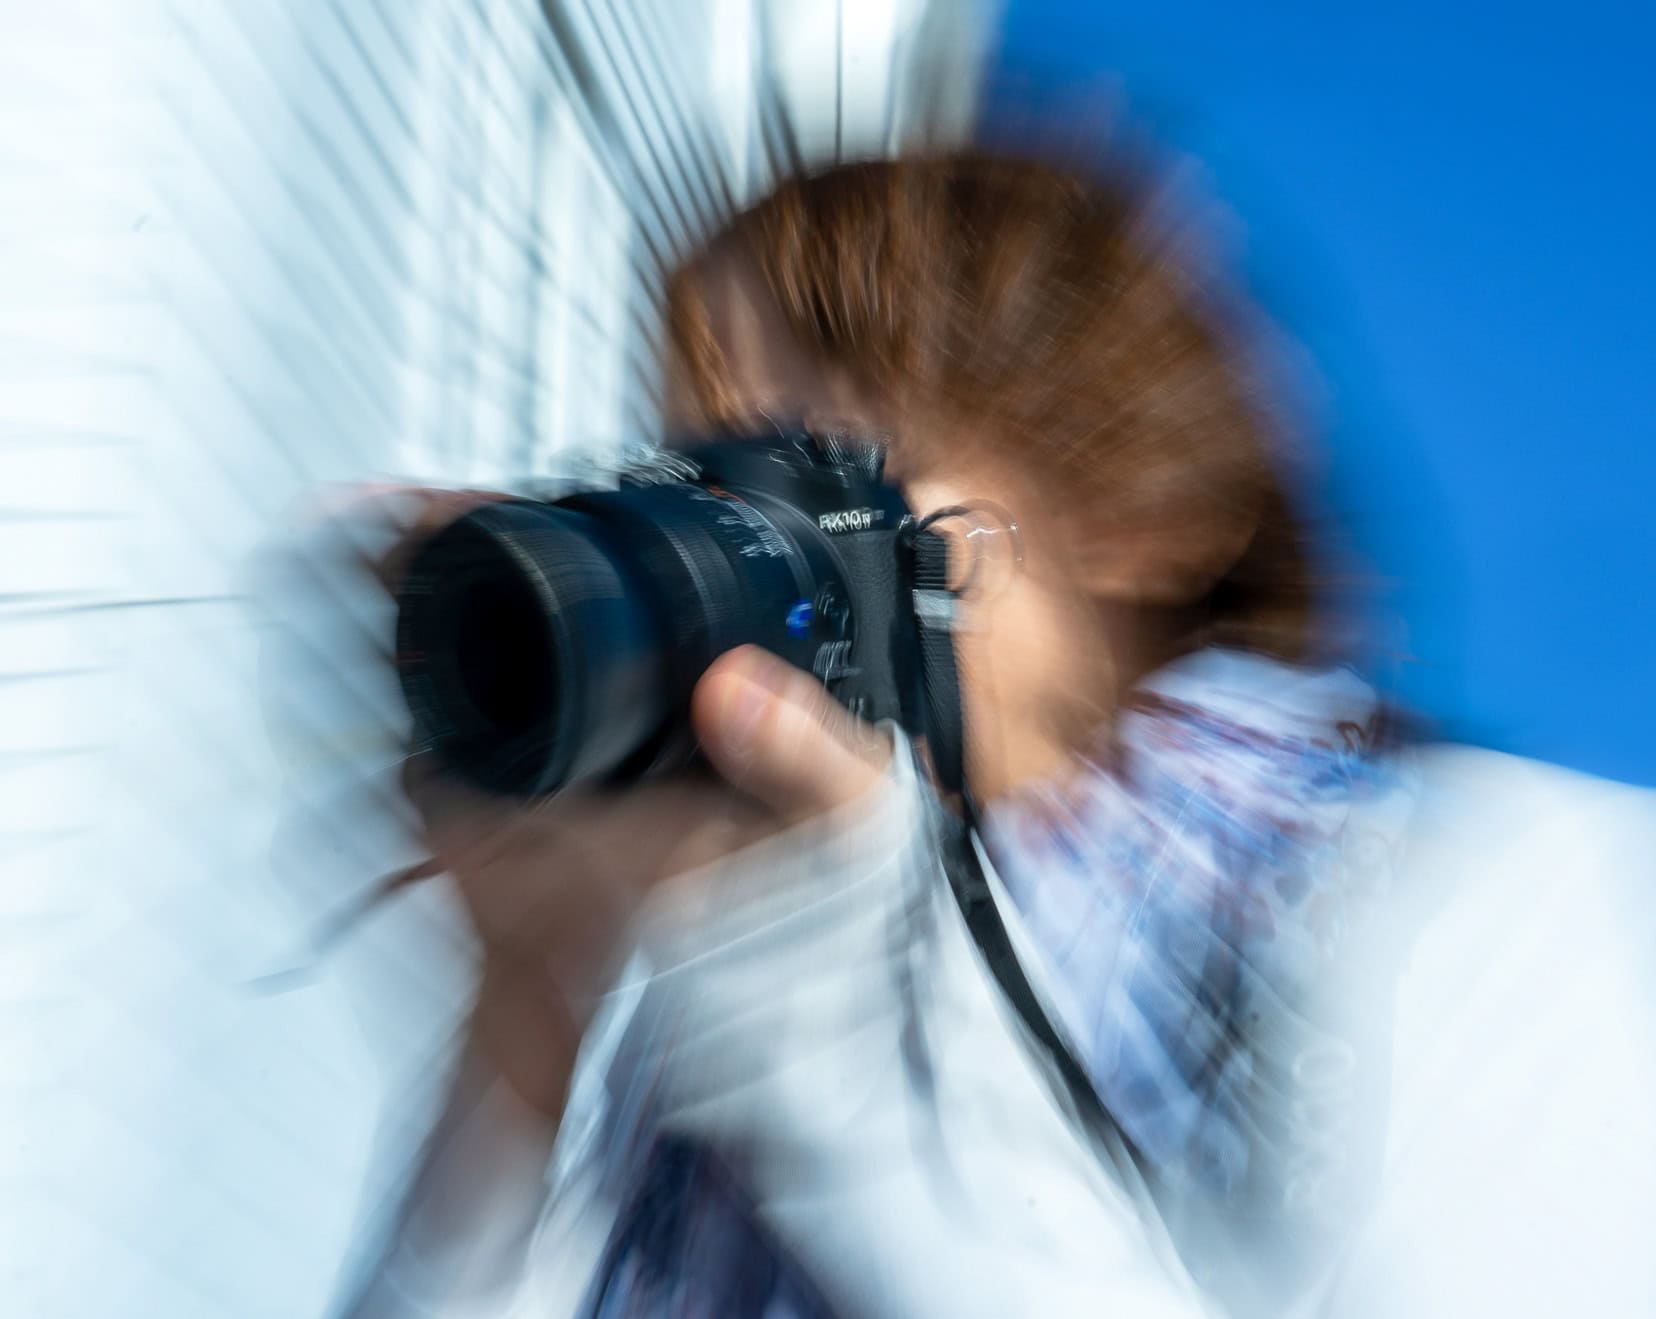
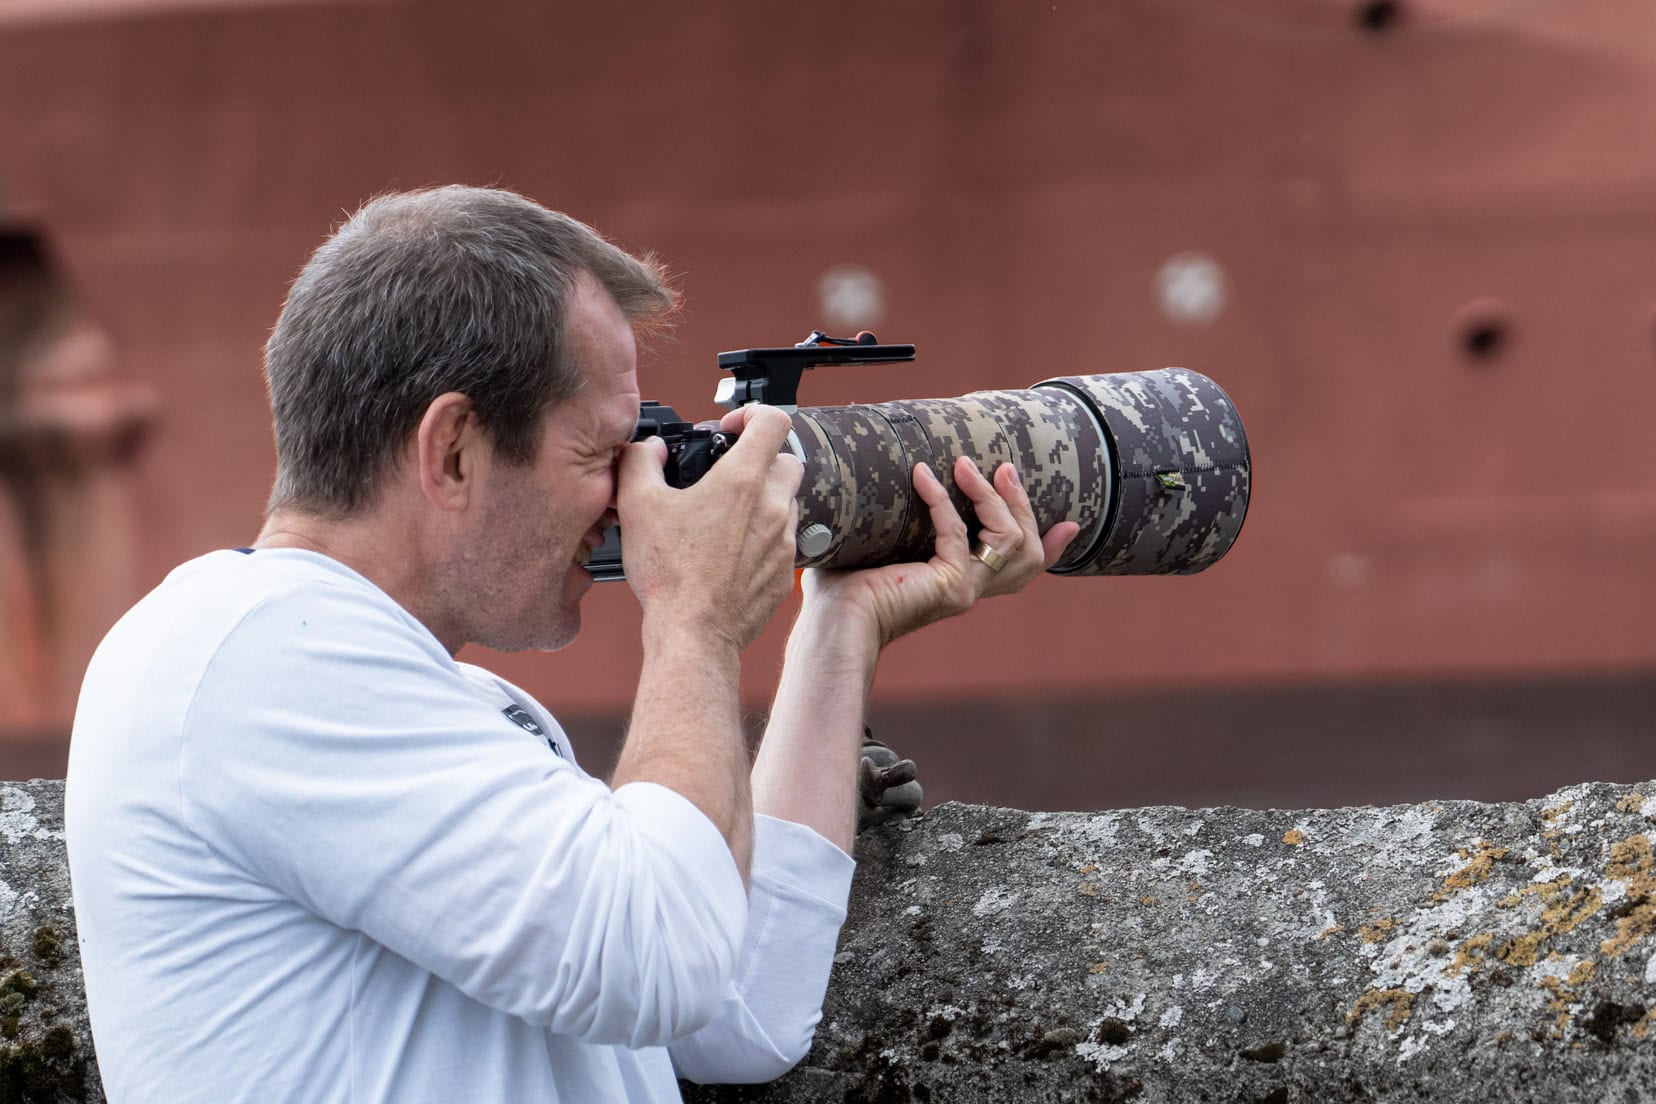
3. Intentional Camera Movement
Intentional camera movement (ICM) is a fancy-sounding term that means exactly that. You intentionally introduce movement so that the image reflects this movement.
This could be induced by moving the camera or the lens. I held the camera steady in the image below and zoomed in using the lens. My focal point is Shelley’s camera.
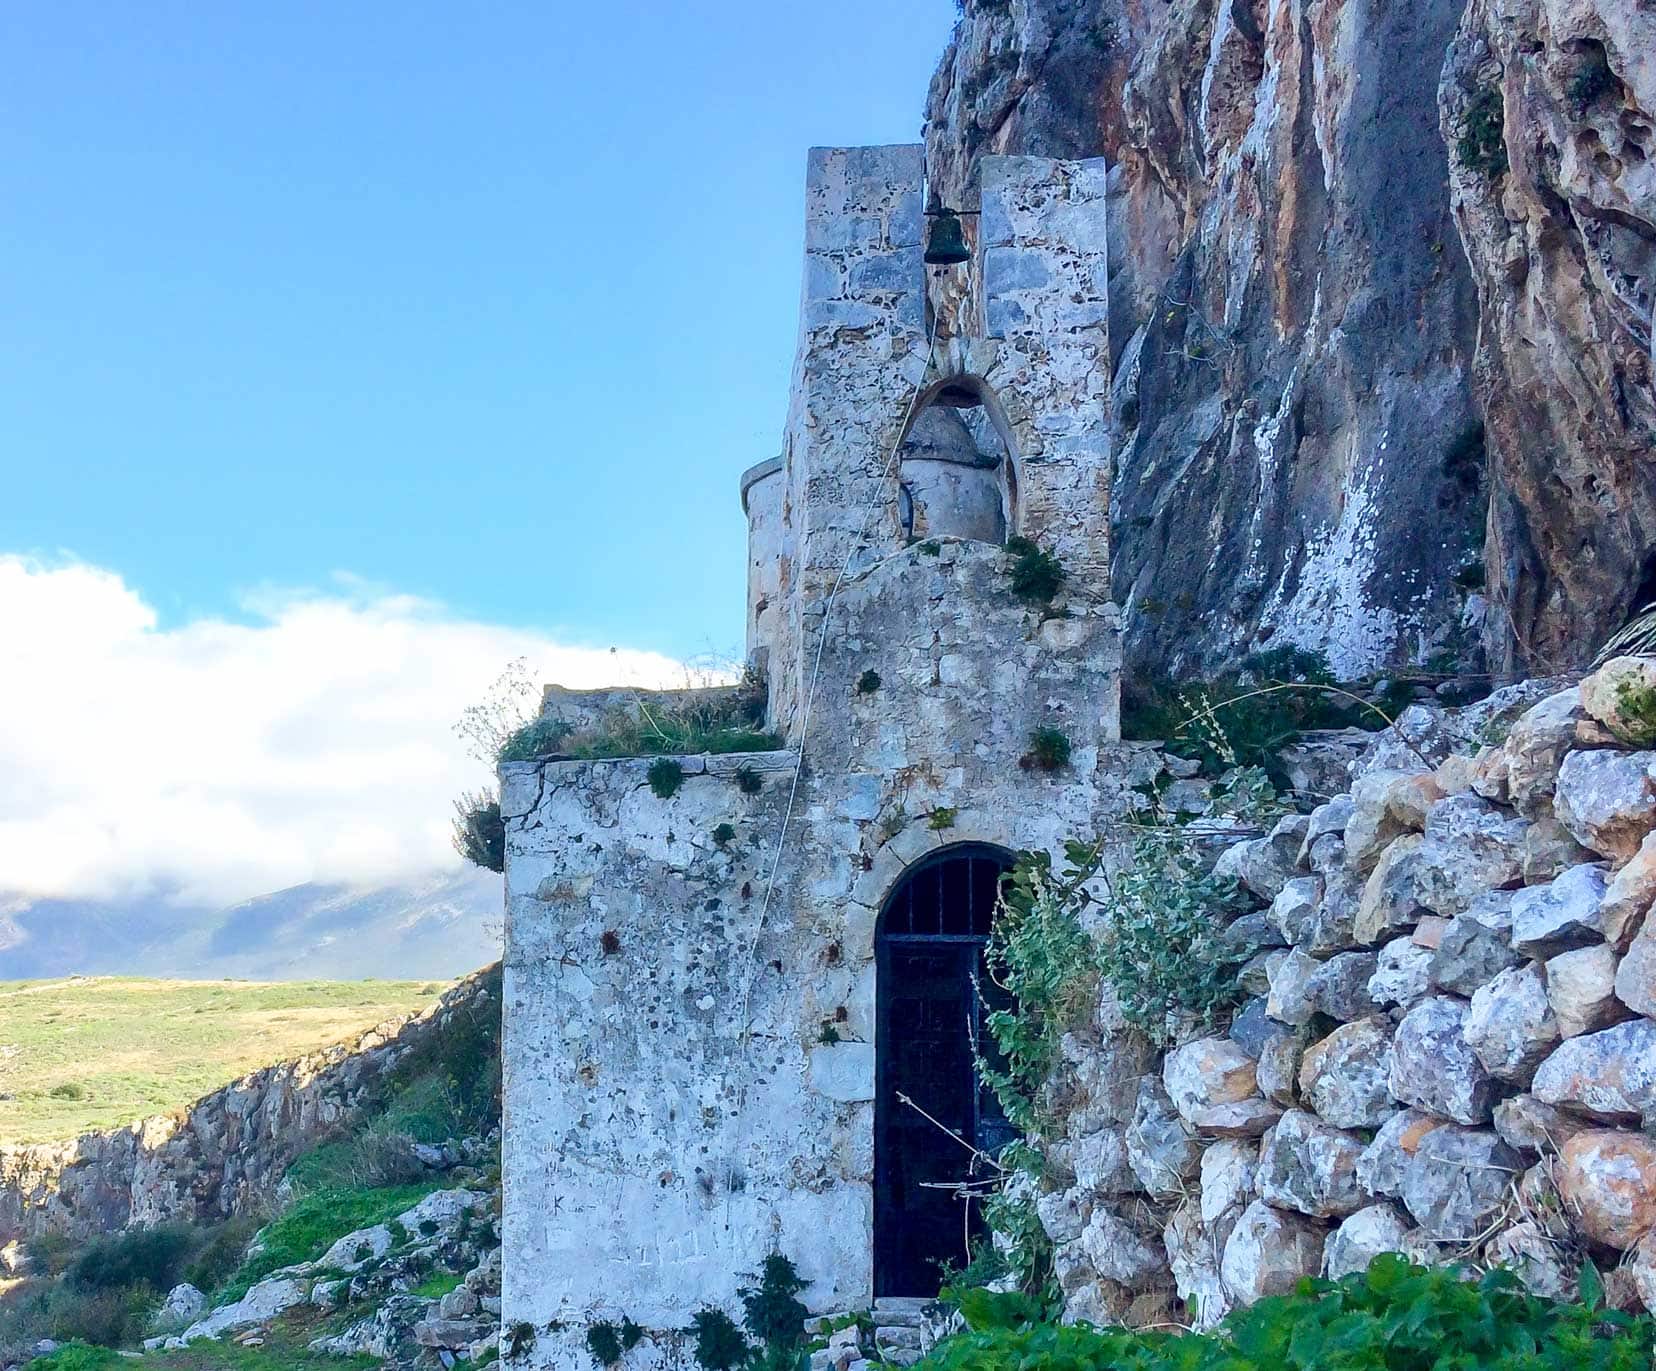
4. Experiment with Angles and Perspectives
Don’t be afraid to get creative with your angles and perspectives.
Try shooting from different angles to make your shots more interesting.
Placing a subject off-centre makes the scene feel unbalanced and interesting; sometimes, symmetry works well.
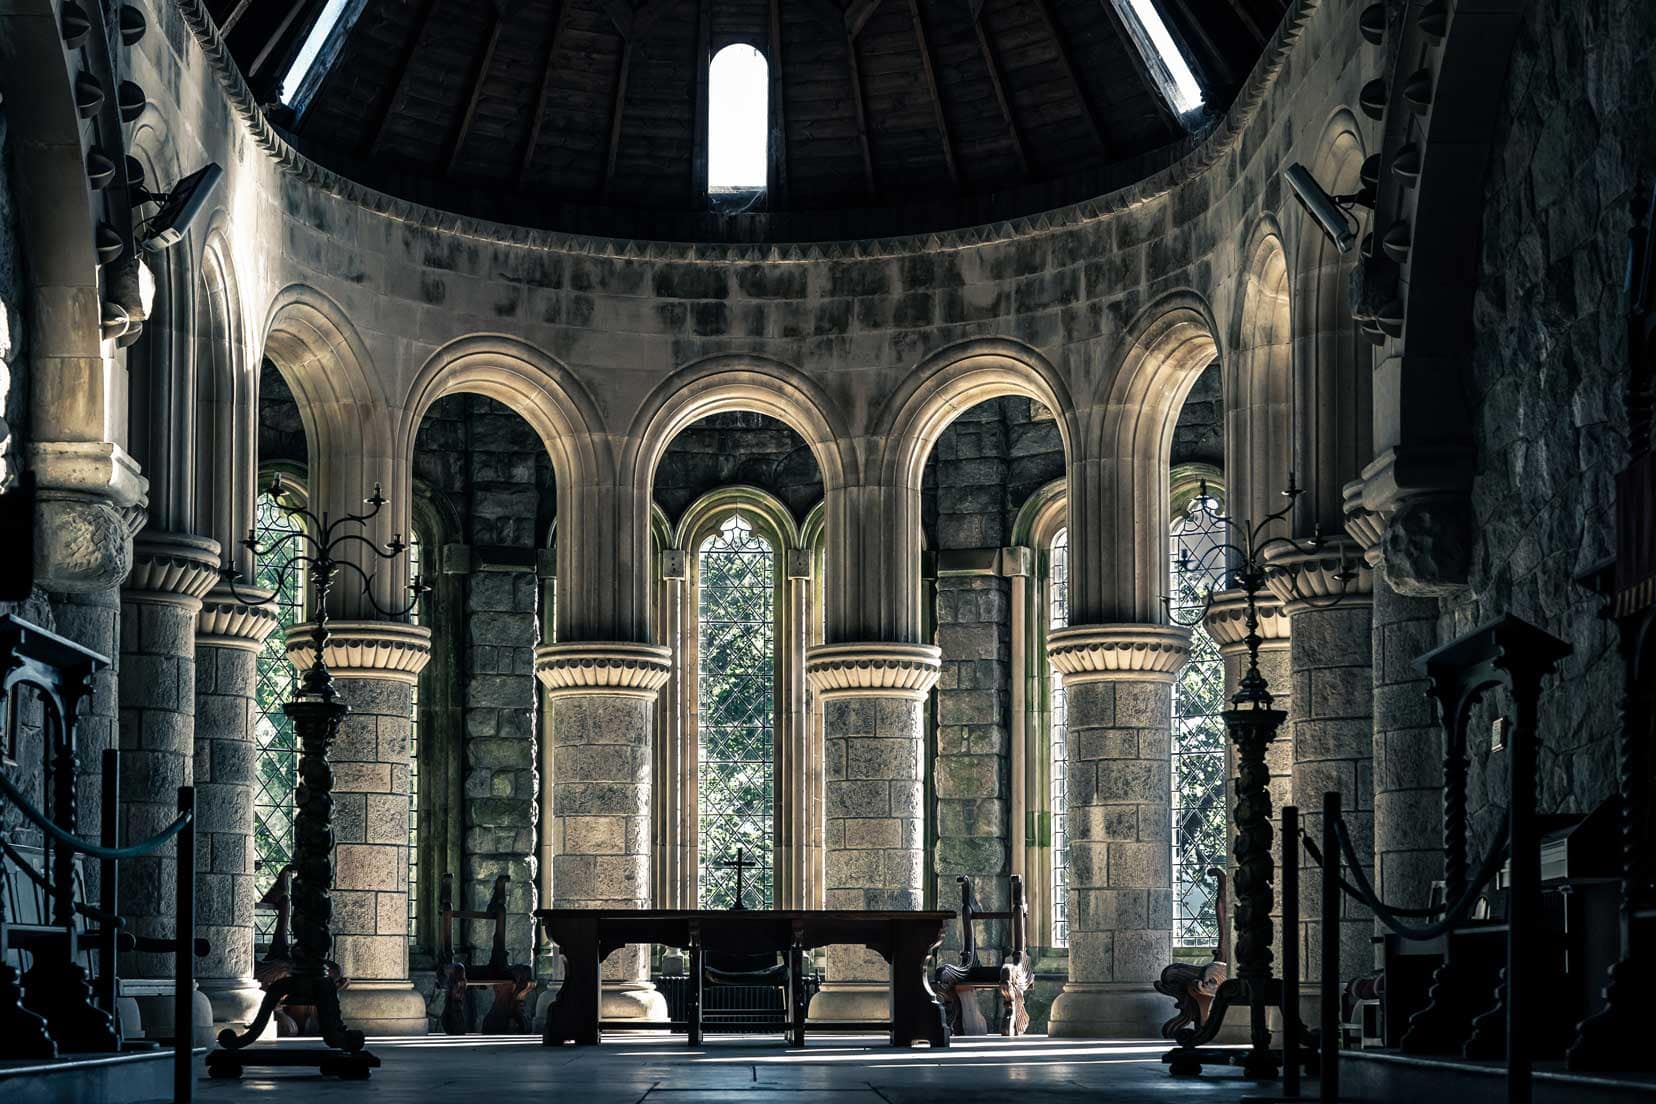
Here, in the above photo, I wanted to capture the symmetry of the church.
Try shooting from high vantage points, low angles, or even from the side.
In the photo below, I offset the subject, the sand-filled tyre of our Isuzu 4×4 camper, and shot it low-down to complete the story of a beach scene.
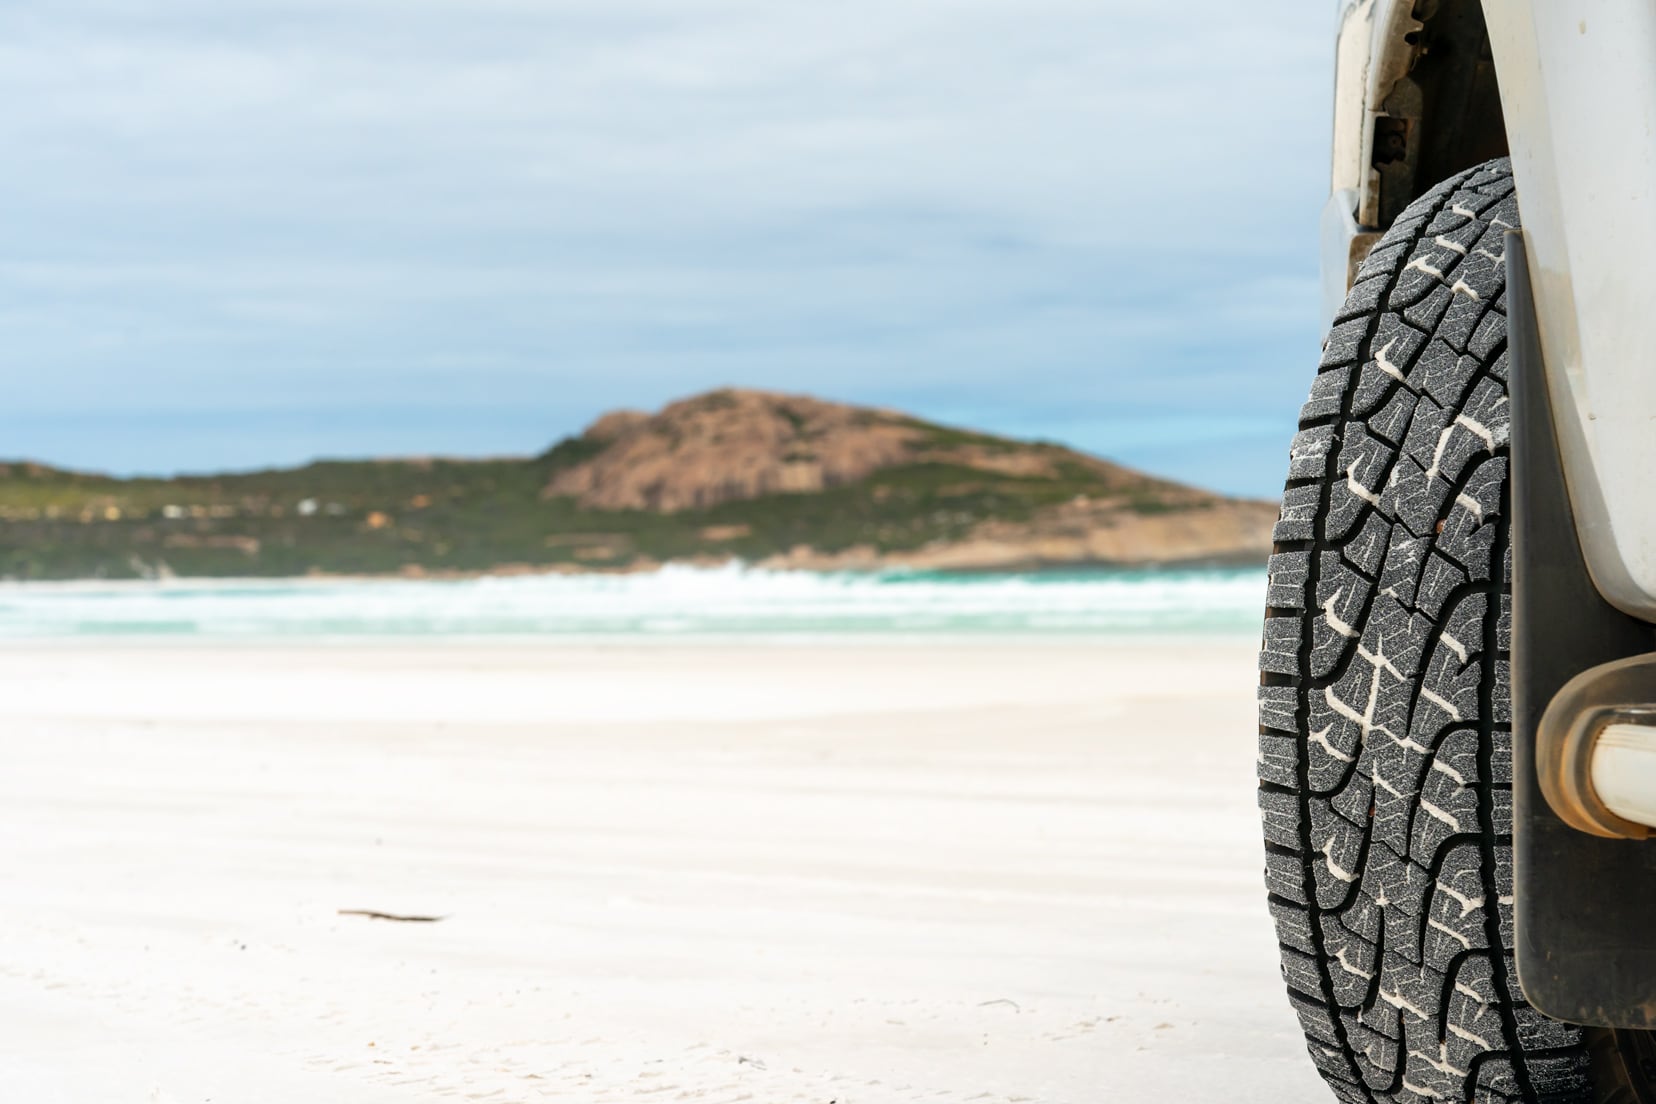
I don’t have a drone, but its footage provides unique aerial perspectives that are impossible to achieve without it. It provides interesting views and, again, something different to the eye.
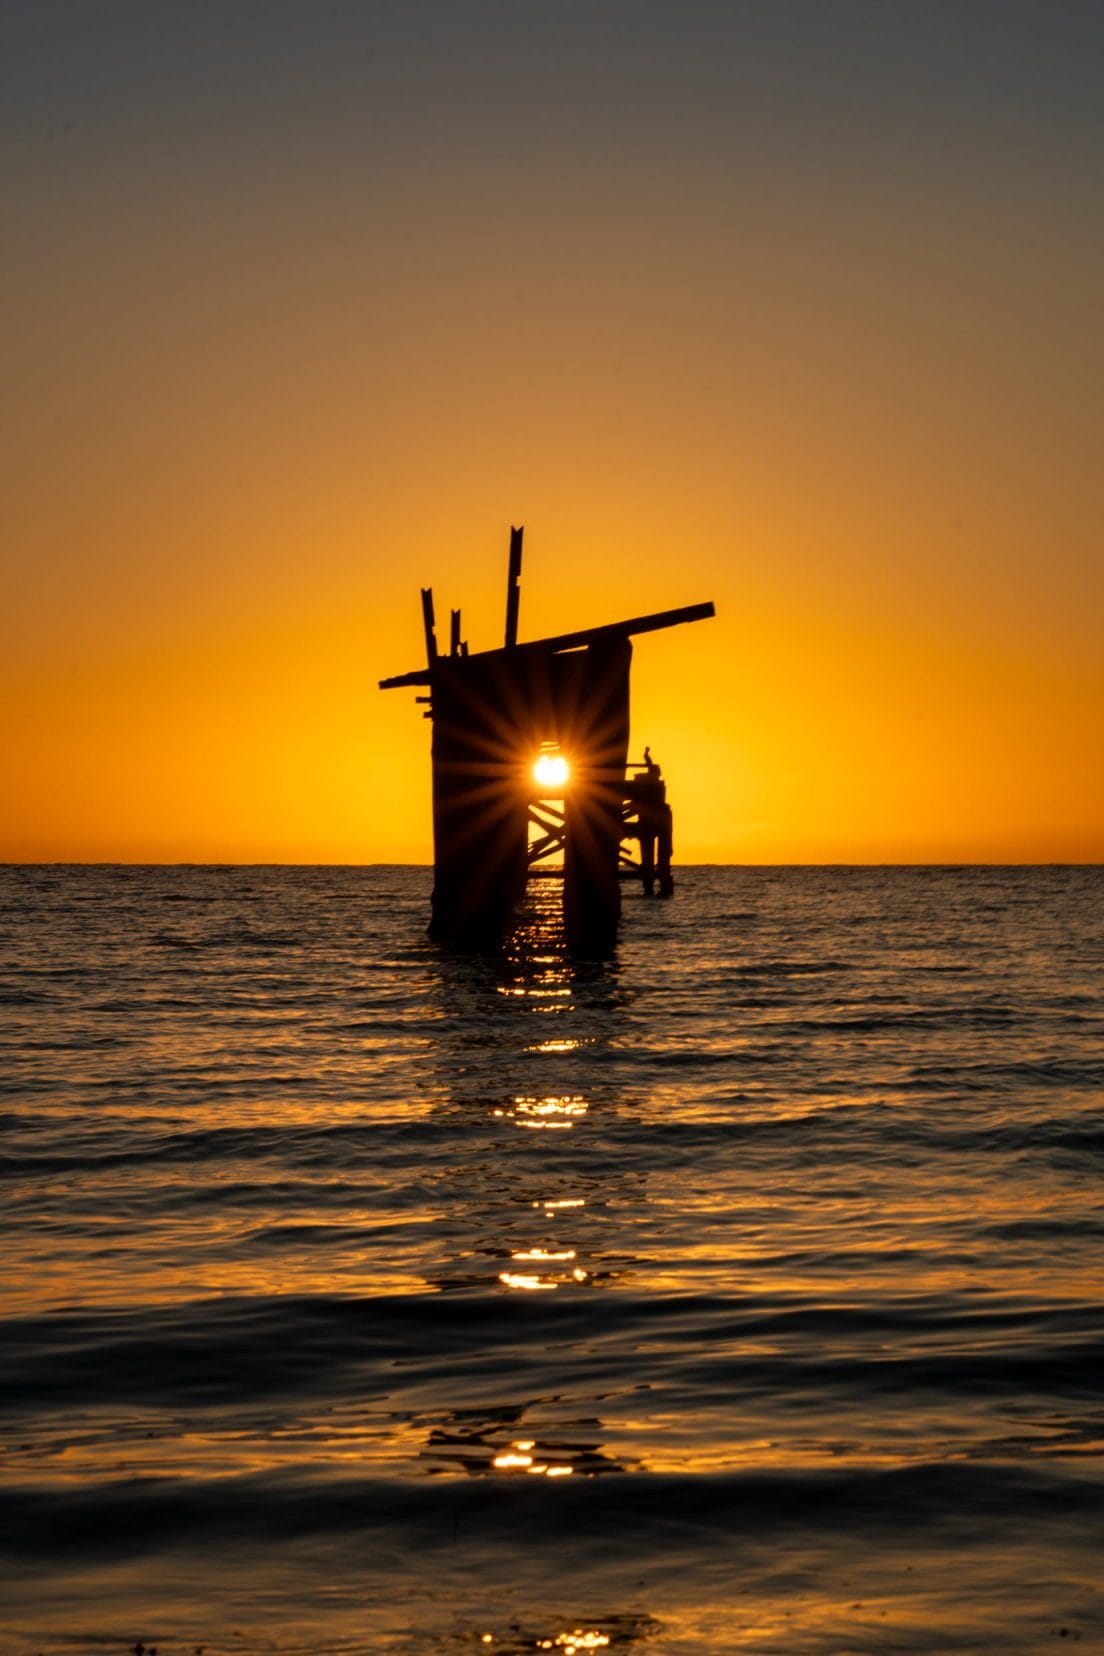
5. Play with Light and Shadow
Light and shadow can dramatically change the mood of your photos. Look for opportunities to play with light, whether the dappled light through trees, the long shadows at dusk, or the glow of city lights at night.
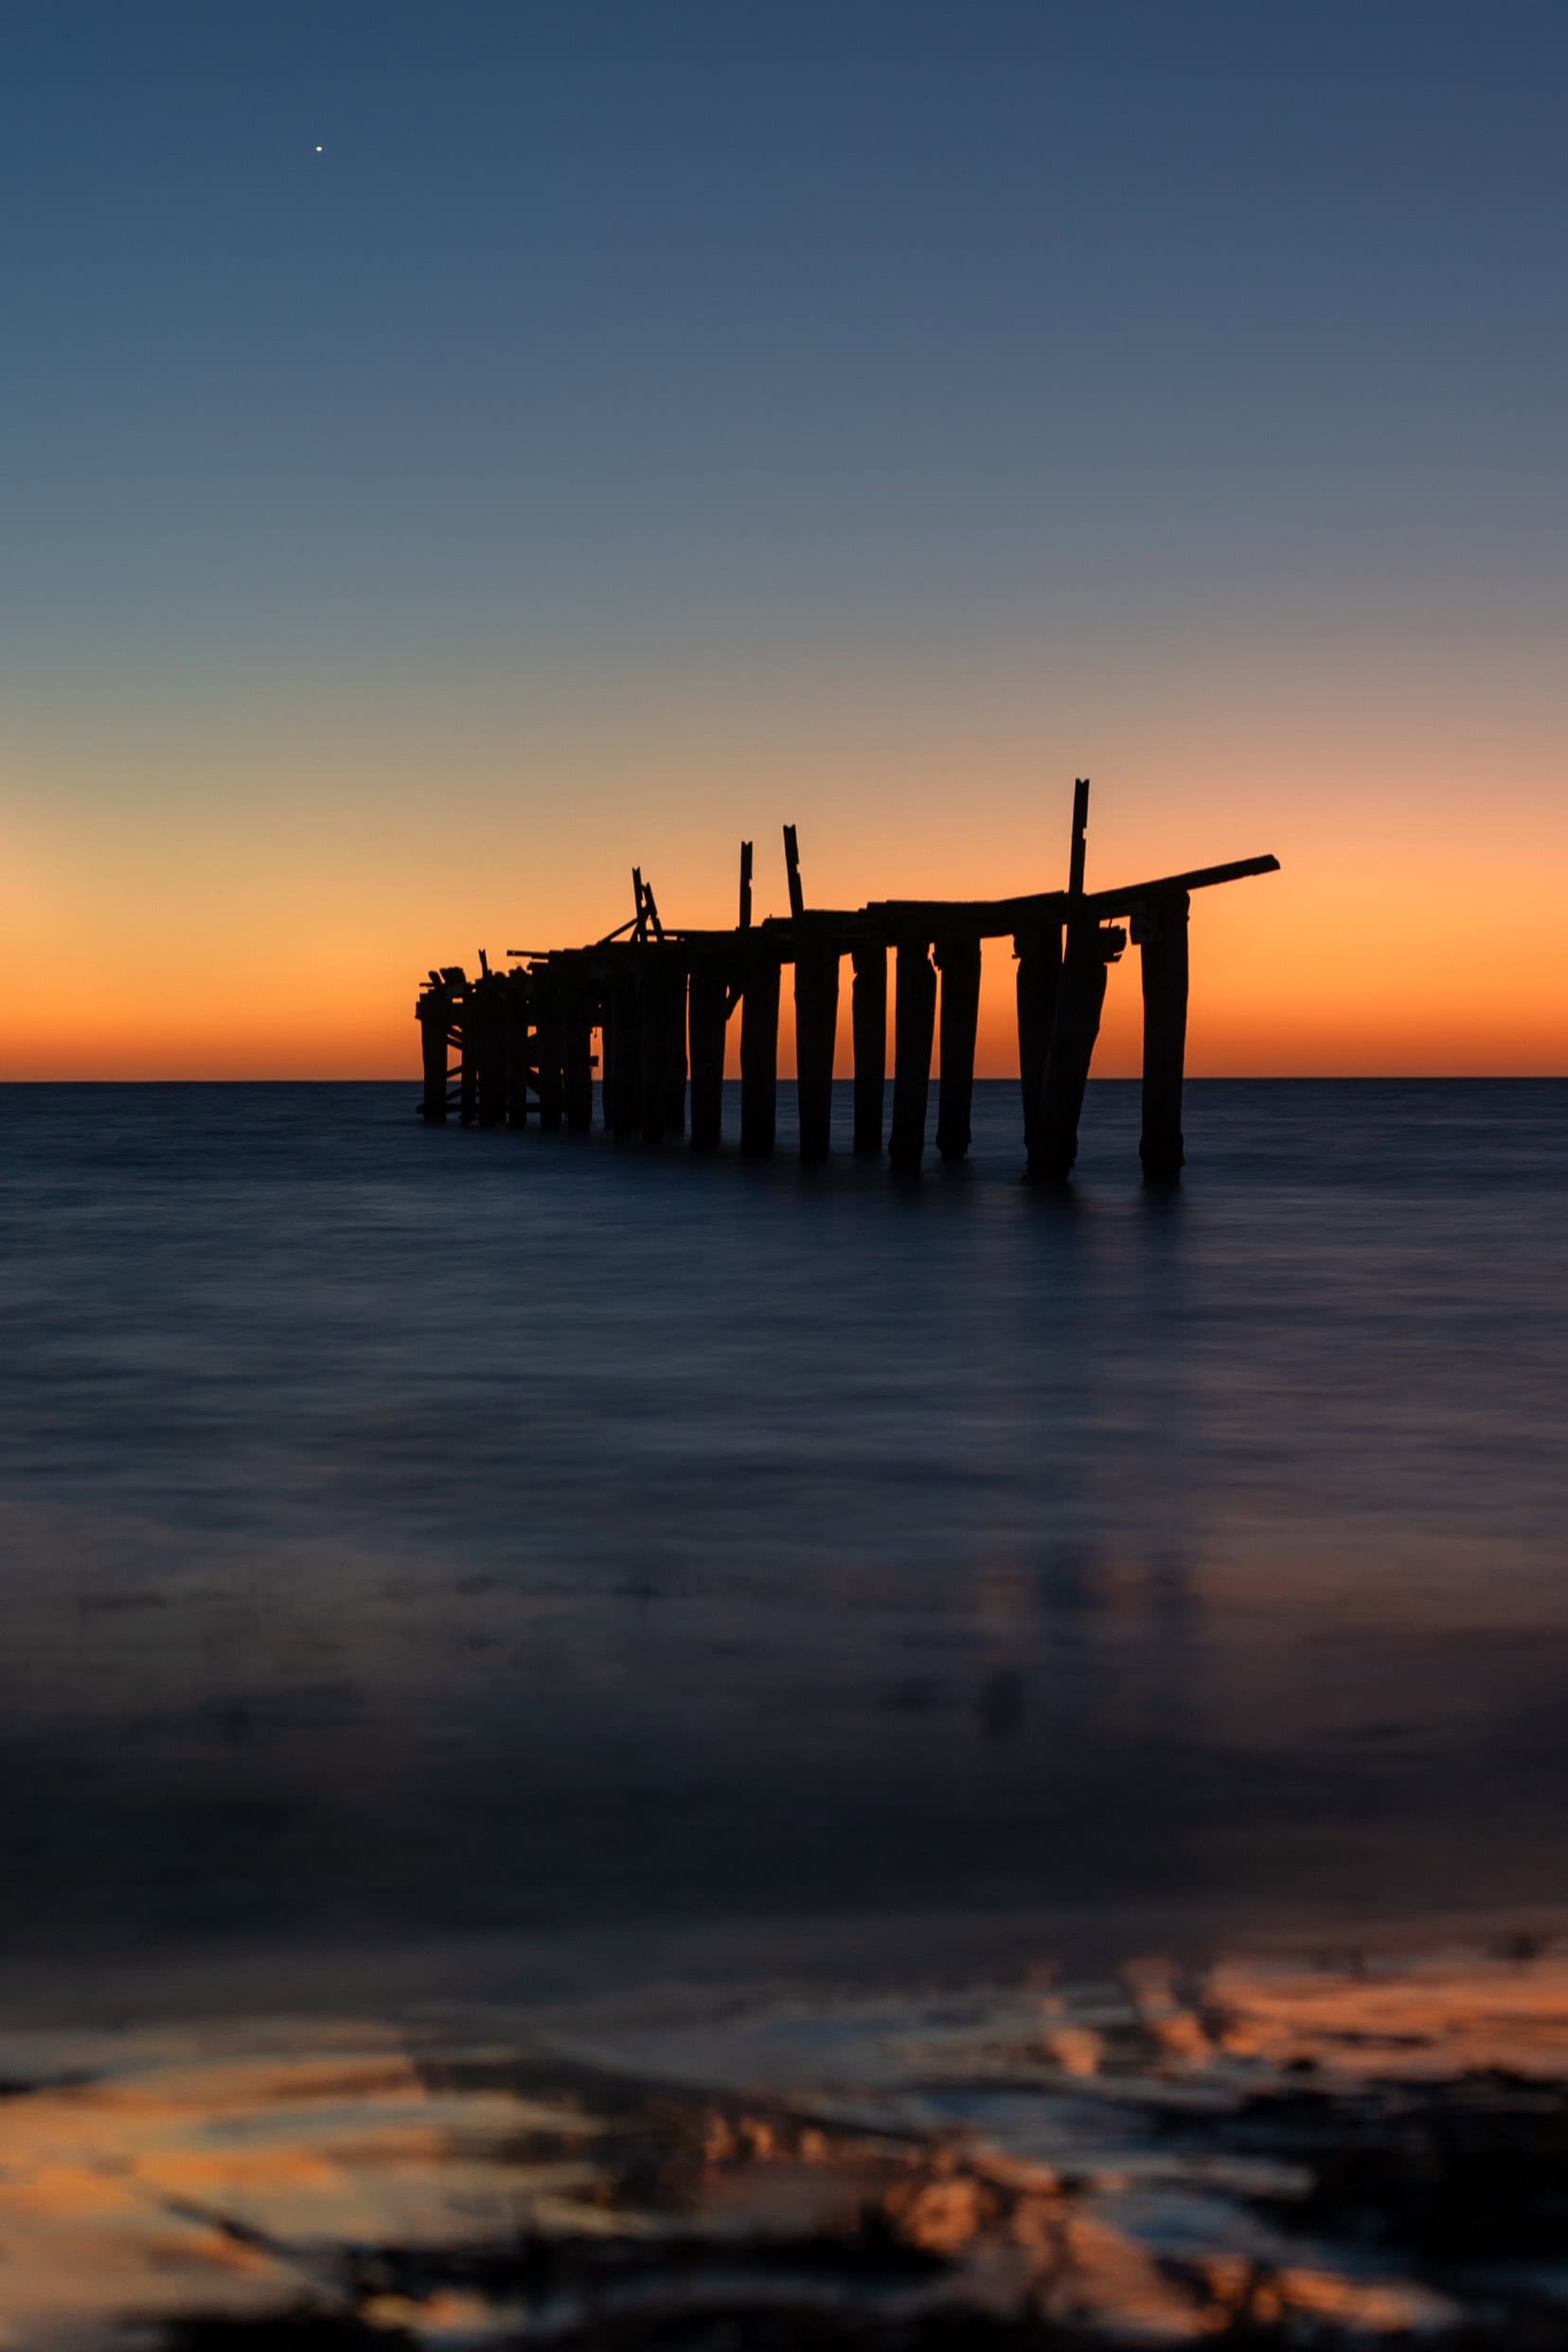
This image of Israelite Jetty was timed for the rising sun’s rays passing under its wooden structure. I wanted the sun-star effect, so I shot with a high focal length.
Experimenting with different lighting conditions can help you create unique and striking images.
6. Action Shots
Action shots capture the movement and energy of your road trip, making your photos more exciting and engaging.
Action shots bring out the energy and excitement to your photo collection. Adjusting the shutter speed can either freeze the action or create movement blur.
Embrace Movement
Movement adds a sense of dynamism to your photos. Whether it’s a friend jumping off a rock, wildlife in motion, or the blur of passing landscapes from a moving car, capturing action can bring your photos to life.
Use a fast shutter speed to freeze the action or a slower shutter speed to create a sense of motion blur.
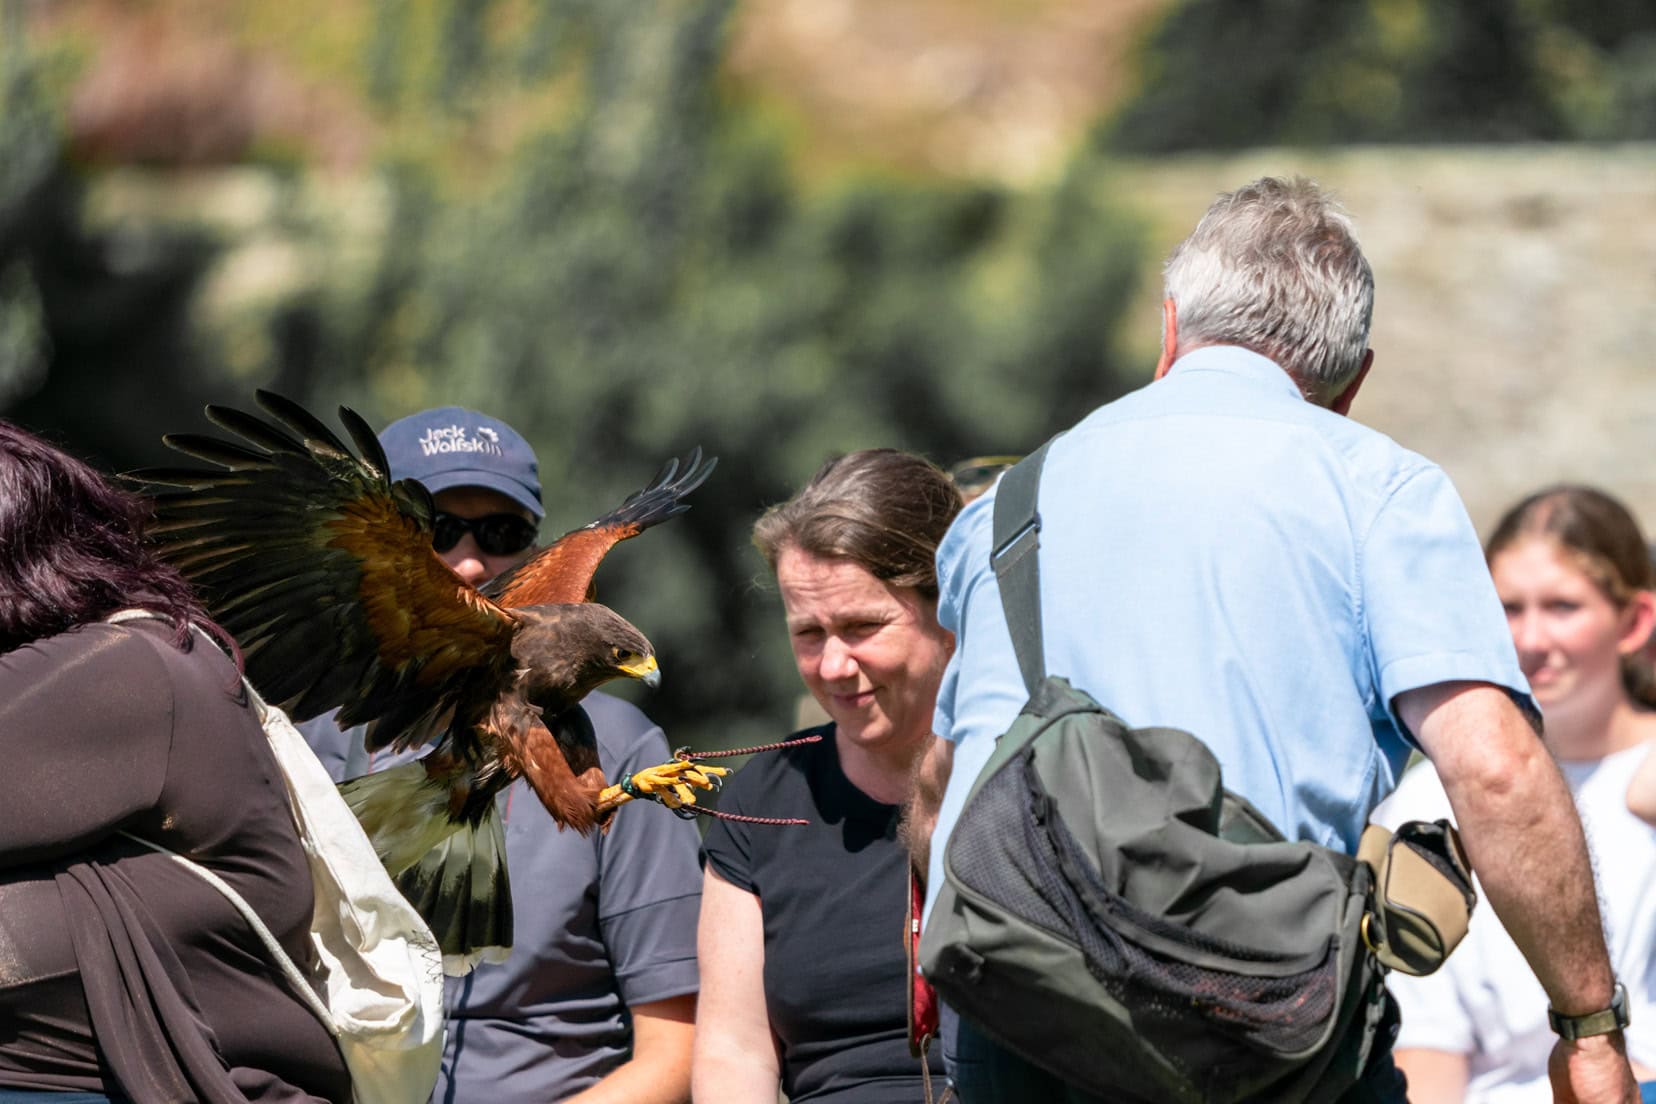
Anticipate the Moment
Great action shots often depend on timing. Anticipate the movement and be ready to shoot.
Continuous shooting mode coupled with auto-focus is essential for capturing a sequence of images, allowing you to choose the best shot later. You really do trust your camera to grab focus on the right subject, but this doesn’t always happen.
But, you can increase your odds of capturing your subject by:
- Using tracking mode on the subject.
- Using a smaller focus area forces the camera to focus only on that area.
- Using a black-out-free camera like the Sony A9 to track the subject through the viewfinder and allow the autofocus to grab it more easily.
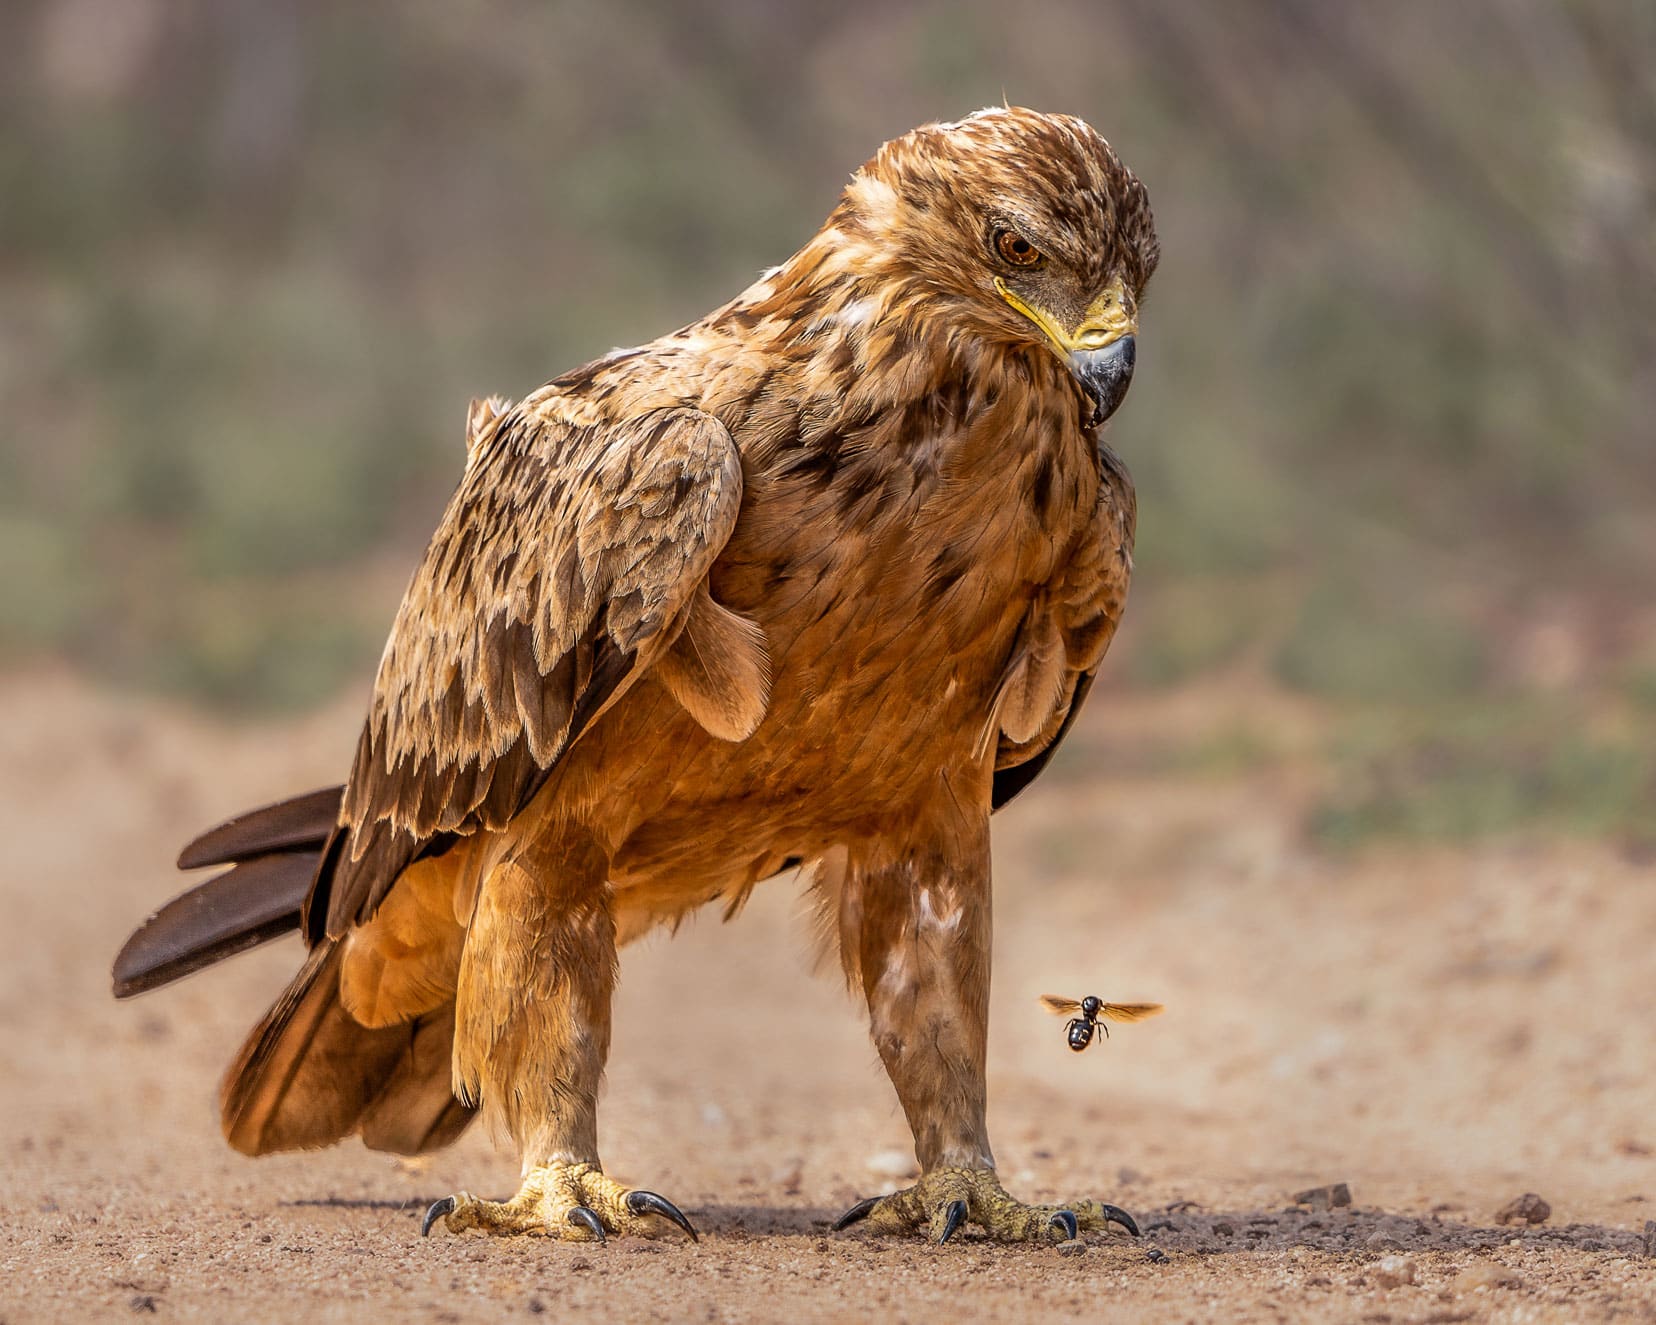
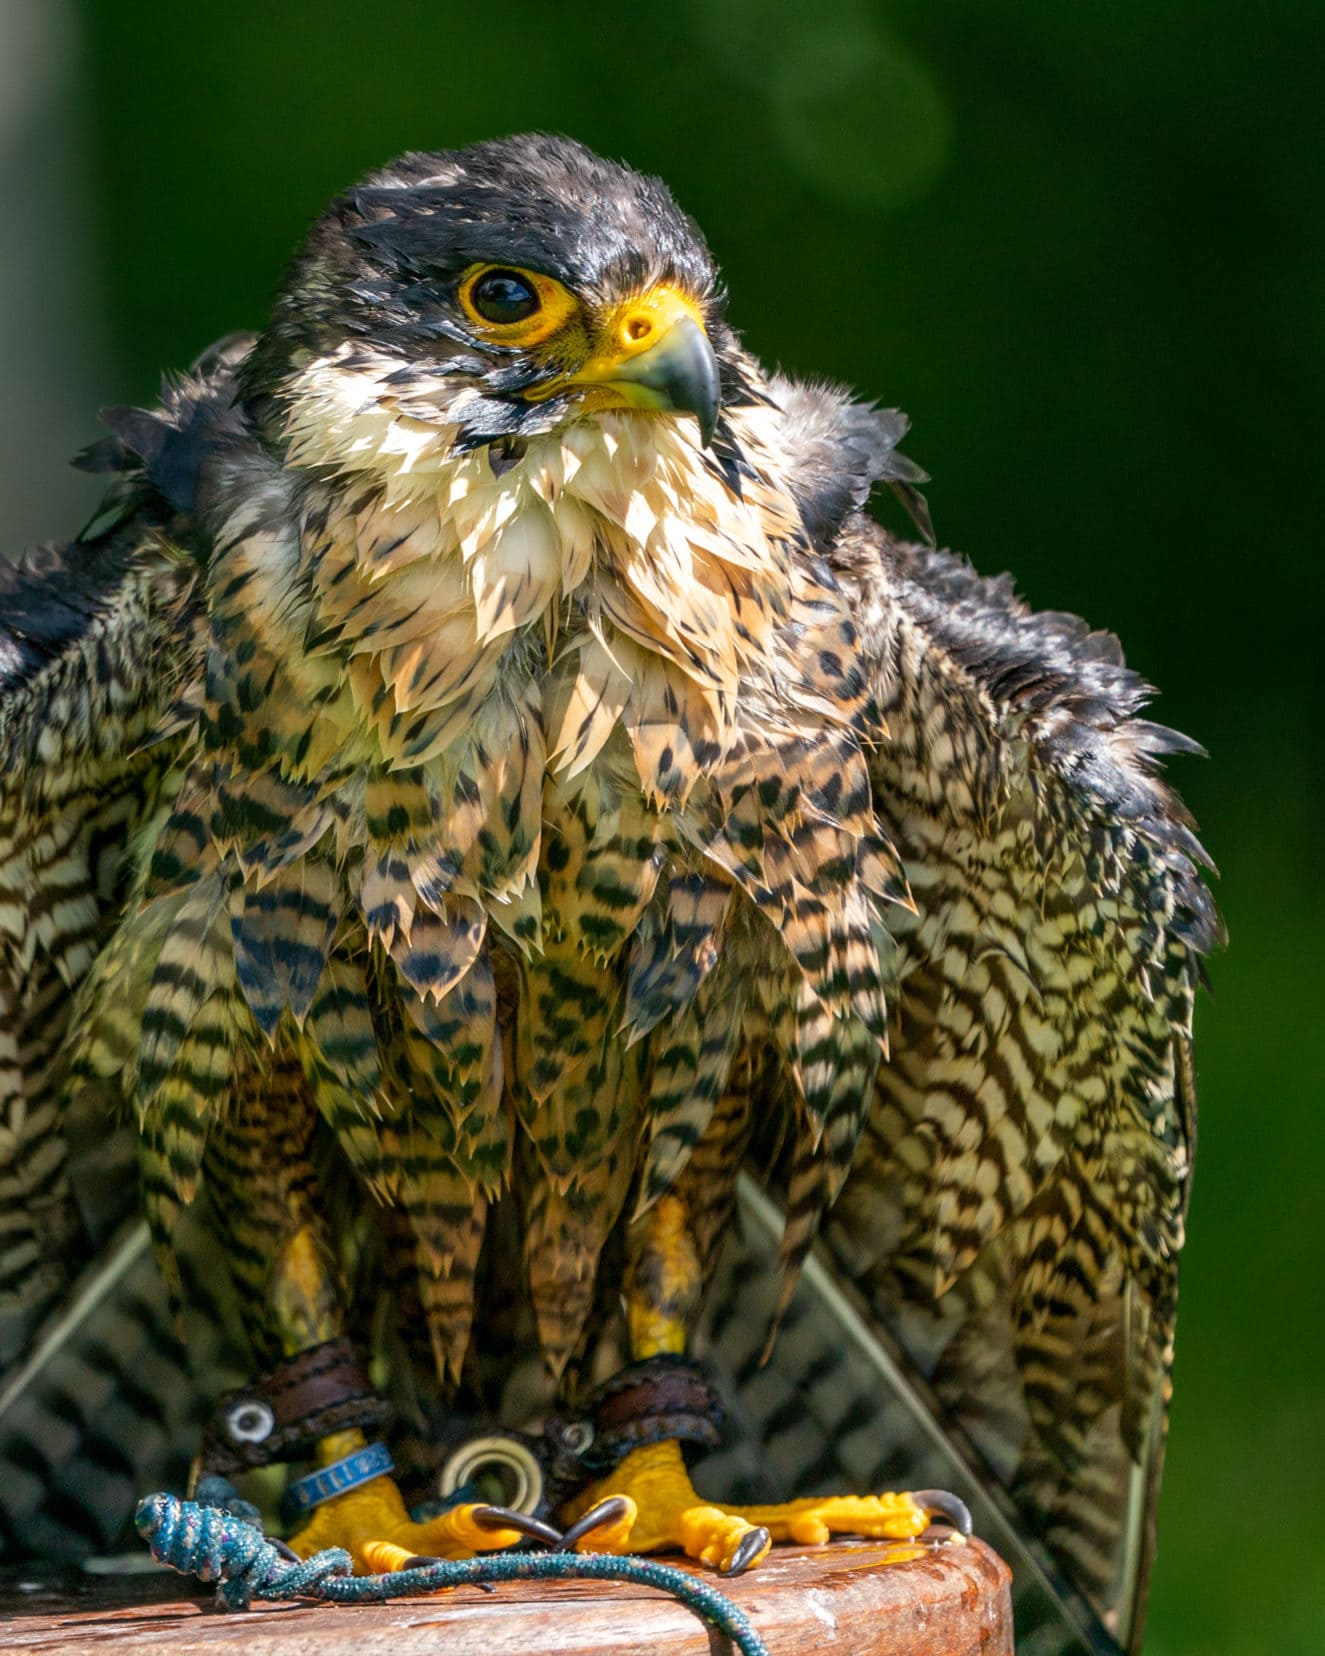
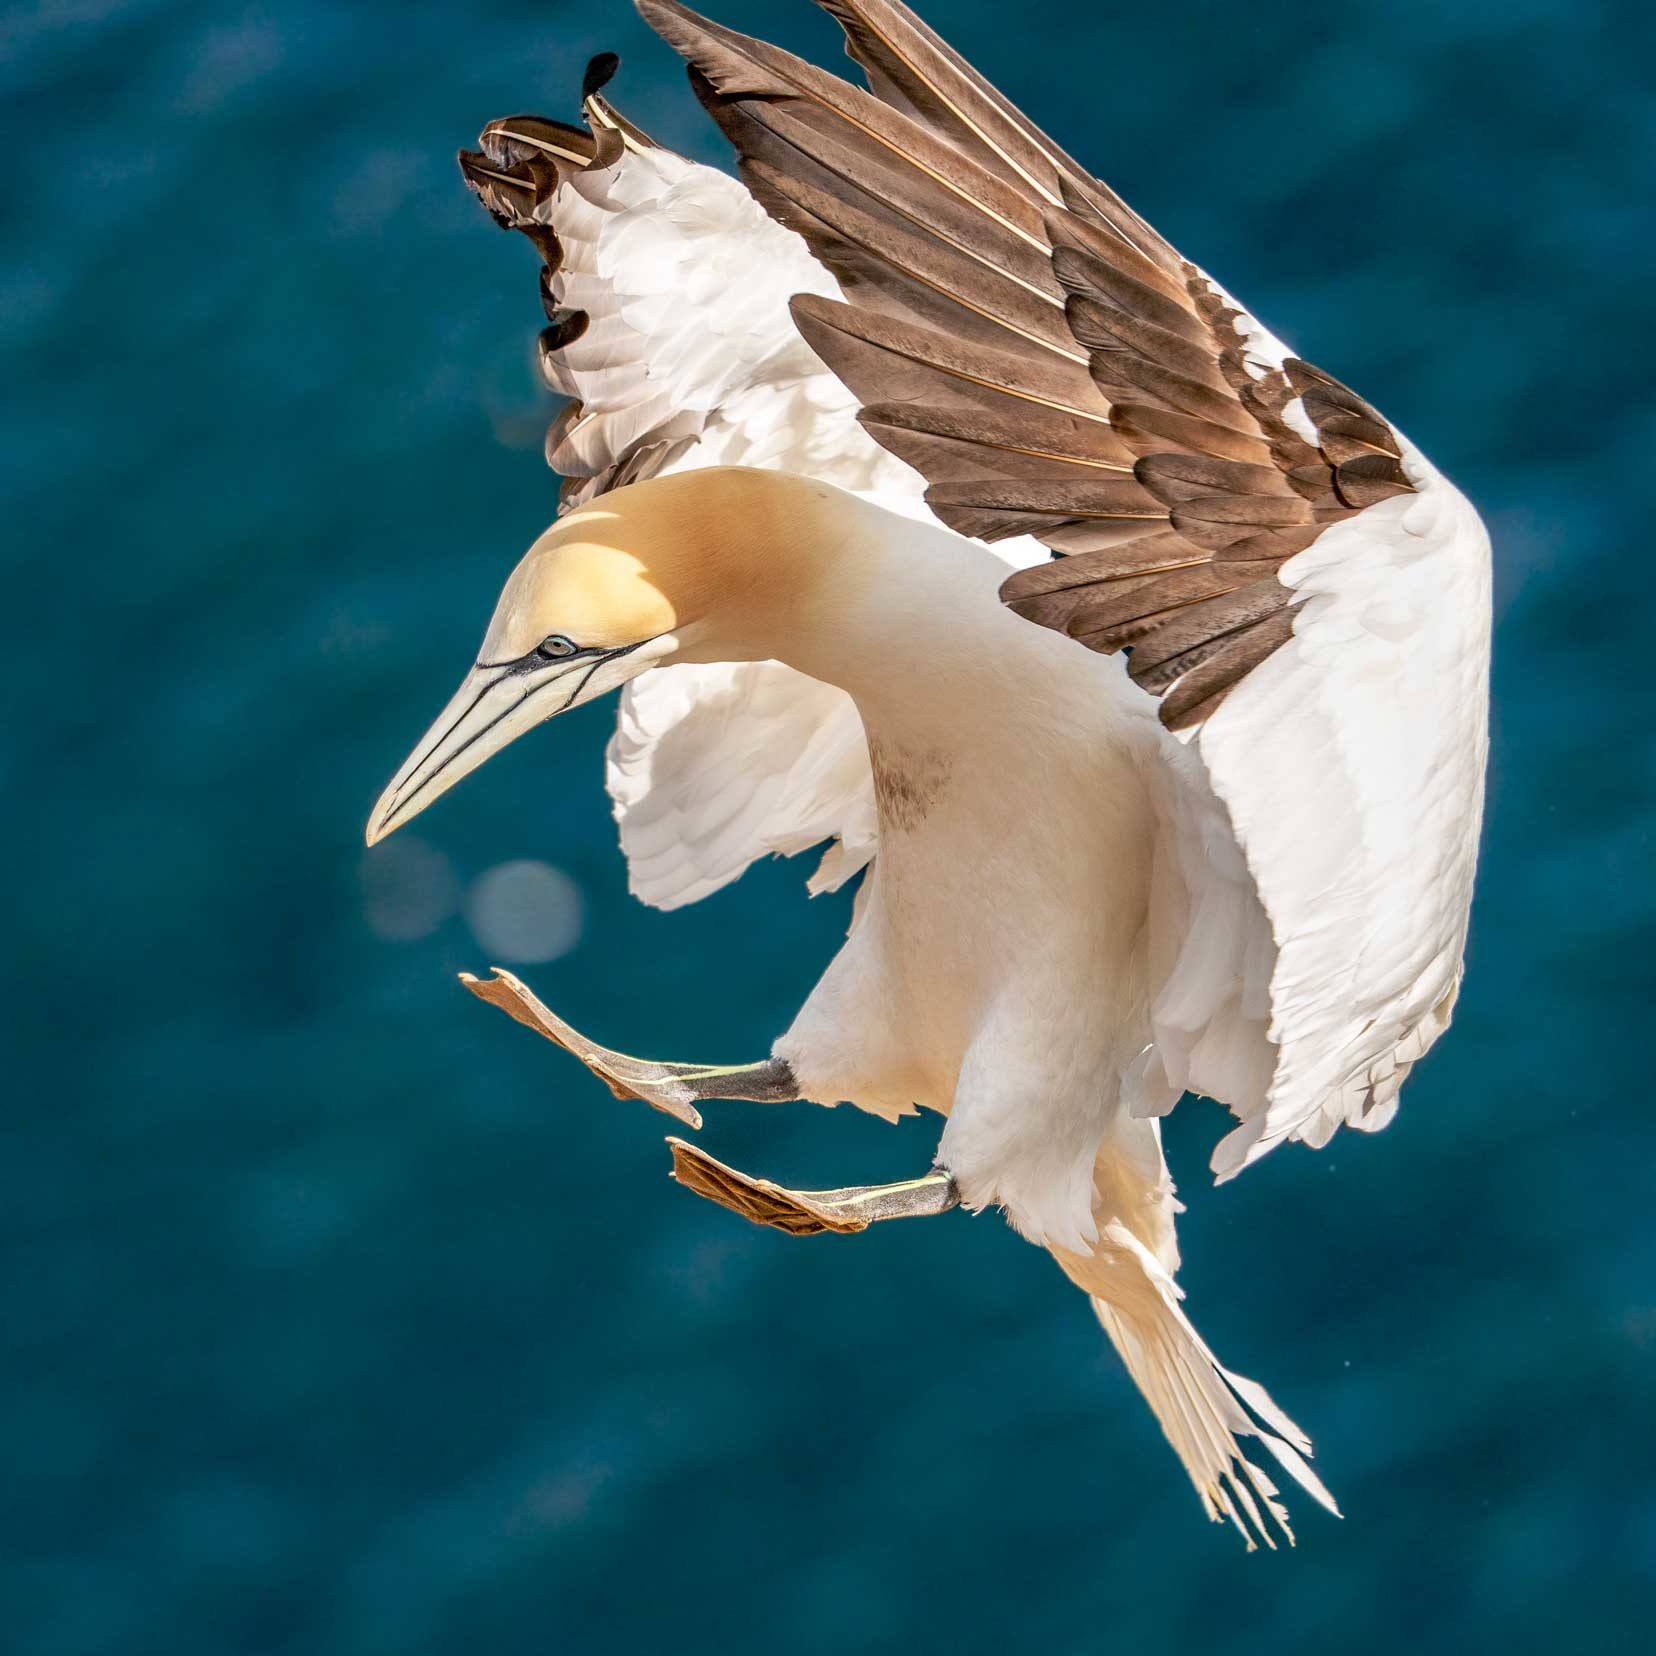
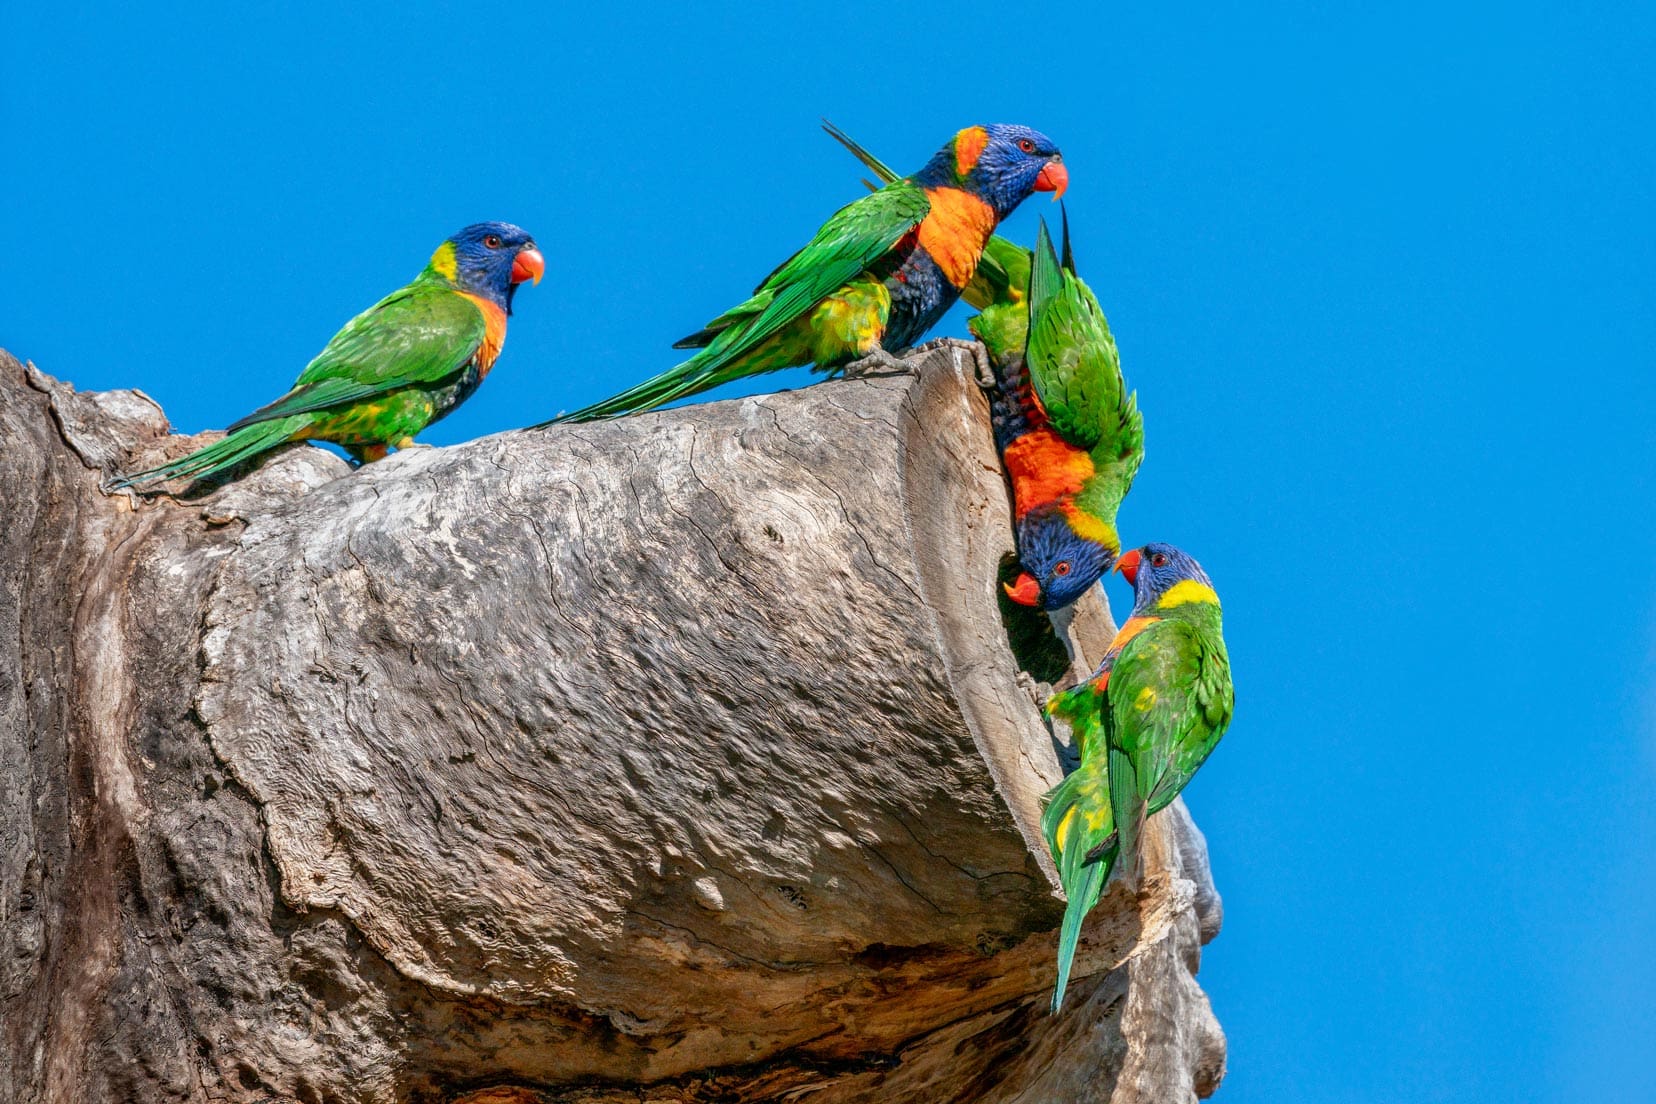
I captured the image below by carefully watching the bird and predicting when it would launch. With focus already acquired, I timed the shutter button press.

Use a Tripod for Stability
While tripods are generally used for low-light stability, they can also be useful for action shots, especially when using slower shutter speeds to capture motion blur.
I often use my Sony 200-600mm on my 3-legged-thing tripod when shooting birds. In this configuration, the tripod supports the weight and keeps the lens still so I can slow the shutter without camera movement.
If you are looking for that silky smooth water effect, a tripod secures the camera to slow the water’s action.
7. Focus on Details
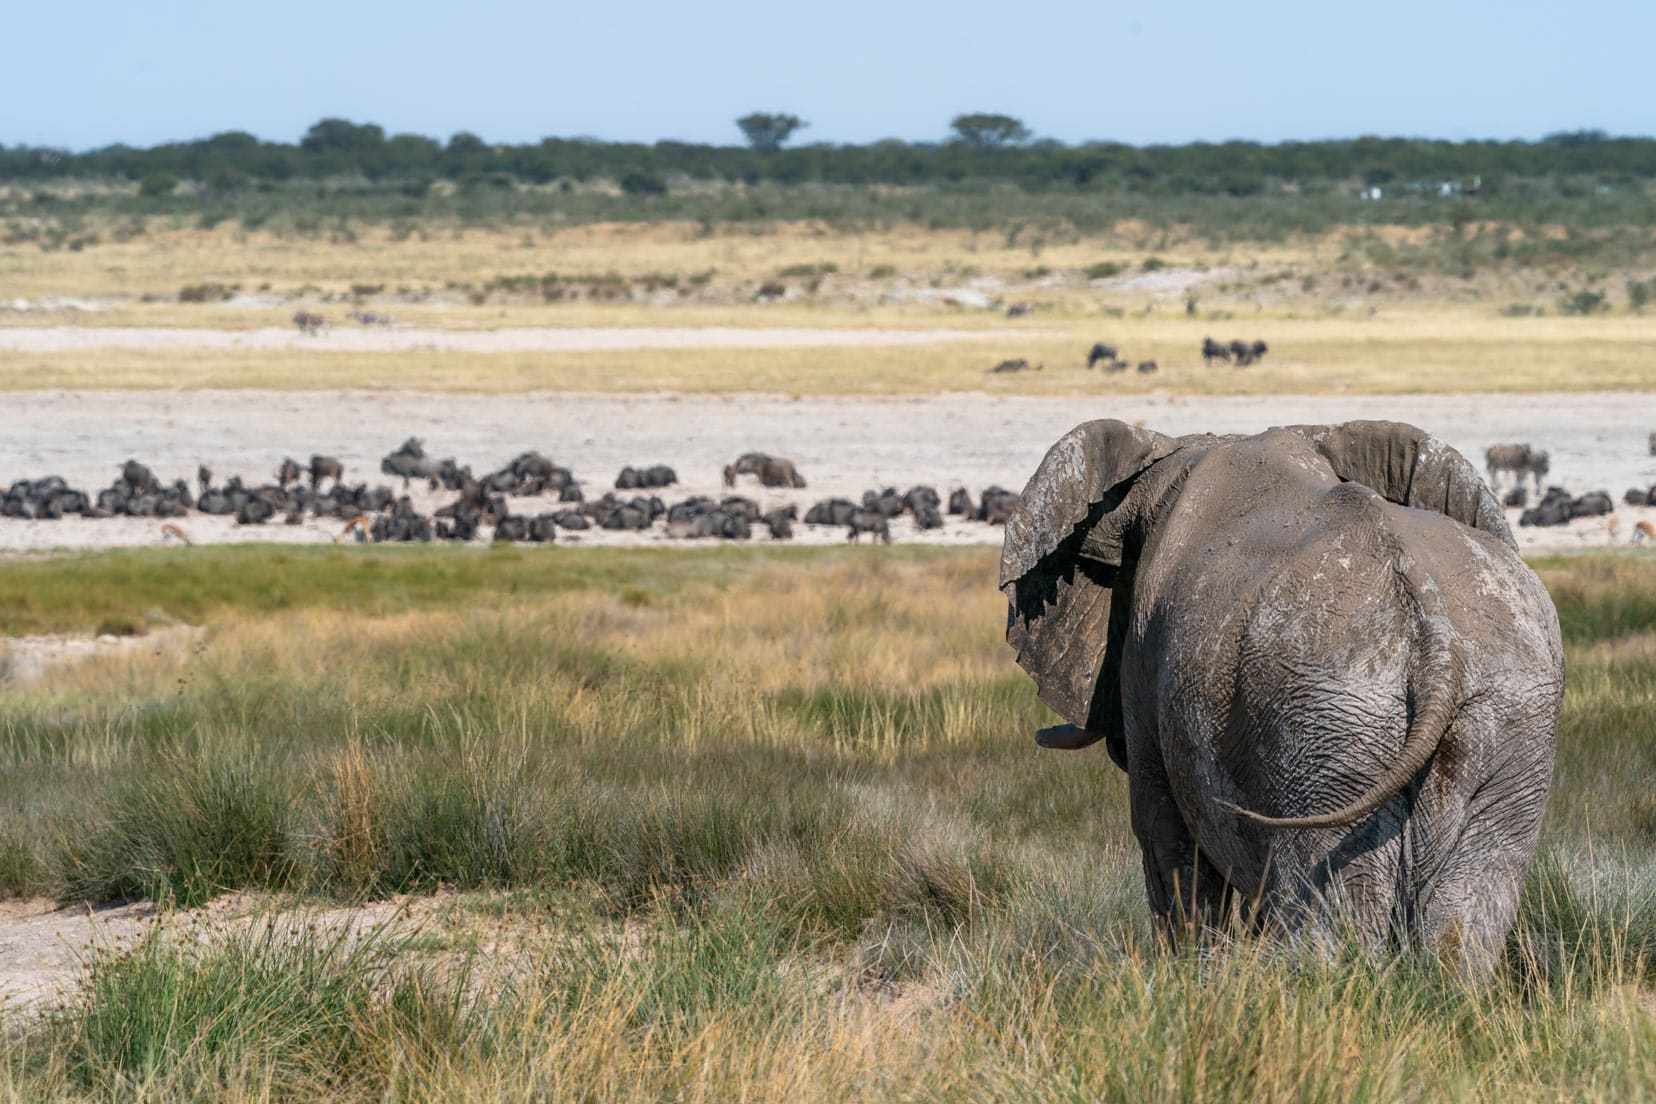
While wide landscapes can be captivating, don’t forget there’s a smaller world right before our noses that we often overlook.
Whether it’s bark on a tree or venturing into the land of macro, details tell their own story.
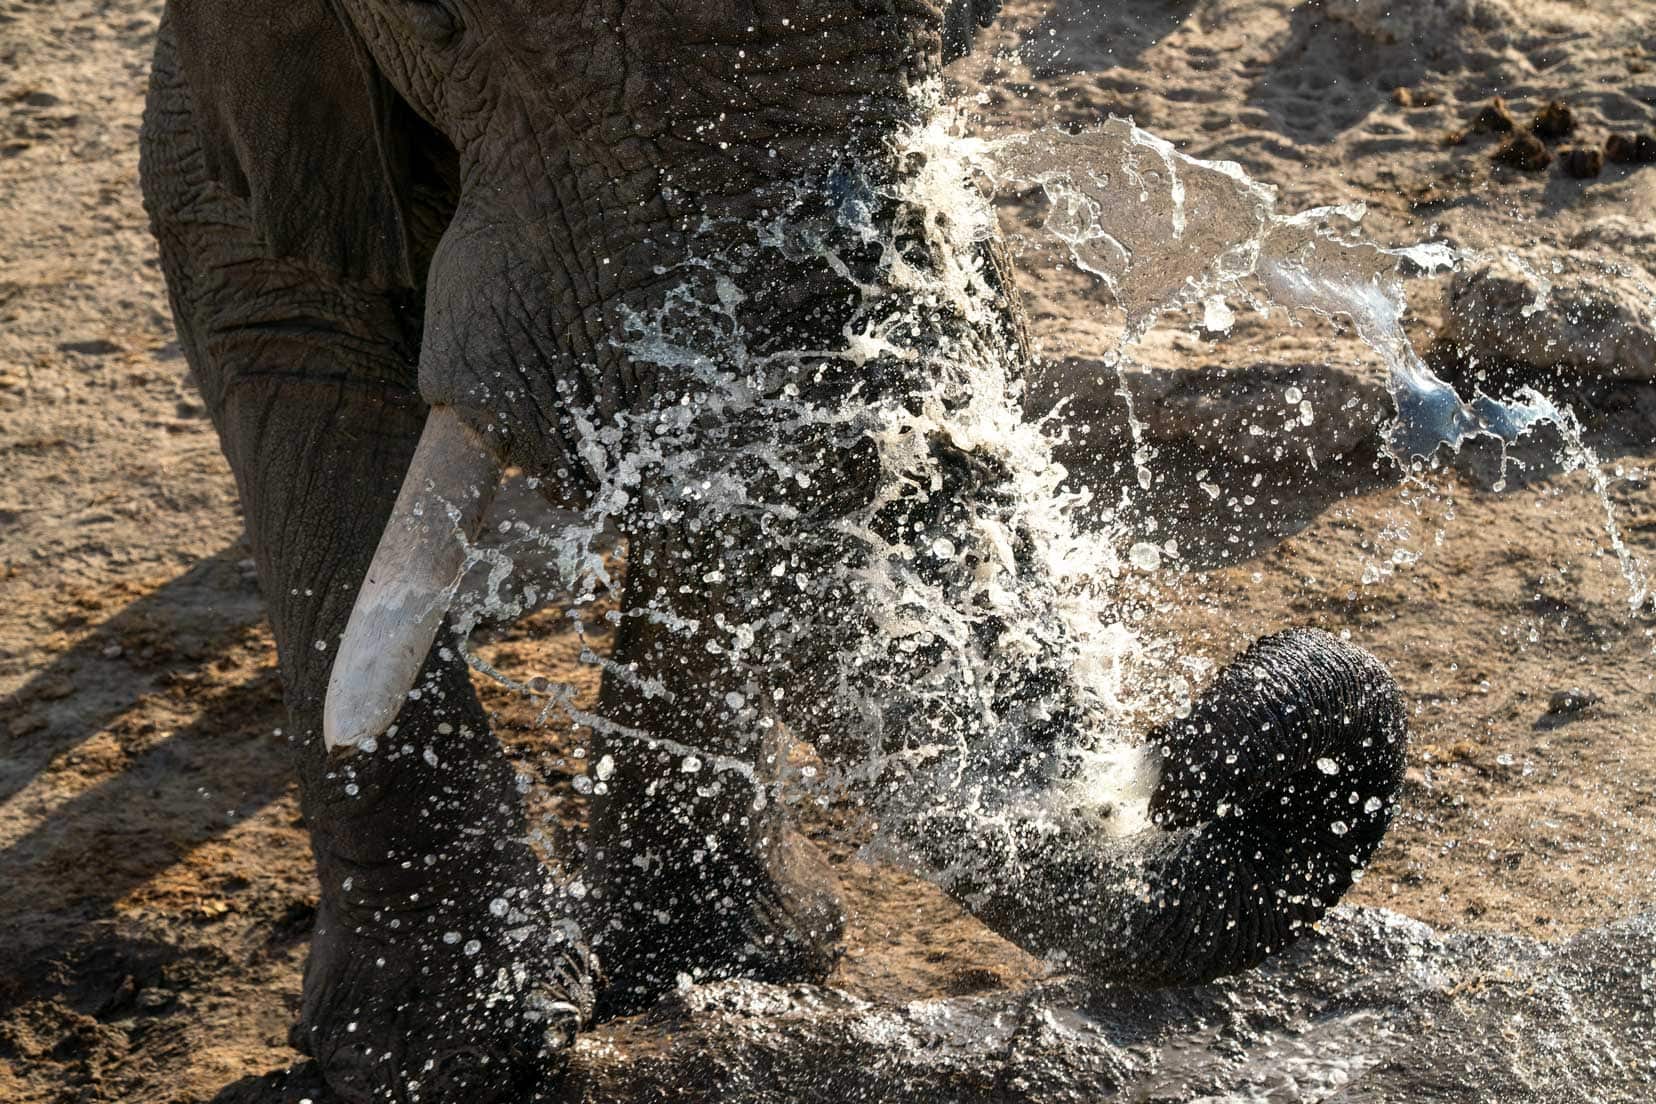
Look for interesting textures and patterns. At a campsite in Etosha National Park, Namibia, we were in an animal hide above the elephants, drinking at a waterhole below. Because we were so close, I could grab this close-up of the trunk.
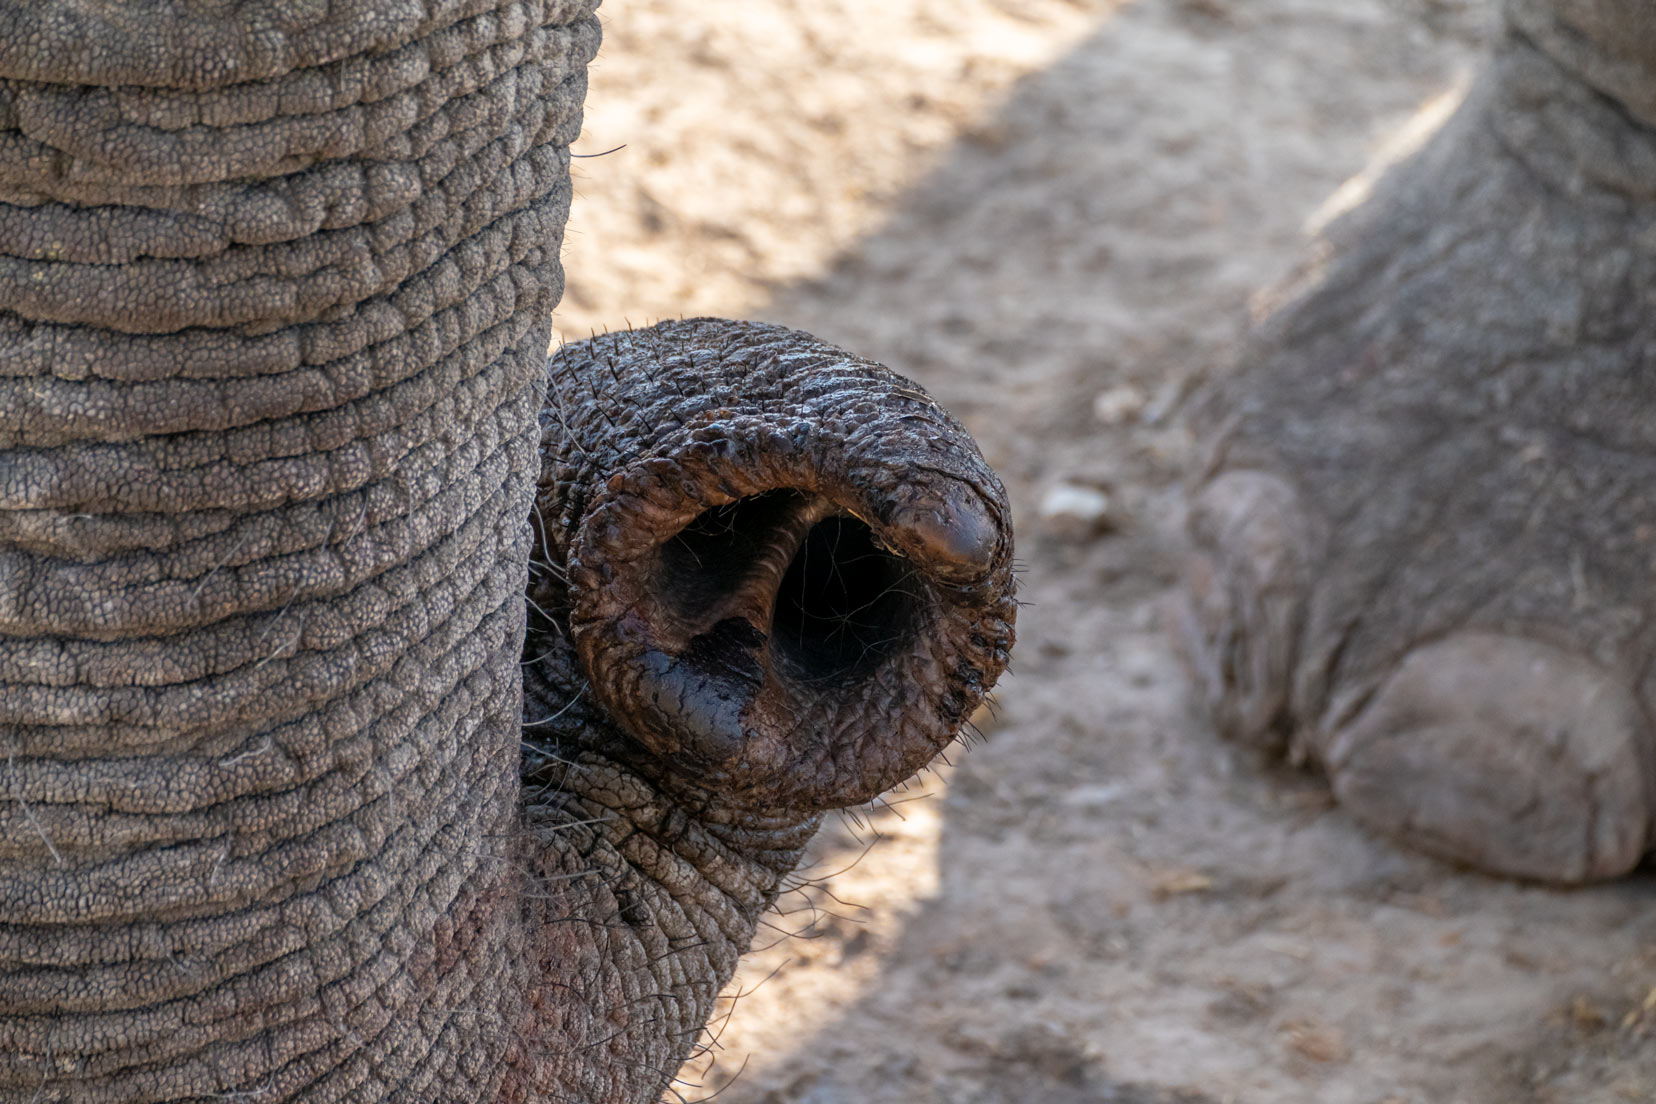
Capturing a small part of a larger image that leaves the viewer’s imagination to complete the image.

8. Themed Photos
Have you heard of themed photo sets? These are collages of the same types of subjects or related subjects that tell a story of a place.
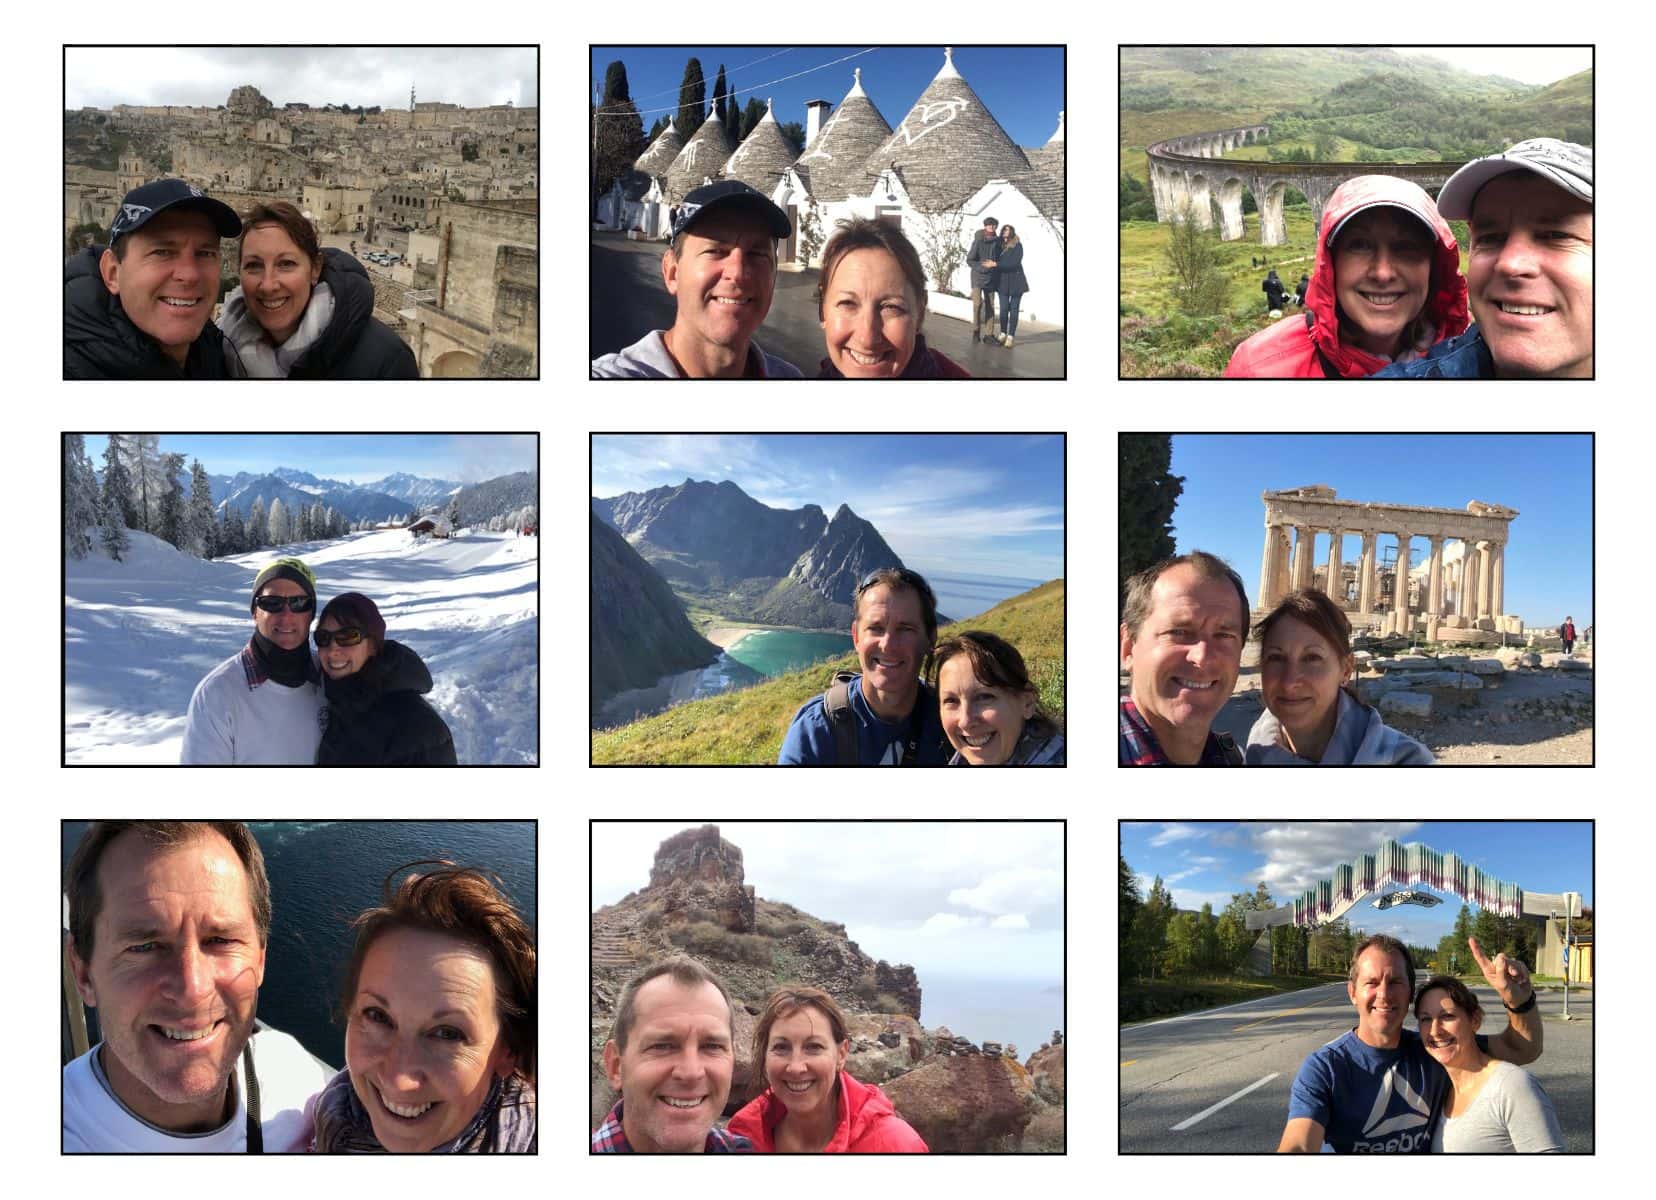
As you can see above, we’ve perfected the art of taking selfies—just our beaming faces against a spectacular backdrop. It’s all in the thumb technique and the strategic squint—truly advanced skills- haha!
4. Road Trip Photo Ideas: Fun and Quirky
Roadside Attractions
Quirky roadside attractions, such as giant statues, unusual buildings, or road signs, are great for photographing. These unique stops add a fun element to your road trip.
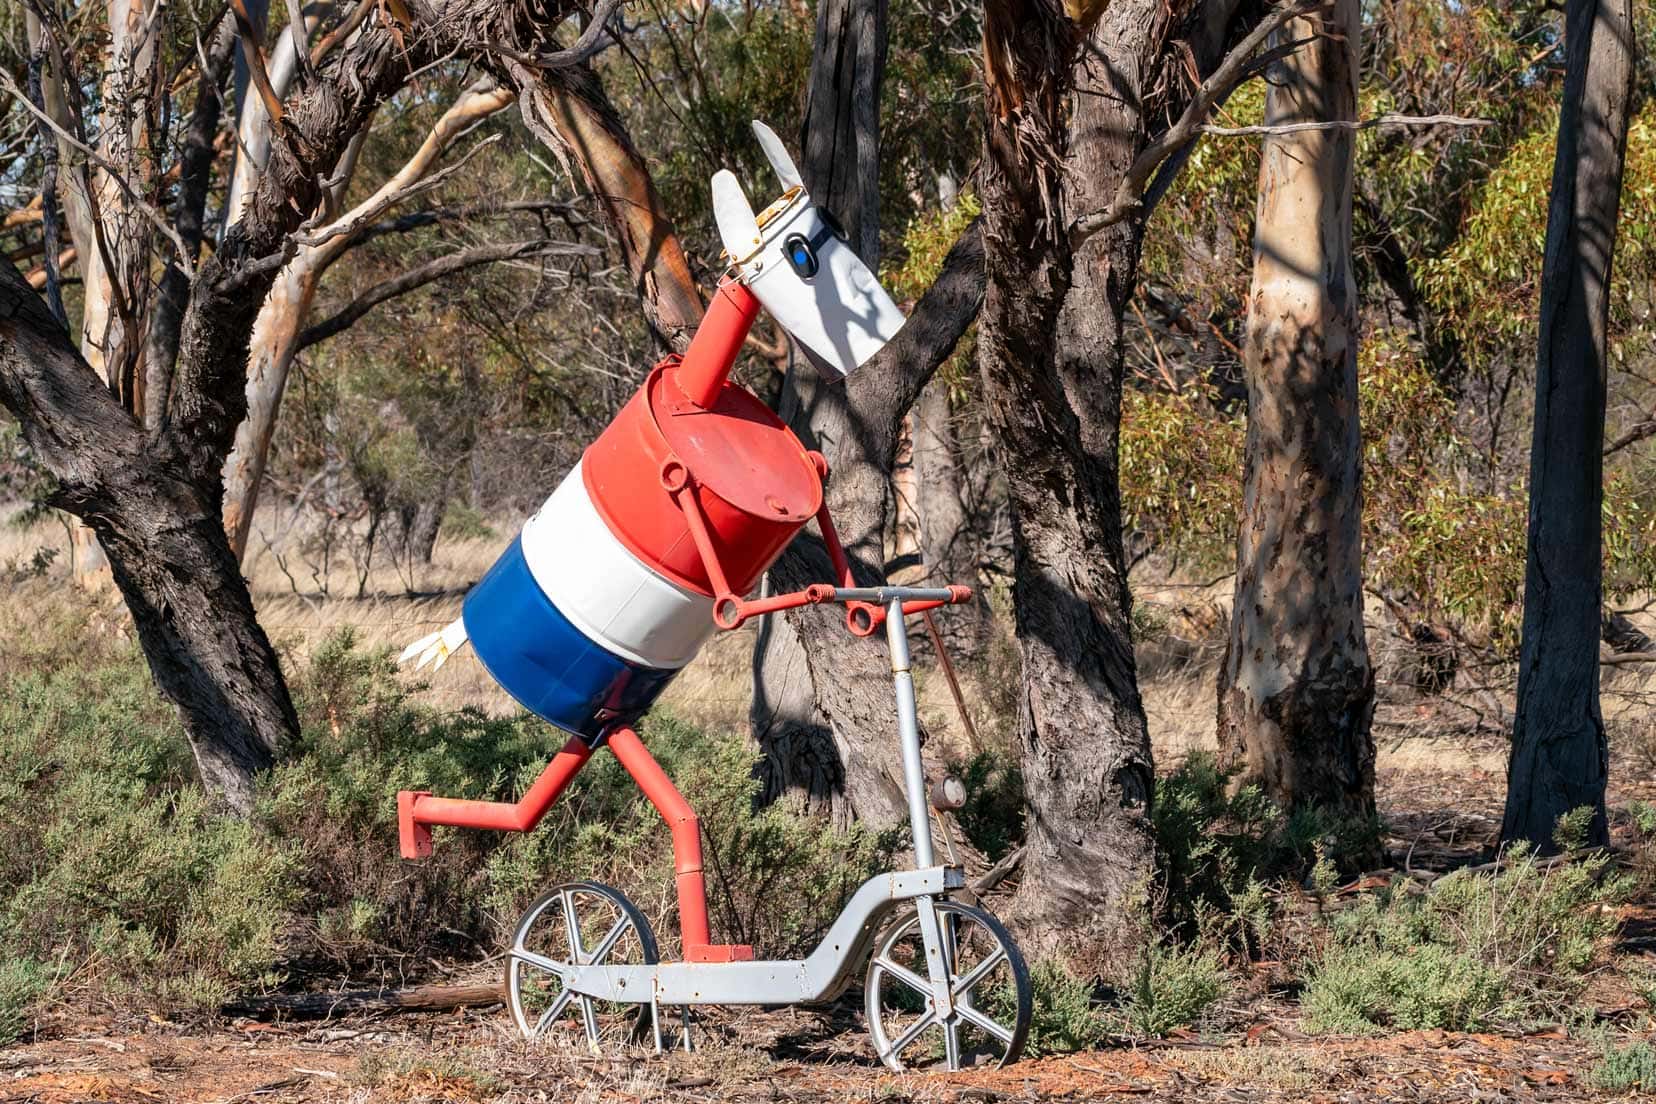
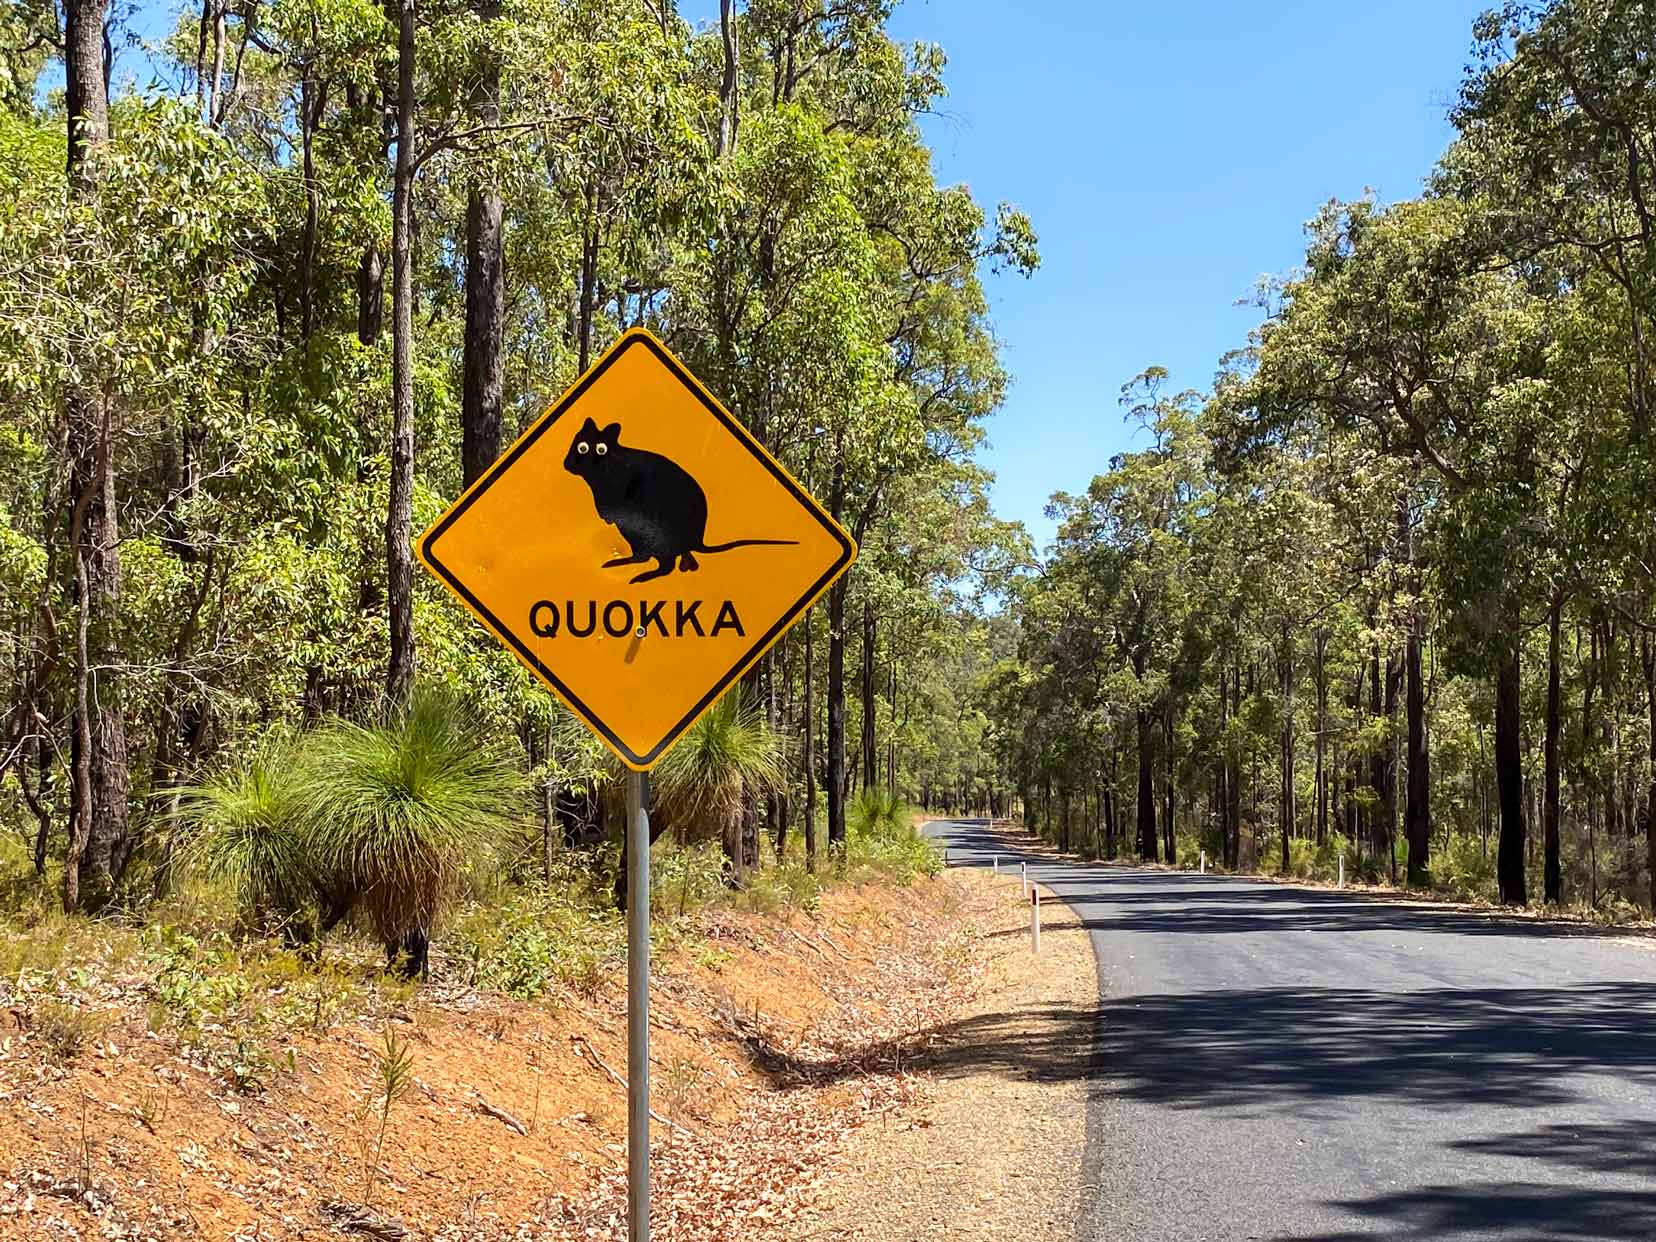
What are some of the quirkiest roadside attractions you’ve seen?
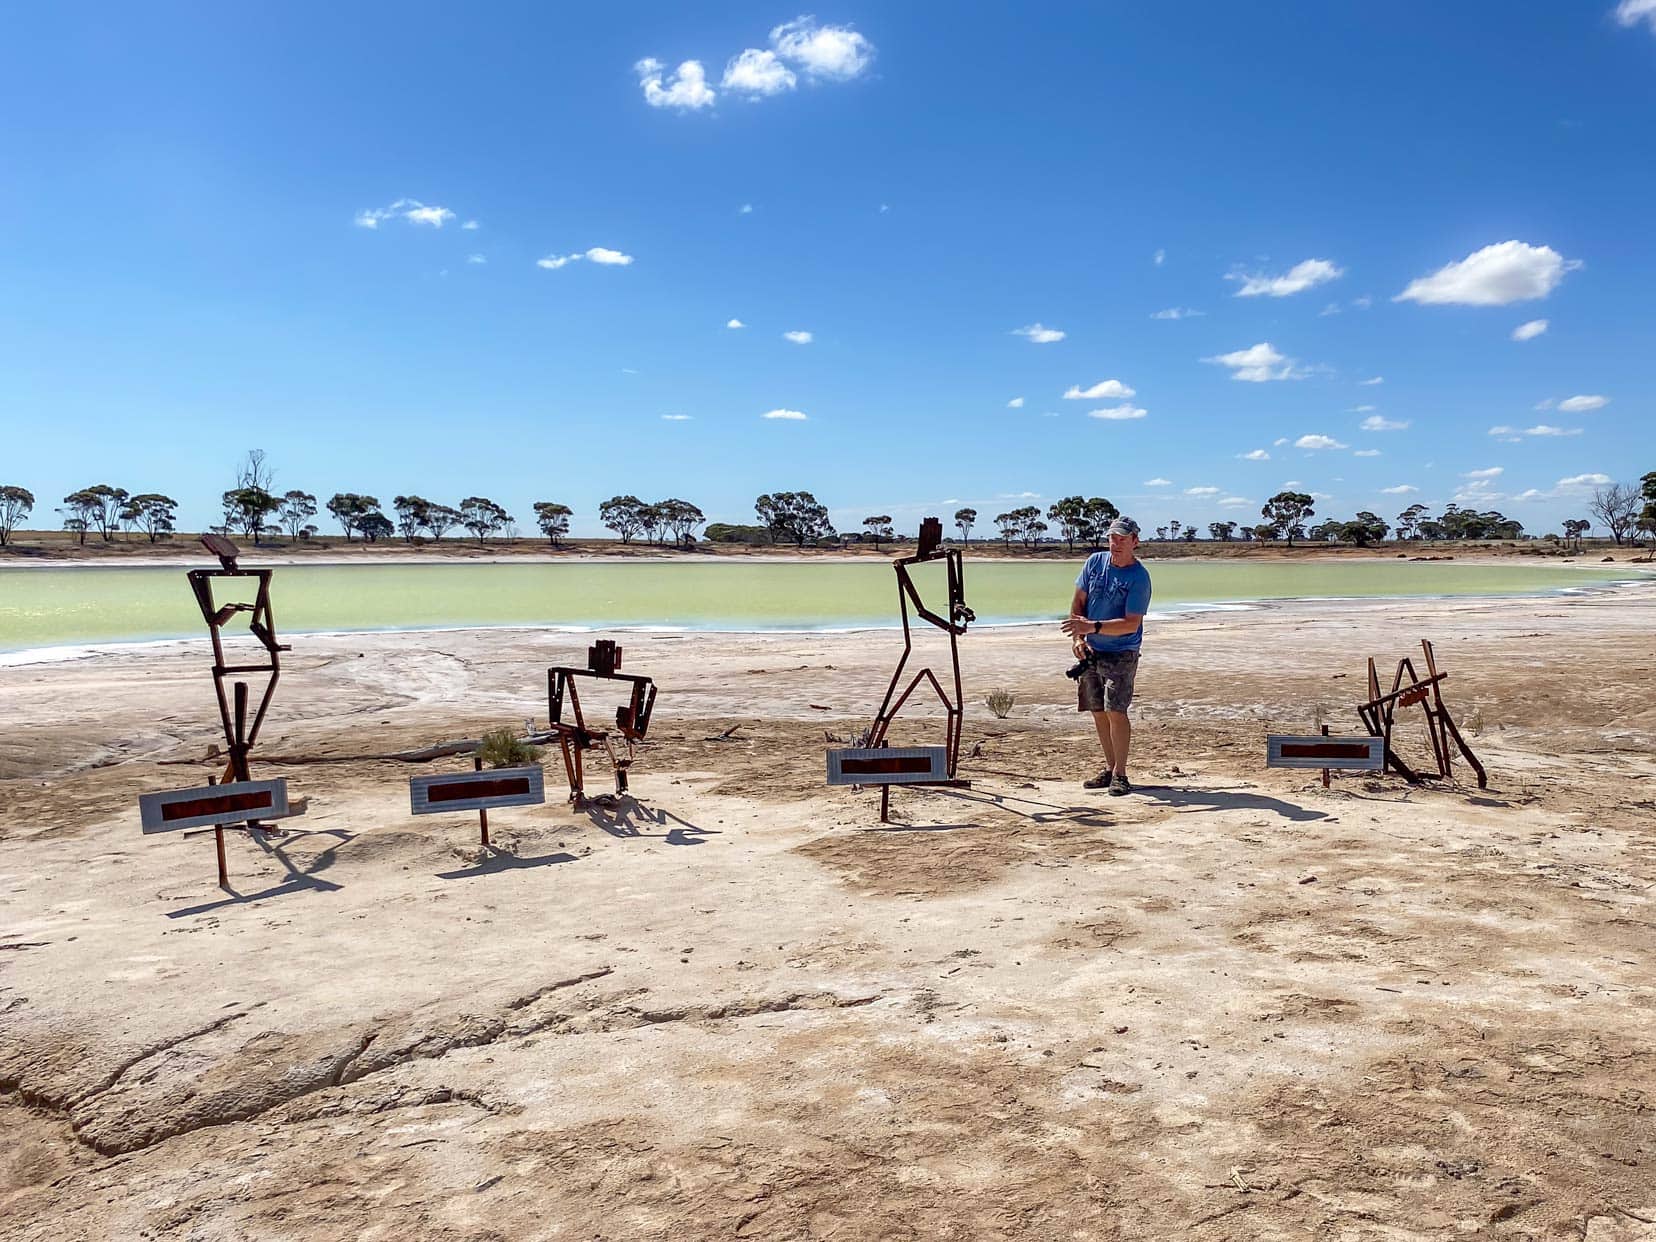
Posing Shots
It’s time to get your silly on. Max out your creativity with silly selfies or funny poses, and bring out the laughs.
Spot the odd one out in our road trip photo below.
5. Getting Ideas from Social Media
Gathering inspiration before your journey can transform your road trip photography. Here’s how to find and make the most of visual inspiration:
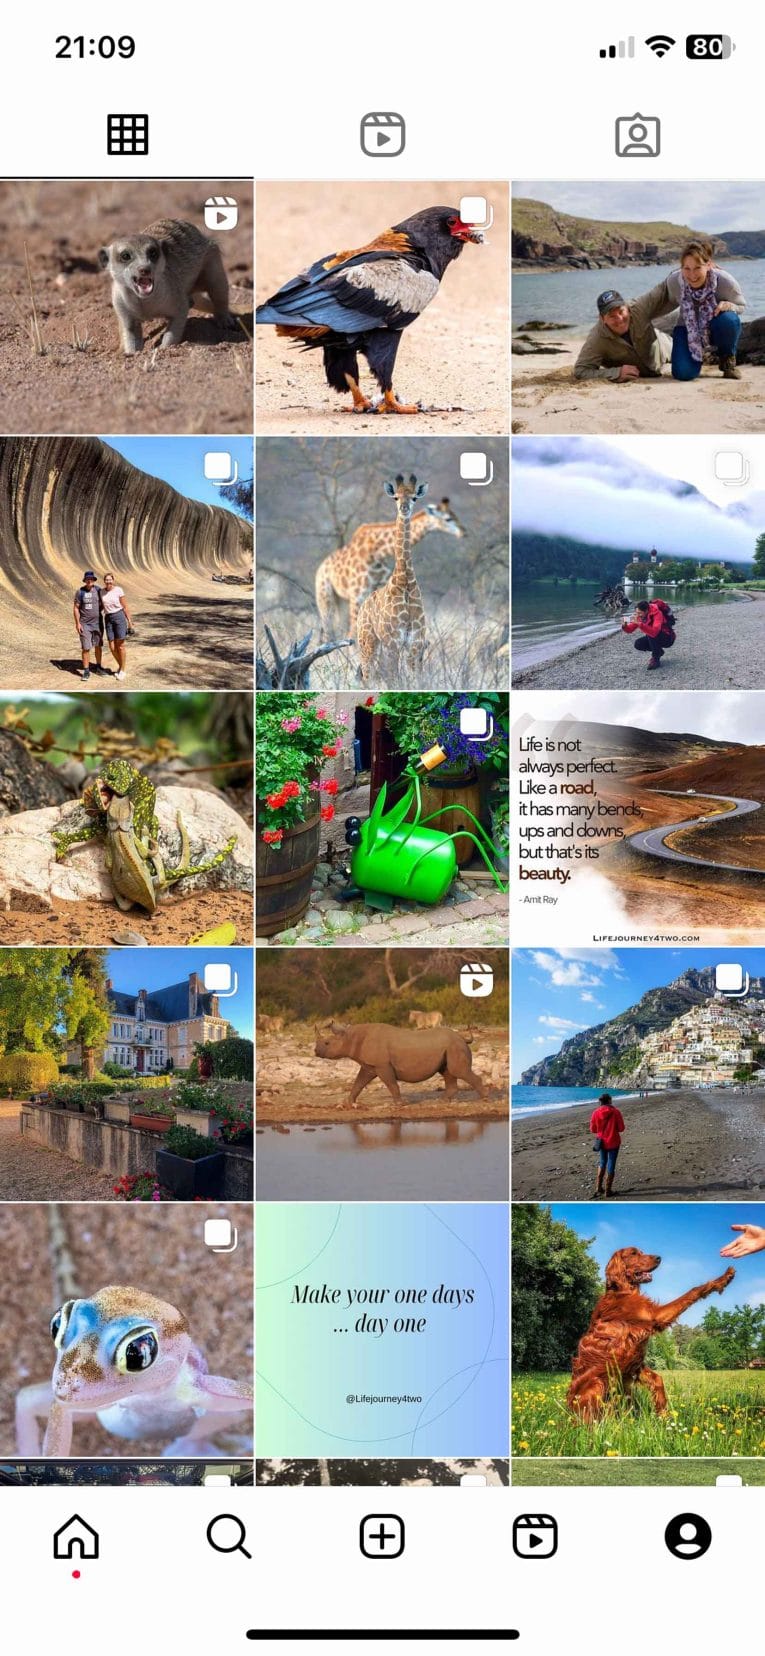
- Explore Social Media: Platforms like Instagram, Pinterest, Flickr, and 500px offer many creative ideas. Look for posts tagged with your destination to discover popular and hidden gems.
- Photography Books and Magazines: Traditional media can be incredibly inspiring. Photography books often showcase different styles and techniques you might not encounter online.
- Local Blogs and Websites: Check out travel blogs and local tourism websites for photo inspiration. They often feature less-known locations that are perfect for unique shots.
- Google Earth and Street View: Use Google Earth and Street View to scout locations remotely. You can get a sense of the landscape and plan your shots before arriving.
Remember, the unique element in any photograph is your personal perspective. Use these tools to replicate what others have captured and add your own creative spin.
Each place you visit holds different stories, and through your lens, you can tell them in a new light.
7. Night-Time Road Trip Photography
Night photography offers a unique and magical perspective on your road trip. It captures the beauty of the night sky and illuminated landscapes.
1. Use a Tripod
A tripod is an essential piece of kit for sharp night photography. It also keeps your camera stable during long exposure shots. In the past, I’ve used the car roof, rocks, and tree stumps as pseudo-tripods.
Sometimes, you just need to get innovative. Look for a stable surface to keep your camera from moving.
2. Long Exposure Techniques
Long exposures can capture stunning details that aren’t visible to the naked eye.
Use a slow shutter speed to capture the movement of stars, the glow of city lights, or the movement of clouds at night.
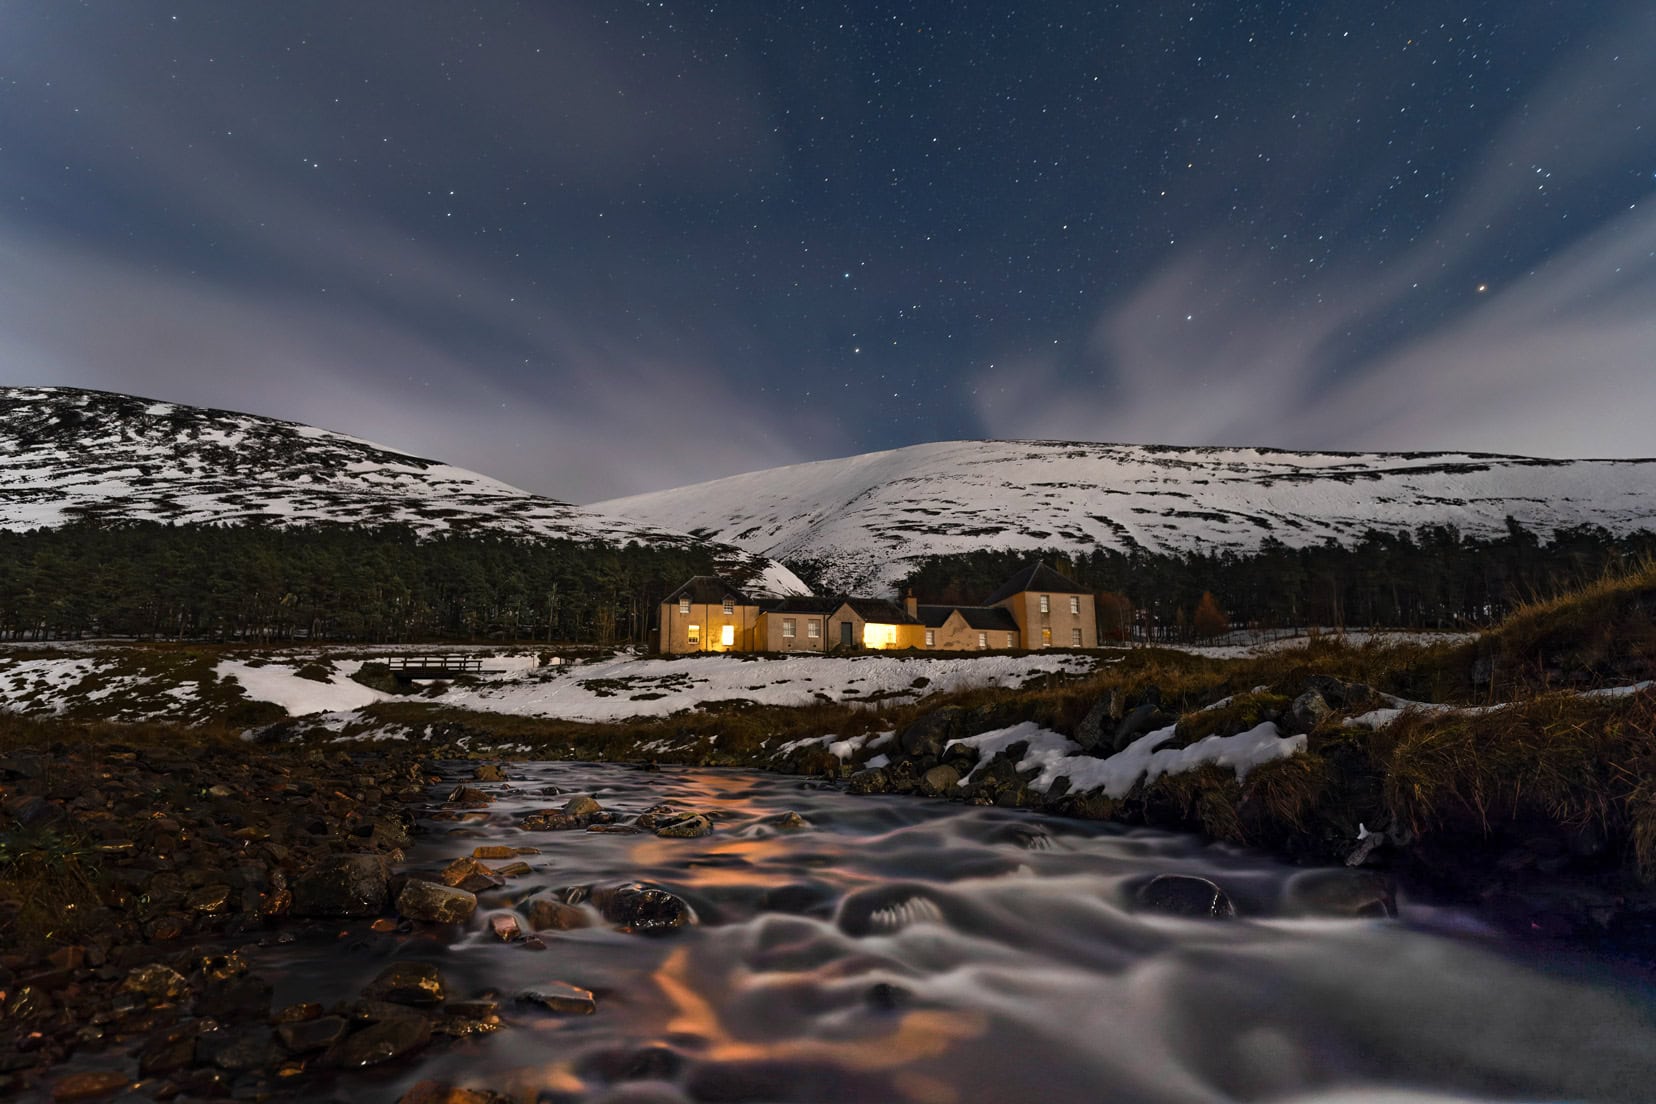
Experiment with different exposure times to achieve the desired effect. For slow-running water, I would lengthen the exposure time.
I found that when shooting the northern lights, I’d need to continually adjust the exposure time depending on the intensity and movement of the lights.
3. Adjust Your Settings
Night photography requires a different approach to camera setup. Use a wide aperture to let in more light, and bump your ISO to enhance the camera’s sensitivity to light.
Increasing ISO has the knock-on effect of introducing noise in the image. Strive for a balance between the two. The maximum exposure time to avoid star trails is calculated as 500/(focal length of the lens).
Using my Sony 20mm, the max exposure time is 500/20 is 25 seconds.
4. Focus Manually
Autofocus can struggle in low-light conditions. Switch to manual focus, use live view to zoom in, and adjust focus until your subject is sharp. This is especially useful when shooting stars to have pinpoint focus.
To test if the focus is pin sharp, take a photo and zoom in to view the brightest star. If the colour fringing is green, push the focus away. and the opposite for a red fringe, pulling the focus closer.
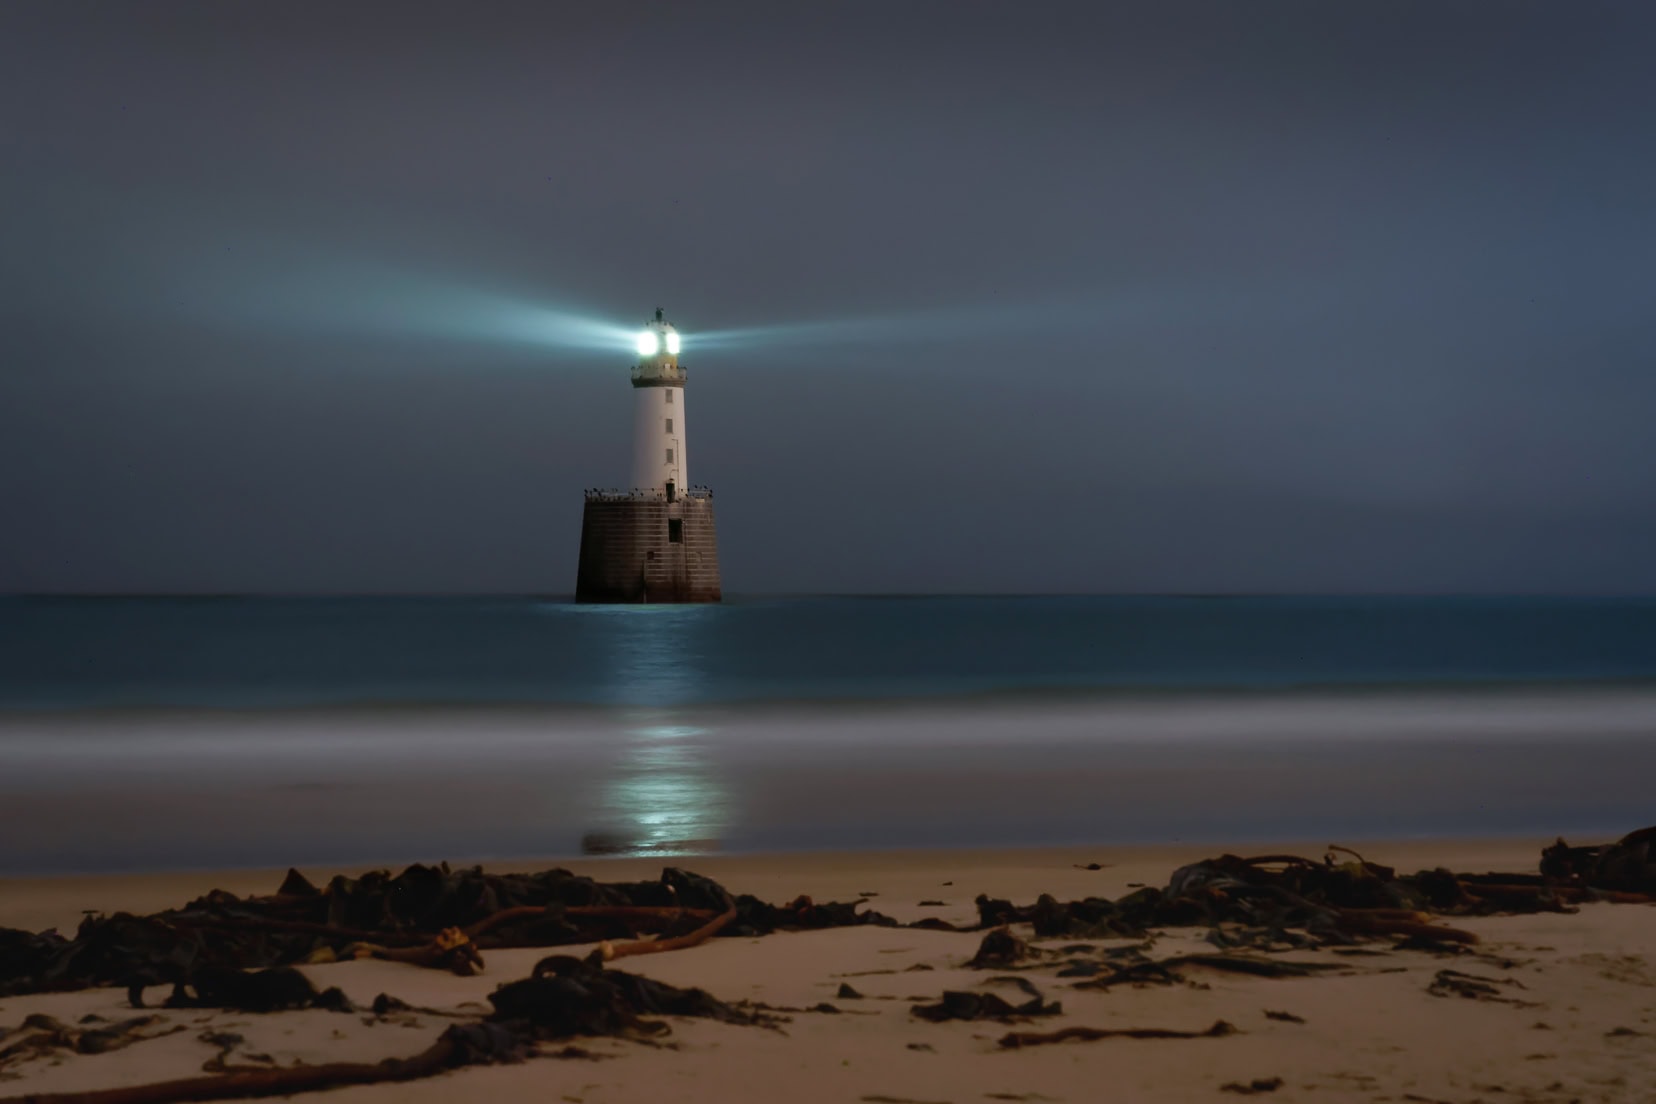
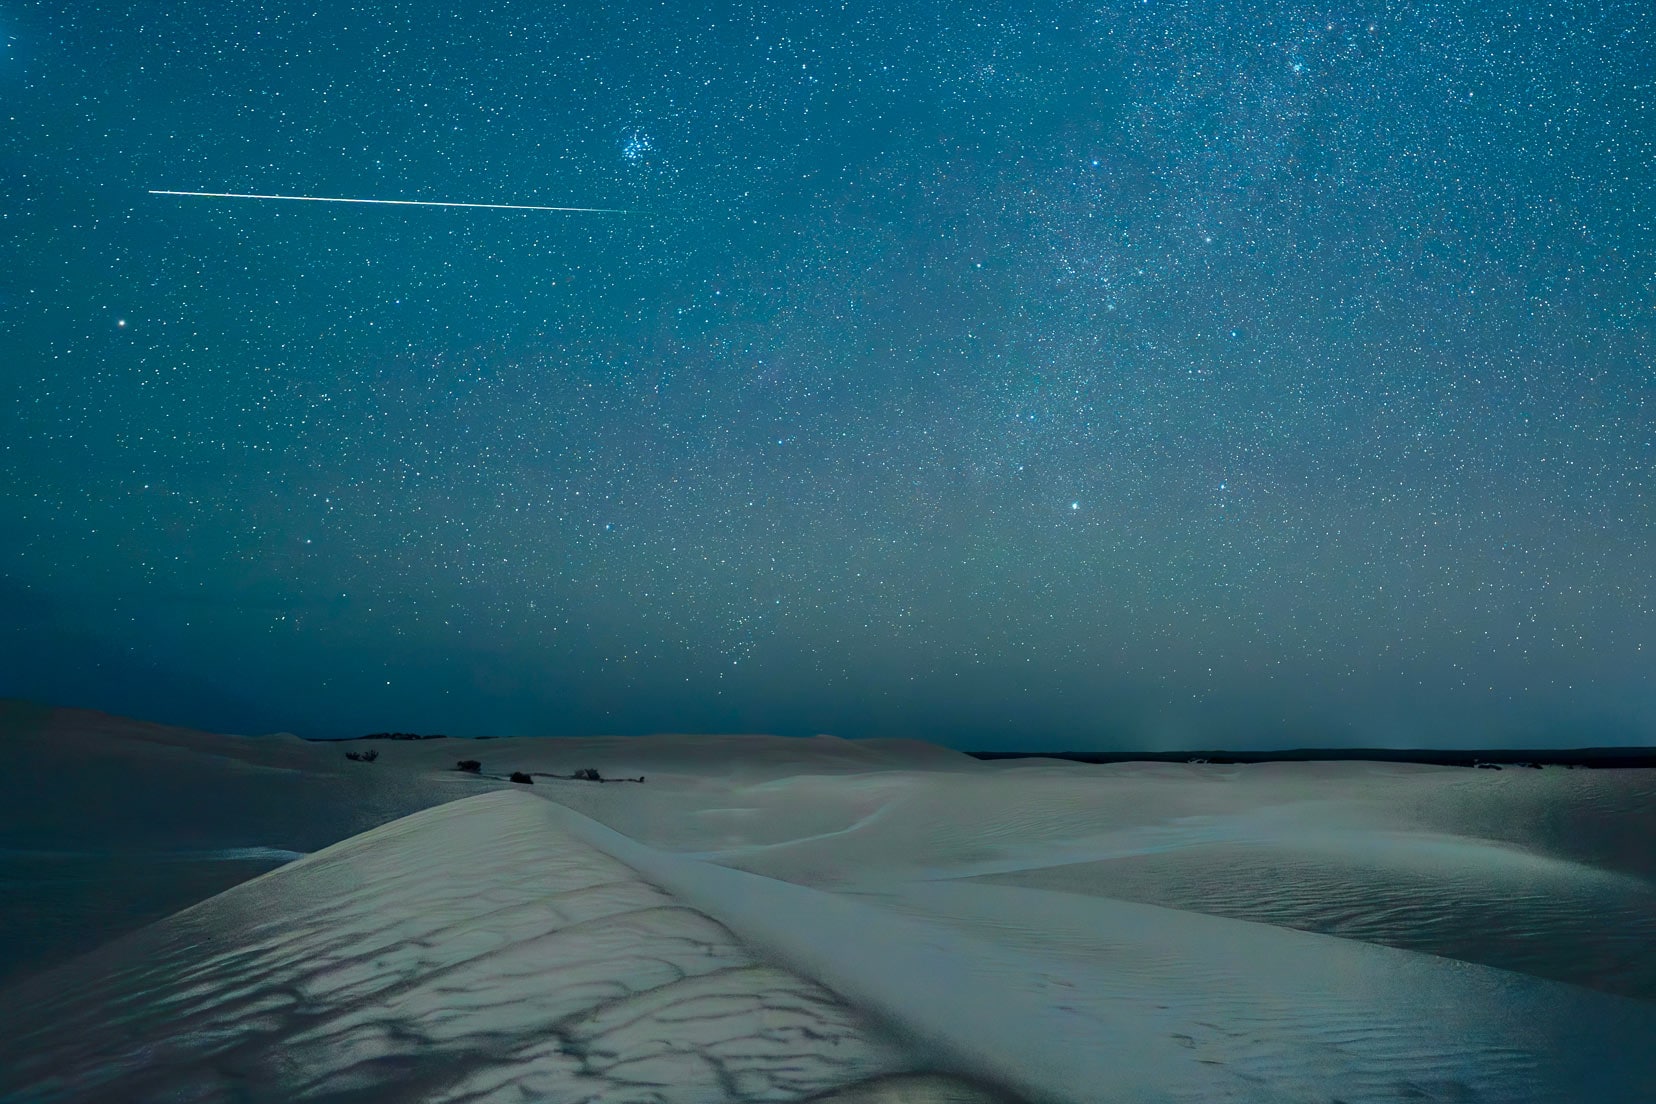
5. Capture the Milky Way, Moon and Star Trails
The night sky offers incredible opportunities for unique shots. To capture the Milky Way, find a location with minimal light pollution and use a wide-angle lens.
For star trails, use a long exposure of several minutes or stack multiple shorter exposures together in post-processing.
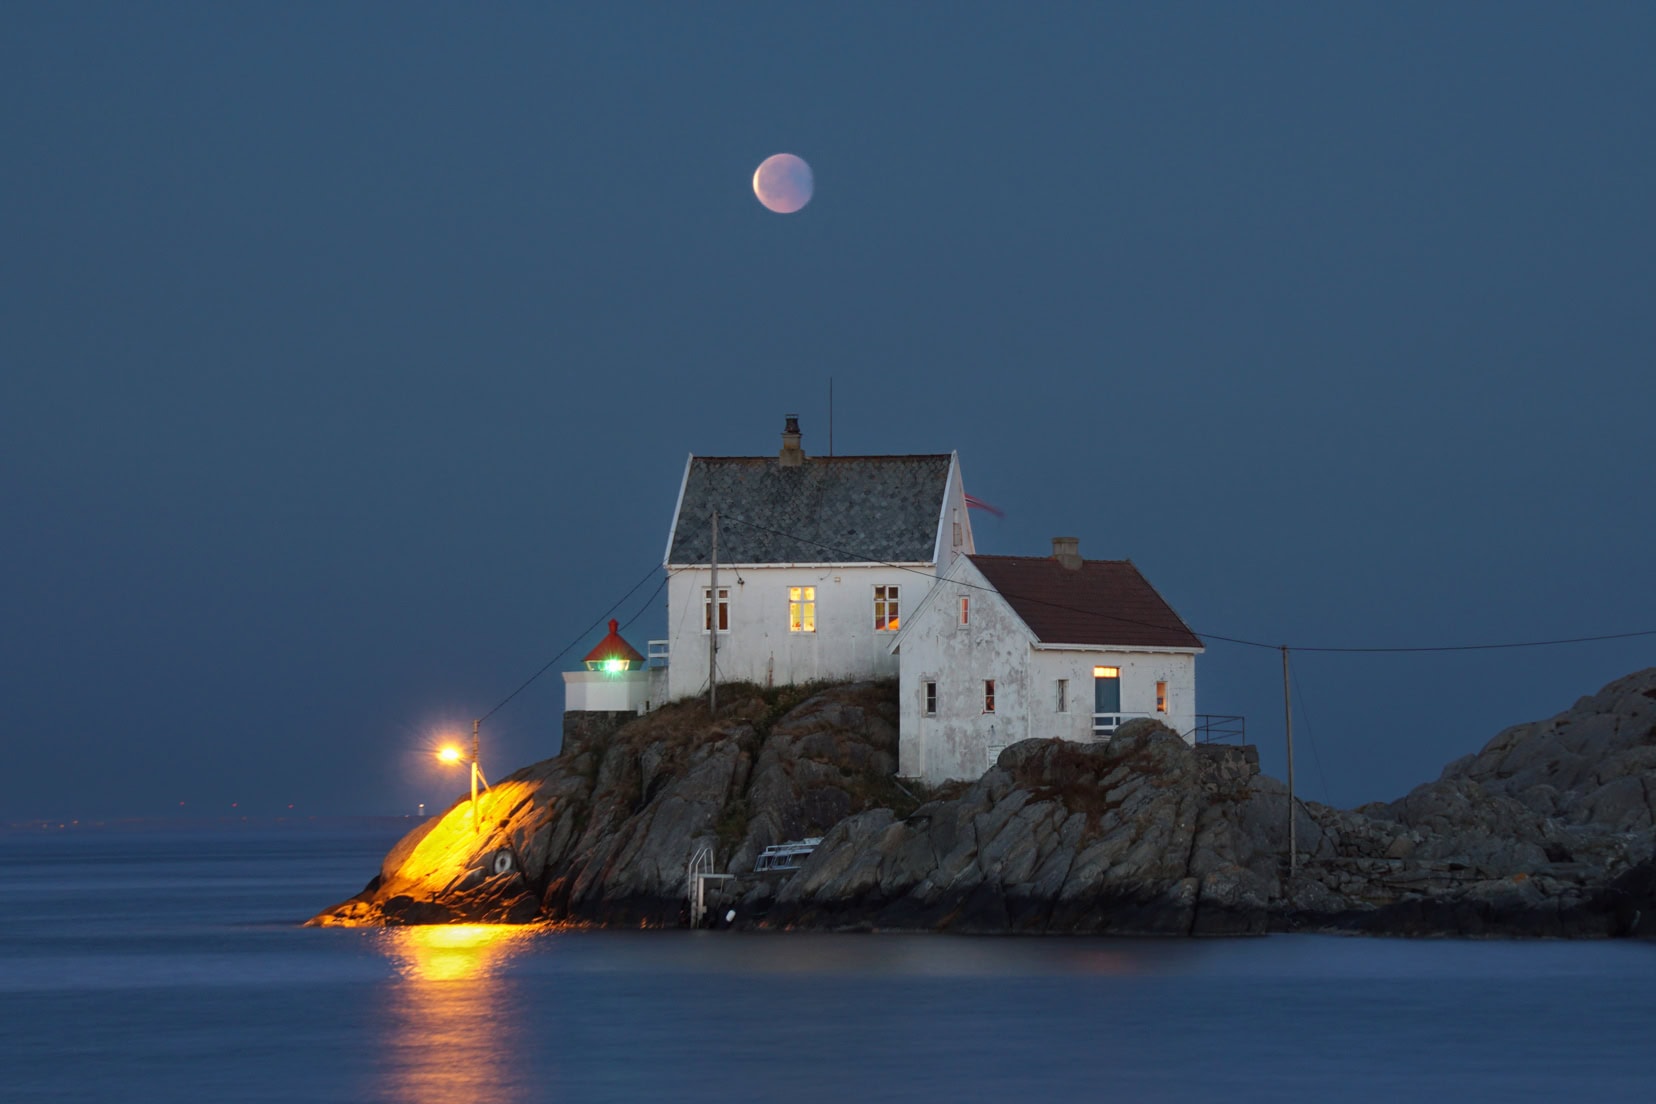
Capturing the moon can be challenging if it reflects a lot of light, and you’ll want to have something interesting in the frame. I did exactly this when shooting the blood moon eclipse over the historic Vikholmen lighthouse in Skudenshavn, Norway.
Capturing People on the Road
Candid shots of people, wildlife, and spontaneous moments add authenticity to your travel photography. Instead of posing your subjects, try capturing them in natural, unposed situations.
We find that shooting candid images of people makes us feel like we’re invading their space and can also make them feel uneasy. If you can catch their eye, then point to your camera to ask, is it ok to take your photo?
Other ways to avoid awkward moments are to:
- Use a zoom lens to give you a degree of separation from the subject
- Join a tour where it is expected that photos will be taken.
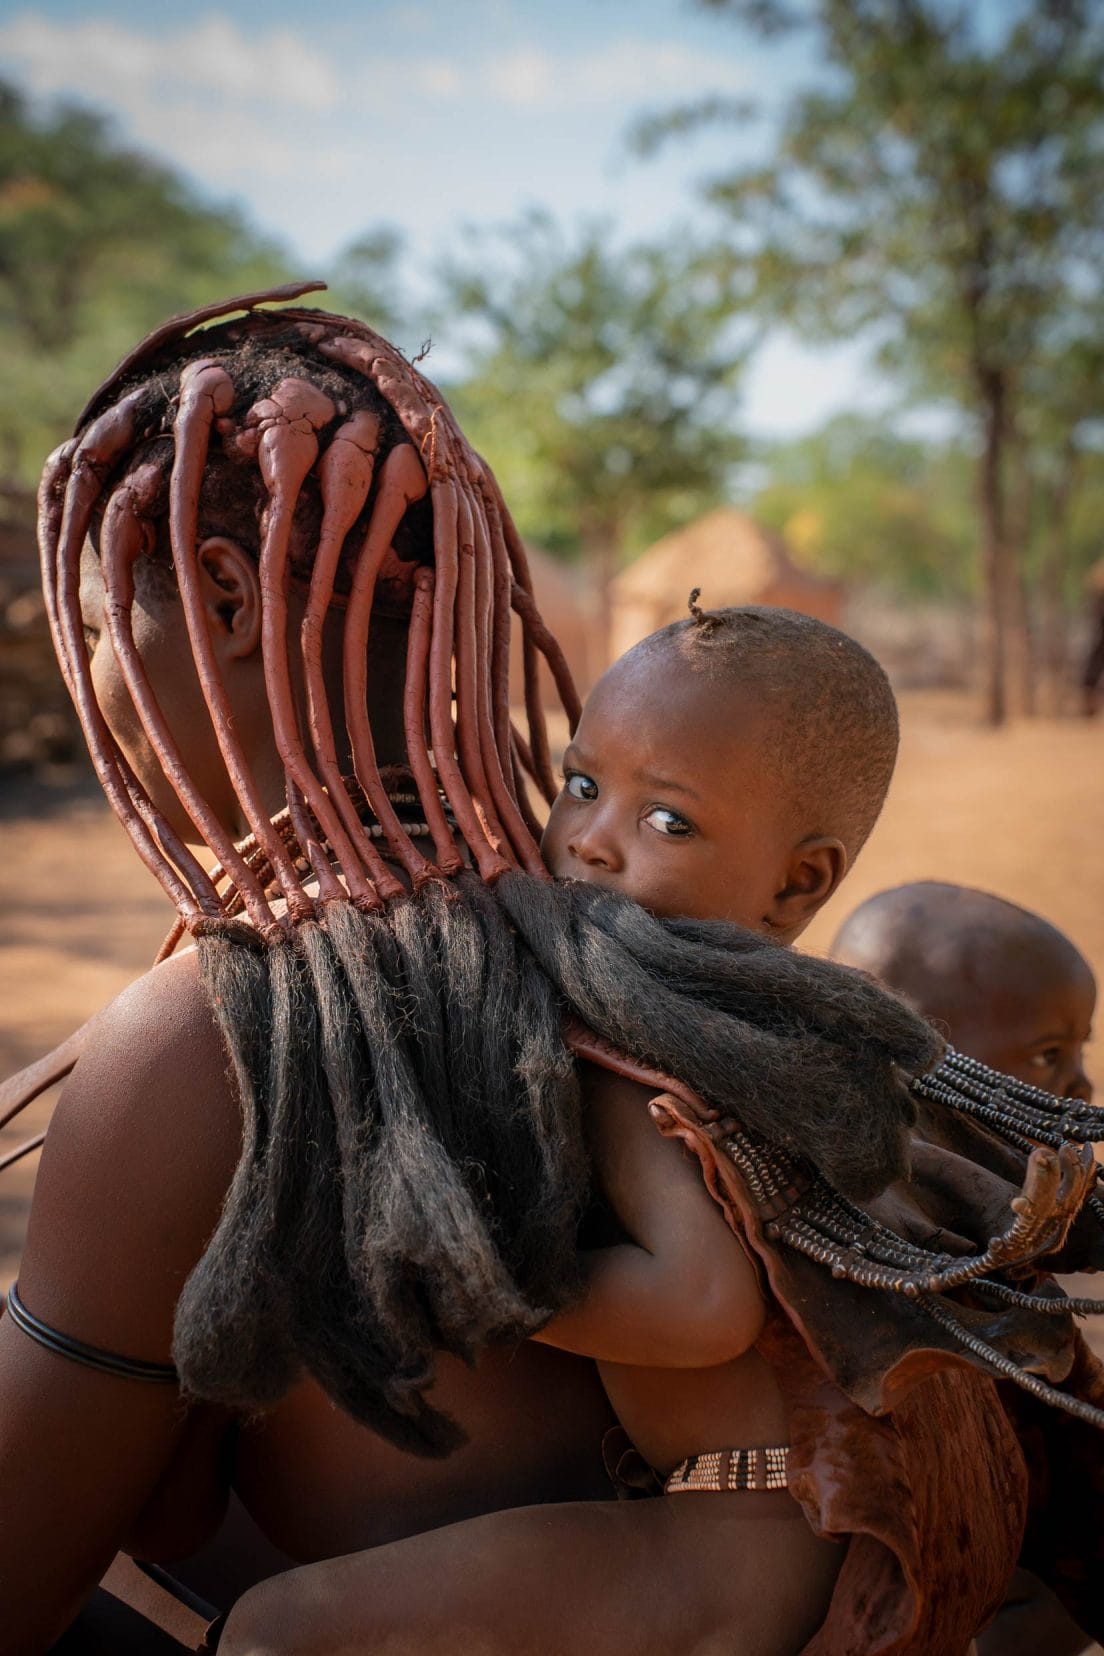
In northern Namibia, a guide took us to a Himba village, where the inhabitants live as they did hundreds of years ago. We conversed through the guide, building a rapport with the Himba. We were allowed to take photos but still asked out of courtesy.
Planning Your Road Trip Photography
When planning a road trip, your route can make all the difference in what you see and what you get to photograph. A well-planned route lets you capture the landscapes and unique landmarks that really give your photos a sense of place.
Here are some tips to help you plan your journey around the best photo opportunities:
Research and Plot Your Journey
Decide what you want to shoot. Is it landscapes, portraits or wildlife photography you’re keen on?
What images have inspired you? Look through Flickr, Instagram, or 500px and find a similar image that resonates with you and is in your area.
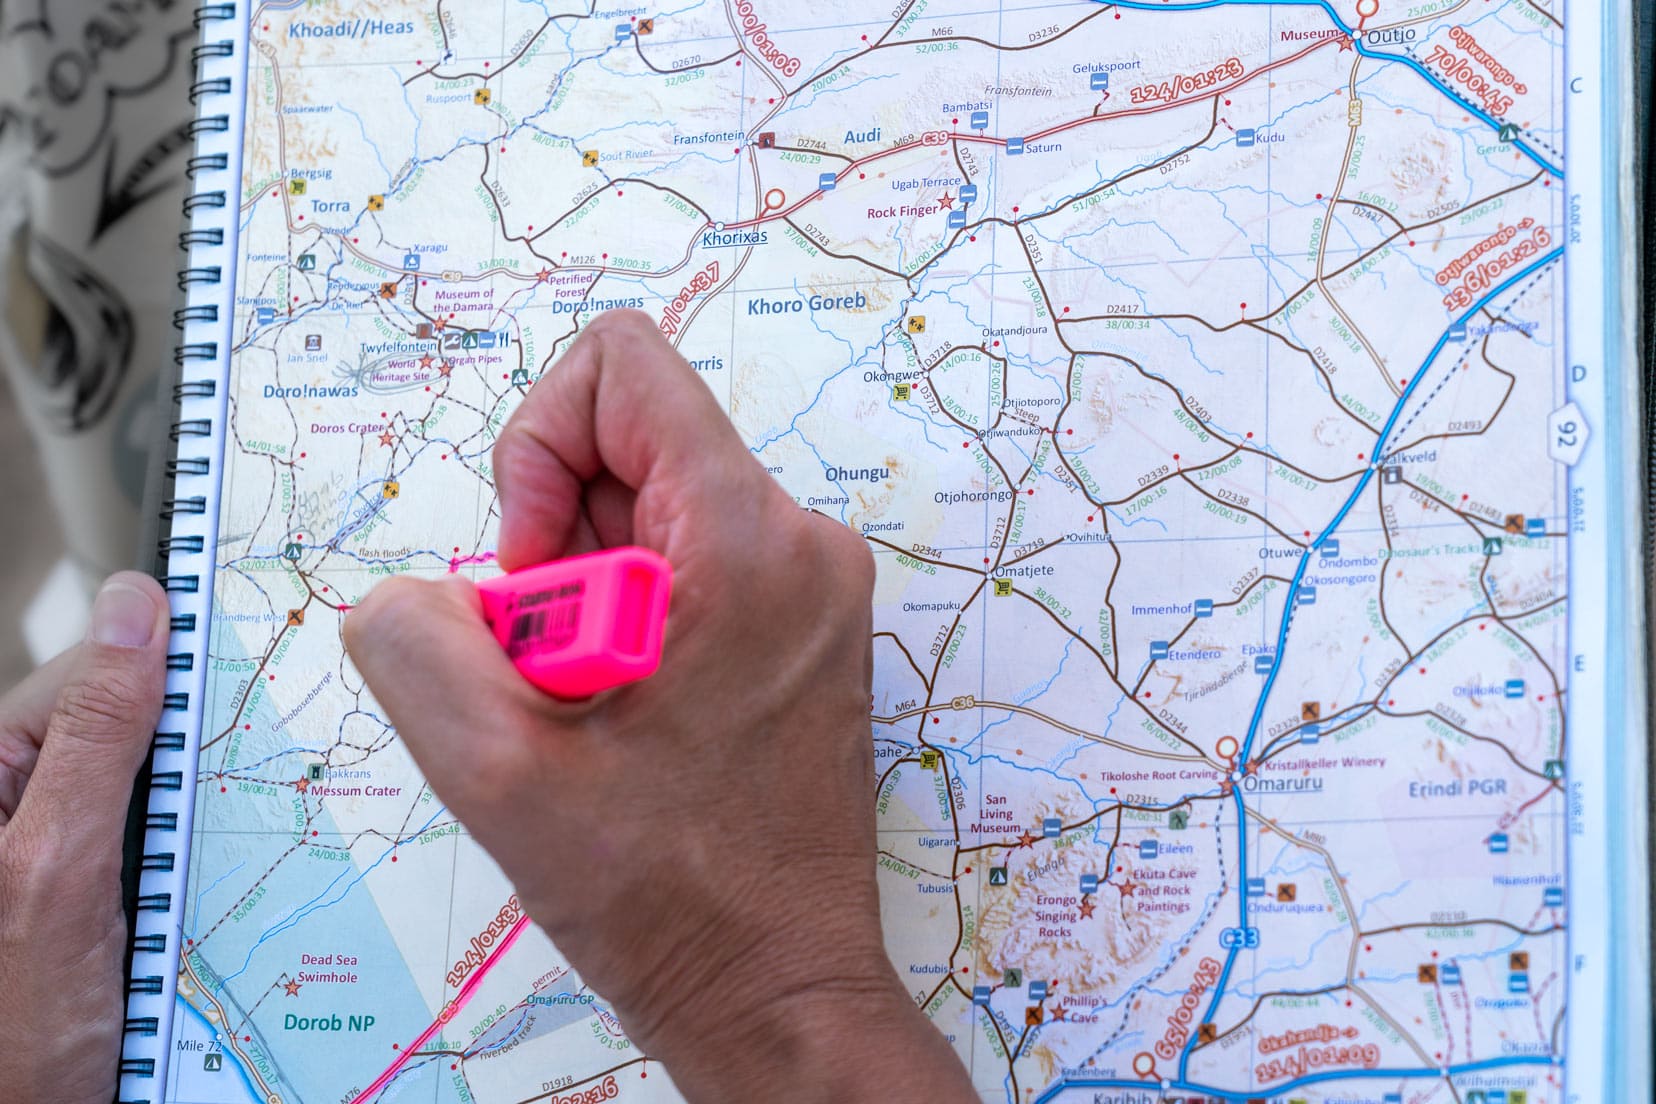
I use a useful paid app, Photopills, which helps you plan your shots by providing information on lighting, sun and moon positions, focal lengths, depth of field and Astro shots.
Focus on Scenic Routes
Choose routes known for their scenic beauty. Open roads that pass through national parks and coastal and mountain passes often provide fantastic views and offer extra photo opportunities.
Norway’s scenic roads are dotted throughout the country and are fantastic for road trip photography. They are renowned for their natural beauty.
Find what’s available close to you or where you are travelling to and hit the road.
Seek Out Unique Landmarks On Your Road Trips
In addition to popular tourist spots, seek out unique landmarks that tell a story. These could be historical sites, quirky roadside attractions, or off-the-beaten-path locations.
Driving along the highway, look for unique natural features that make compelling subjects.
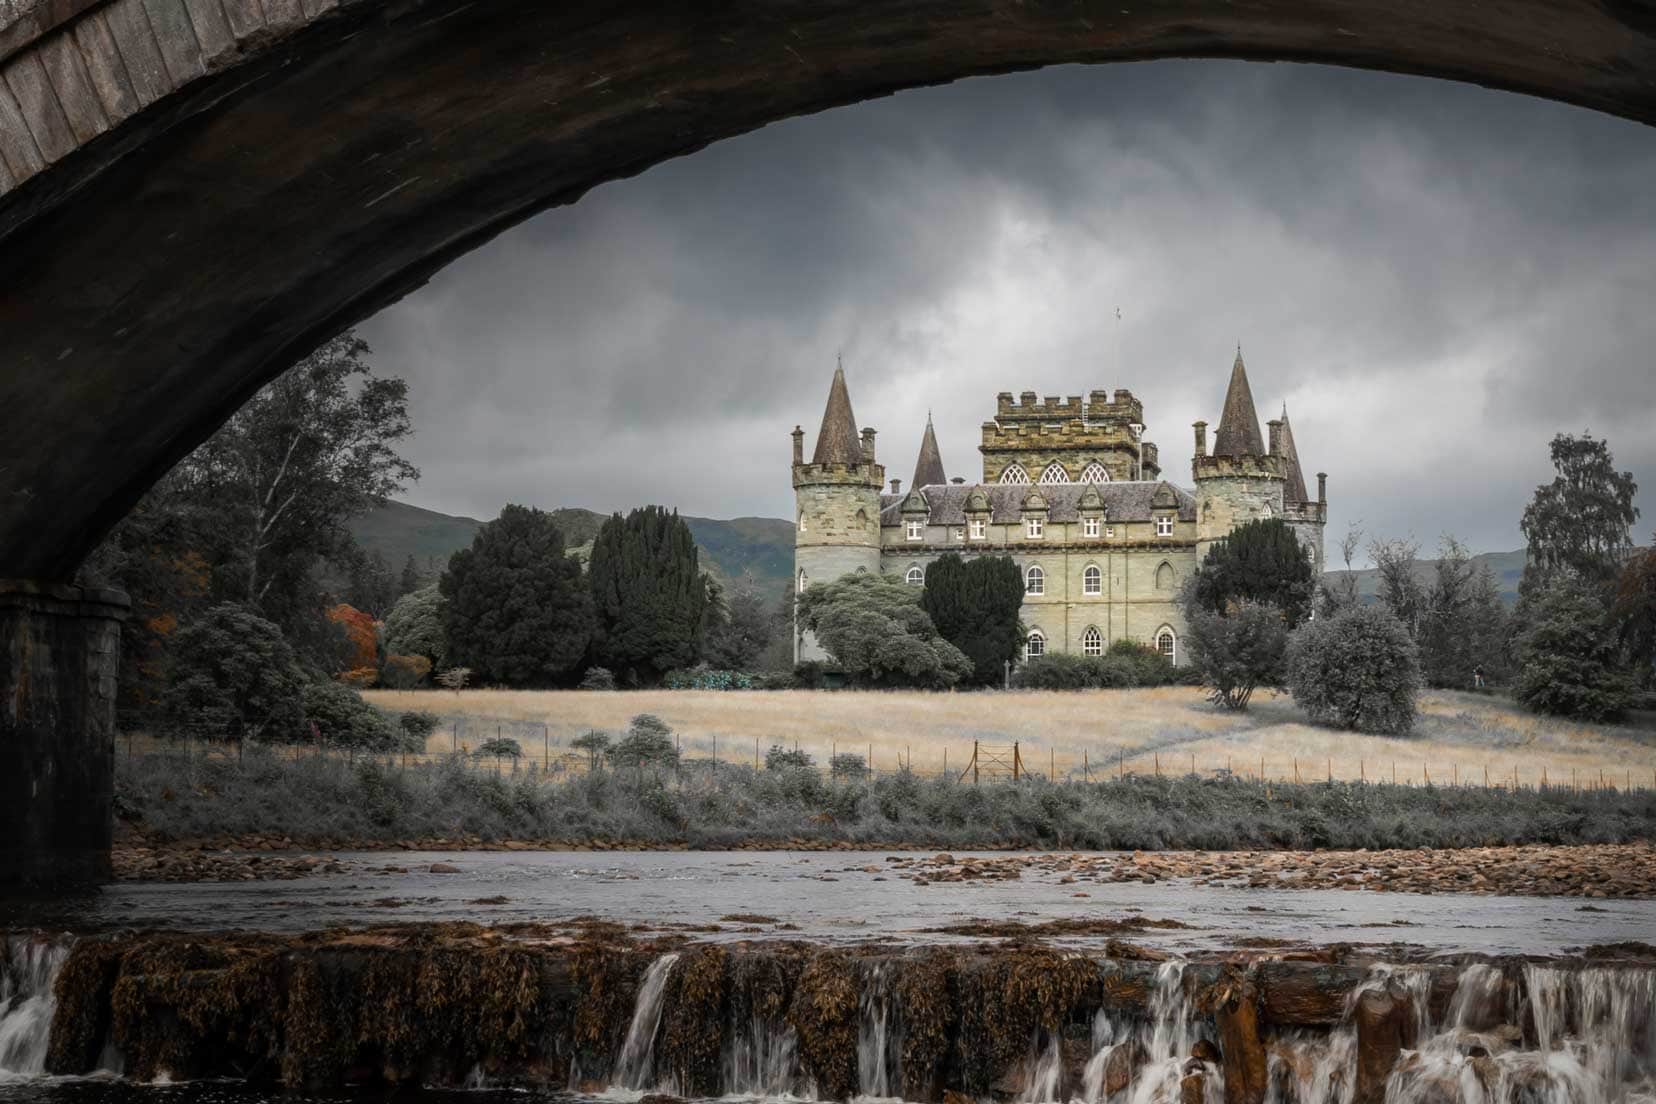
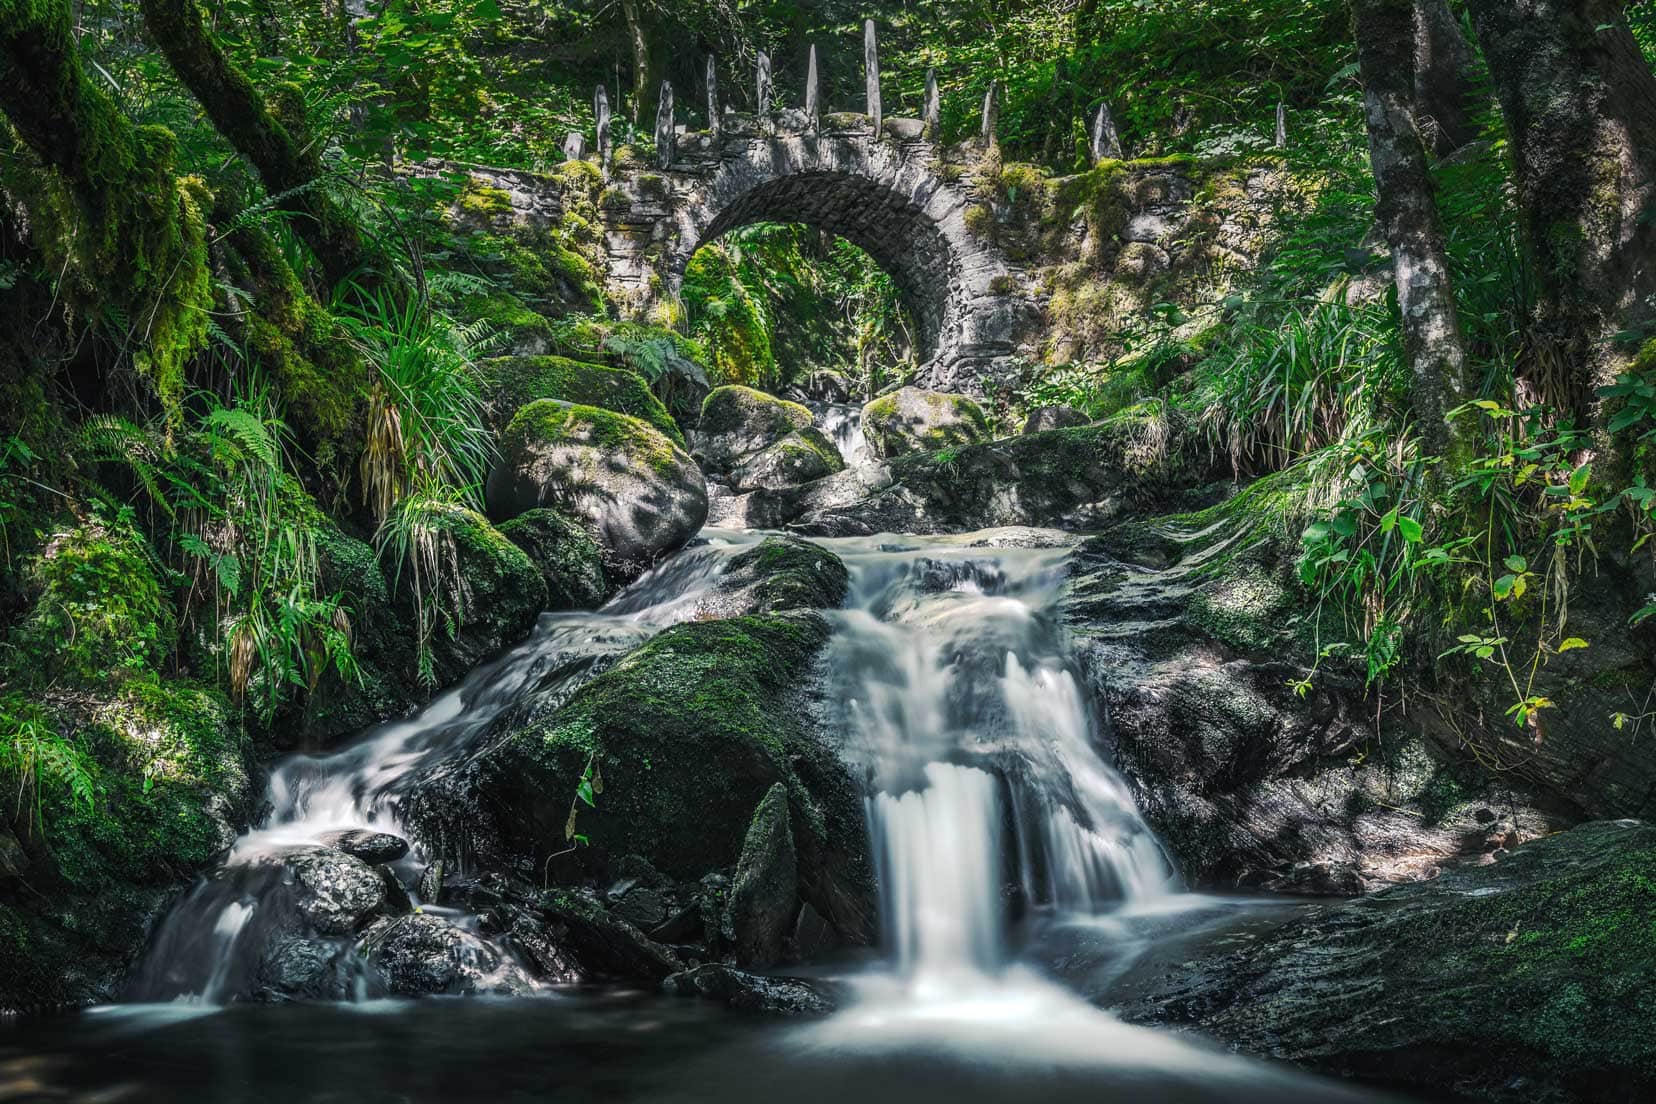
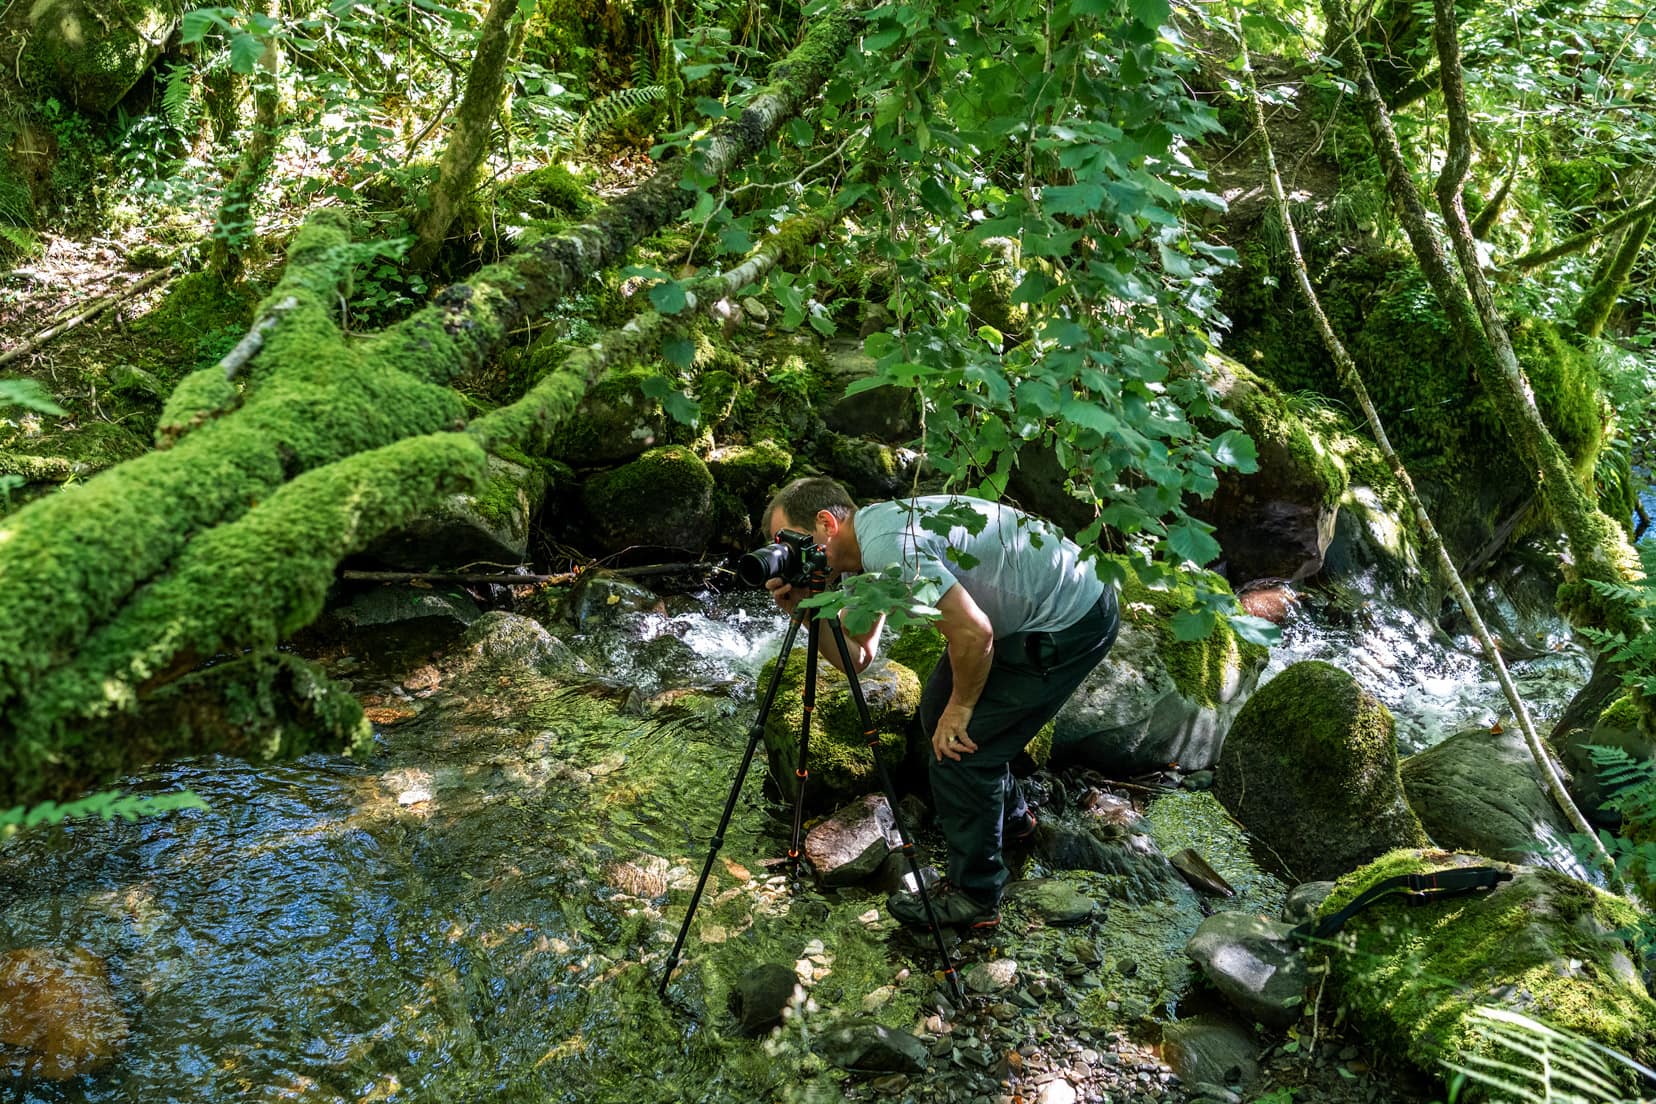
For example, when we were passing this castle on the road, I spotted this bridge and climbed down into the stream to get a shot of the castle using the bridge arch to frame the shot.
Research online forums and photography communities to find recommendations from fellow travellers.
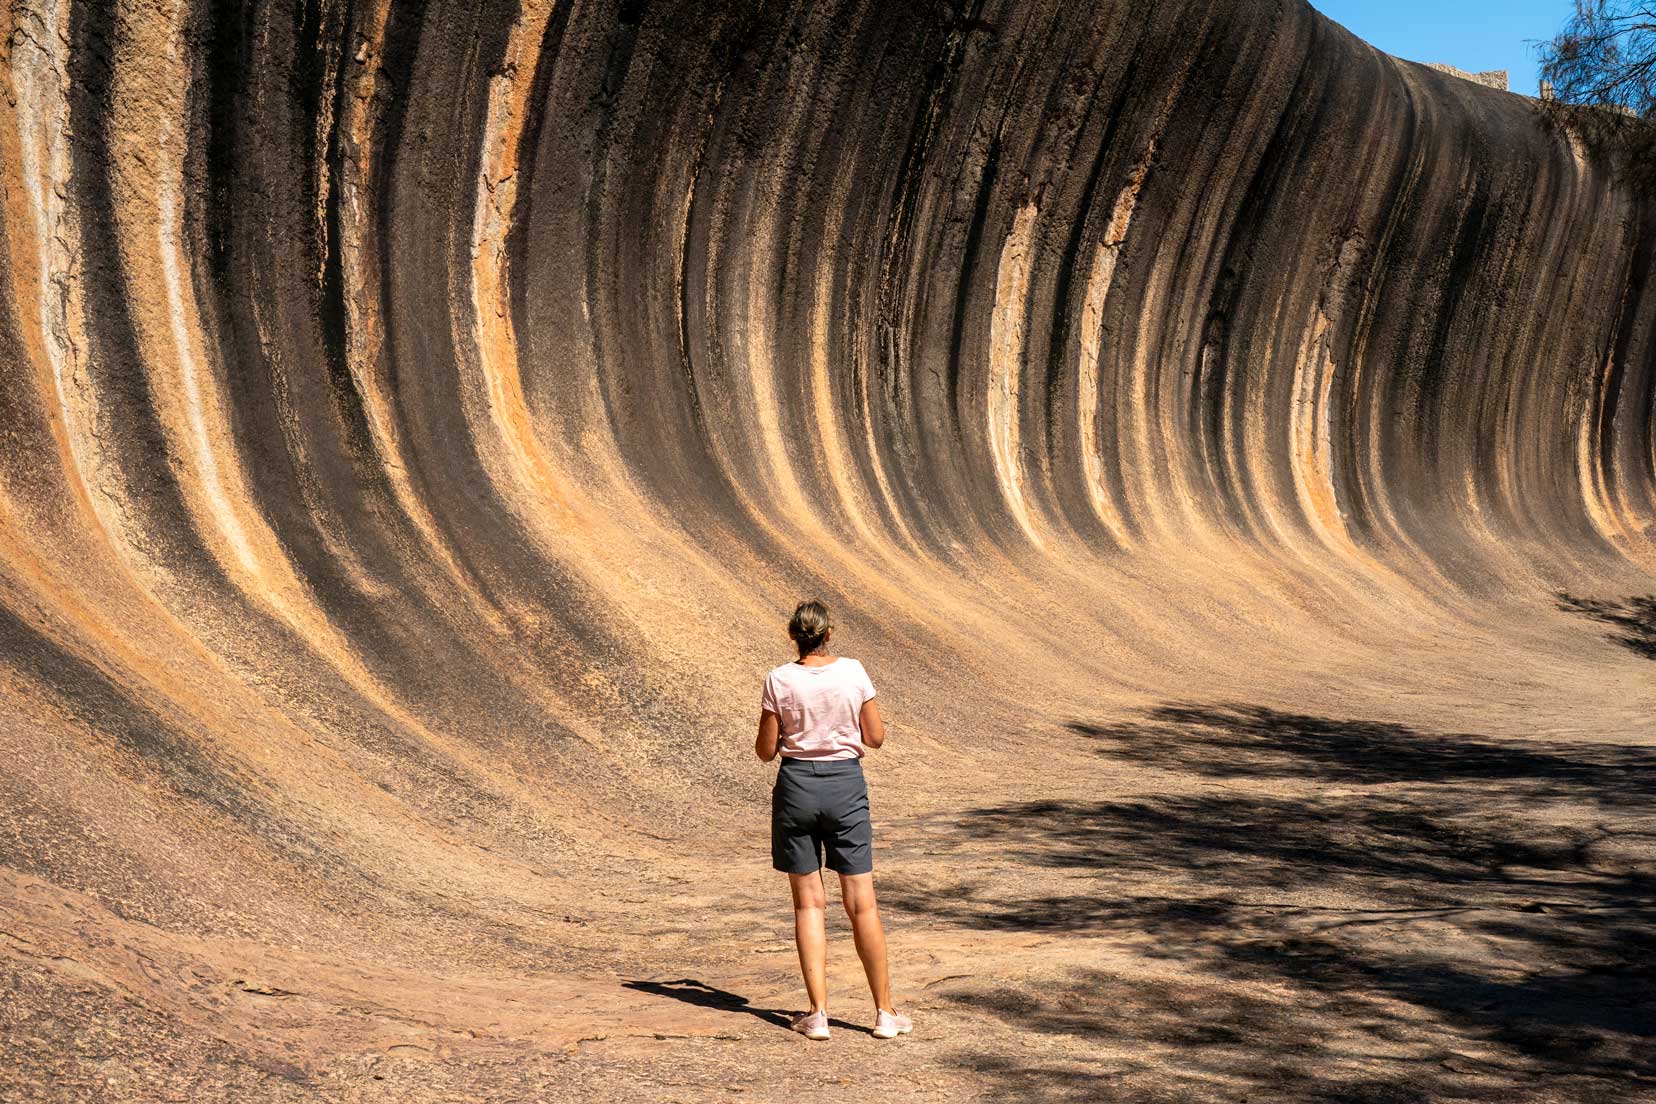
In Western Australia, our home state, we have the epic Wave Rock, a natural rock formation shaped like a tall, breaking ocean wave in the middle of nowhere. It’s an iconic landmark perfect for photographing.
Explore Lesser-Known Spots
While famous landmarks are must-sees, don’t overlook lesser-known spots that offer a different perspective. These off-the-beaten-track spots can often provide some of your trip’s most memorable and unique photos.
Local guides, maps, and talking to locals can help you discover these secret locations.
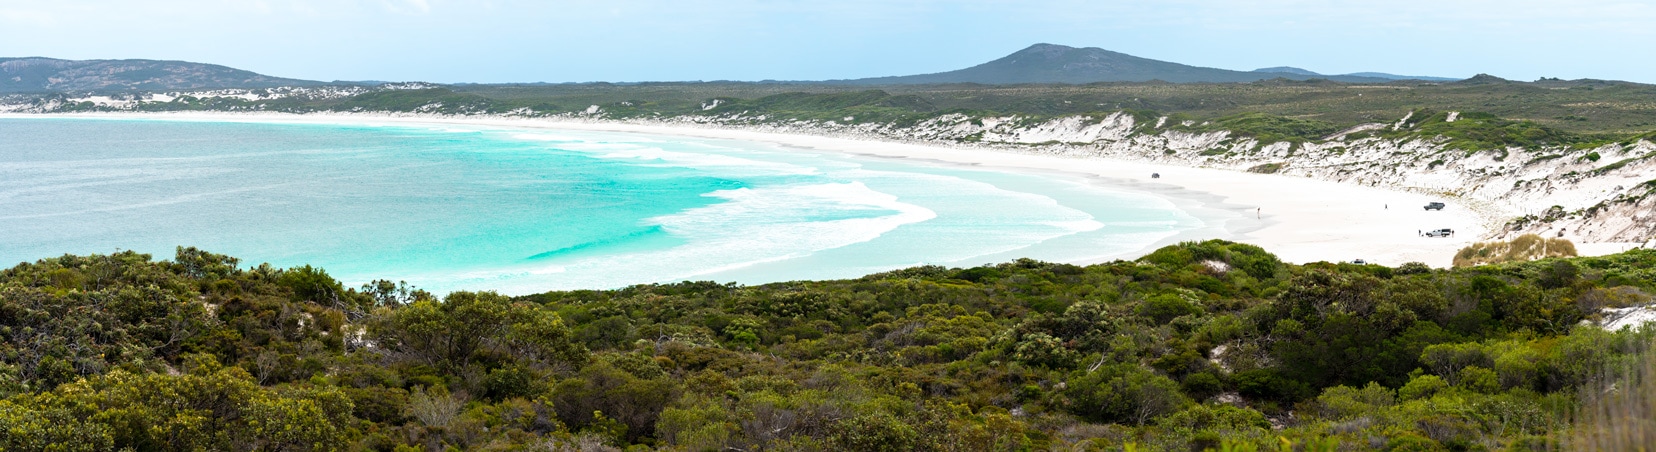
During our Perth to Esperance road trip, we visited the gorgeous Lucky Bay and after chatting to a local, we were given a hot tip about not missing the long stretch of white sands at Wharton Beach.
He was right, it was gorgeous! A chat with the locals was certainly worthwhile.
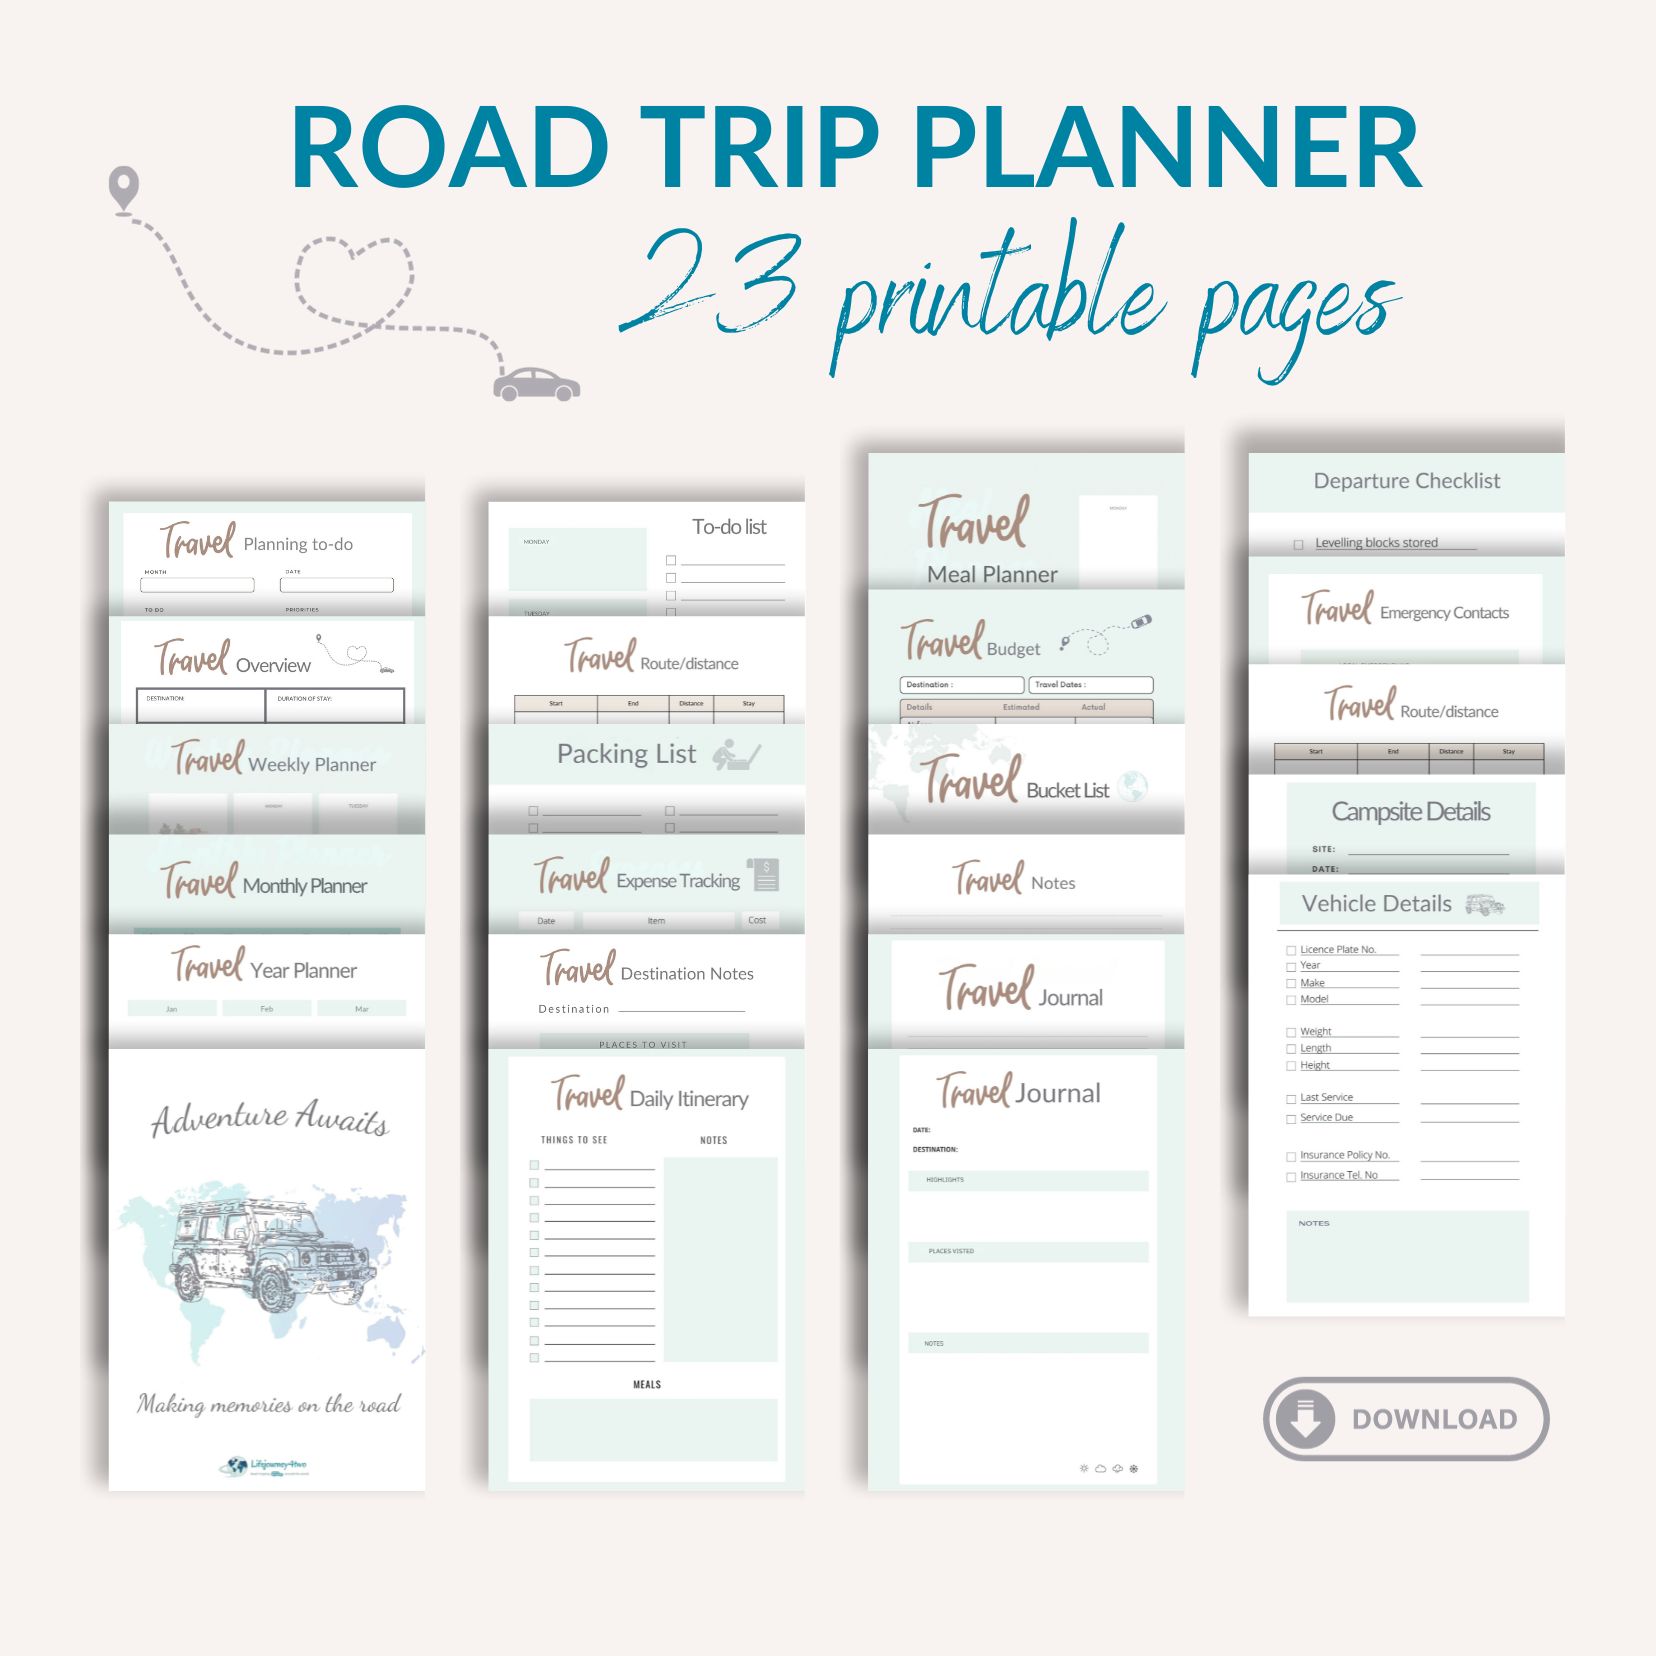
Download our free printable road trip planner to help plan your next photography road trip.
Stay Flexible
Even with the best planning, be prepared to adapt your route.
Weather conditions, road closures, or unexpected discoveries can change your plans. It’s good to have a plan B. And you never know – plan B might see you have even better opportunities for photography.
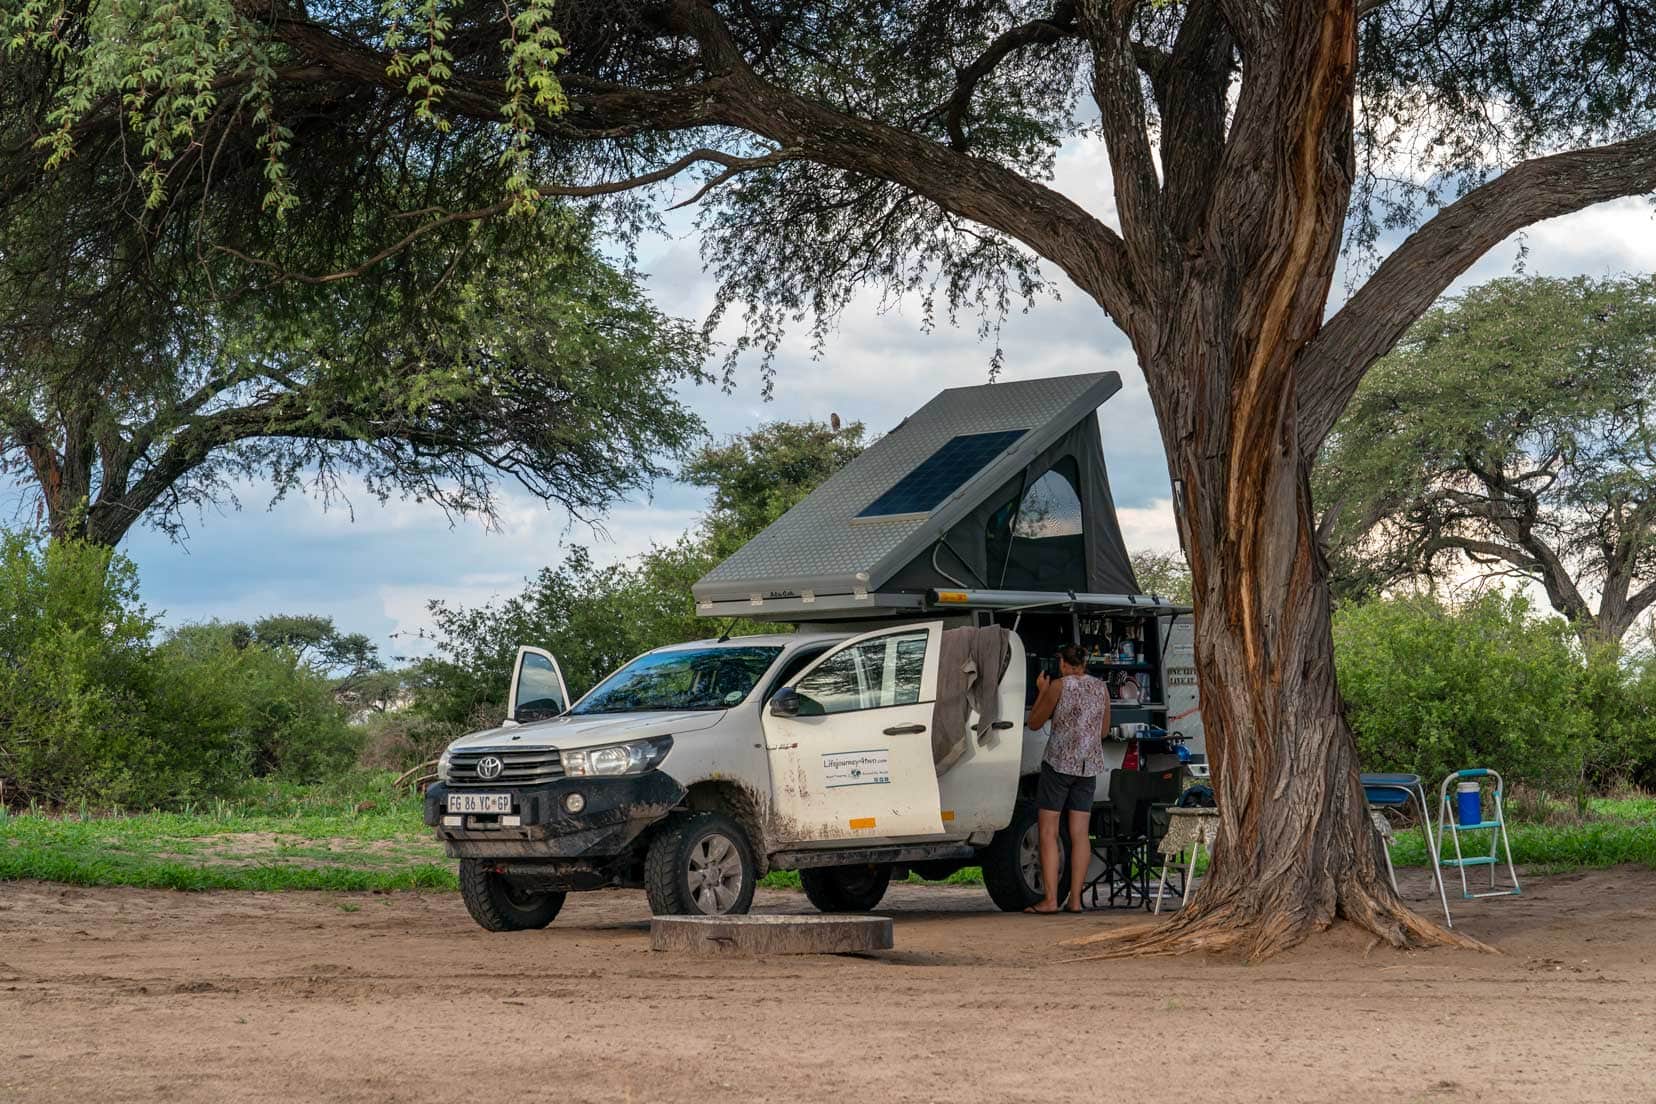
This is especially true when we overland Africa in our 4×4 bushcamper. Situations can be very fluid, and having options means we have a degree of flexibility to adapt to these changes.
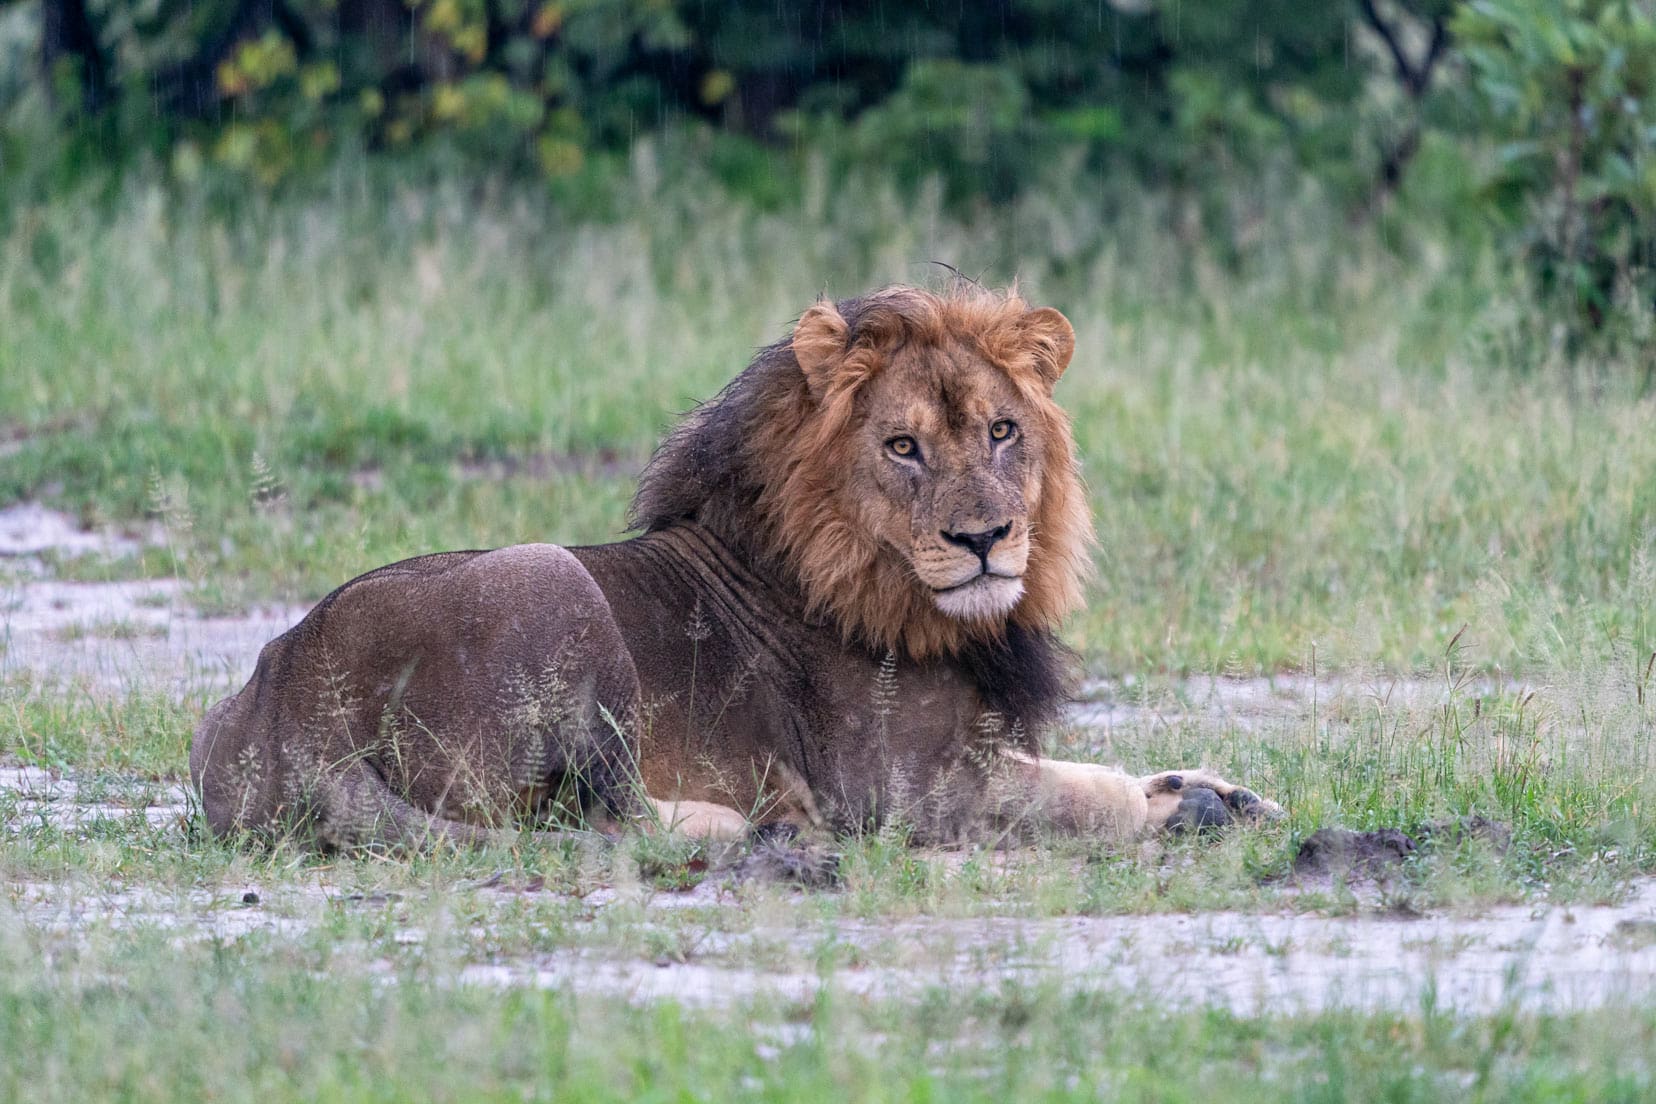
It brings to mind a time when we were on a self-drive safari through the Okavango Delta in Moremi National Park, Botswana. Heavy rains began, and the roads started flooding.
It was pretty hair-raising, and we just made it back to camp. Our planned route was now impassable. But those same heavy rains meant we got a great sighting of this lion soaked to the bone.
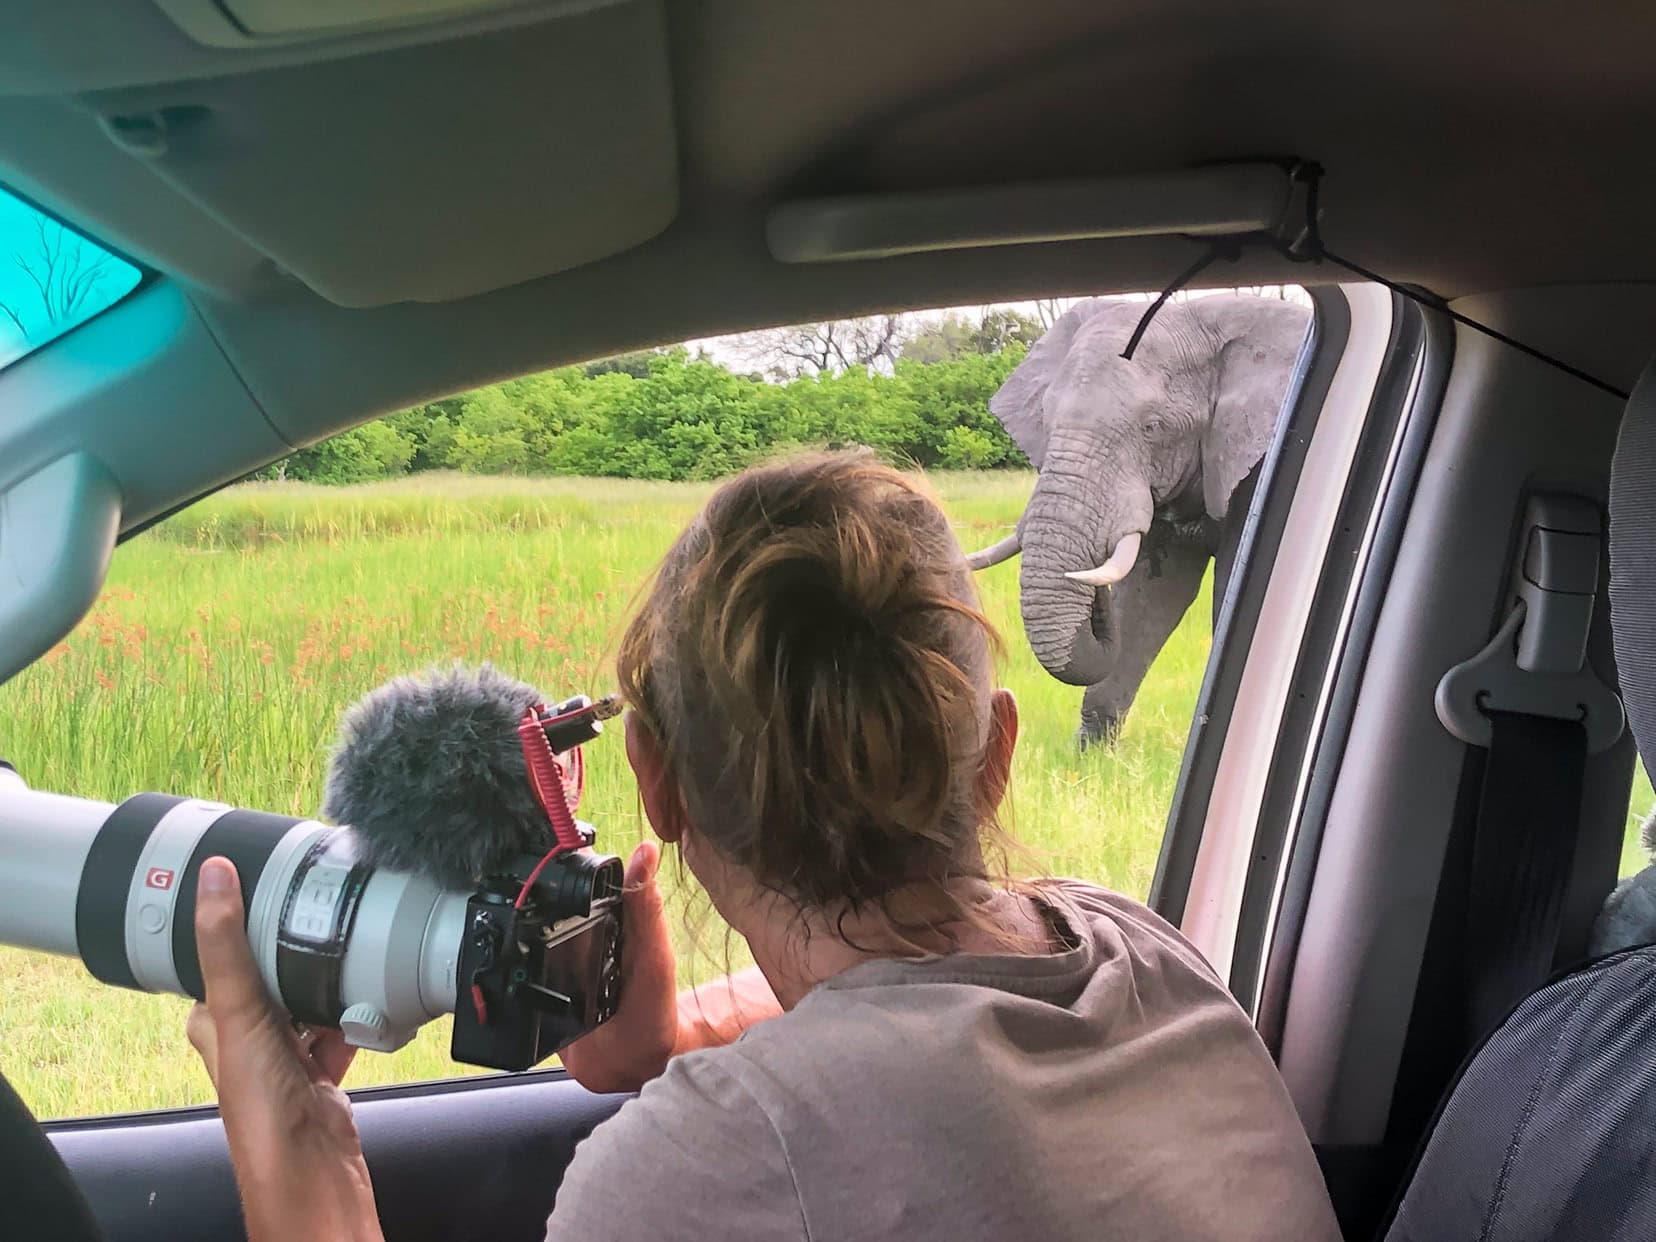
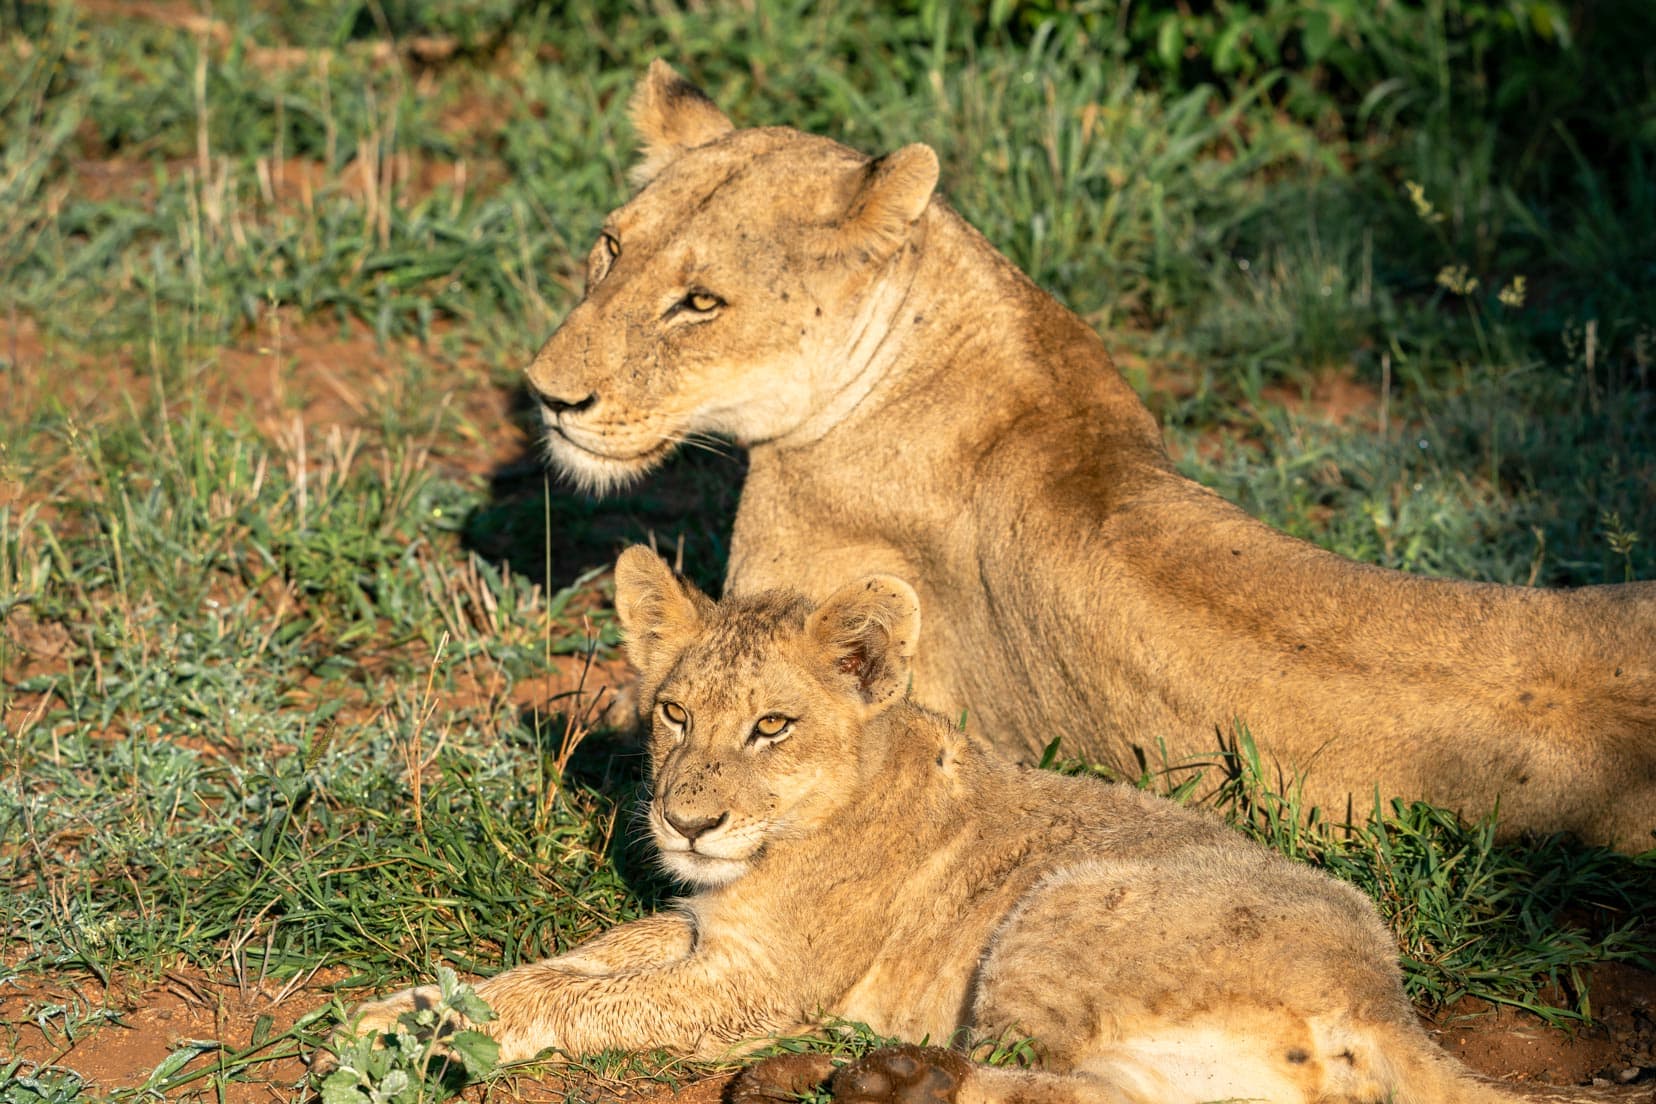
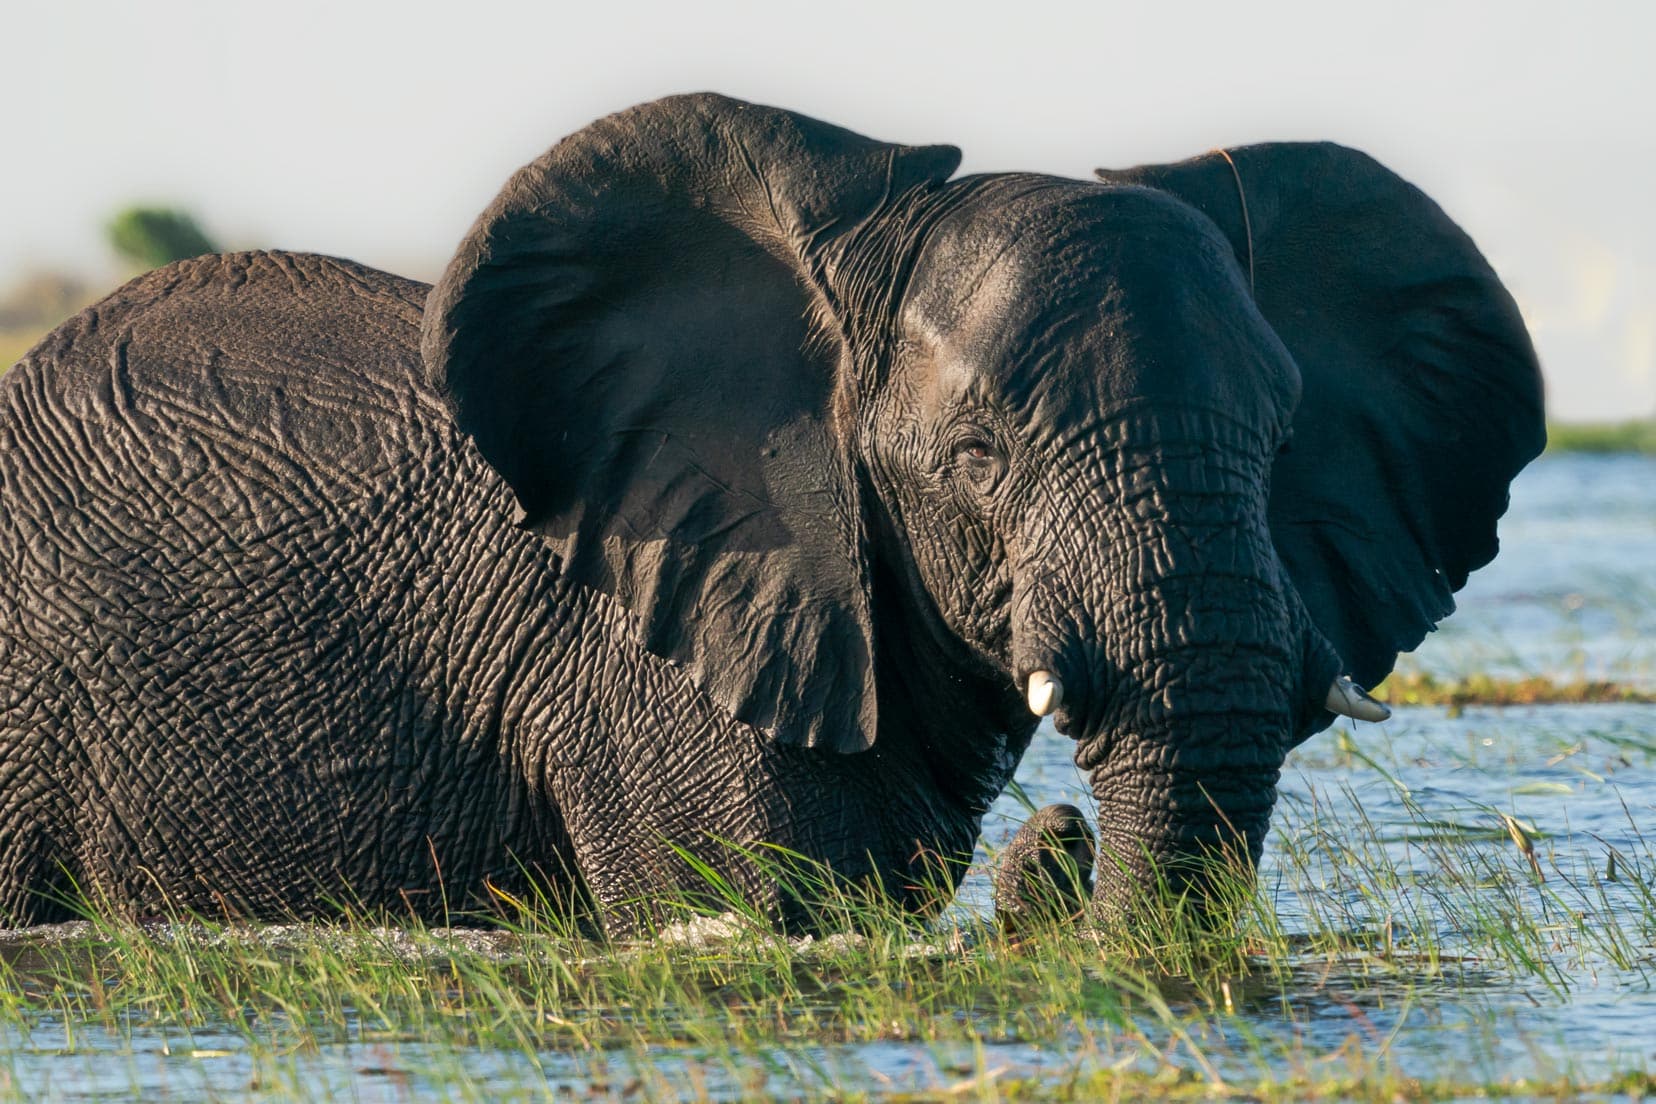
Another time, we were on a game drive in South Africa. We were following a bull elephant walking down the road, so we decided to detour down a different track to get around him.
On this detour, a roar stopped us in our tracks.
A male lion lay in the bushes with a female and her cute cub nearby. If fate had not stepped in, we would have certainly missed this opportunity to see and photograph these magnificent animals.
If you’re keen to learn how to capture such magnificent scenes on your camera, check out our detailed guide on safari photography.
Flexibility allows you to take advantage of unexpected photo opportunities, spend extra time at a spot when necessary, and make the most of your journey.
9. Essential Road Trip Photography Gear
Pack the essentials for a successful road trip: a reliable camera, versatile lenses, extra batteries, memory cards, and a tripod.
For more detailed gear for road trip photography, you can check out our comprehensive travel photography gear guide.
Best Cameras For a Road Trip
Mirrorless cameras are smaller and lighter than DSLRs, making them great for travel and any sort of road trip. There are many models on the market to choose from, ranging from budget-friendly to high-end options. You’re spoilt for choice.
Key Attributes of a Road Trip Camera:
- Portability: Is the camera small enough to be carried easily?
- Comfort: Does your hand fit comfortably around the grip, and can your fingers reach the function buttons?
- Weight: Do the camera and lens feel too heavy in your hand or when carried around your neck?
- Functionality: Will the camera do what you actually want it to?
For hobbyists, cameras from brands like Sony, Nikon, Canon, Panasonic, Olympus, and Fujifilm are good choices. Consider starting with a camera/lens bundle deal, which is how I began my photography journey.
My Choice of Road Trip Camera: Sony a9
I enjoy wildlife photography, so the Sony A9 was an obvious choice. It is a versatile, all-purpose, full-frame mirrorless camera.
It shoots at a maximum of 20 frames per second, uses over 693 phase-detection autofocus points covering 93% of the sensor, and offers blackout-free silent shooting with the electronic shutter.
Blackout-free shooting was a game-changer for me. It means you can look through the viewfinder and shoot without the screen blacking out, which is perfect when you need to track a fast-moving subject.
Although the a9 is no longer manufactured, the Sony a9II is very close to the same specifications.

⭐️ Check Price on Amazon ⭐️
Alternatives to Camera/Lens Combos
If you don’t want to bother with interchangeable lenses, there are excellent alternatives:
Compact Cameras and Bridge Cameras:
- Compact Cameras: These are point-and-shoot, pocket-sized units. A good example is the Sony RX100 Cybershot.
- Bridge Cameras: These are bigger and have a long zoom range, like the Sony RX10IV.
These tips will help you choose the perfect camera to capture your road trip adventures.

Mobile Phones v Cameras for Road Trip Photography?
I’m often asked: Do you need a camera, or is a mobile phone good enough for taking photos?
A modern mobile phone camera will be fine for most situations, especially everyday shots that don’t require technical settings. Technological advancements and AI are closing the performance gap between digital and mobile phone cameras.
However, cameras still have the edge in certain scenarios:
- Low Light: Cameras perform better in low-light conditions.
- Macro Photography: True macro shots are best taken with a dedicated camera.
- Fast Action: Digital cameras excel at capturing fast-moving subjects.
- Zoom: Telephoto lenses are much better than mobile zoom lenses.
Using a digital camera offers more versatility and control over the settings, which can result in higher-quality images.
Mobile phones are incredibly convenient for video. I frequently use my mobile’s video function because it’s quick to access, requires no setup, and delivers reliable results.

Additional Photography Equipment
In addition to the basic camera setup, several pieces of additional equipment can take your road trip photography to the next level. Let’s take a look.
Tripod and Monopod
A tripod and monopod help stabilize the camera and lens, minimizing movement that can blur an image. They are essential for low-light shots, long-exposure shots of water, and astro.
While I don’t use a monopod often, it’s handy when shooting with my heavy Sony 200-600mm lens for long periods. My tripod can convert to a monopod, providing flexibility.
I use two different-sized tripods:
- Manfrotto Pixie Mini Tripod: Great for macro photography.
- Three-Legged Thing Travis Tripod: Ideal for landscape and wildlife shooting.
ND Filter
An ND (Neutral Density) filter can be placed over or screwed into the front of the lens to reduce the amount of light entering the lens. It’s like placing sunglasses on your camera.
This allows for longer exposures, creating effects like silky-smooth waterfalls or blurred coastal waters.
I use the 3-stop (ND 8) and 8-stop (ND 64) filters, with the 8-stop filter being my favourite for its stronger effect. An inexpensive step-down converter allows me to use the filter on lenses of different diameters.
Camera Bag
A camera bag is essential for carrying your gear. It should be comfortable on your shoulders and back, with wide padded shoulder straps, a waist strap, and lower back support.
It should also be the right size for your gear and made of water-resistant material. Look for a camera bag with enough pockets for accessories and the ability to secure a tripod.
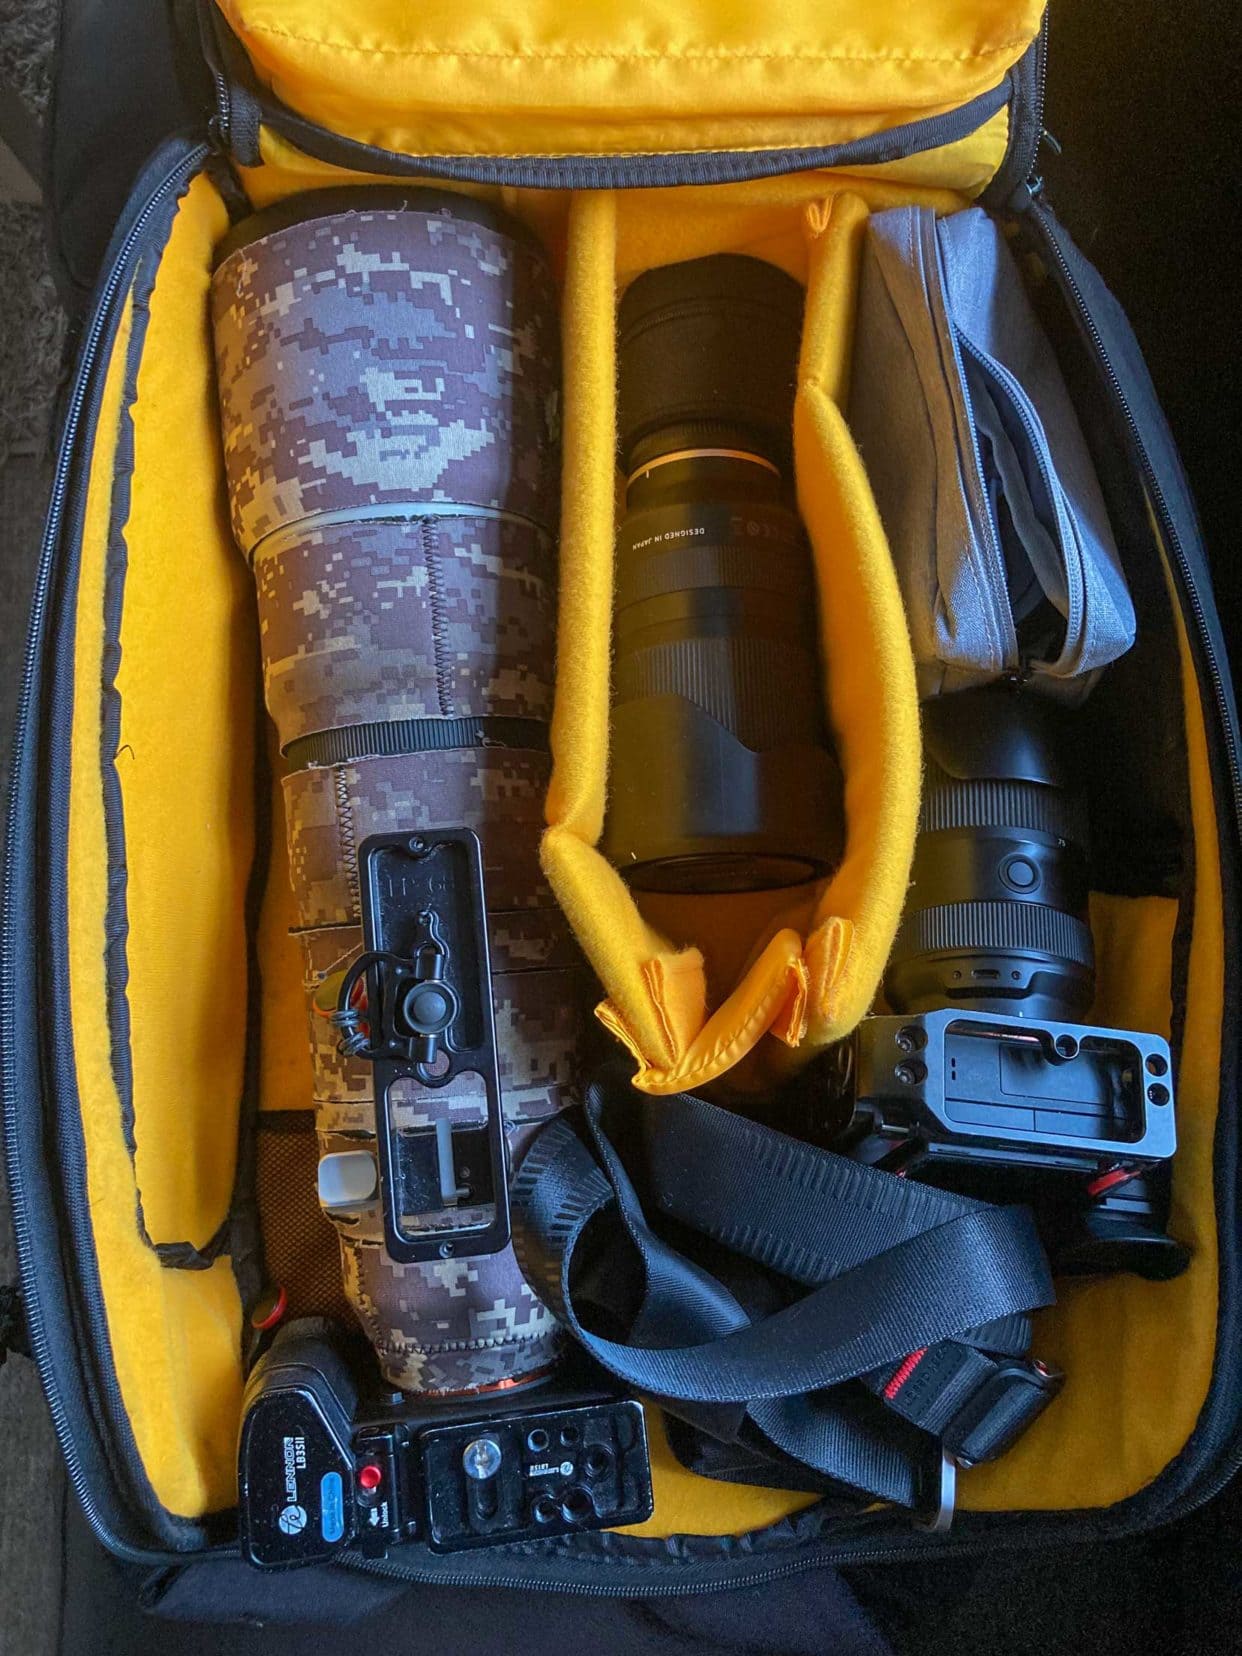
I use the Vanguard Alta Rise 48, which fits my largest lens, the Sony 200-600mm, along with several other lenses and a second Sony A9. The bag is versatile, comfortable on my back and accommodates all my essential gear.
GoPro
I use the GoPro portable action camera to capture dynamic shots. Mounting the GoPro 11 Hero to the car bonnet, I capture the scenery while driving. This is especially useful on a game drive where you can’t leave the vehicle.
I also use a handy GoPro accessory: a mobile 3-way adjustable selfie stick with the GoPro attached to the end—another method for capturing wildlife videos while we’re in our vehicle.
Wear The Right Clothes
Spontaneity might require changing your schedule, so consider wearing or packing weatherproof or warm clothes to fully utilise opportunities.
Don’t underestimate how cold you can get when you’re wet; it’s a show-stopper. The snow and wind chill can mean you can’t feel your fingers—not great for trying to put your road trip ideas into practice!
Having travelled road-tripped extensively in Norway and Scotland, we’ve had plenty of moments when we’ve been out in the elements capturing photos. Consequently, we have tried so many variations of photography gloves meant to help deal with the cold.
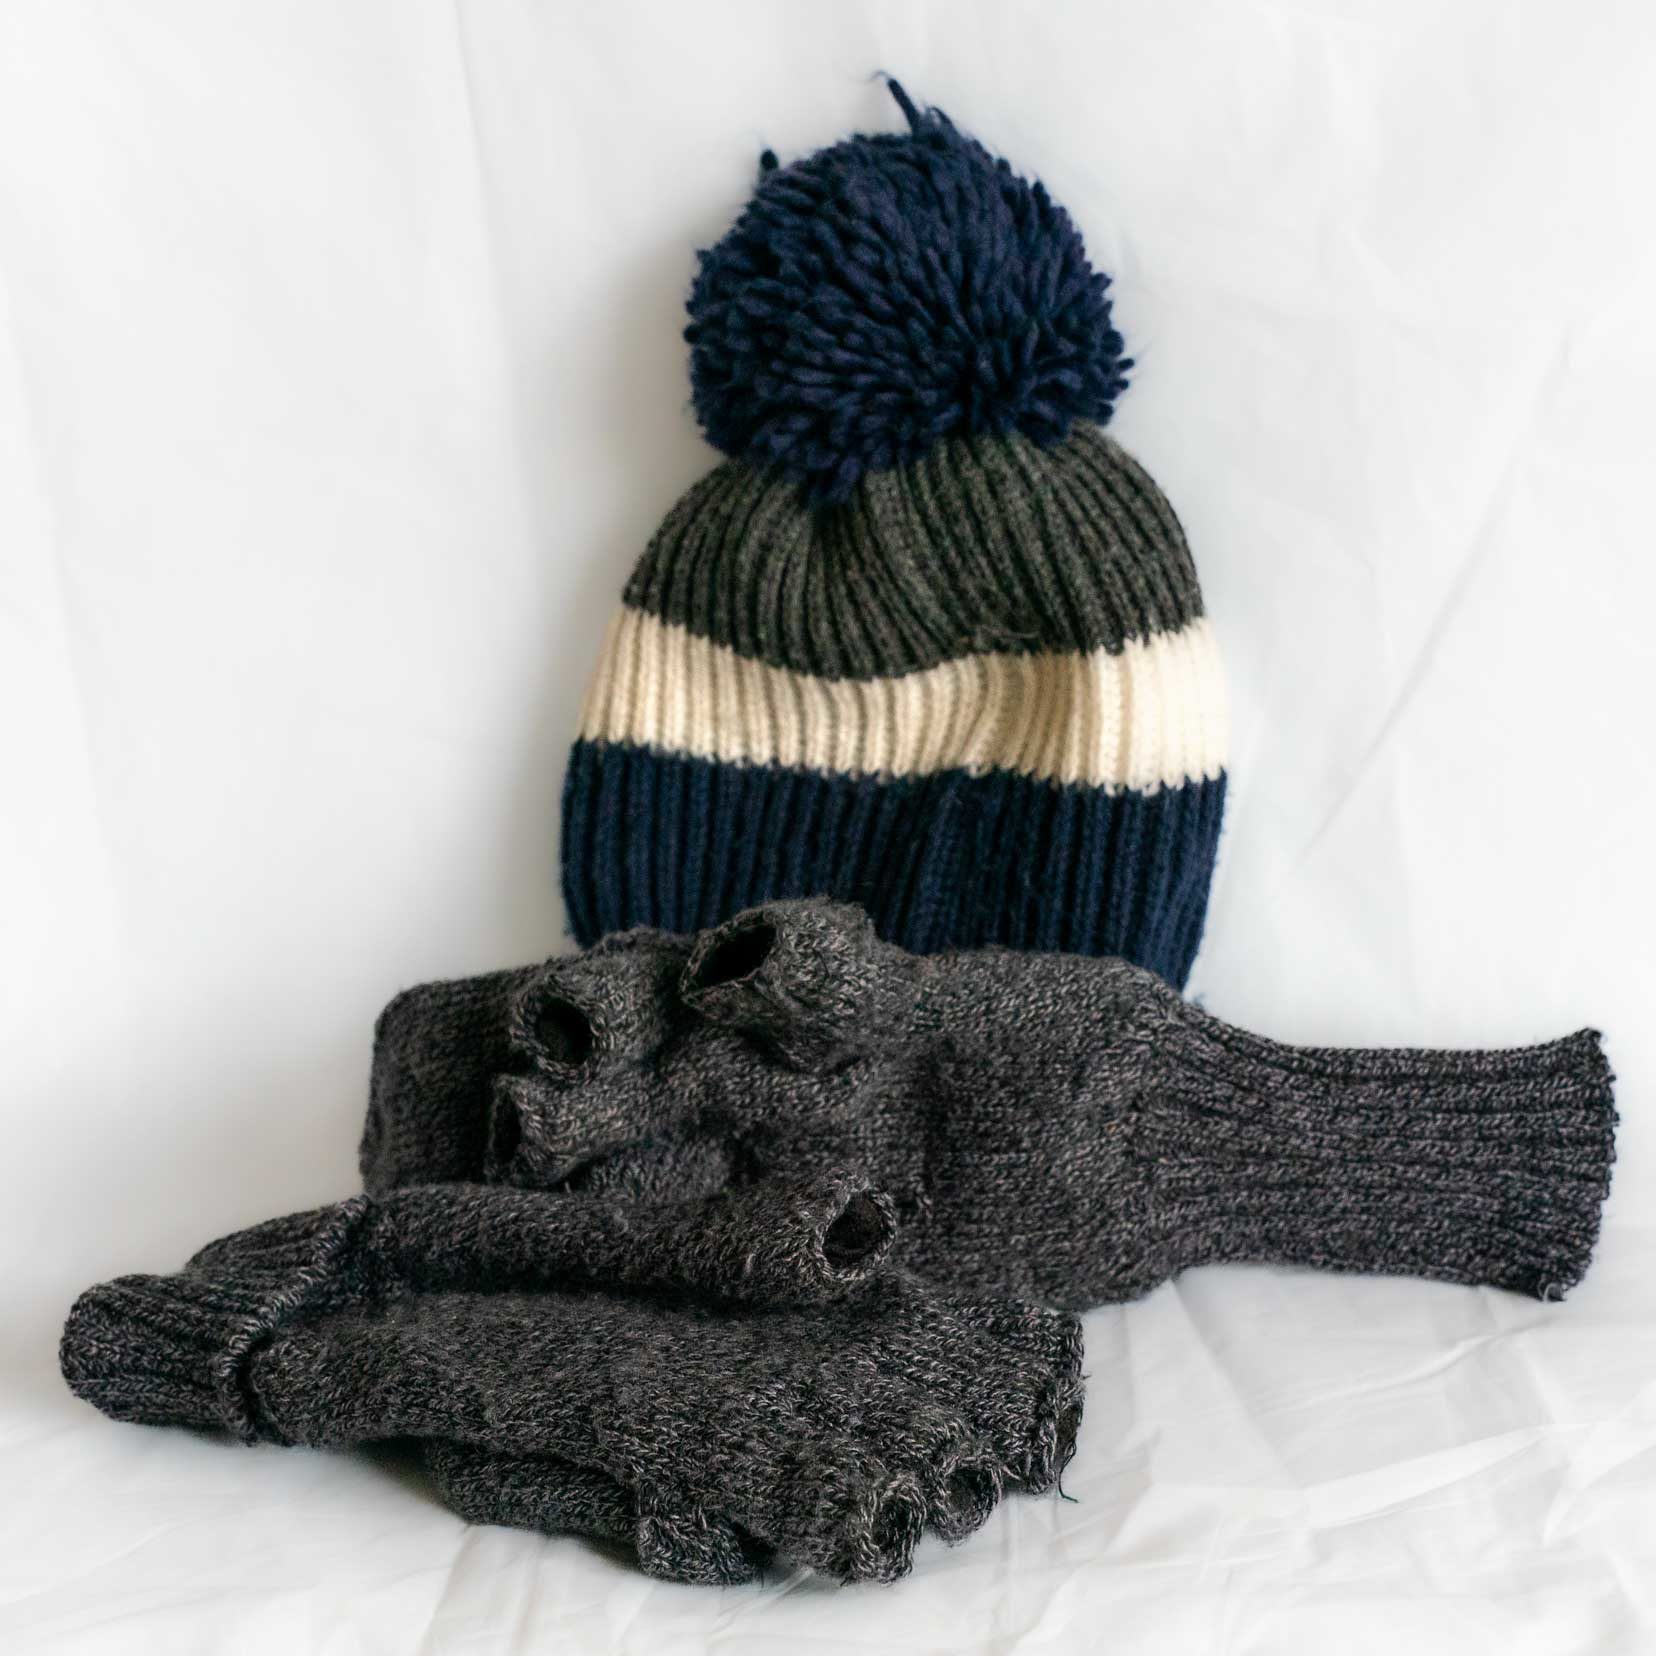
But do you know what were the best … and the cheapest? A pair of fingerless woollen gloves with a mitten top that pops over. We bought ours while at Urquhart Castle in Scotland, but you can buy them easily from Amazon and they are cheaper, like these grey women’s gloves or these unisex woollen gloves in the same style.
10. Editing Your Road Trip Photography
Once you’ve captured your road trip photos, the next steps involve editing and sharing your best shots.
Here’s how to refine your images effectively:
1. Organise Your Photos
Start by organizing your photos. Sort through your images and select the best shots. Organising your photos makes the editing process smoother and more efficient.
When I shoot wildlife, I do so at a high frame rate. This results in many images; however, often, you just need that one special image that captures the moment perfectly.
2. Basic Adjustments
Any image will need some processing. This might just be an adjustment of a crooked horizon line or to remove an unwanted feature from the frame. Processing is about restoring the flat image the camera has taken of the scene as you envisaged it.
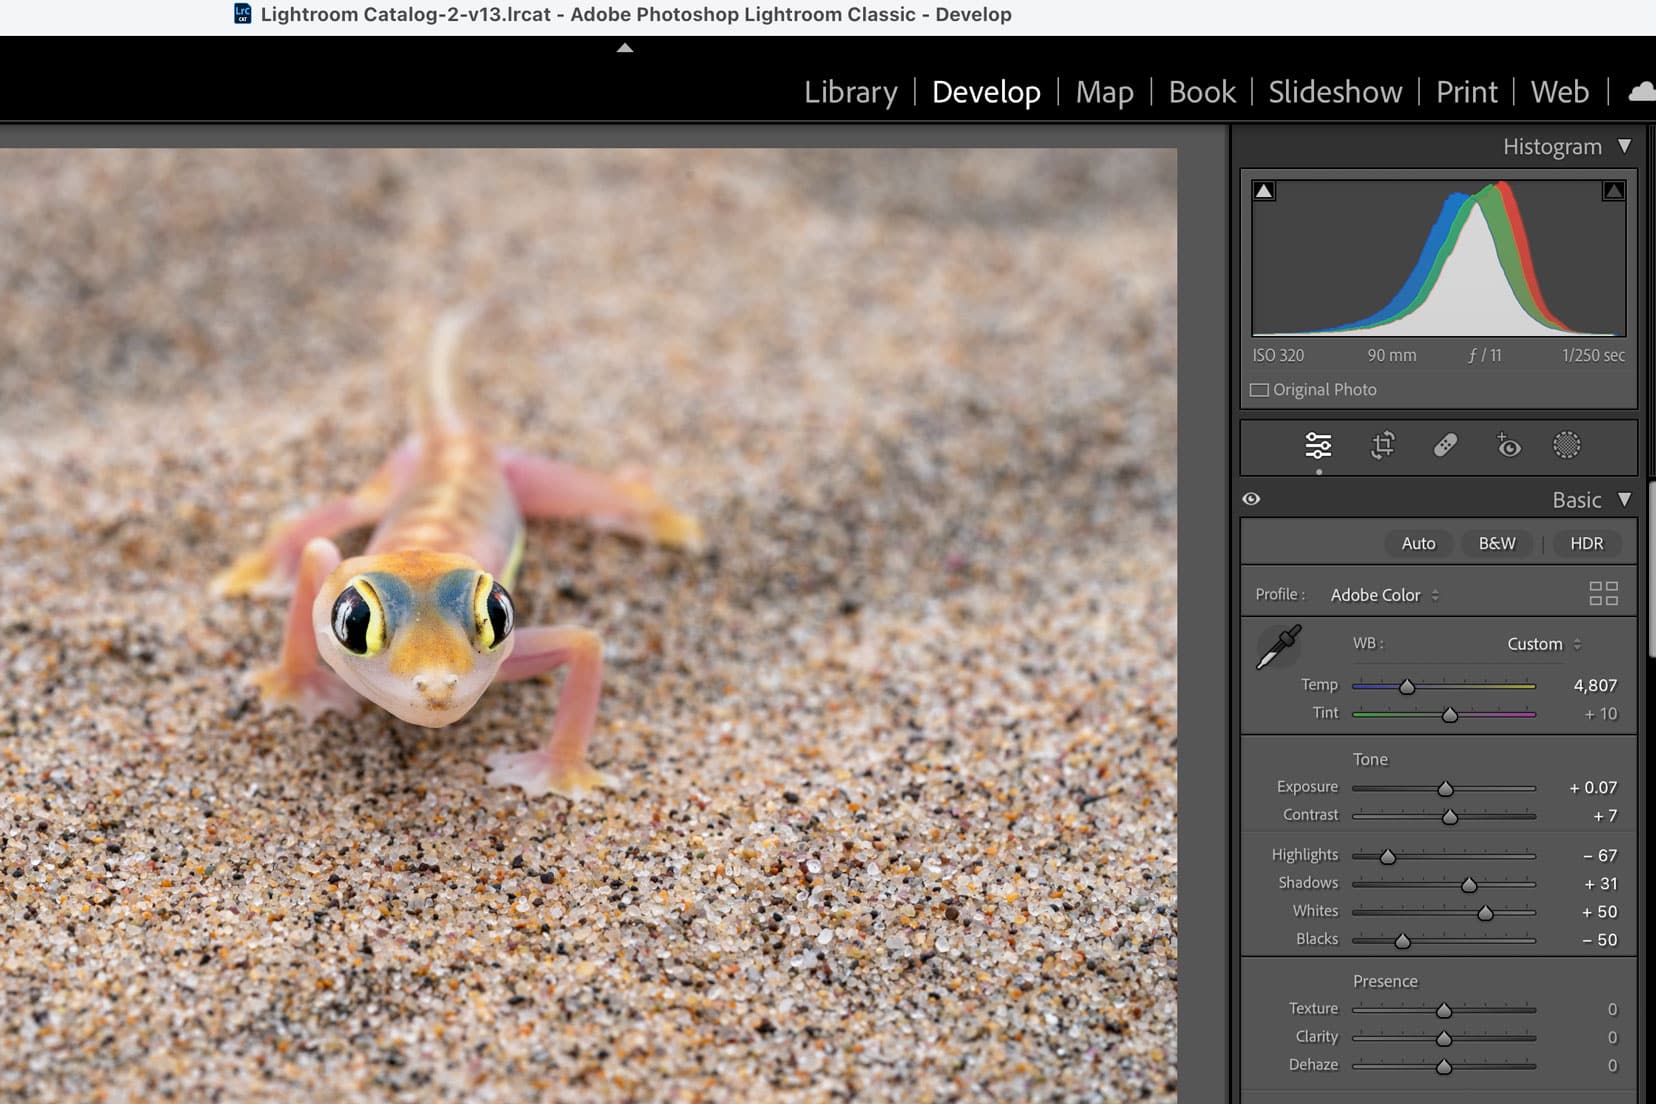
Many image editing software packages are available, some free and some paid. I use Adobe Lightroom and Photoshop.
Editing Techniques for Enhancing Road Trip Photos
Ideally, I try to shoot the best image I can when I’m in the field to minimise post-processing. Being mindful of obstructions, the direction of sunlight and composition saves plenty of time later in the processing stage.
Basic Adjustments
- Brightness and Contrast: Adjust these to add depth and highlight the details in your photos.
- Saturation: Enhance the colours slightly to make your images pop, but avoid over-saturating.
Advanced Techniques
- HDR Processing: Combine multiple exposures of the same scene to capture a greater dynamic range.
- Noise Reduction: Apply noise reduction for higher ISO shots to maintain quality.
I like to begin processing the image with the obvious things that annoy me, like a wonky horizon and an over-exposed sky.
I then finely adjust the basics: cropping, white balance, vibrance, contrast, and noise reduction. I’ll also use the adjustment brush to make selective edits on a particular part of an image.
3. Experiment with Presets and Filters
Using presets and filters during processing can give your photos a cohesive look and feel. Lightroom offers a variety of presets that can be applied with one click.
Creative Edits
Filters and Effects: Use filters sparingly to maintain a natural look or choose a specific style, such as vintage or black-and-white.
Cropping and Framing: Crop your photos to improve composition or to focus on the main subject.
Experiment with different styles to find the one that best suits your photos. However, don’t over-indulge. You can dial in how much of the effect you want.
Personally, I rarely use a filter.
I sometimes change a colour image to black-and-white. Especially in strong, glaring light, a black-and-white image can be quite contrasty and invoke a different emotion from a colour image.
4. Keep the Natural Look
While editing, aim to enhance the natural beauty of your road trip photos without making them look artificial. Be careful of using excessive adjustments that can make your images look over-processed.
I realise that social media images often portray a certain over-saturation, which I don’t like. My aim is to create attractive yet true to the eye photos.
11. Sharing Your Road Trip Photos
1. Social Media
We share our road trip photos on social media platforms like Instagram, Facebook, Pinterest, and, obviously, our travel blog here.
Using relevant hashtags to increase visibility is important to ensure the photos reach a wider audience.
Sharing the story behind the image is also important, as is engaging with your audience for recommendations and feedback.
For ideas of quotes or captions to use check out our huge list of road trip quotes or our travel captions perfect for social media.
2. Photo Sharing Sites
For more exposure, consider uploading your photos to photo-sharing sites like Flickr, 500px, Unsplash, or Reddit. These platforms allow you to showcase your work to a community of photography enthusiasts.
You can also receive constructive feedback and gain inspiration from other photographers, which can help you to fine-tune your approach.
3. Create a Photo Book
Think about creating a photo book to preserve your road trip memories. Online services offer customizable photo books where you can arrange your photos and add captions.
A photo book makes a great keepsake or gift.
4. Enter Photo Contests
Enter your best road trip photos in photography contests. Contests provide an opportunity to gain recognition, win prizes, and receive feedback from professional photographers.
Participating not only boosts your visibility but can also enhance your skills through professional critique.
Look for contests that align with your style and interests. Finding the right contests can propel your work to wider audiences, whether landscapes, wildlife, or candid human portraits. For example, my participating in various contests has opened doors to new opportunities and collaborations, enriching my photography journey and expanding my professional network.
Road Trip Photography Ideas… That’s a Wrap
Capturing the essence of a road trip through photography is both an art and a journey. It involves planning your route, selecting the right gear, capturing unique shots, and editing and sharing your memories.
Every step contributes to telling the story of your adventure.
Road trip photography is more than just taking pictures; it’s about experiencing and capturing the world in all its beauty and spontaneity. I hope these tips resonate with you and help to create stunning visuals that tell the story of your travels.
There’s a world of incredible photo opportunities just waiting for you. Happy shooting!
What are your tried and trusted methods that work well for you? I’d love to hear about them.

Planning Your Travels?
These are the travel resources we recommend and use when planning our trips.
- 🚘 Car Hire: We use DiscoverCars.com
- Motorhome/Campervan Rental: We highly recommend the Motorhome Republic
- 🪪 Order your International Driver’s Licence online here
- 🛏 Book Accommodation: We use Booking.com to find accommodation that suits our budget
- 🐶 Pet Sitting/Pet Sitters: Check Out TrustedHousesitters here (Use our Discount code: LIFEJOURNEY25 for 25% off. )
- Activities and Experiences: Get Your Guide and Viator
- Travel Insurance: Safetywing or World Nomads
- 🥾 Travel Gear and Accessories: Check out our top picks here — Lifejourney4two page on Amazon
For a more thorough list, visit our Travel Resources page here.