
Planning to 4×4 Israelite Bay?
In this article, I’ll walk you through the 4×4 drive, the must-see spots, and what to do once you’re there. I’ll also share essential tips to make the most of your drive to remote Israelite Bay and throw in some GoPro footage of the trip.
Get ready for an off-the-beaten-path adventure along this wild Western Australian coastline, known for its rugged landscapes, wide-open spaces, and remoteness.
Our four days camping at Israelite Bay were just superb.
As there are so many things to do in Esperance, we used it as a base to explore the area during our epic Perth-to-Esperance road trip.
Ok, let’s get this show on the road.
4×4 Esperance to Israelite Bay – Need to Know Stuff
Distance from Esperance to Israelite Bay: 200km
Approximate drive time: 4.5 hours (Esperance to Israelite Bay)
4×4 required: For the last 75 km to Israelite Bay.
Park Pass: If you venture off the Fisheries Track, you must have a park pass to enter Cape Arid National Park; Nuytsland Nature Reserve is free.
Free Camping: Permitted at Israelite Bay as it is within the Shire of Esperance Recreation Reserve
Road Closures: Check the current status on the Esperance government website; call the Esperance District Park Office at +61 (0)8 9083 2100 or Cape Arid Senior Ranger at (08) 9075 0055.
Phone Signal: Lost at the start of the 4×4 Fisheries Track.
Last Fuel Stop: Condingup Tavern
Self-Sufficiency: Bring water, food, vehicle recovery gear, and a first aid kit
No Pets: Pets are prohibited in Cape Arid National Park.
Tide Charts: Essential if considering beach travel. Check tide predictions here.
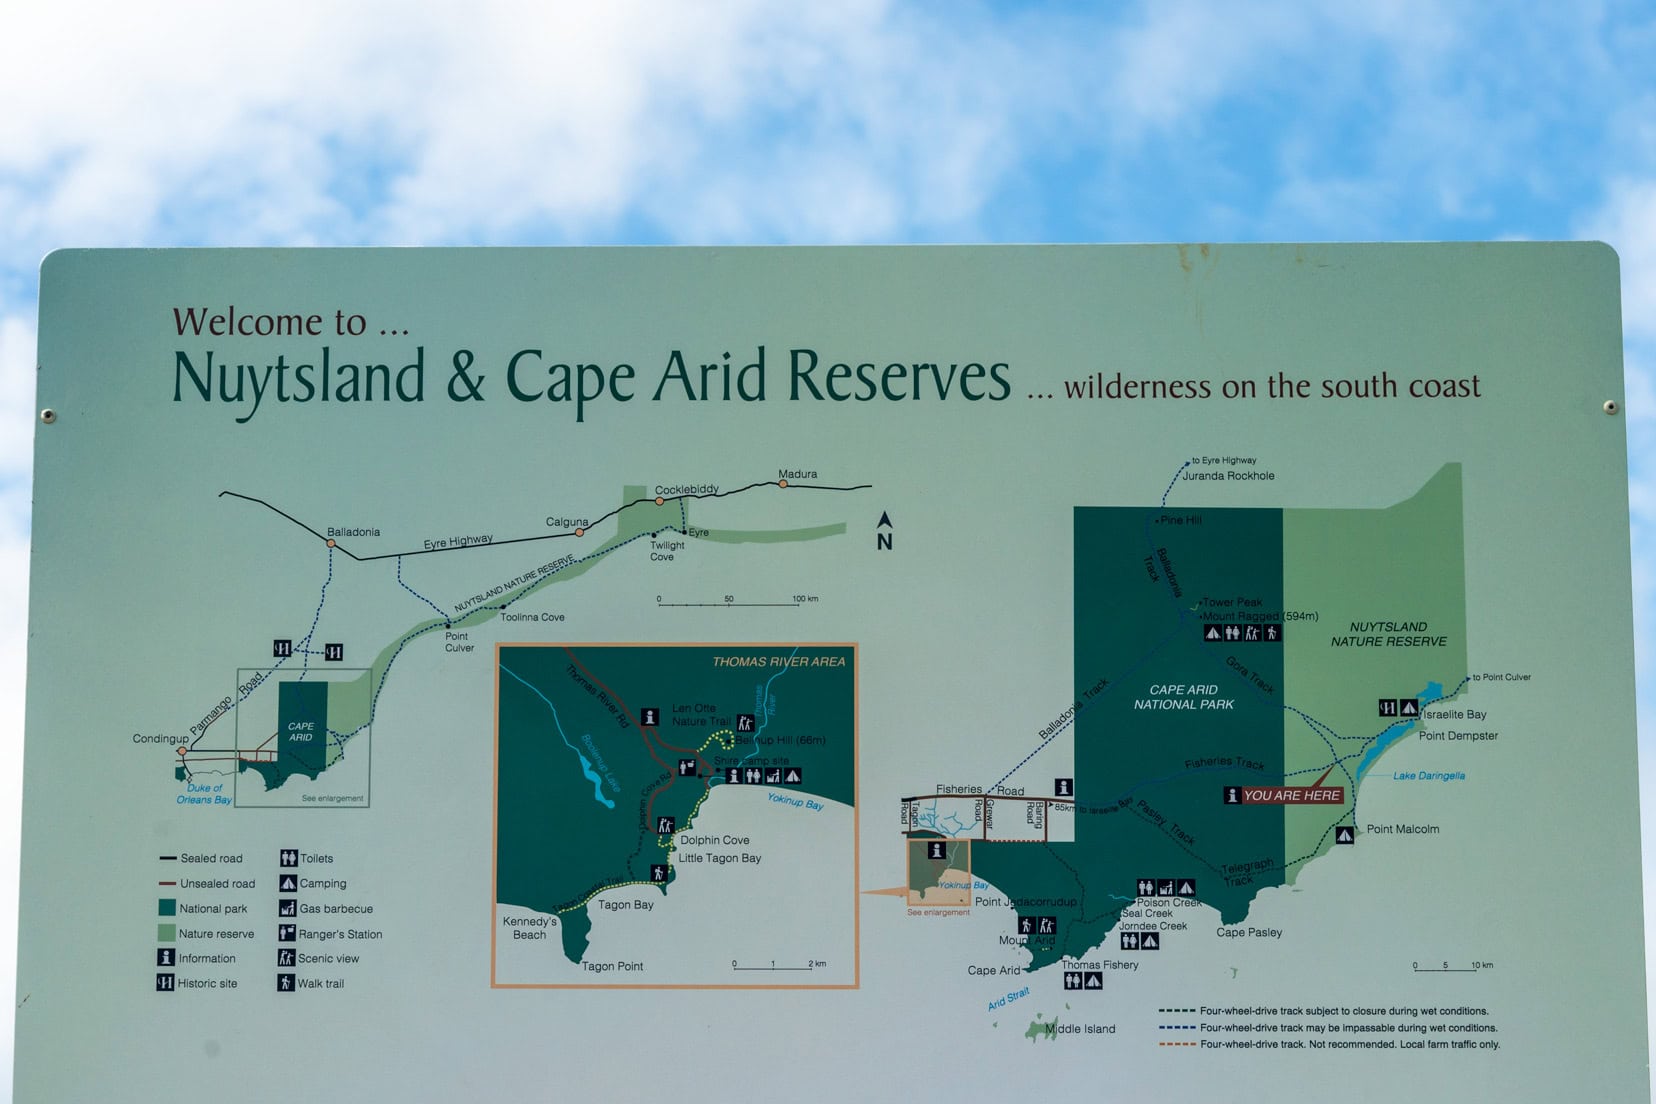
Quick Information
- Location: 200km east of Esperance, within the Nuytsland Nature Reserve, Western Australia.
- Coastal Features: The area is known for its sandy beaches and rocky outcrops, ideal for walks, fishing, and beachcombing.
- Natural Surroundings: The area features salt lakes, clay pans, and native woodlands enriched with diverse flora, providing habitat for various wildlife.
- Wildlife and Flora: Abundant birdlife, and Israelite Bay is popular during wildflower season around September.
- Historical Significance: Home to the National Trust-classified Post Office and Telegraph Station ruins, part of the historic settlement that played a crucial role in early telecommunication.
- Accessibility: Though beautiful, the region poses challenges like bogging near salt lakes and clay pans; caution is advised.
- Grab our FREE Camping Checklist here.
What This Guide Includes
- 🌏 Google Map: The route with attractions shown on Google Maps.
- 🚗 The Drive: Esperance to Israelite Bay via Seal Creek: Detailed directions and what to expect on the journey, including road conditions.
- 🏕️ Camping: Information on the best camping spots and facilities.
- 🔎 Points of Interest at Israelite Bay: Highlights of must-see historical sites and natural attractions in and around Israelite Bay.
- 🗺️ Trip Preparation: A checklist of essential items to pack and preparations to make before embarking on your adventure.
- 📸 Photography: Tips on capturing the stunning landscapes and wildlife of Israelite Bay, including recommended gear and locations.
- 🦺 Safety Tips: Important safety advice to keep you and your vehicle safe during your trip, including navigation and emergency planning.
- ☀️Best Time to Visit: Tips on the optimal seasons for visiting Israelite Bay, considering weather conditions and visitor numbers.
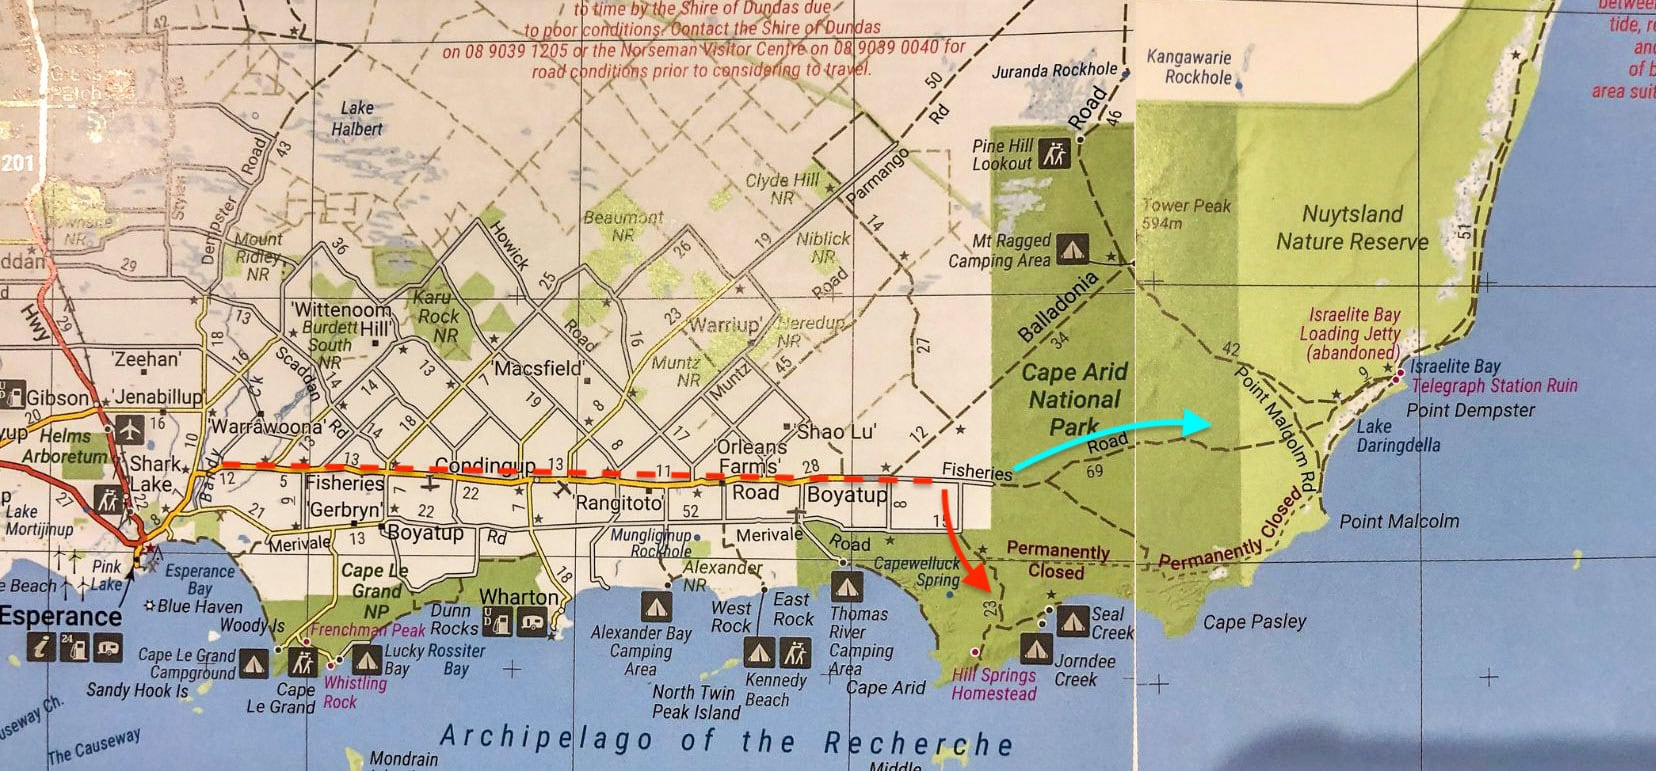
Map: Esperance to Israelite Bay with Attractions
Video – Drive Fisheries Track to Israelite Bay and its Attractions
Take a peek at what it’s like to ride with us during this 6.5-minute adventure, which starts at the Fisheries Track and continues to Israelite Bay.
The Drive: Esperance to Israelite Bay via Seal Creek
We did the drive in two parts:
From Esperance, we drove first to Seal Creek campsite in Cape Arid, where we stayed for one night before backtracking to Fisheries Road to continue onto Israelite Bay.
It’s a short detour south of Fisheries Road, about an hour’s drive. The road is in very good condition. Of course, you could skip Seal Creek and continue straight to Israelite Bay.
Esperance to Seal Creek
🚙 Driving distance (from Esperance): 165km; Drive time: 2.5 hours
Seal Creek Coordinates: S33.91387, E123.33426
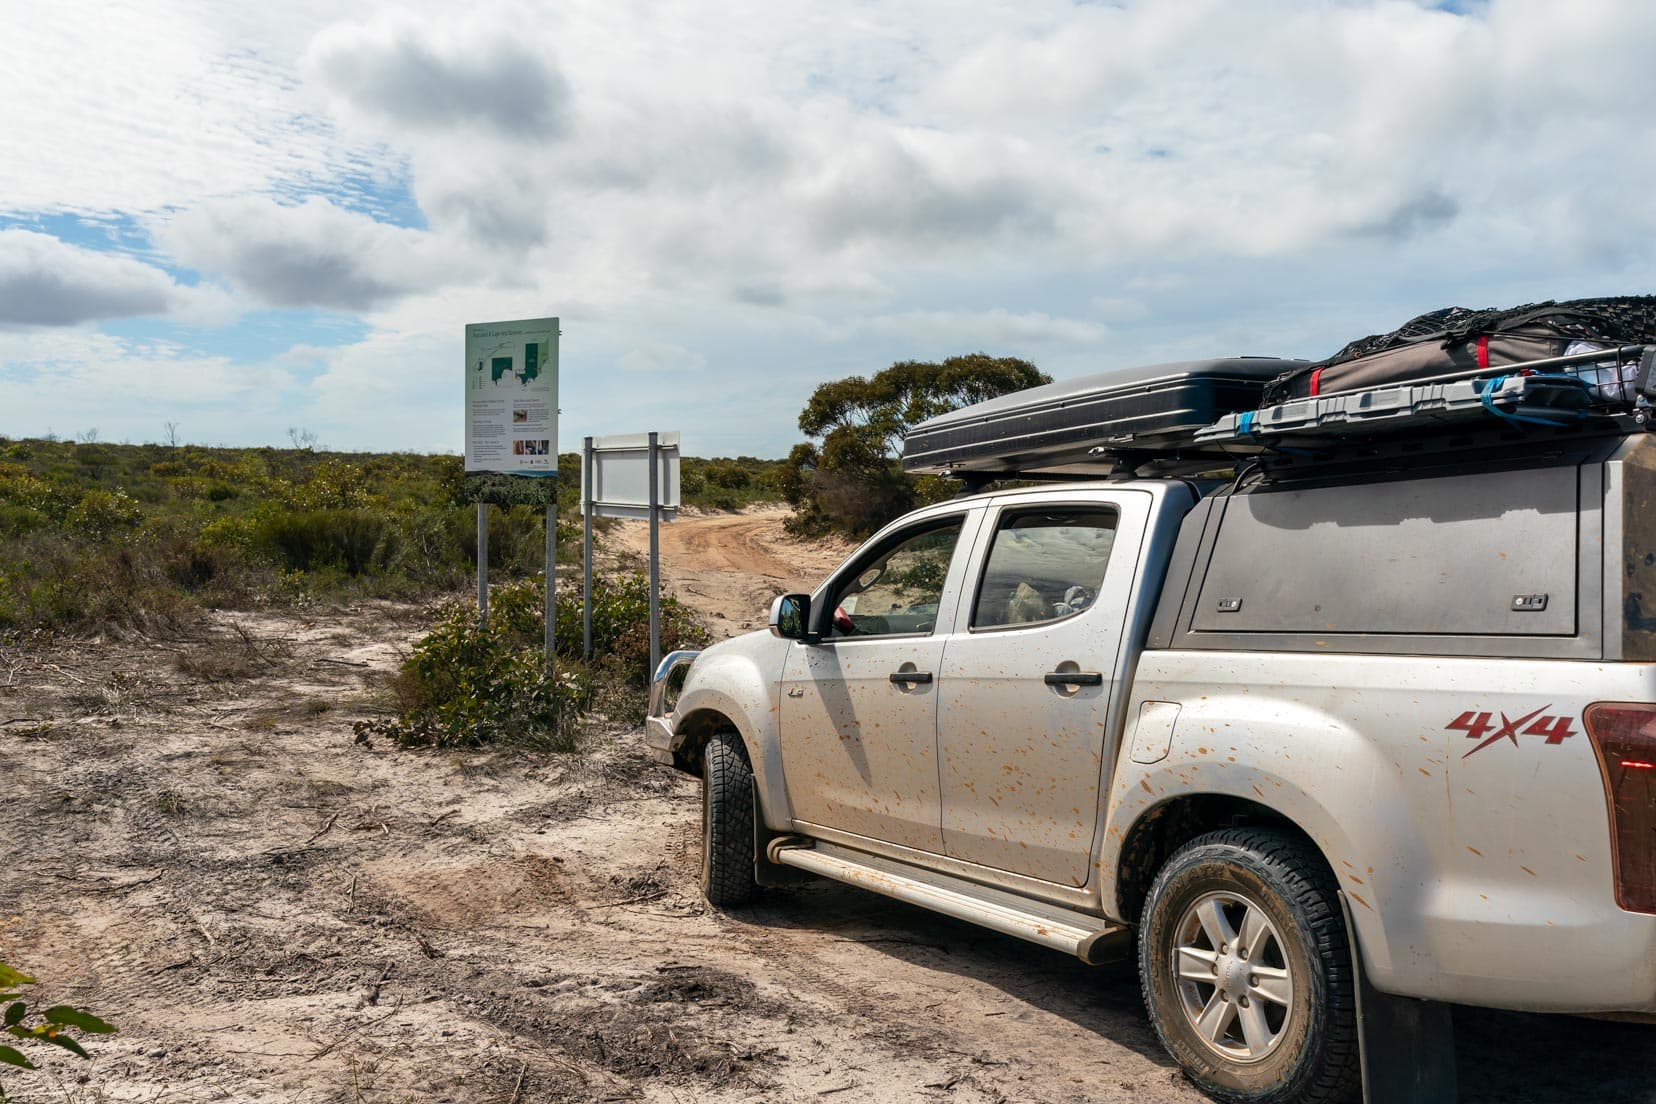
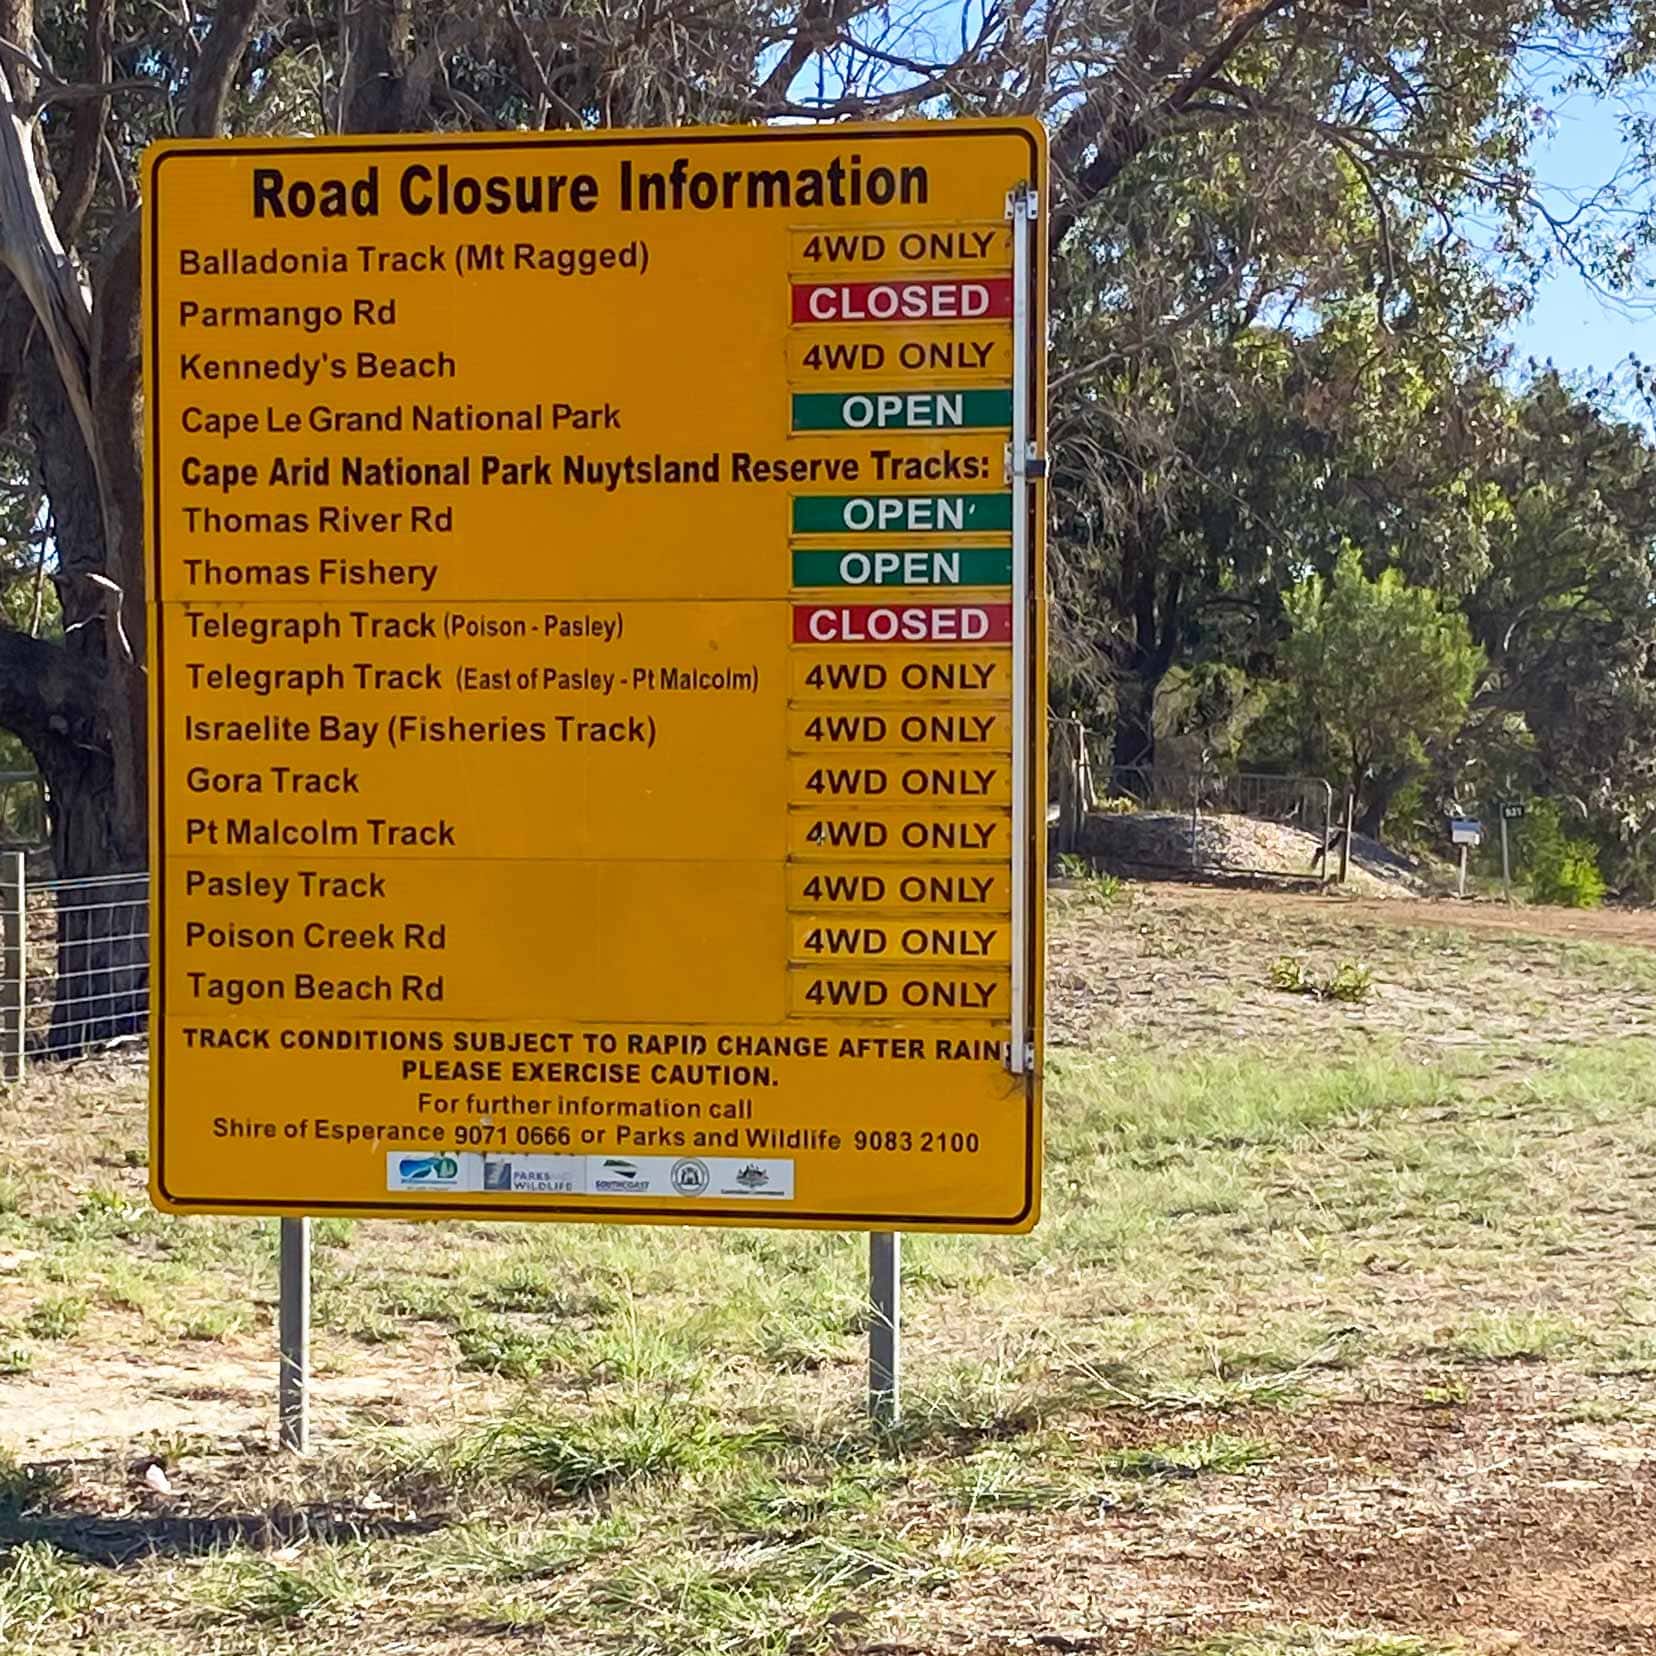
Departing Esperance on the Fisheries Road, on the outskirts of town, is a sign displaying road closure information. It’s definitely worth a look to check if your route is open.
We passed the town of Condingup (the last fuel stop location) and turned south off Fisheries Road onto Baring Road, then Poison Creek Road and into Cape Arid National Park.
Cape Arid National Park Pass Information
Driving into the national park to visit Seal Creek or other campsites requires a park pass.
However, if you were to drive directly to Israelite Bay using the Fisheries Track, you would not require a Park Pass. This is because the Fisheries road passing through Cape Arid National Park is not considered a part of the national park.
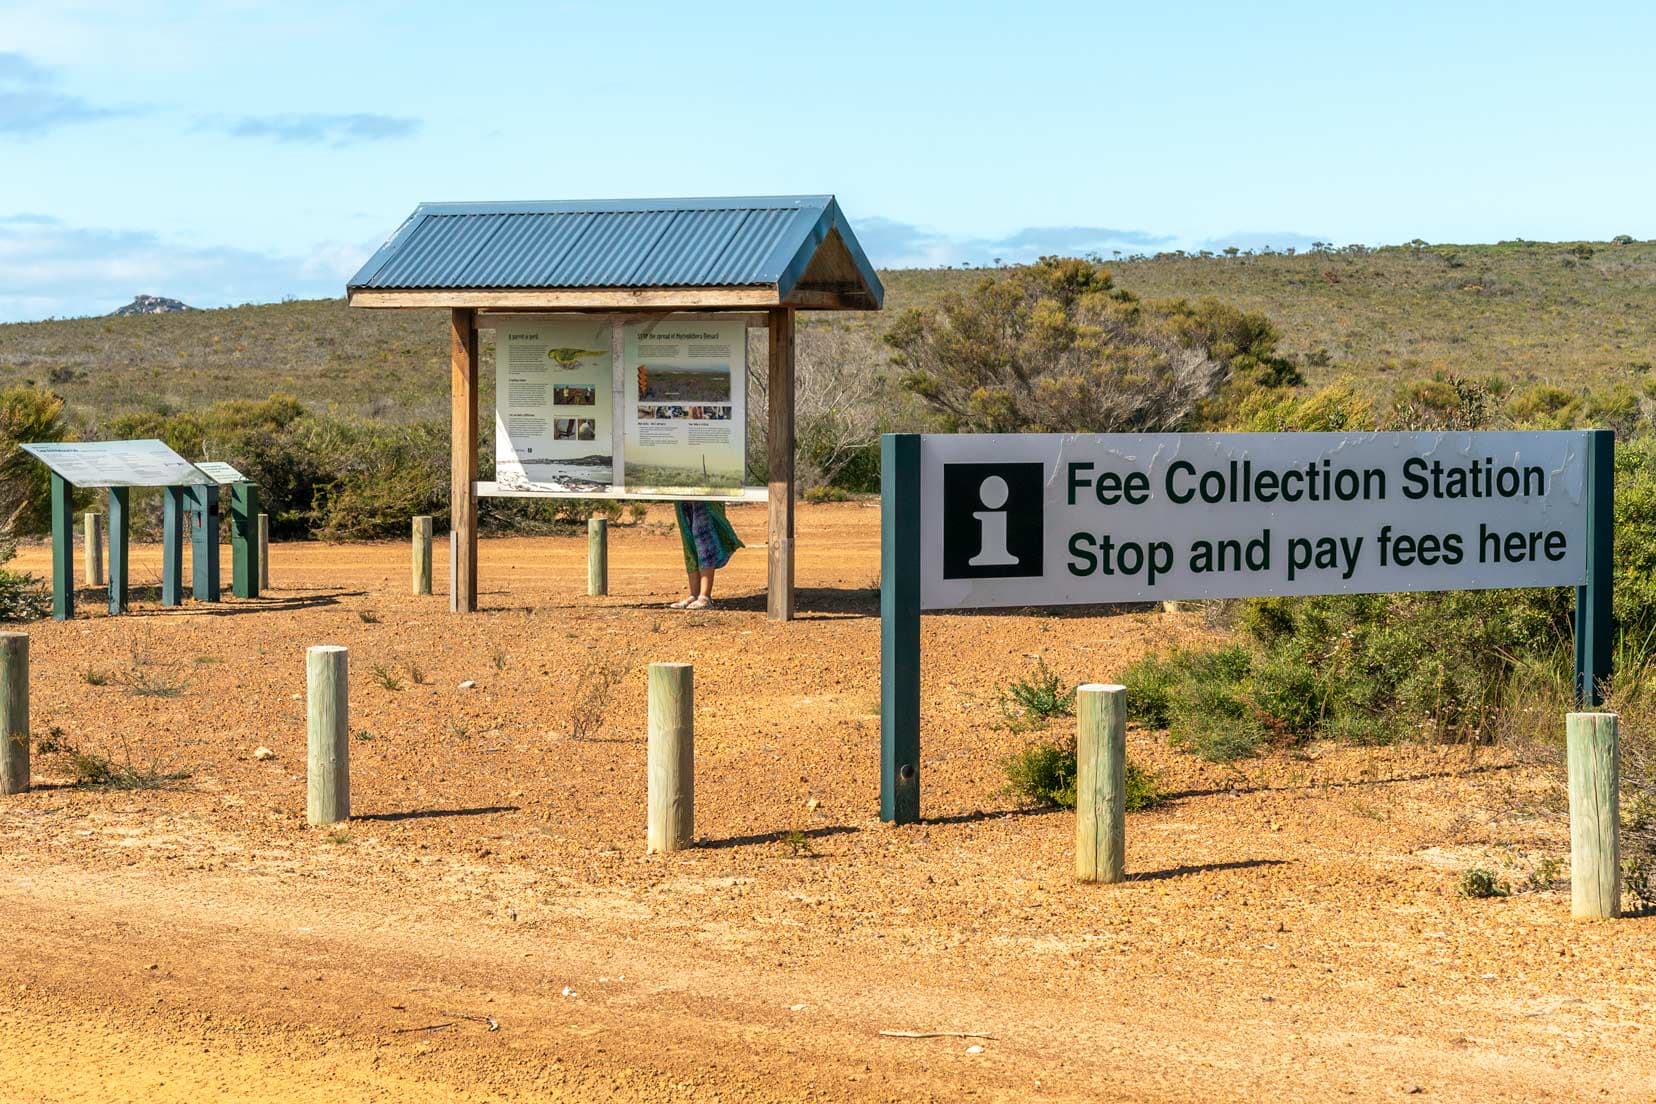
You can purchase different park passes on the Parks and Wildlife Service (DBCA) website or pay in cash at the fee collection station at the junction of Poison Creek Road and Thomas Fishery.
The drive from Baring Road, along Poison Creek Road, to Seal Creek took us about an hour.
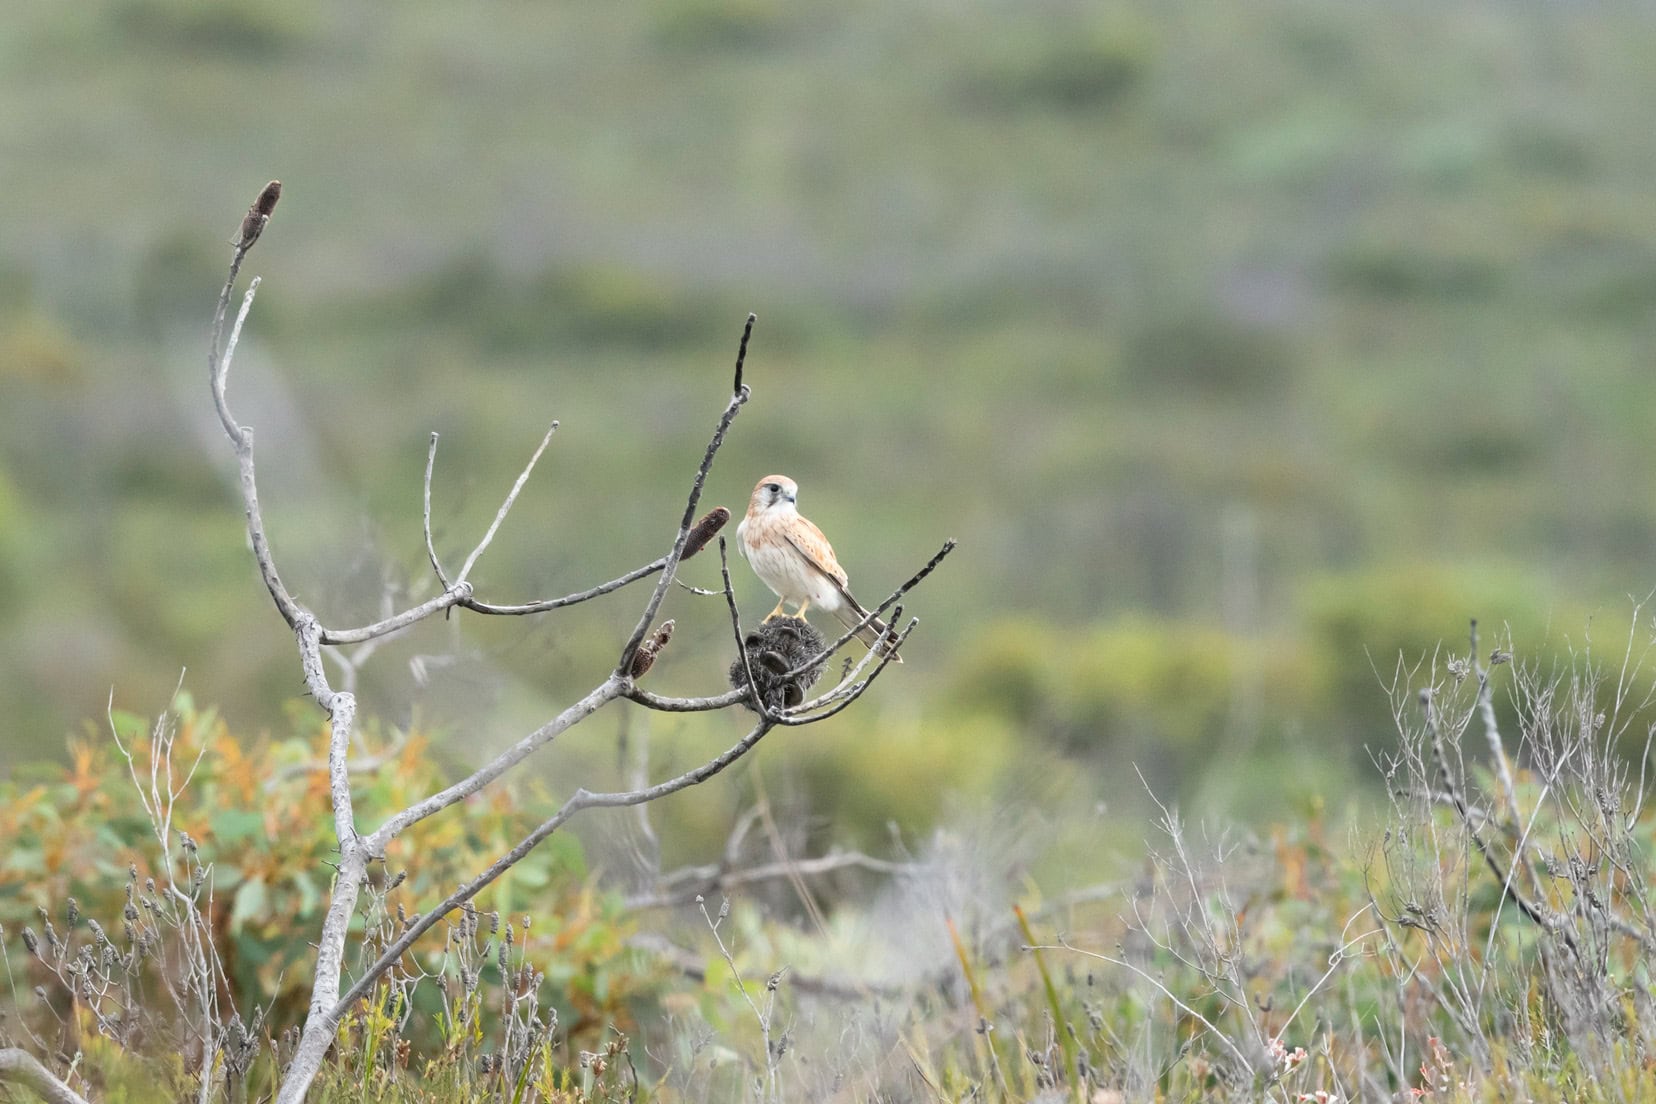
Keep your eyes open for birds of prey on the Poison Creek Road roadside heaths—we saw a few Brown Falcons and this Nankeen Kestrel.
The Poison Creek road is hard-packed dirt, making it accessible to 4×4 vehicles towing good-sized off-road caravans. We saw a few on this trip.
Seal Creek Campsite
Seal Creek campsite is a paid campsite with big private pitches. Its amenities include a drop toilet, a tank of non-drinkable water, a free gas-powered BBQ and picnic tables.
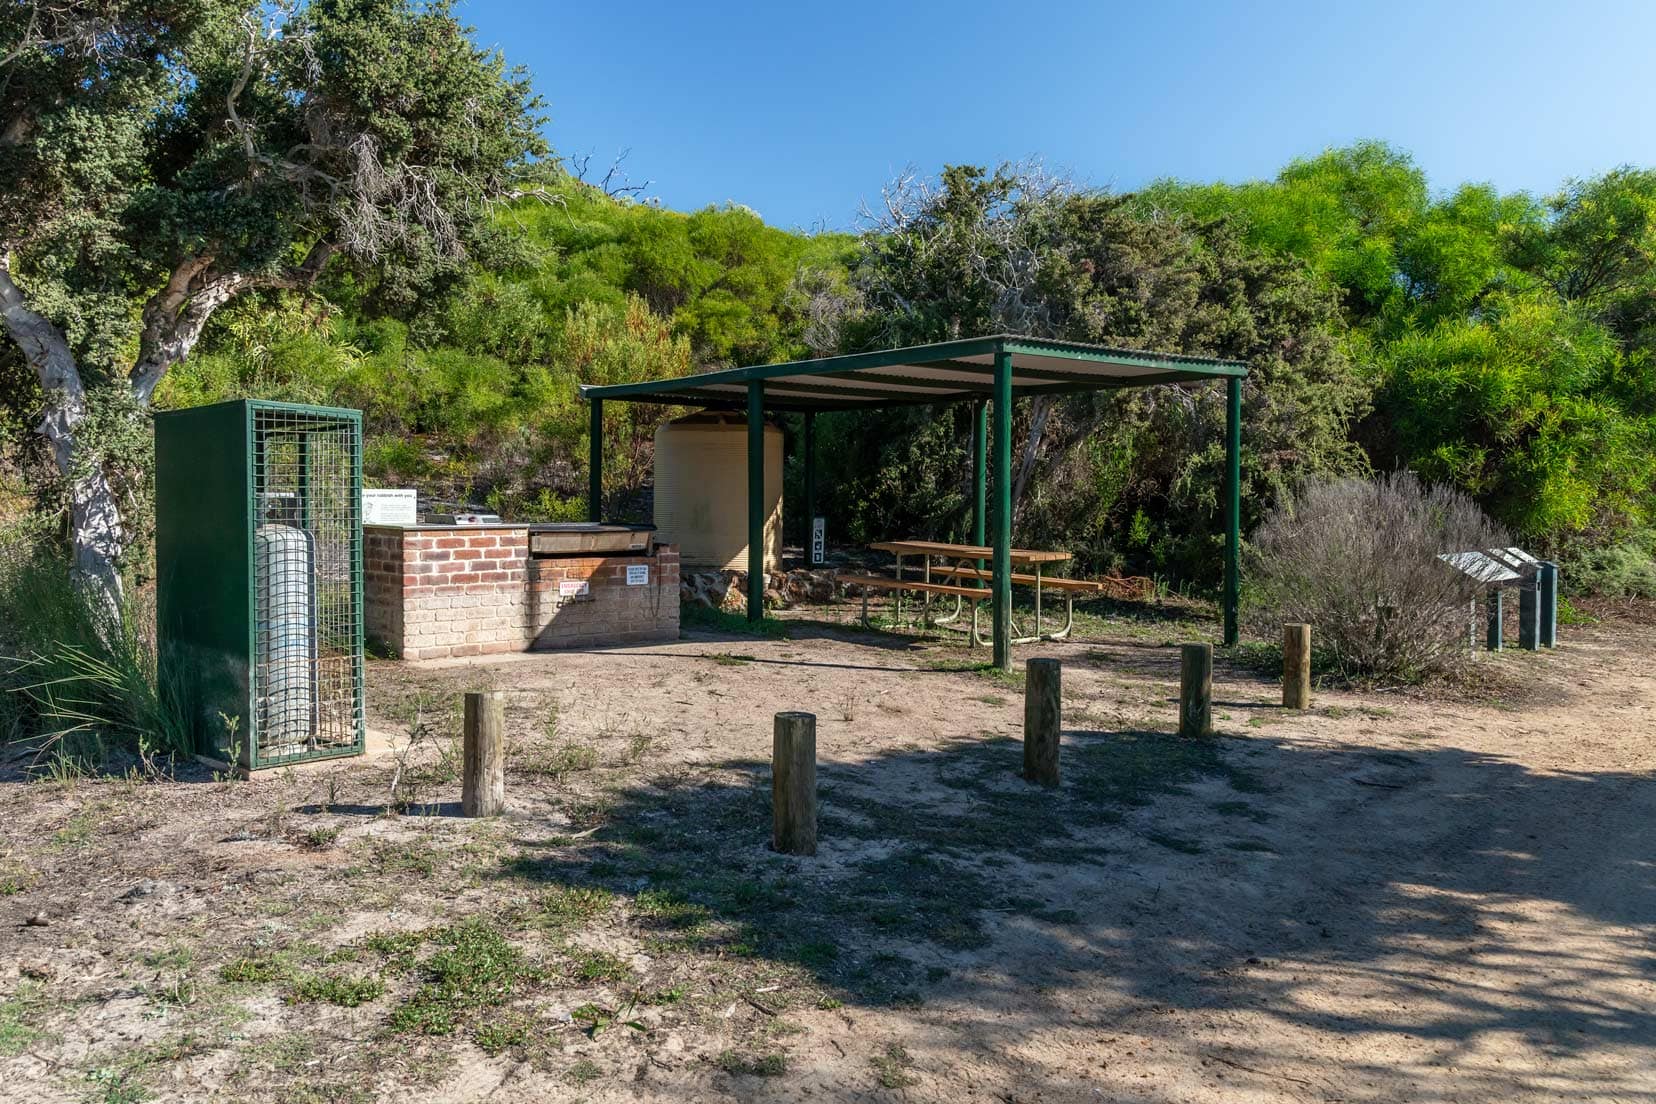
Fees are charged per person per night, so we were out of pocket $30 for a 1-night stay. We paid cash, slipped the envelope into the collection tube and posted the receipt on the pole at our campsite.

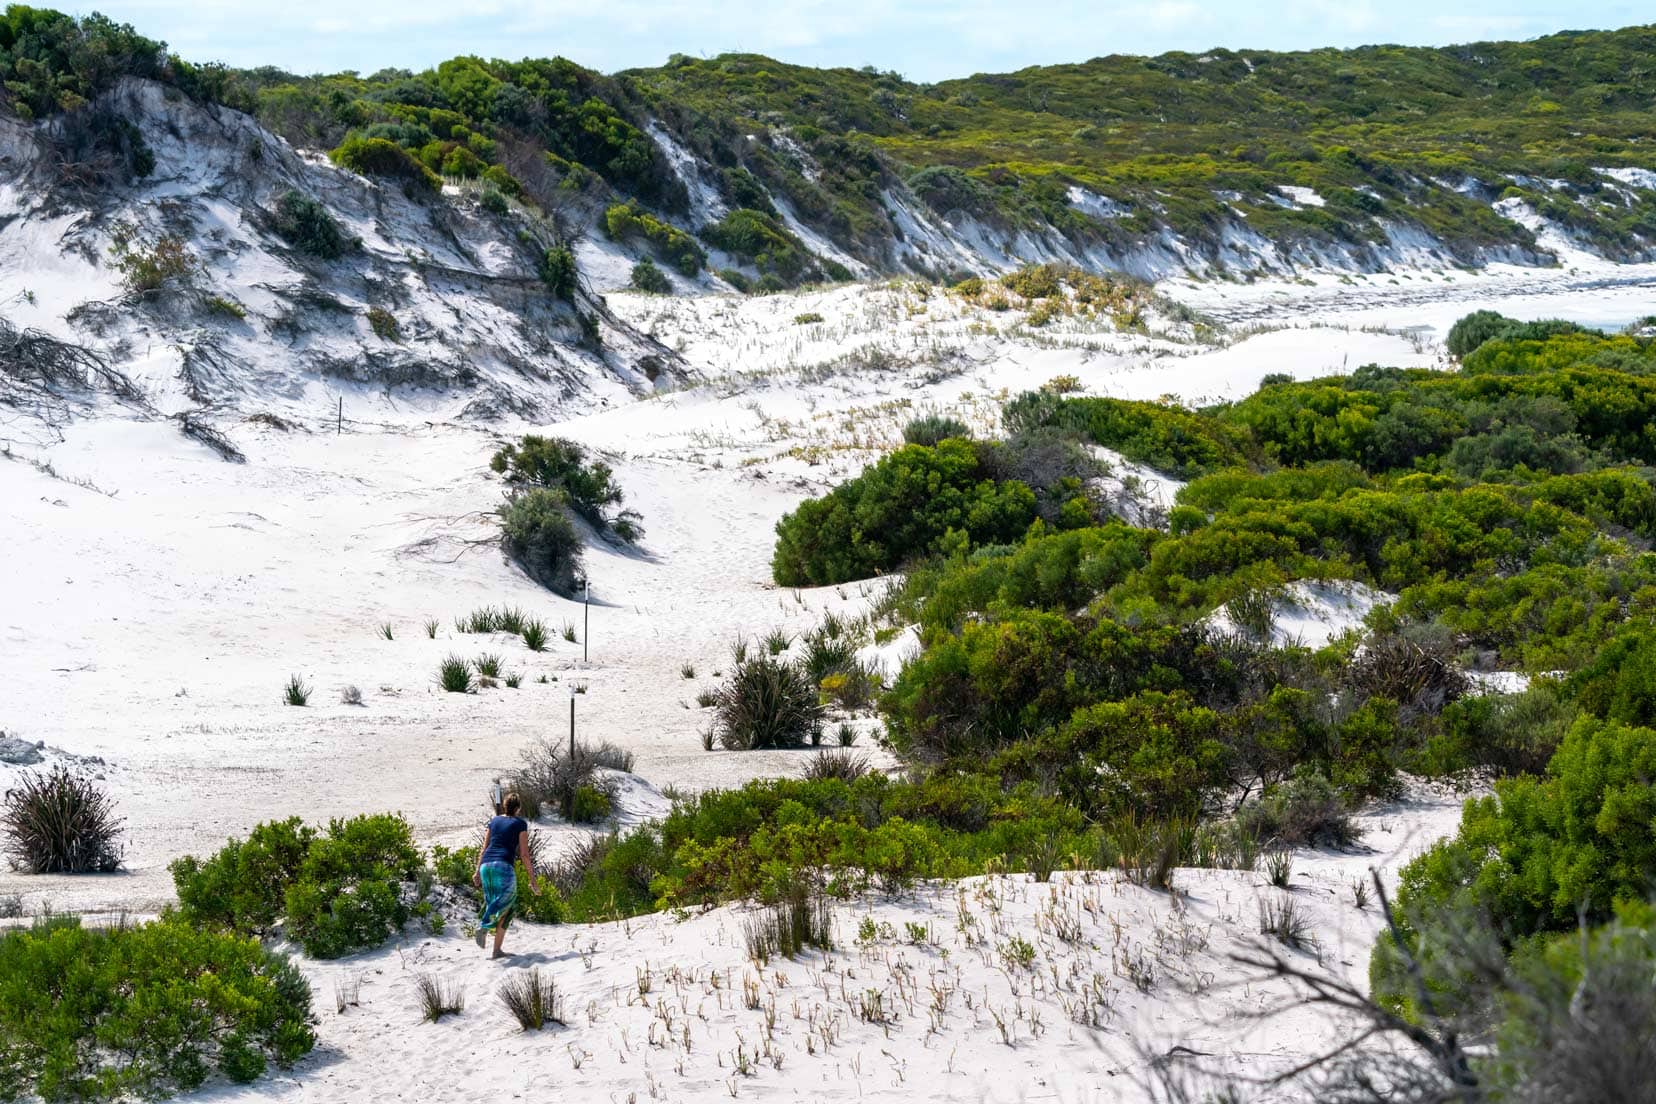
A nice beach walk from the campsite starts at the top of the stairs (near the BBQ area) and follows white marker poles to exit onto yet another one of WA’s pristine southern beaches.
It’s a short 20-minute one-way amble.
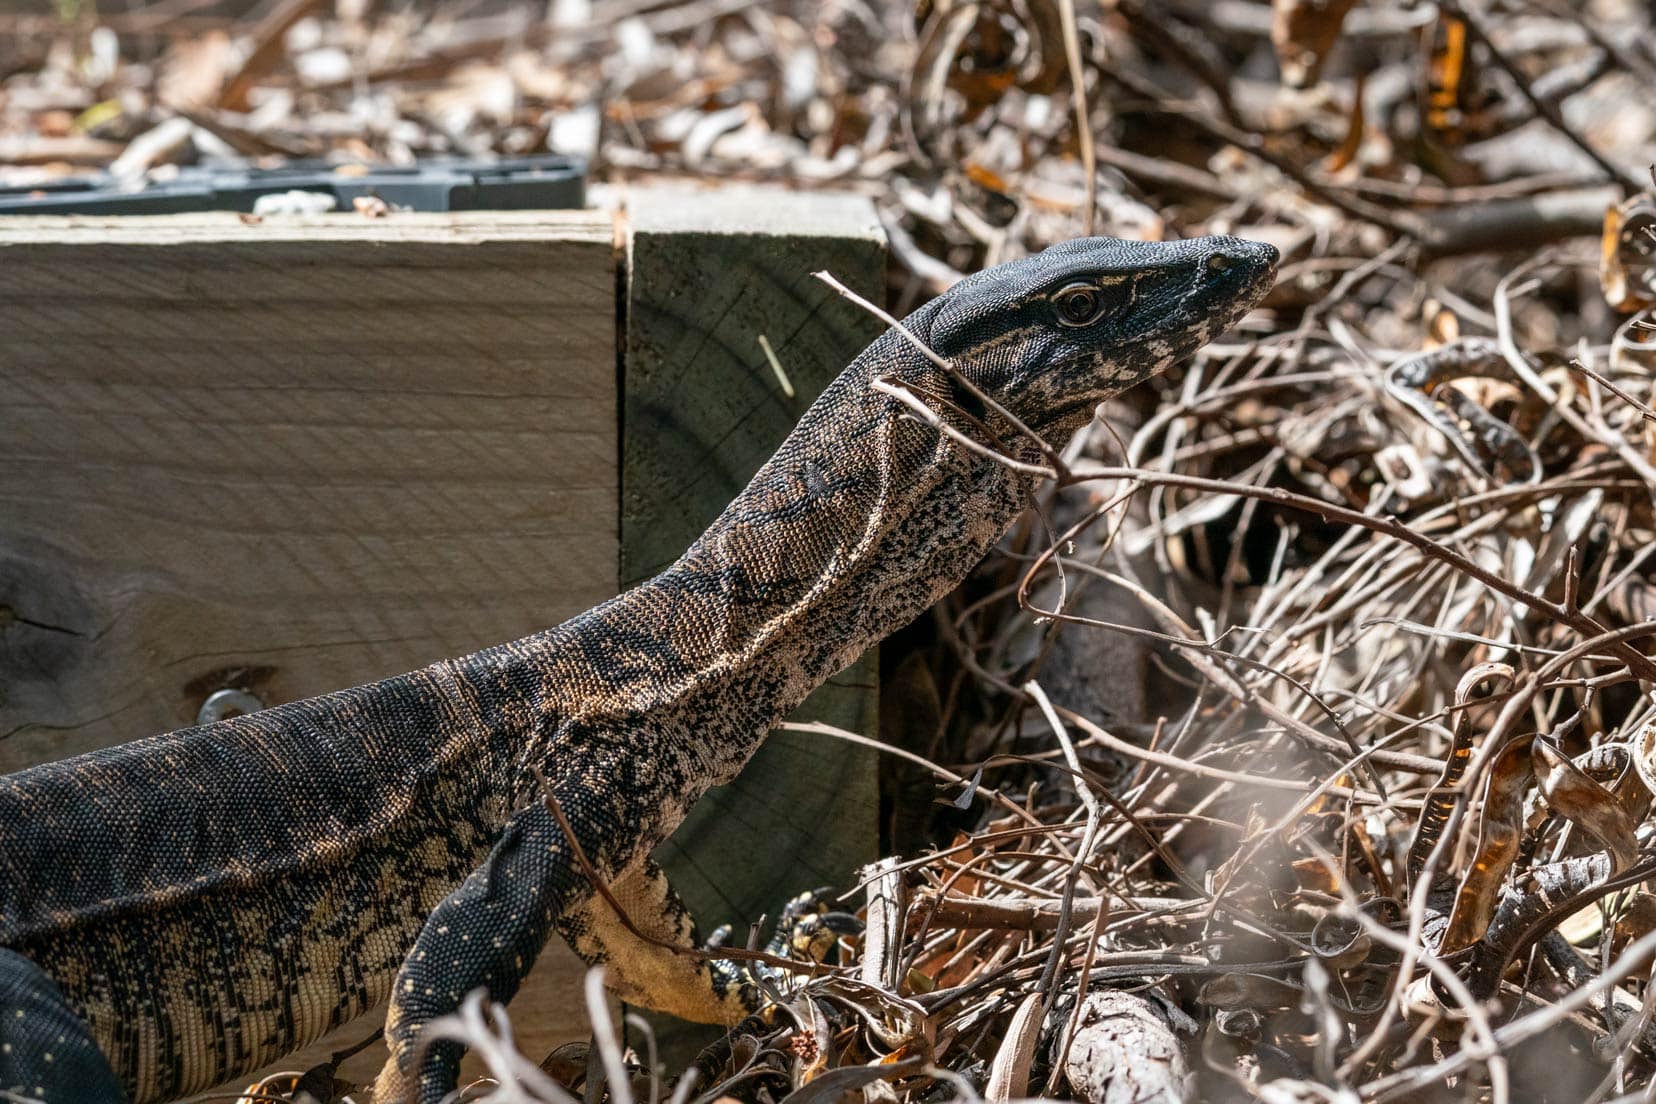
There’s not much to see, but that doesn’t stop the locals from checking you out.
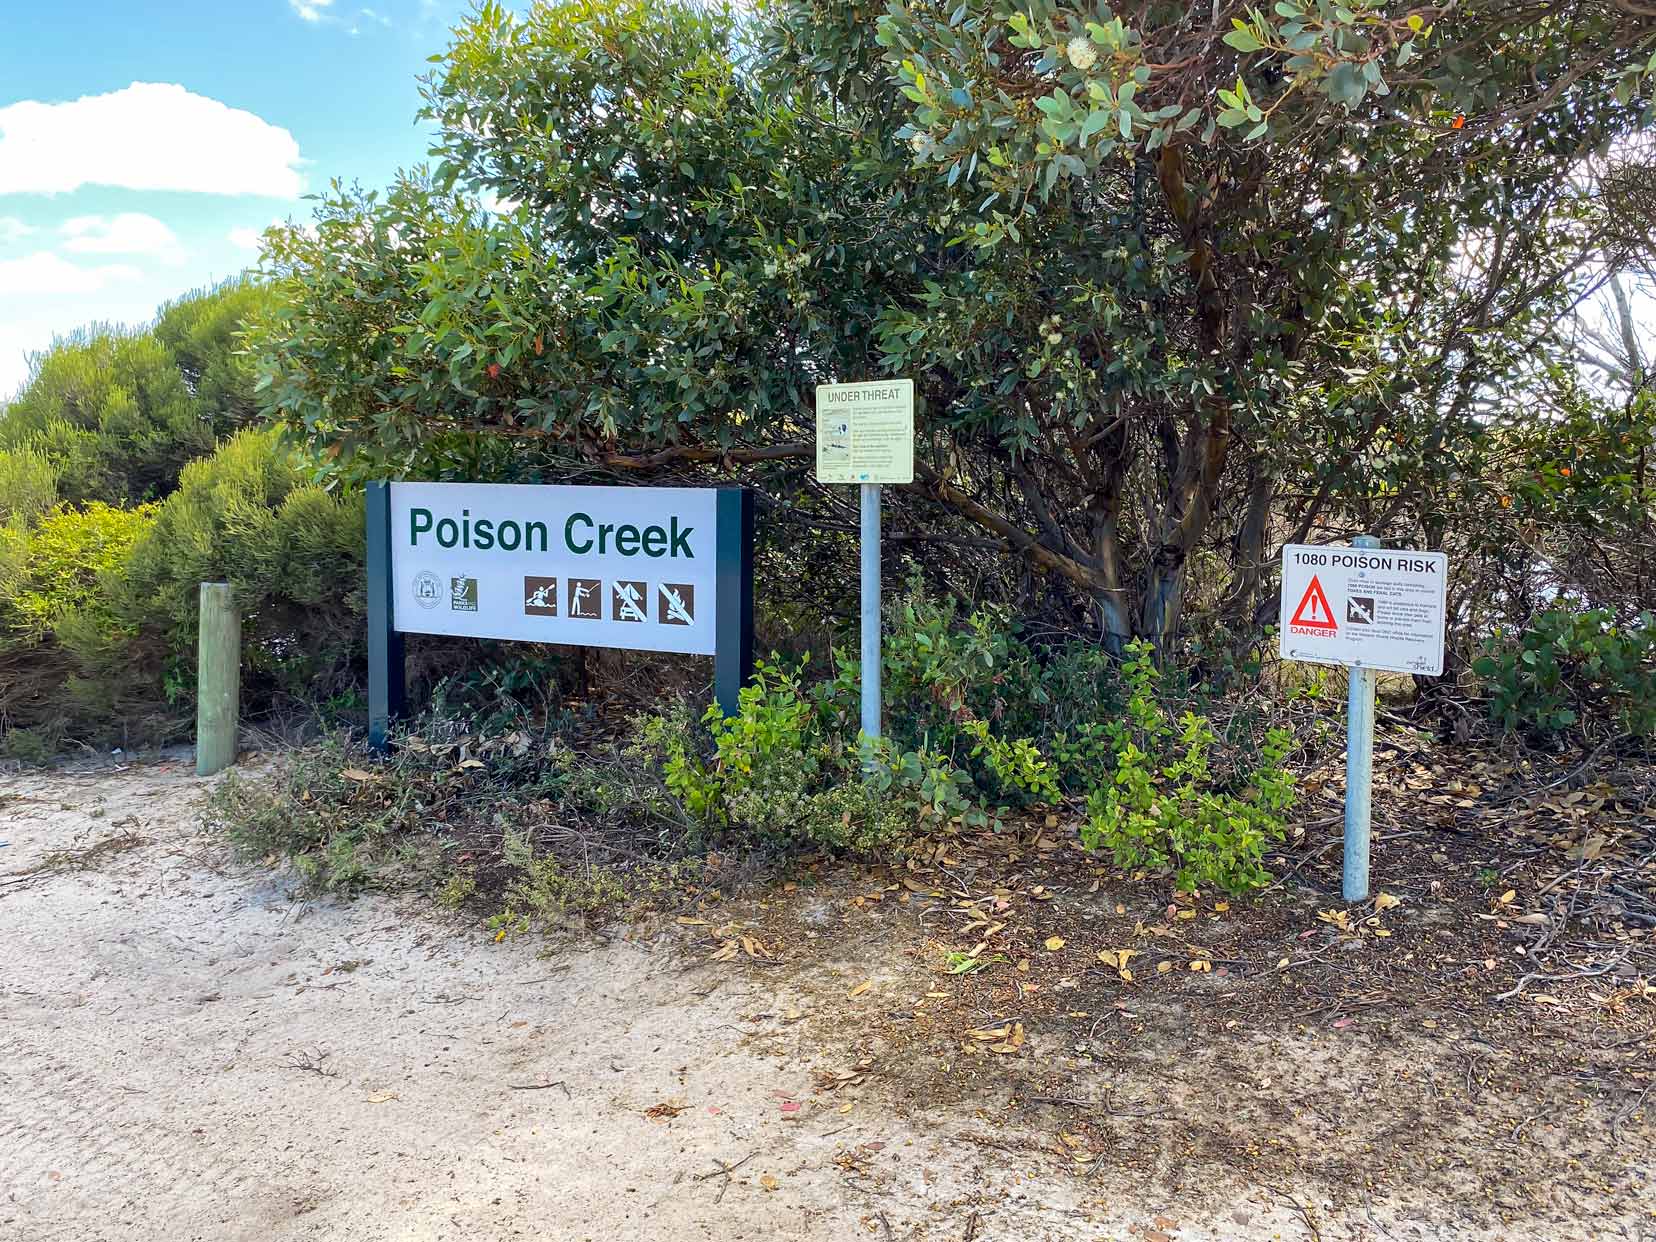
Before leaving the area, we drove about one kilometre to Poison Creek (S33.90428, E123.35011) to look around. This beautiful spot is renowned for its great fishing.
I wish I’d packed a rod.
I noticed some wheel tracks leading to the beach through a water section but couldn’t be convinced to drive through it. We were a lone vehicle; a tow wasn’t within coo-ee if things went wrong.
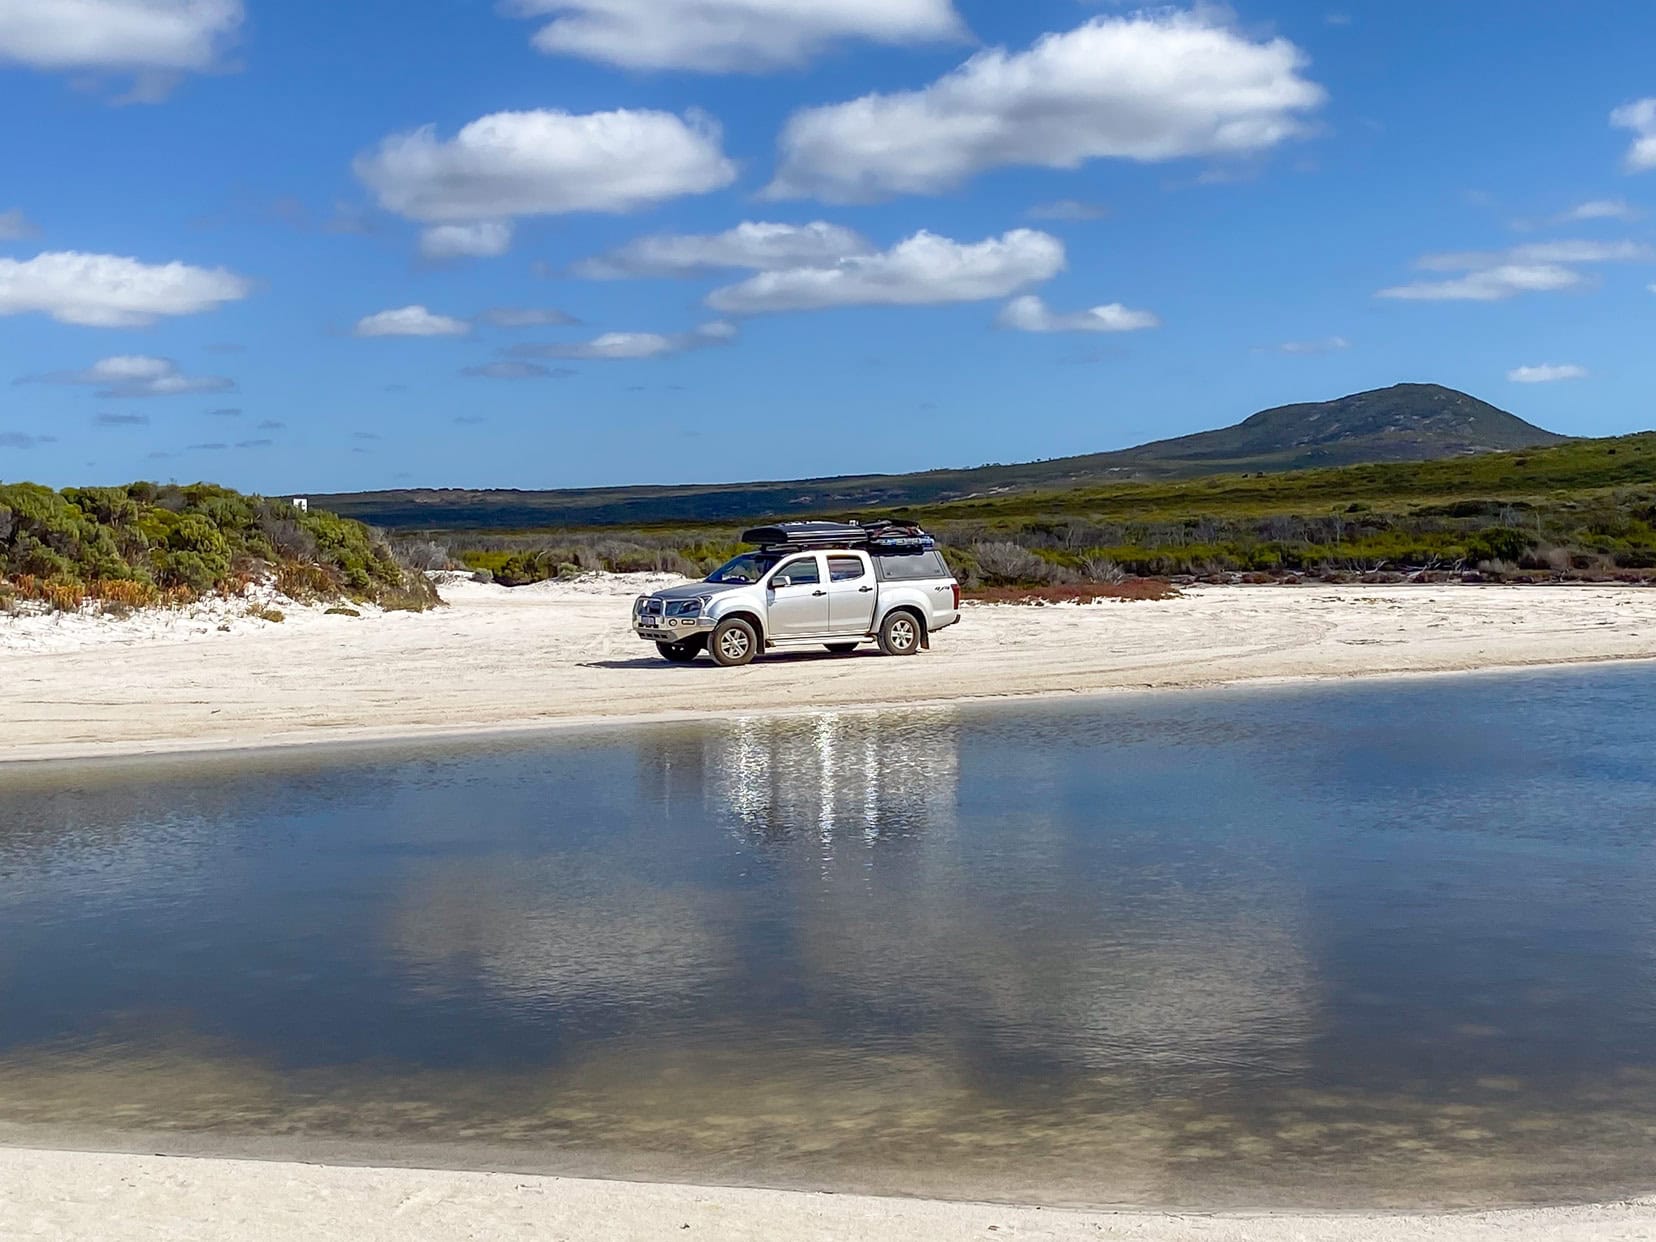
On Google, this location shows as a campsite, and for a minute, we thought we might stay here for a second night—until we saw the nearby sign ‘No Camping‘.
Oh well, on we go.
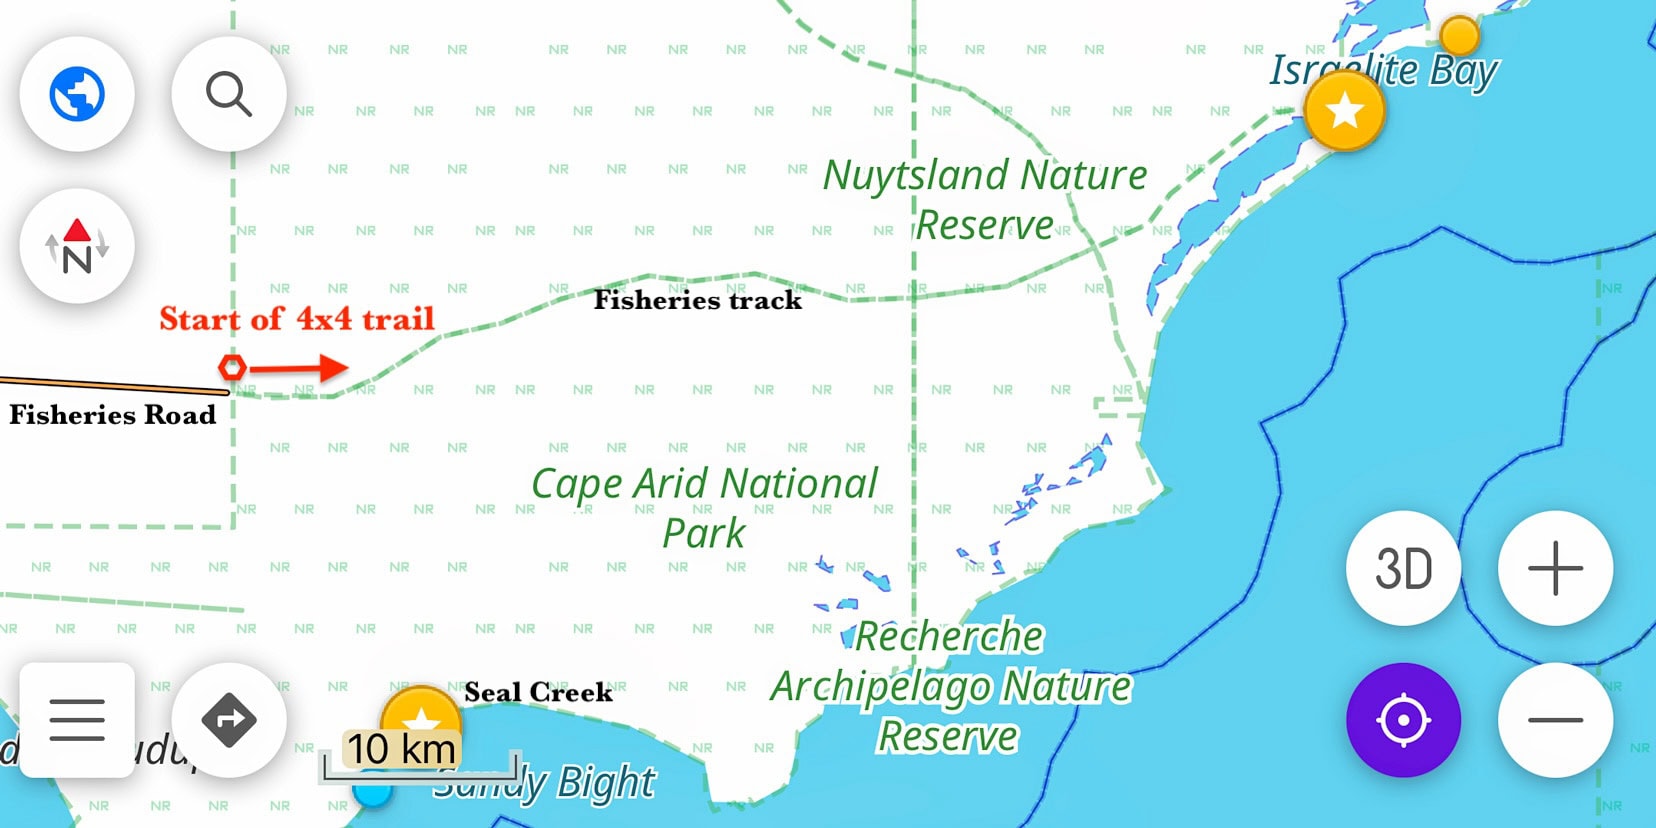
Seal Creek to Fisheries Track to Israelite Bay
Driving distance (from the start of Fisheries Track): 75km; Drive time: 3 hours
Start of Fisheries Track (western end) Coordinates: S33.75114, E123.24296
Israelite Bay Coordinates: S33.61998, E123.85486
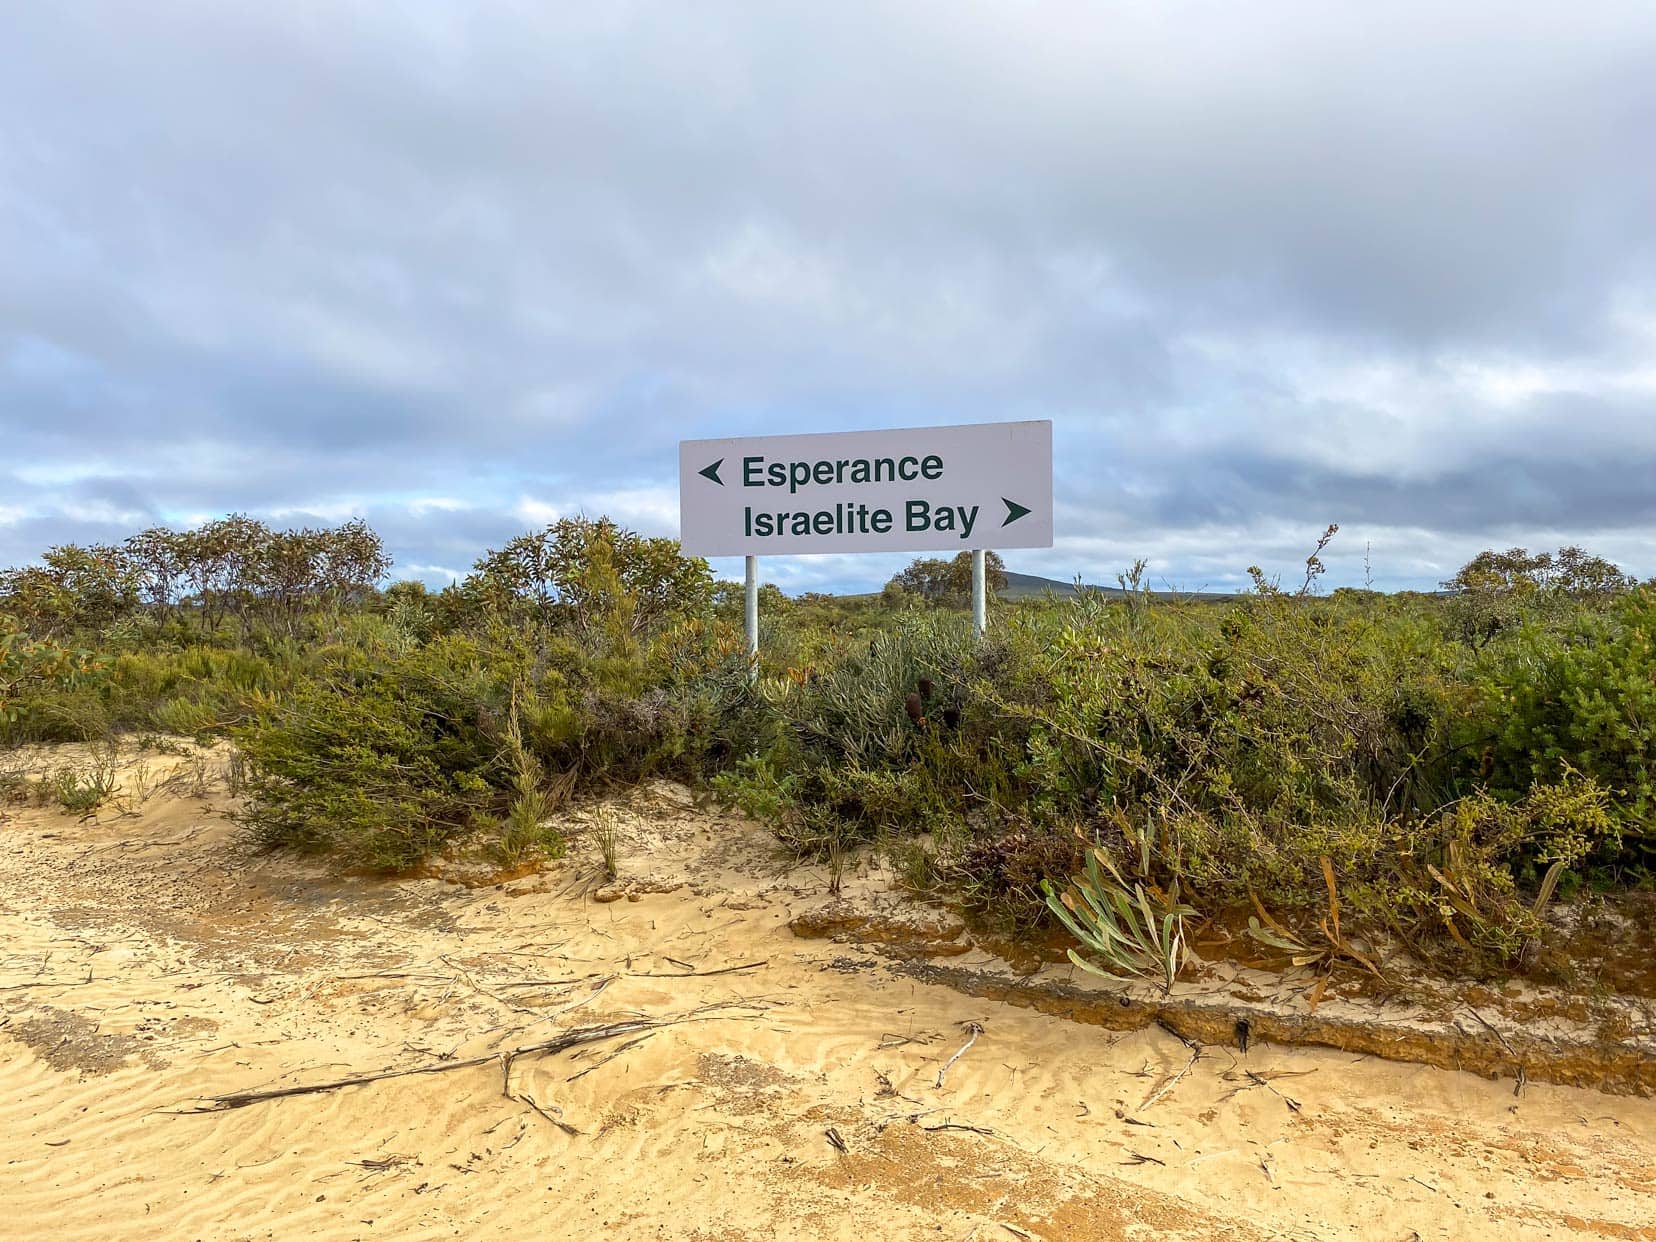
Departing Poison Creek campsite, we backtracked to Fisheries Road (about an hour) and again picked it to follow it east to the start of Fisheries Track.
It was around here that we lost the Telstra network signal.
You need to stop at the start of the Fisheries Track to drop the pressure on your tyres, so have a read of the roadside information signs while there.
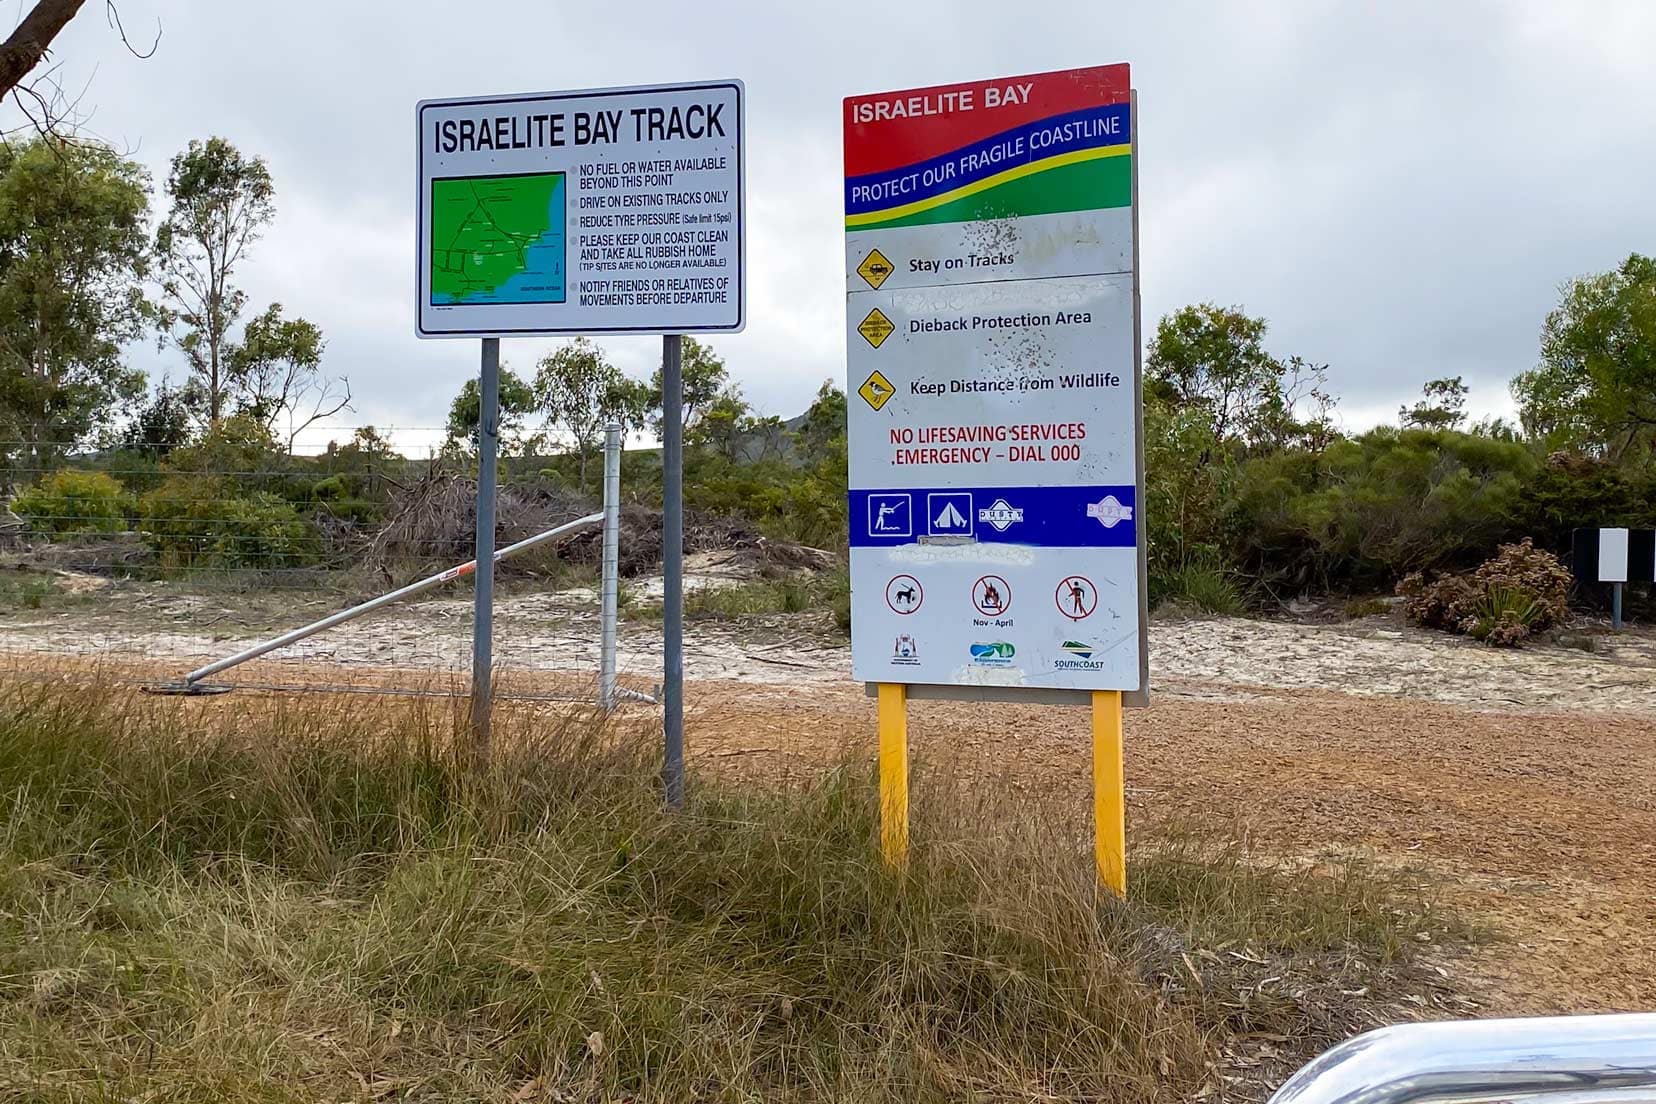
I set my tyre pressures to 25psi and selected 4×4 High. Since I wasn’t towing anything, I thought that would be a good starting pressure.
Should I become bogged in the sand, I could always reduce the pressures further and, in the worst case, break out the recovery boards.
The Fisheries Track is single-lane with terrain and countryside that varies greatly along this 75km stretch.
The early section (approximately 1.5km) is a track of undulating hills with soft sand lined with scrubby bushes.
You could probably get two vehicles past each other, but it would be tight. Having said that, there are a few places that open up, allowing you to pull to the side.
I kept my speed up to maintain momentum but not excessively so. You could feel the car bleed off speed on the inclines, indicating how boggy it was.
At this early stage of the drive, I was concerned about fuel consumption and whether the track was soft sand all the way, which would affect the economy. I left Esperance with a full 76 litres of diesel in the tank; would it be enough?
Anyway, these concerns were unfounded. I did finish the drive back to Esperance with a quarter of a tank left (if you trust the gauge).
But back to the drive.
With fuel consumption on my mind, when the terrain allowed, I flicked the car into 2WD and felt better for it. It wasn’t long before the sandy part of the track was behind us; the track firmed, and the countryside opened up.
Happy days … so I thought.
It was less than a minute before the damn corrugations began. Sometimes, you can reduce the effect by speeding up and skating on the crests, but the track wasn’t in the condition to allow this.
Dropping the speed was the only option.
Little did I know, this was the start of three hours of slow-speed, monotonous corrugations. I was plodding along mostly at 20km/hr, with the odd squeeze of the throttle to 40km/hr; slow and steady it was.
About halfway along, we called a stop, made a brew, and quickly checked the vehicle for anything that might have vibrated loose. I ran my hands over the tyres to feel for heat, but all was good.
If the tyre was uncomfortably warm, I would have reduced my driving speed or raised the tyre pressure. The 25psi was working well so far.
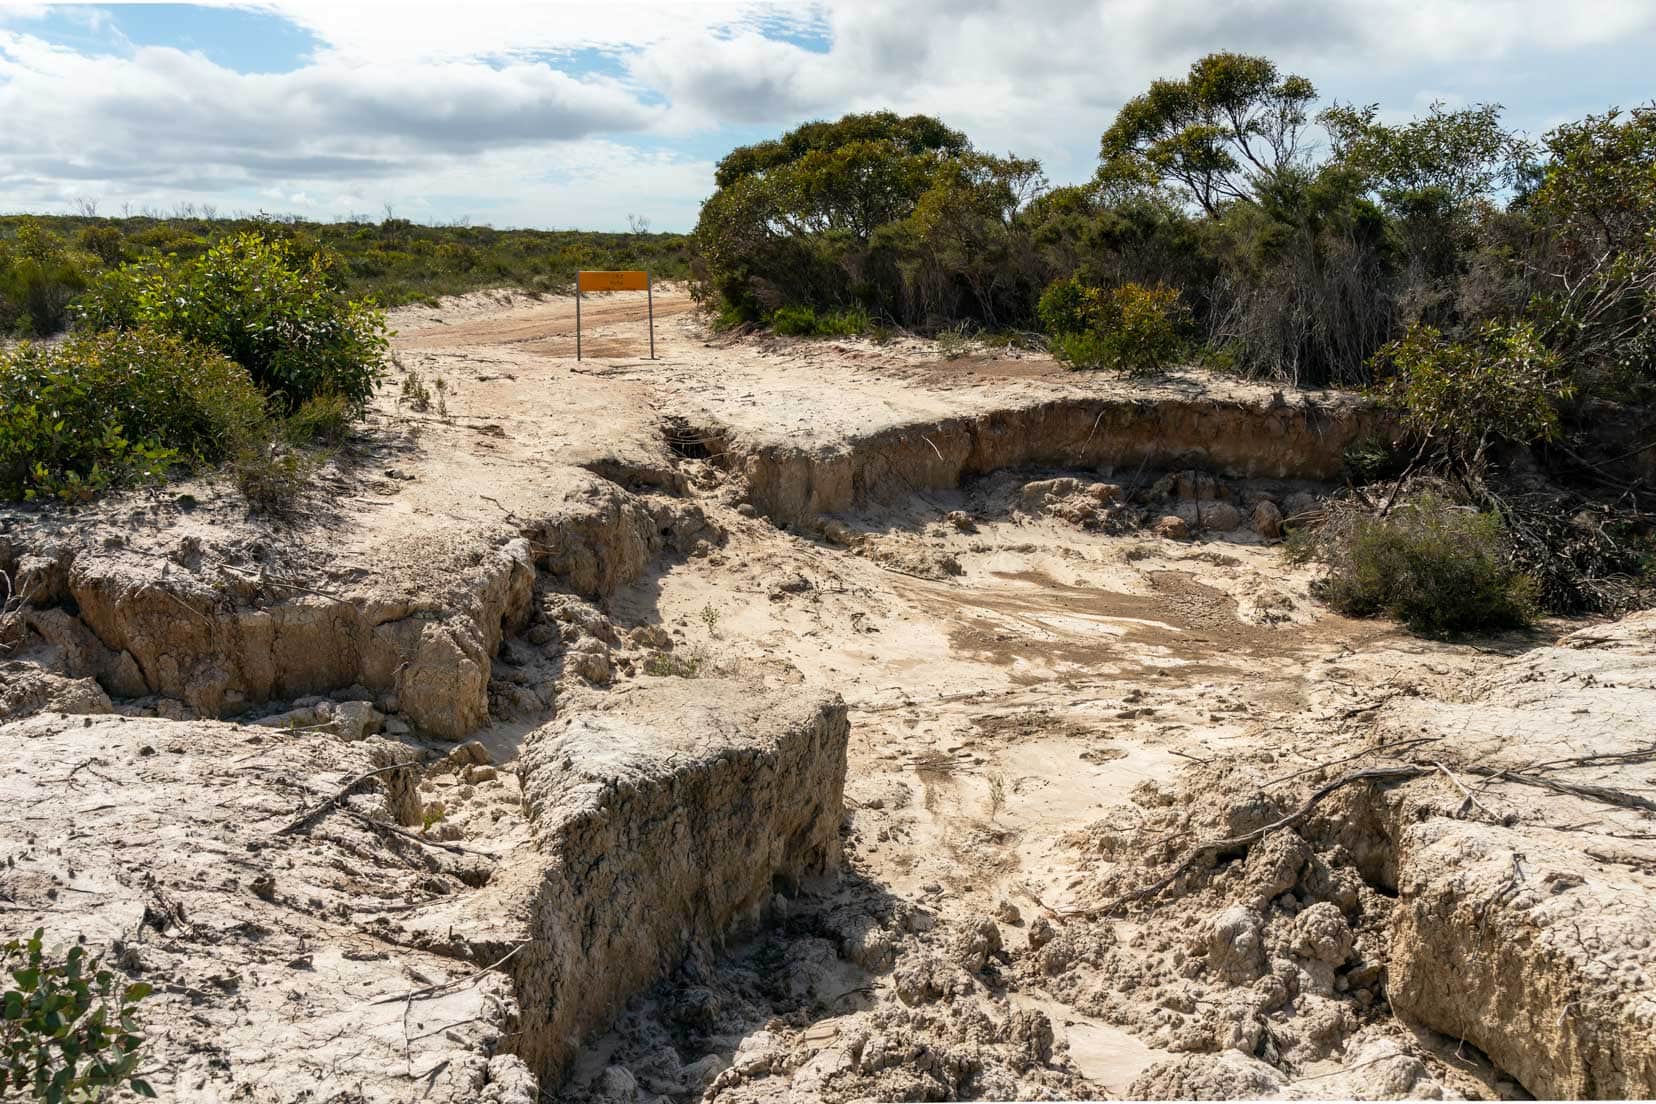
Some track sections were rutted and water-filled, but there was always a detour. There is a massive washout at one spot, but signs indicate the way around.
A distance marker indicated we were 10km from Israelite Bay and it wasn’t long after that the corrugations started to subside.
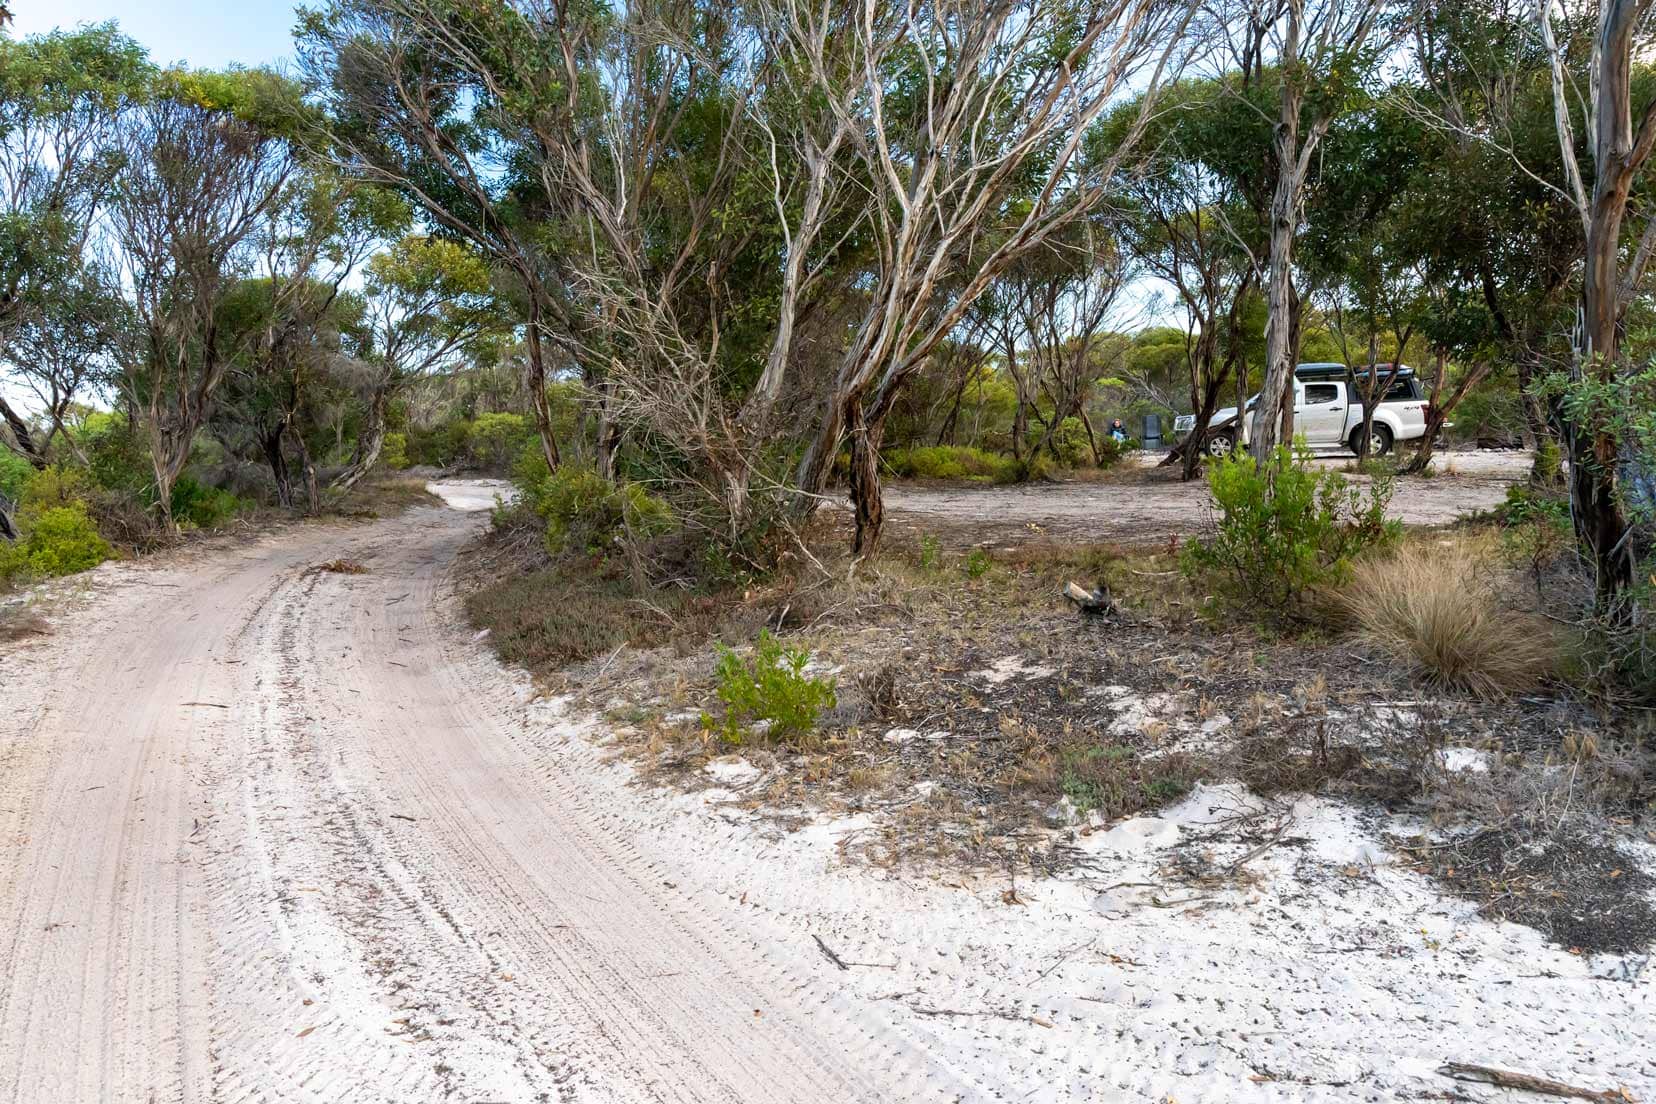
In pretty short time we were at the outskirts of Israelite Bay to begin our exploration.
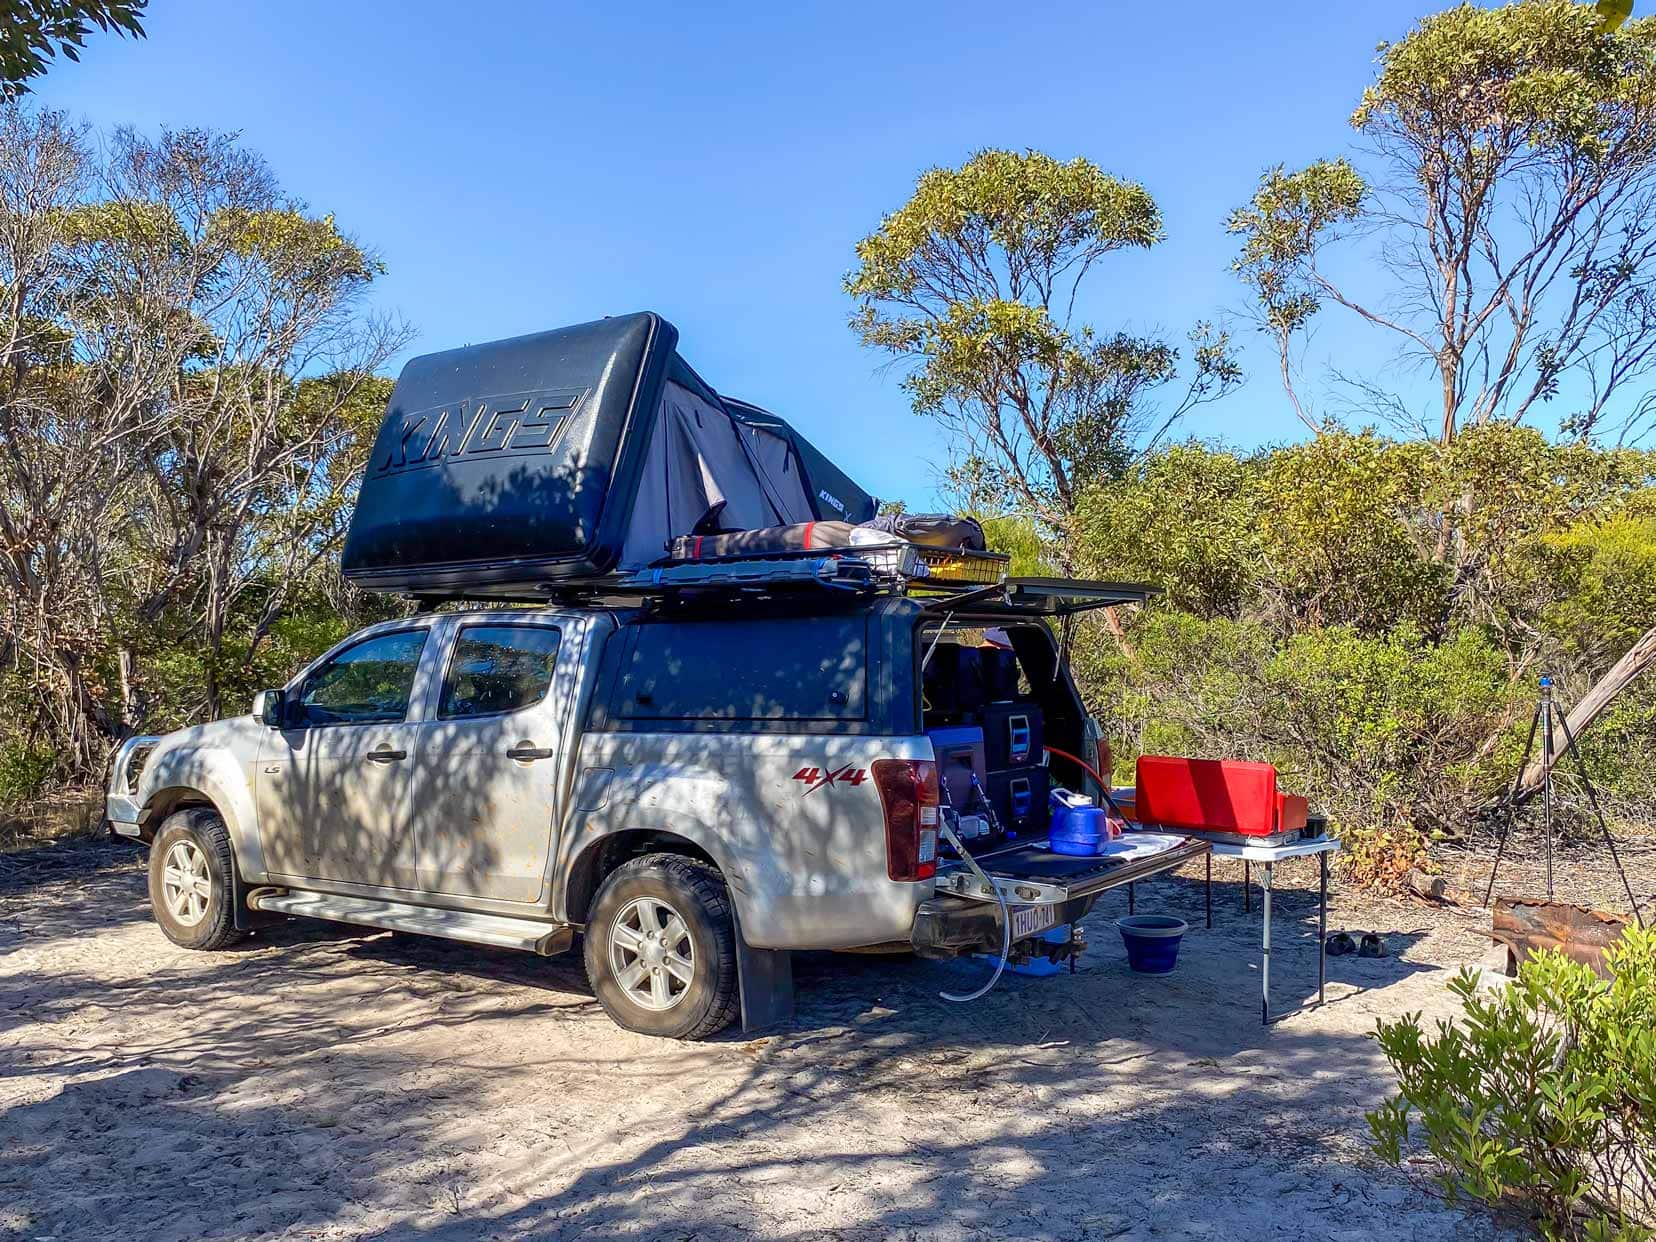
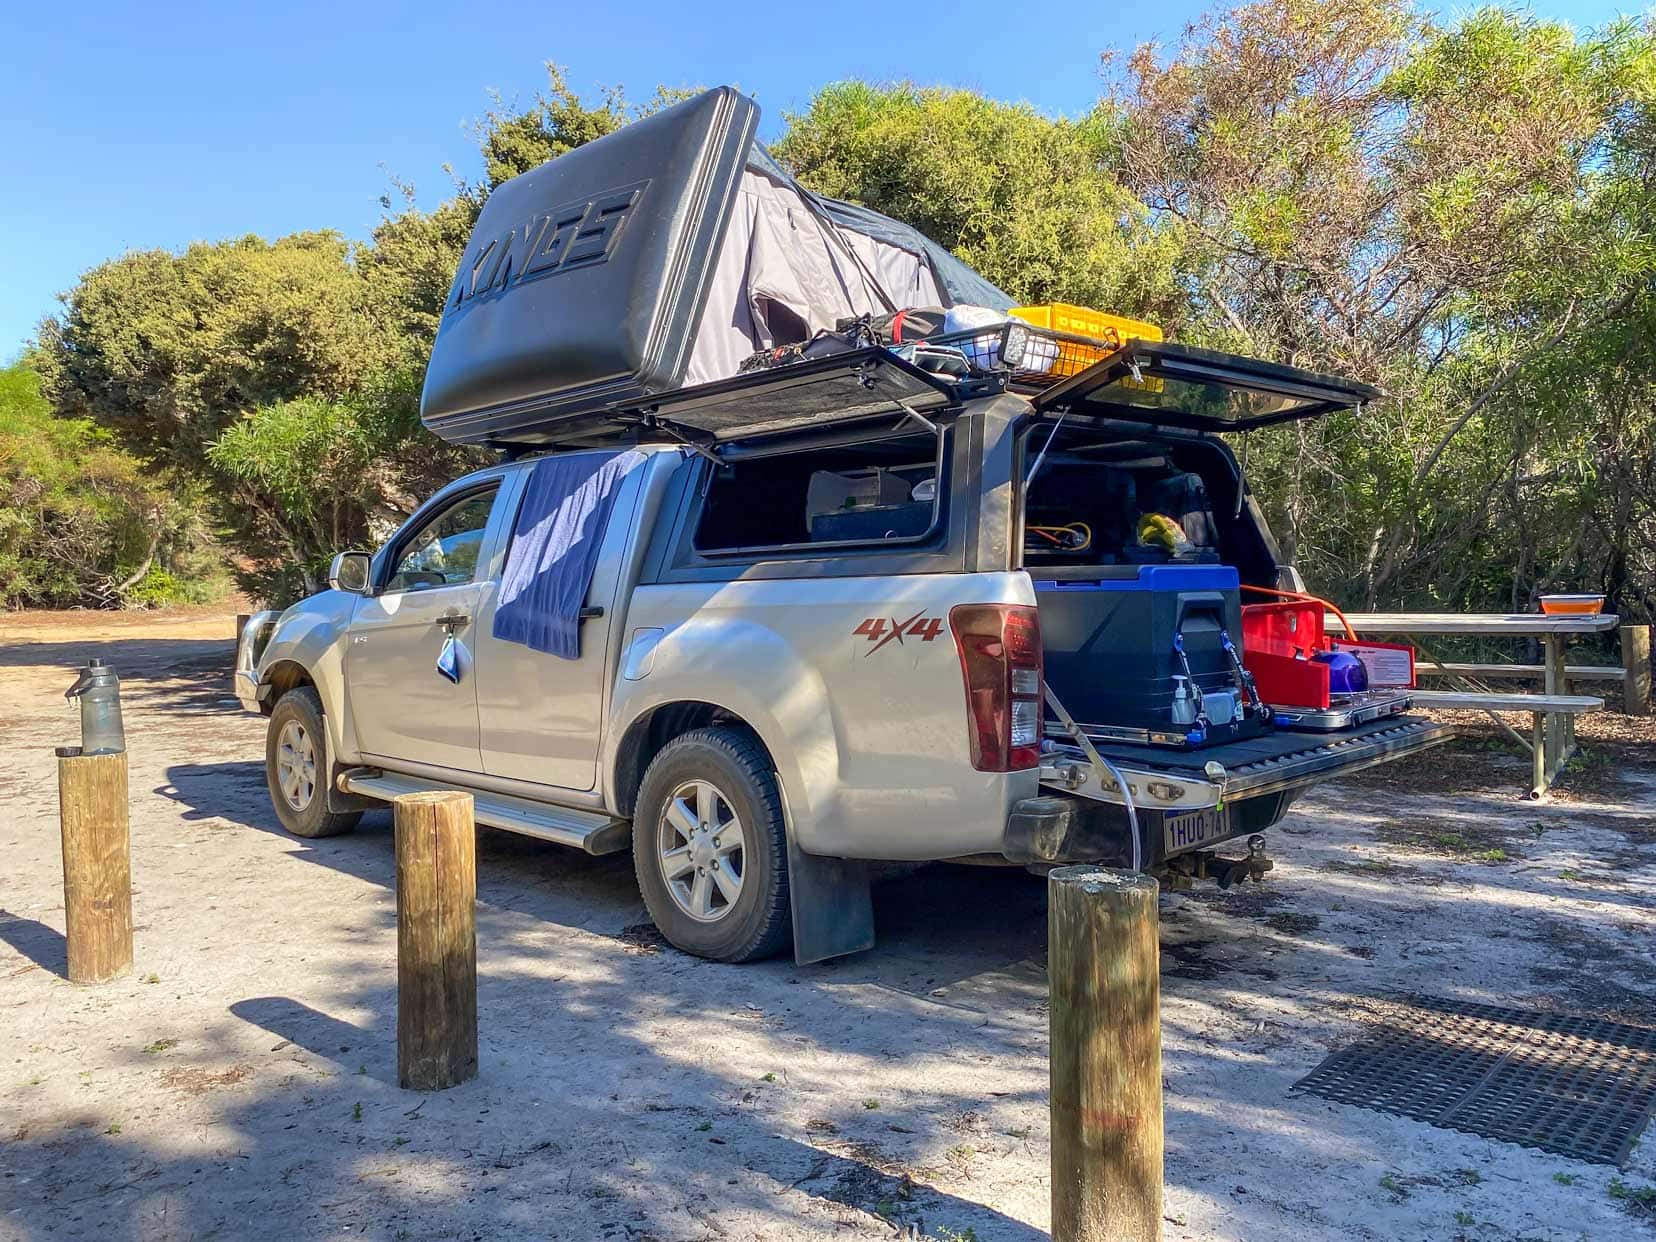
Camping at Israelite Bay
The first job was to find a campsite. Camping at Israelite Bay is free.
We found two areas, roughly 700m apart, where we could camp.
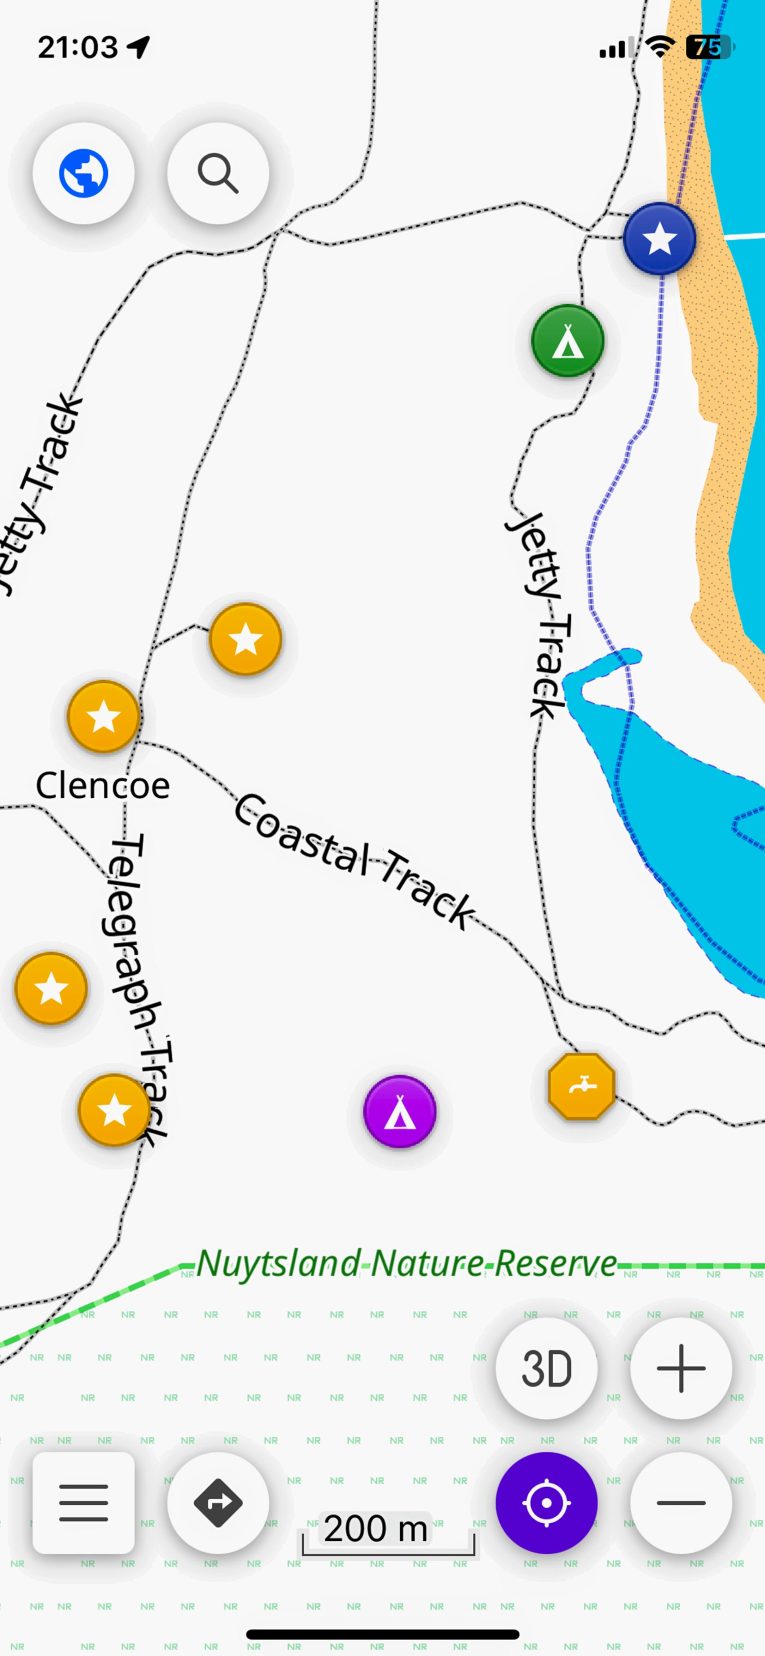
One really large camp area (S33.62248, E123.86416) with the purple marker (🟣) shown above is the most popular and set amongst tall trees. You’ll get some space and shade here. A few campers obviously had the same idea.
The second camp area with the green marker (🟢) was the more appealing option. It is a much smaller site within a few hundred metres of the jetty (S33.61452, E123.86625).
This suited us for several reasons:
- We had the site to ourselves.
- It was within short walking distance of the jetty, which I wanted to photograph during the day and night.
- It was a quieter location where we would probably have better wildlife sightings.
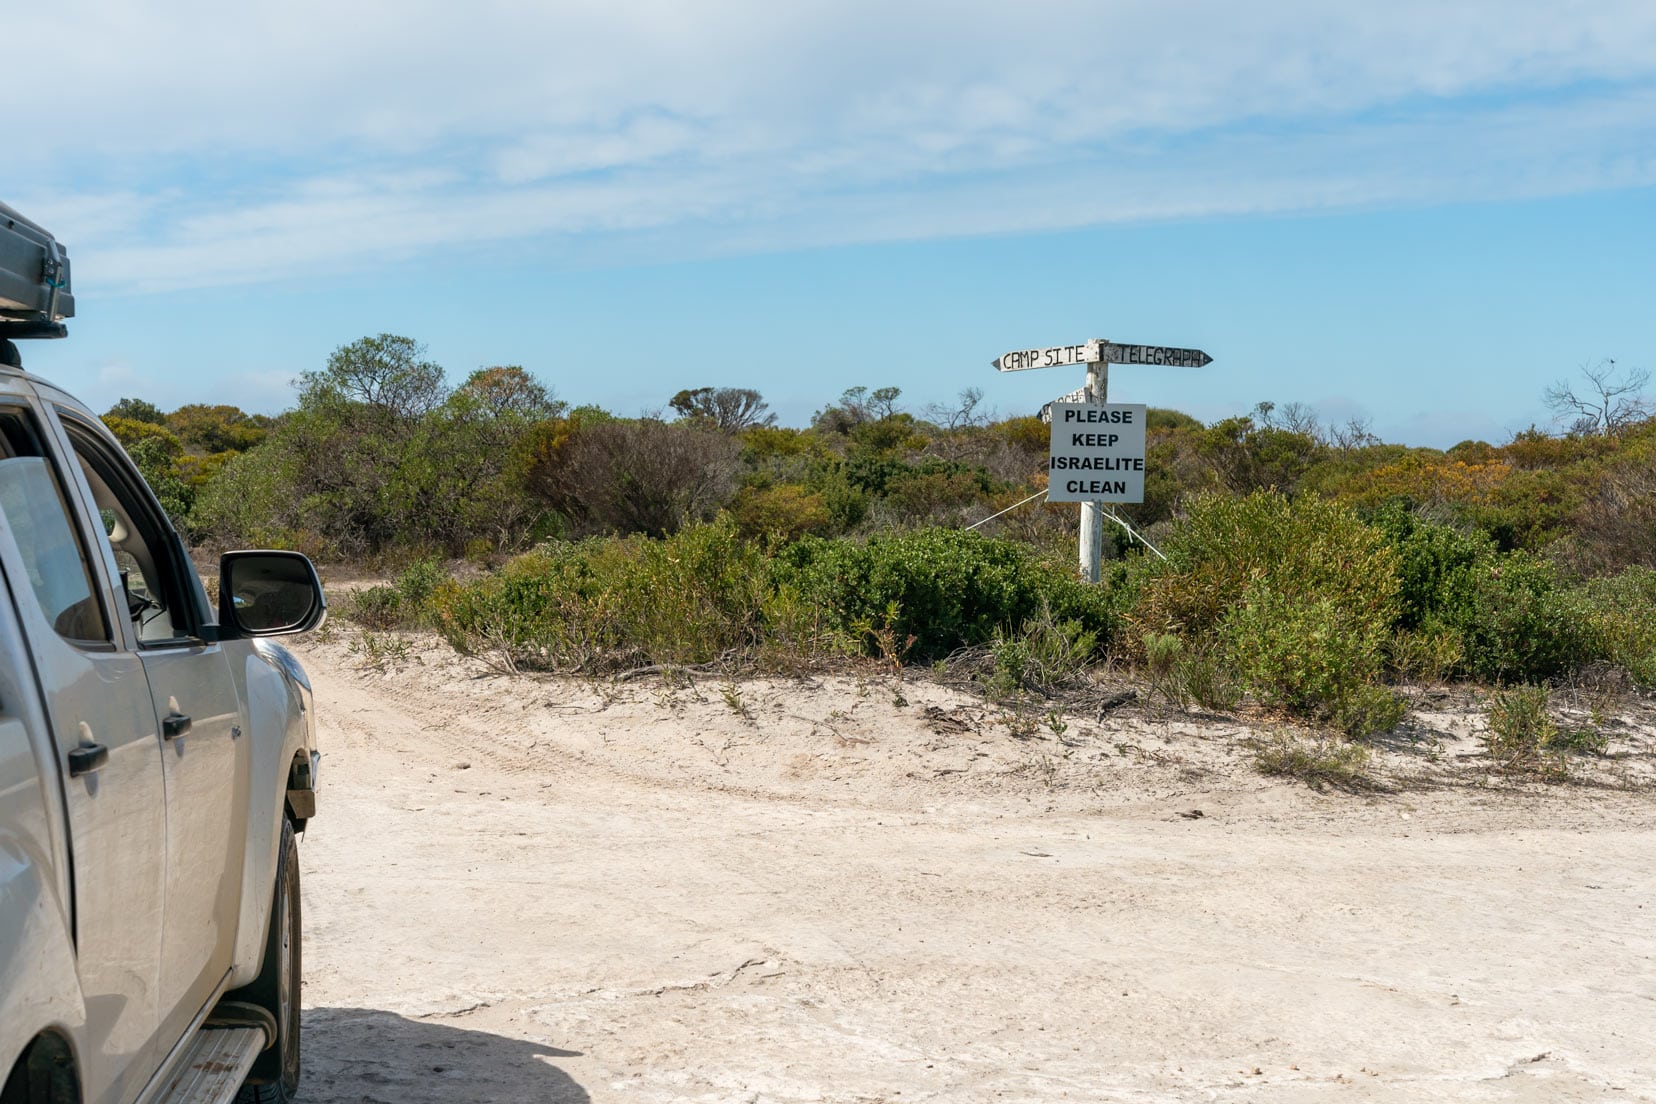
Leave No Trace
There are no facilities at Israelite Bay, so visitors and campers are expected to employ the leave no trace principles to ensure we keep our country in pristine condition.
These are:
- Plan ahead and prepare
- Camp on durable surfaces (fragile soil, soft plants, and muddy sites to be avoided)
- Proper waste disposal involves taking it with you and not burning it. Dig your personal waste deep (at least 20 cm) away from water sources.
- Don’t take souvenirs
- Minimise campfire impacts by creating a fire pit and avoid depleting the native wood habitat by bringing your own.
- Respect wildlife
- Be considerate to other visitors.
Points of Interest at Israelite Bay
Israelite Bay is rich in historical sites and remnants of the past, offering a glimpse into the area’s fascinating history.
Here are some of the key spots, all within a short drive, that you won’t want to miss:
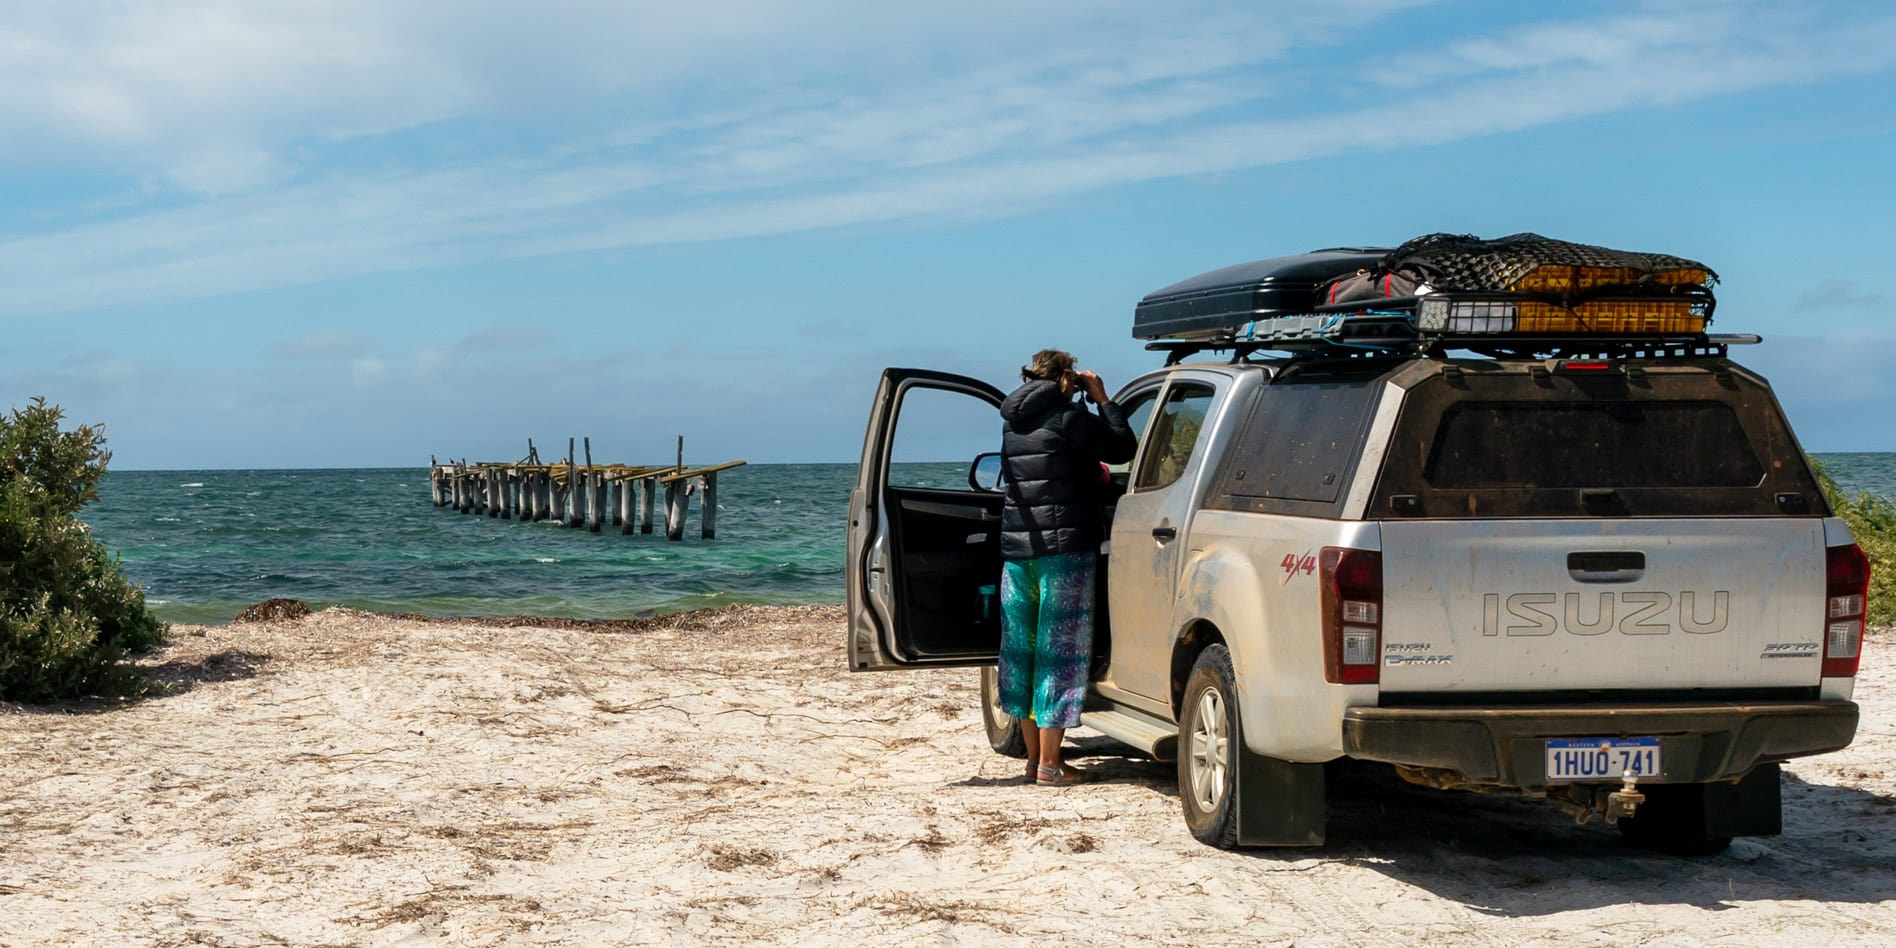
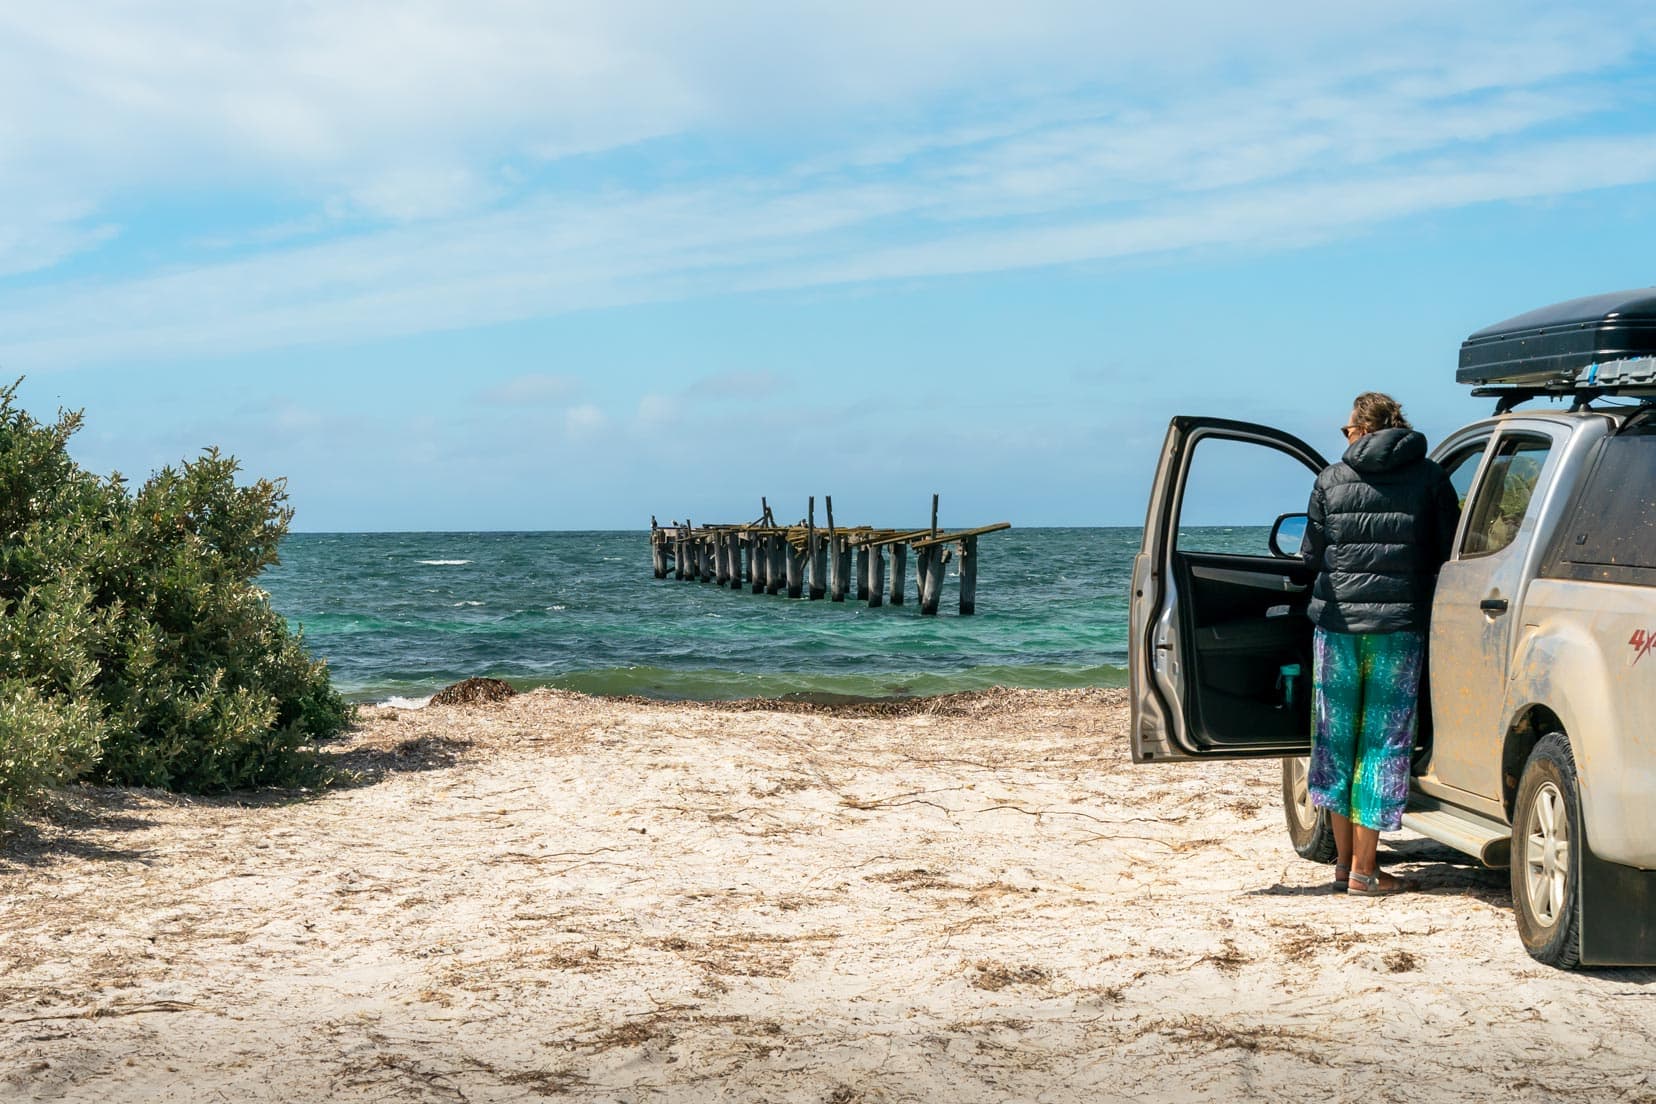
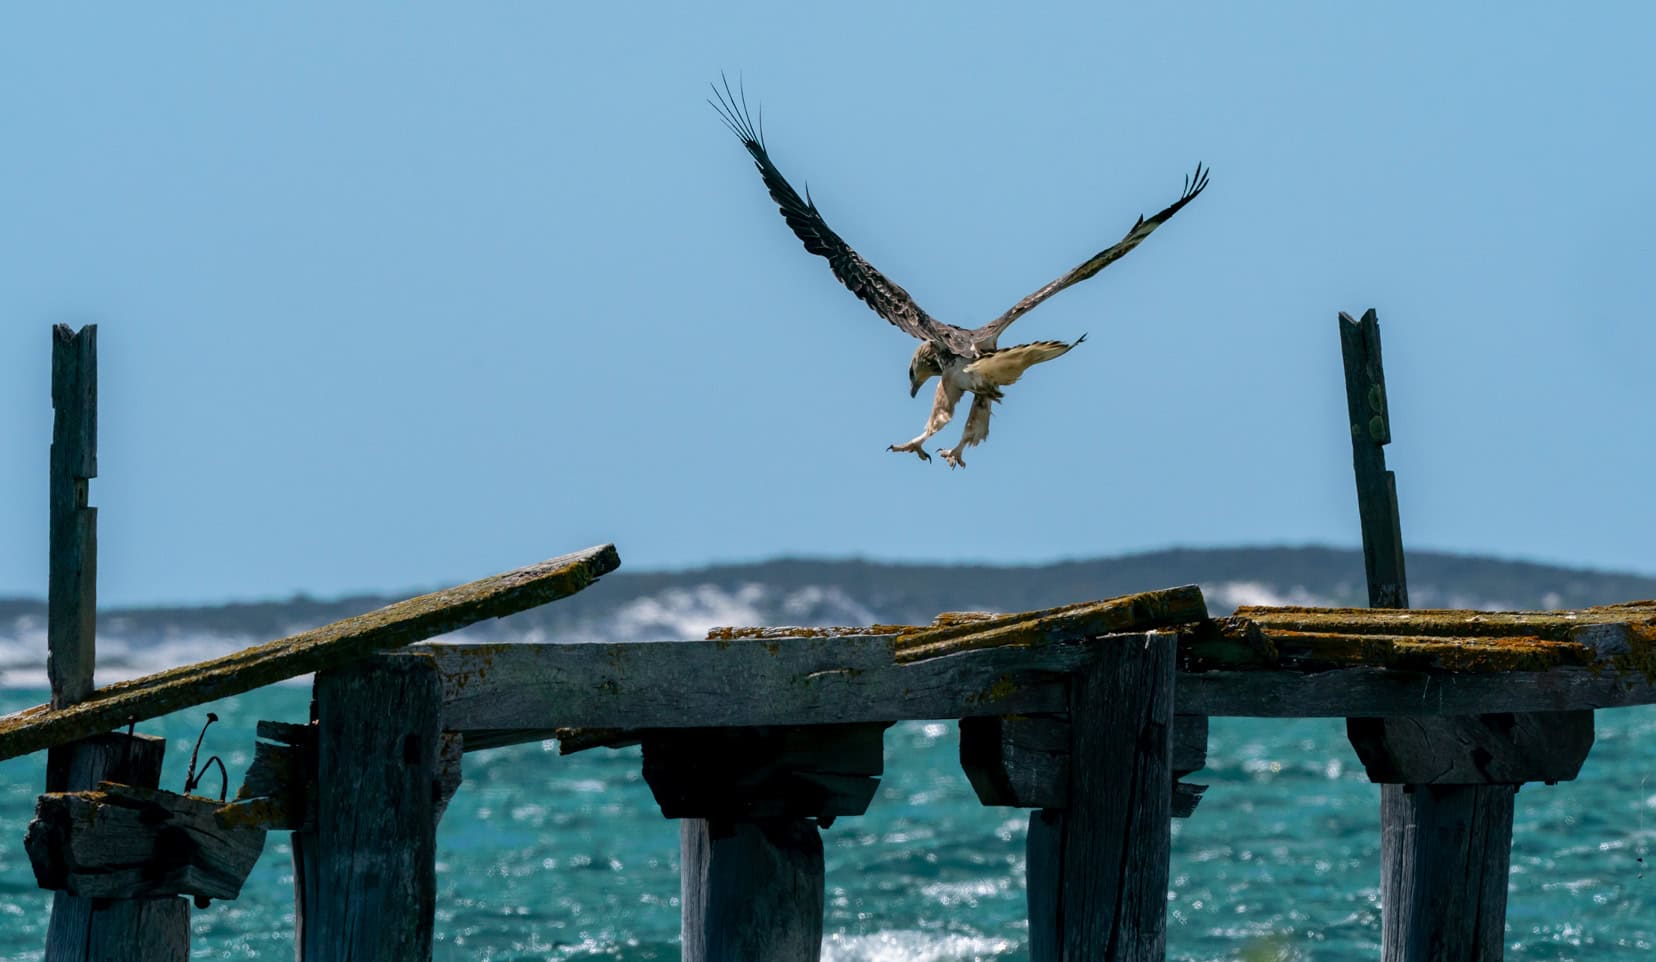
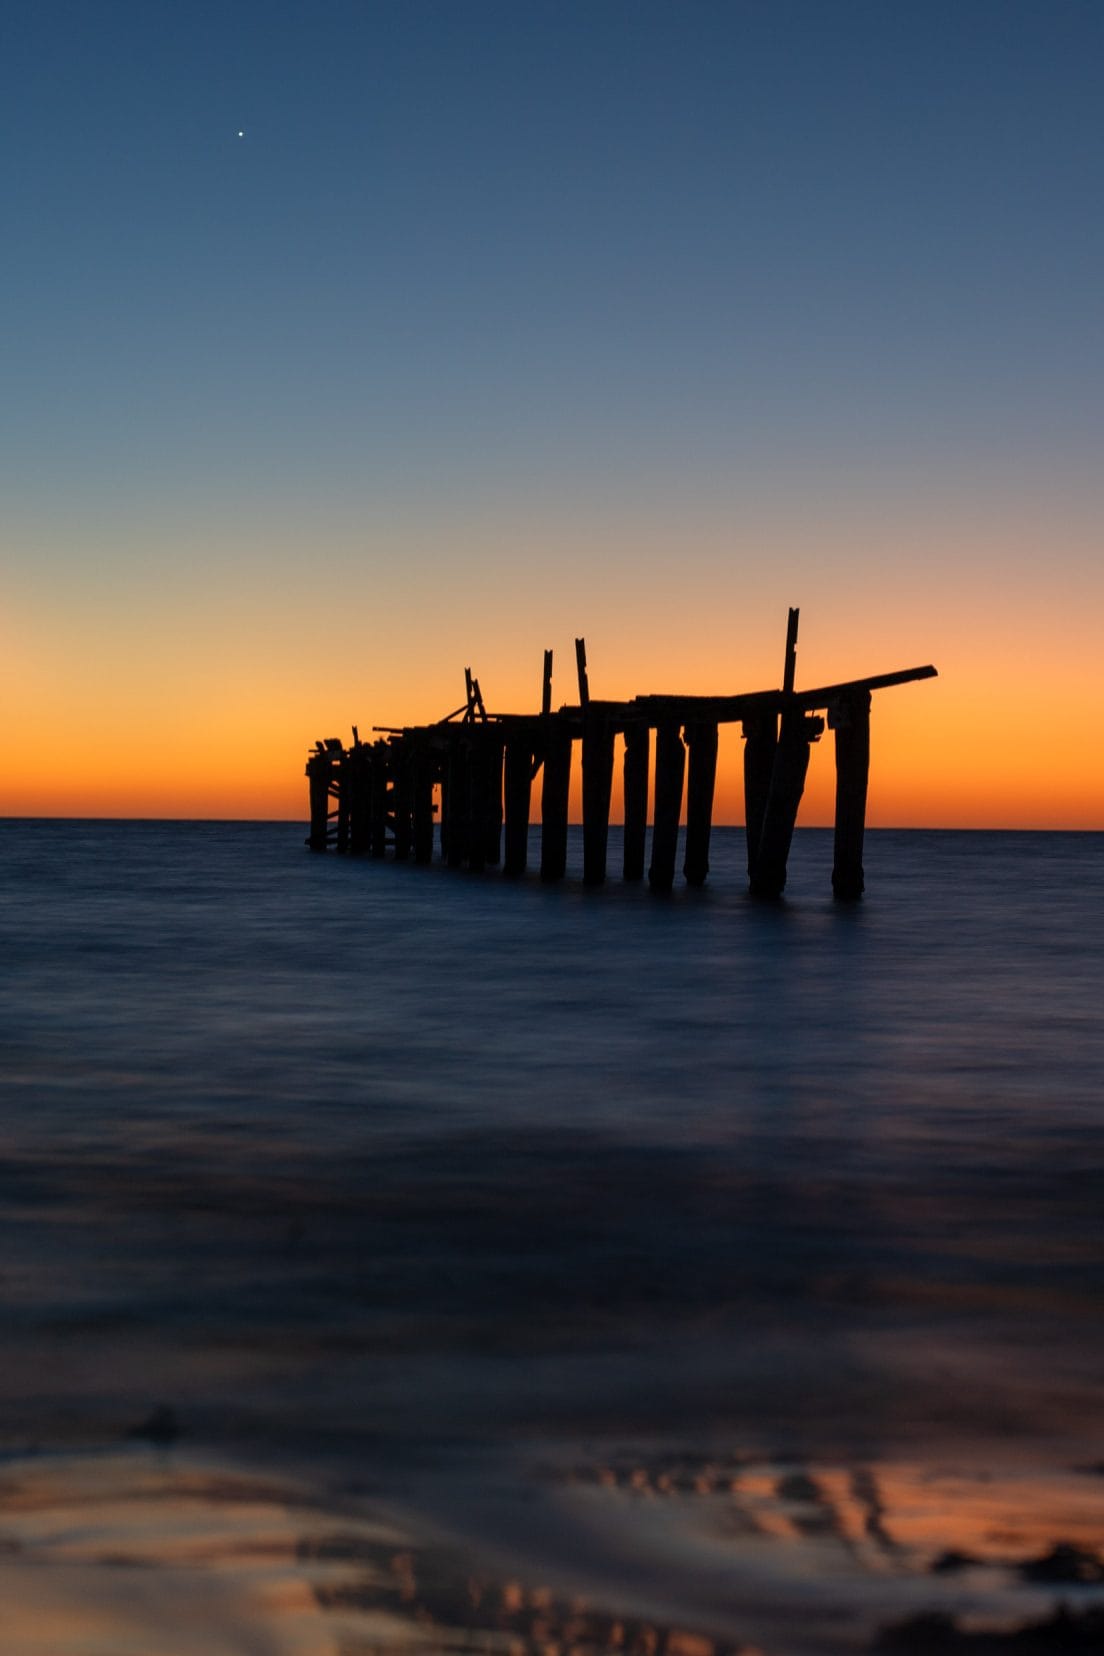
Israelite Bay jetty
The remnants of a wooden jetty were used for off-loading telegraph poles to build the overland telegraph system and loading wool from sheep stations.
The jetty was built in 1898 for ships to berth and unload the wooden poles needed for the overland telegraph line. Although the original jetty length was 89m, what you see today is around 60m, with the section closest to the shore now missing.
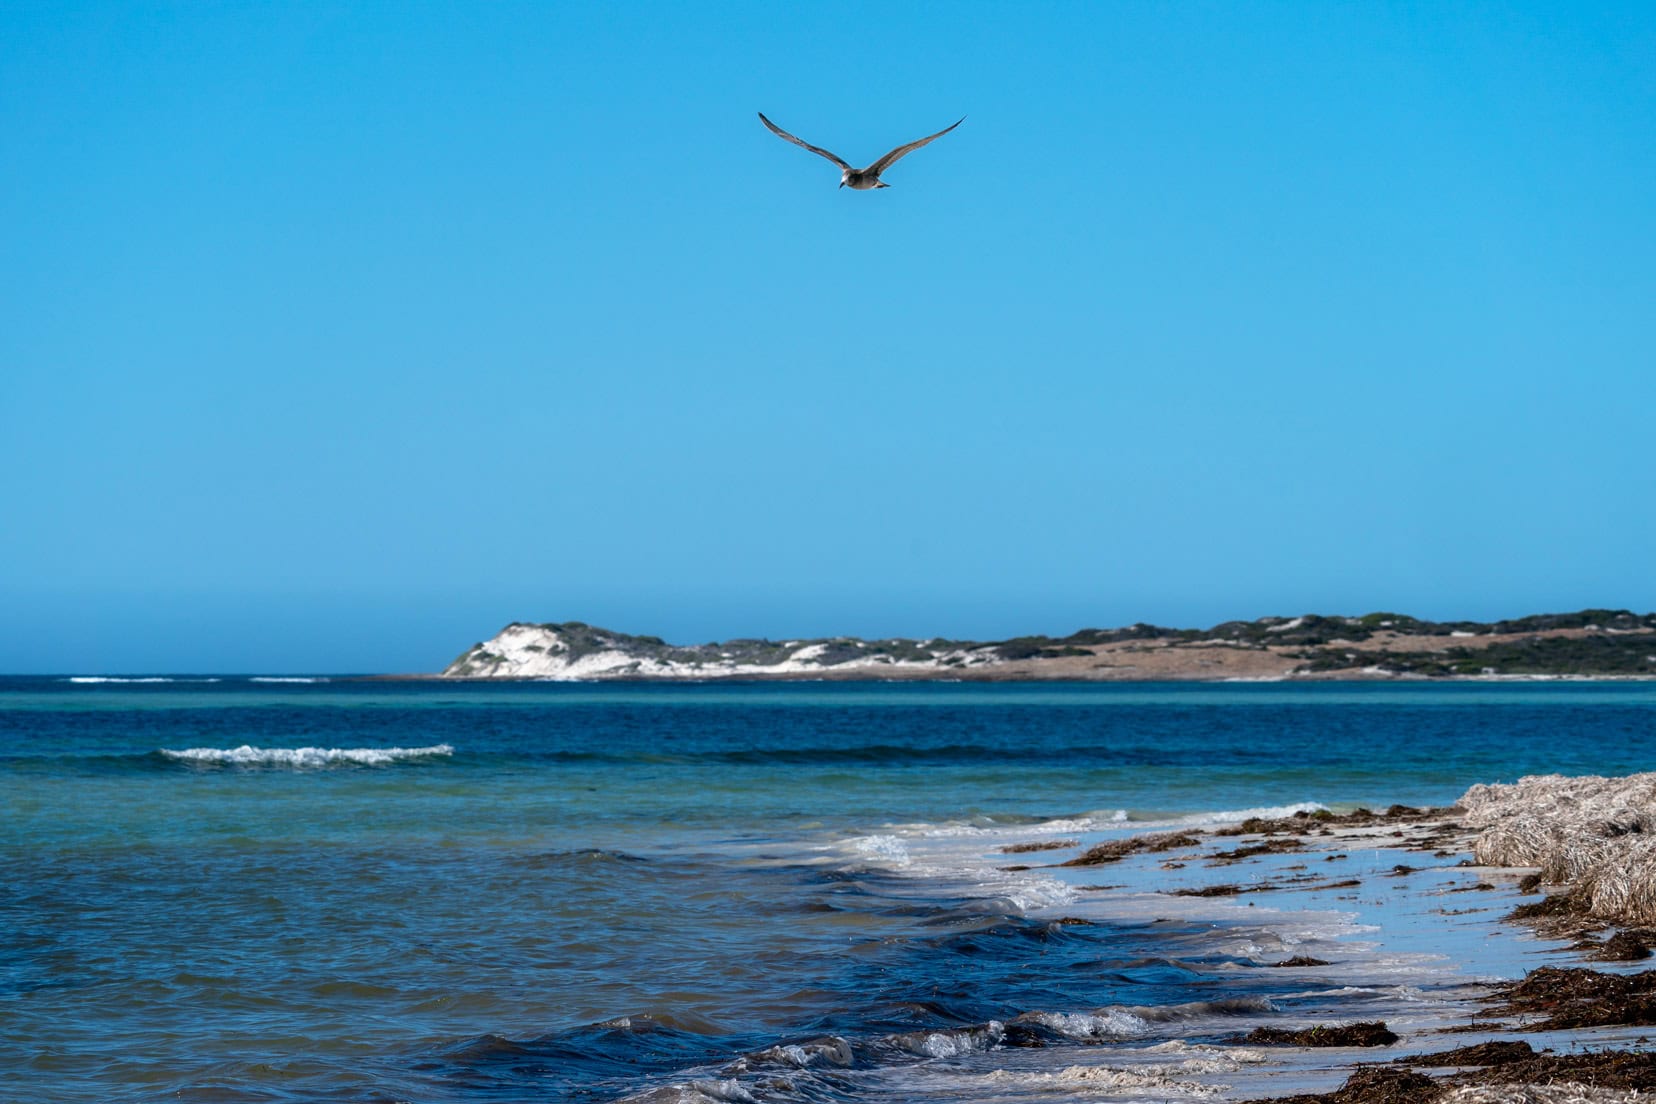
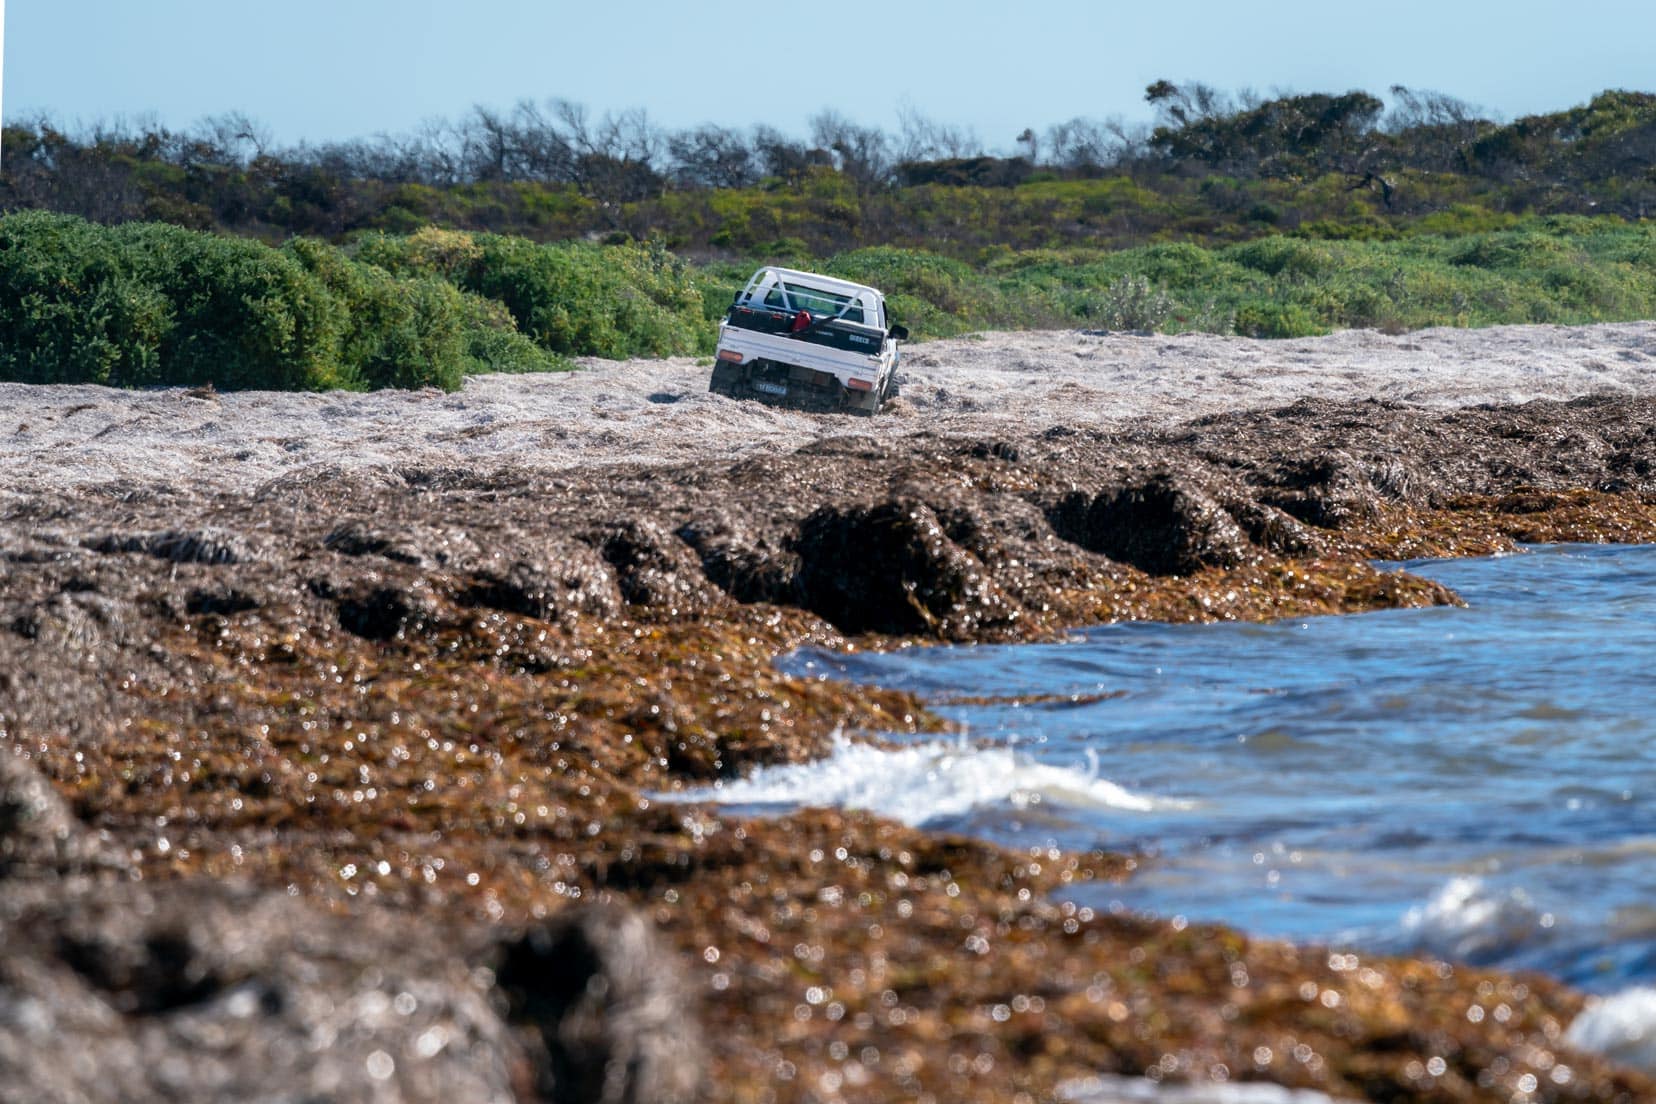
When we were there, the exposed sections of the coastline, especially in the jetty area, were heavily covered in washed-up seagrass.
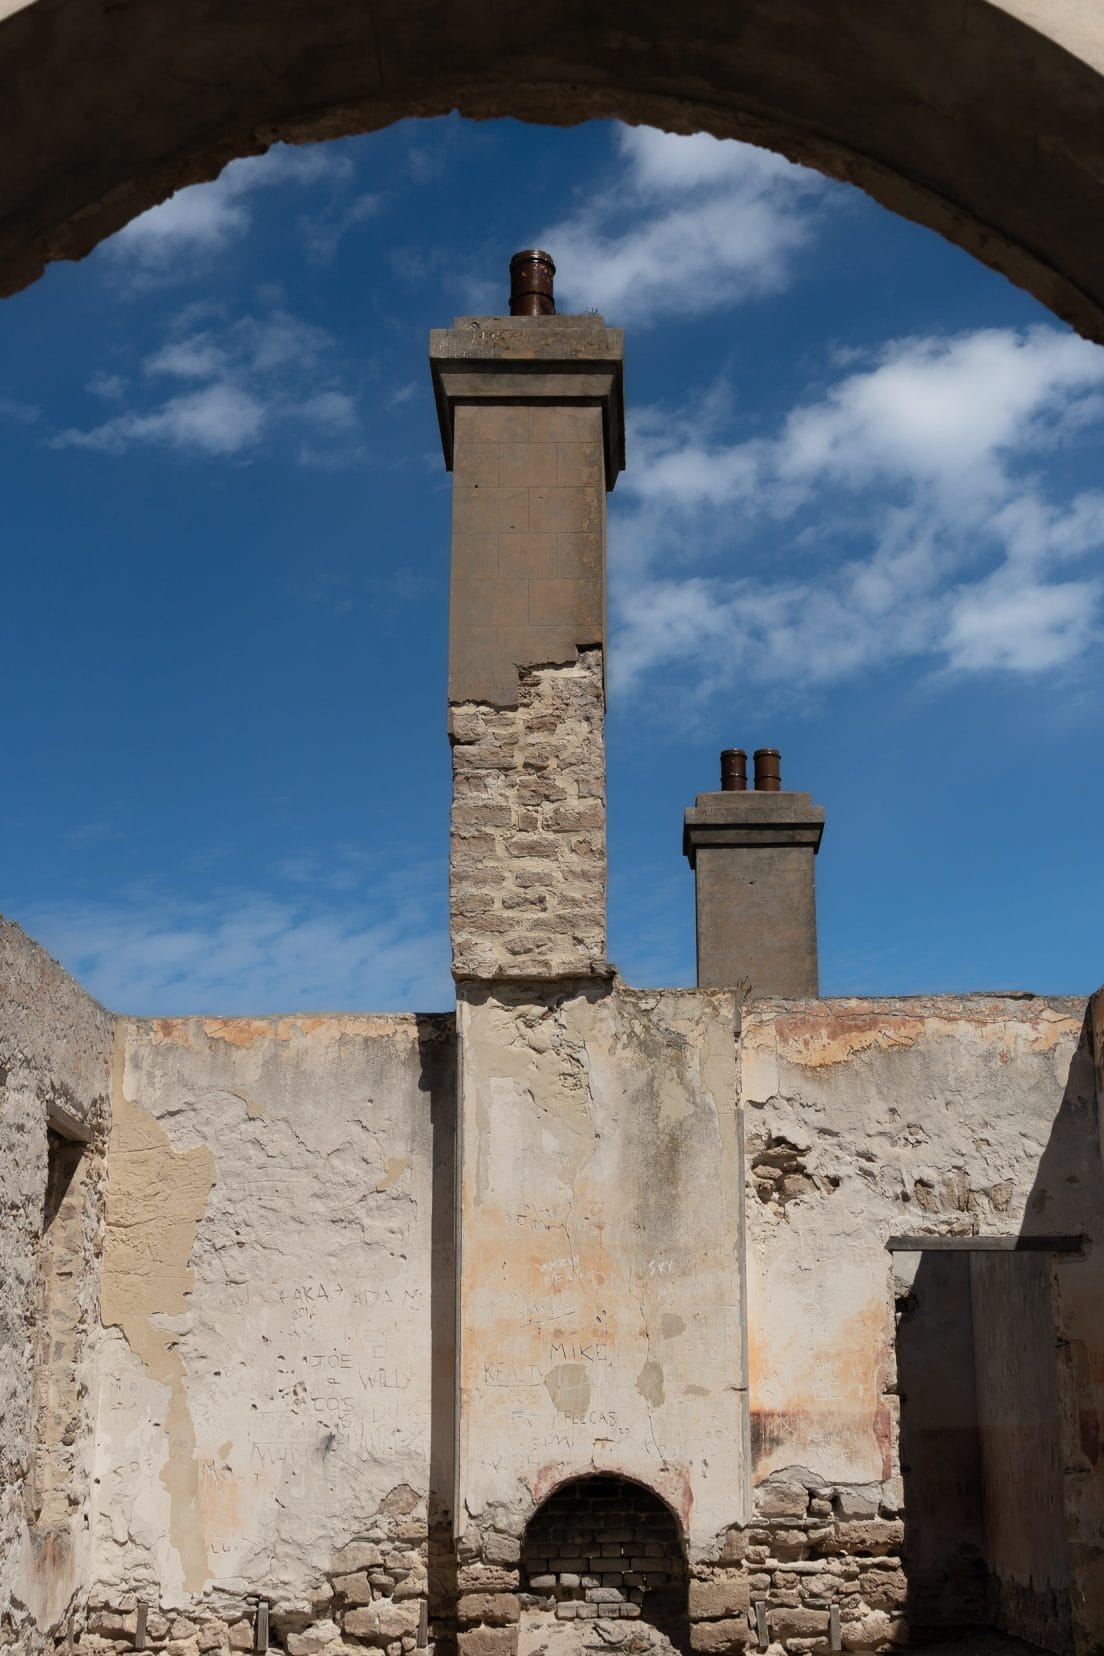
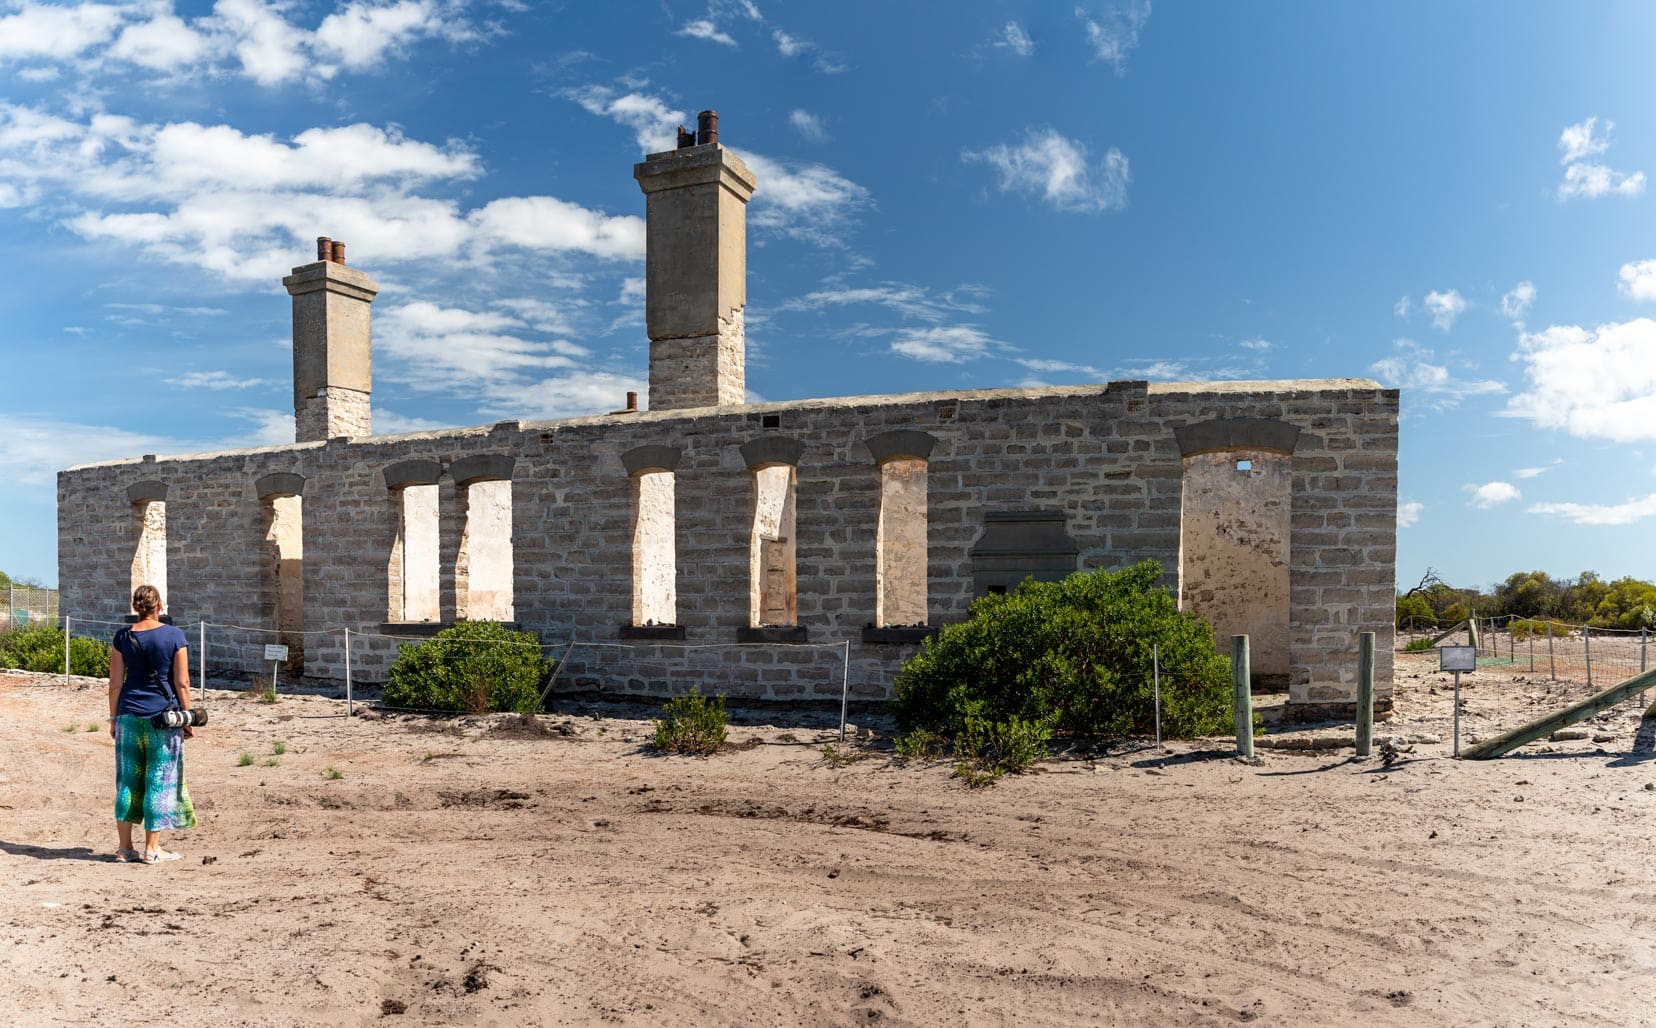
Telegraph station
The Telegraph Station, originally built in wood in 1876 and replaced with a stone structure in 1896, was a crucial part of the Intercolonial Telegraph Line that connected South Australia to Western Australia.
It remained in use until 1917 and, by 1927, had been stripped of its timber and iron, but its 12-foot walls remain intact and it is National Trust classified. This historic structure, a few graves and an old cottage are all that now remain.
The inland telegraph track extended from this station northeast to Eucla.
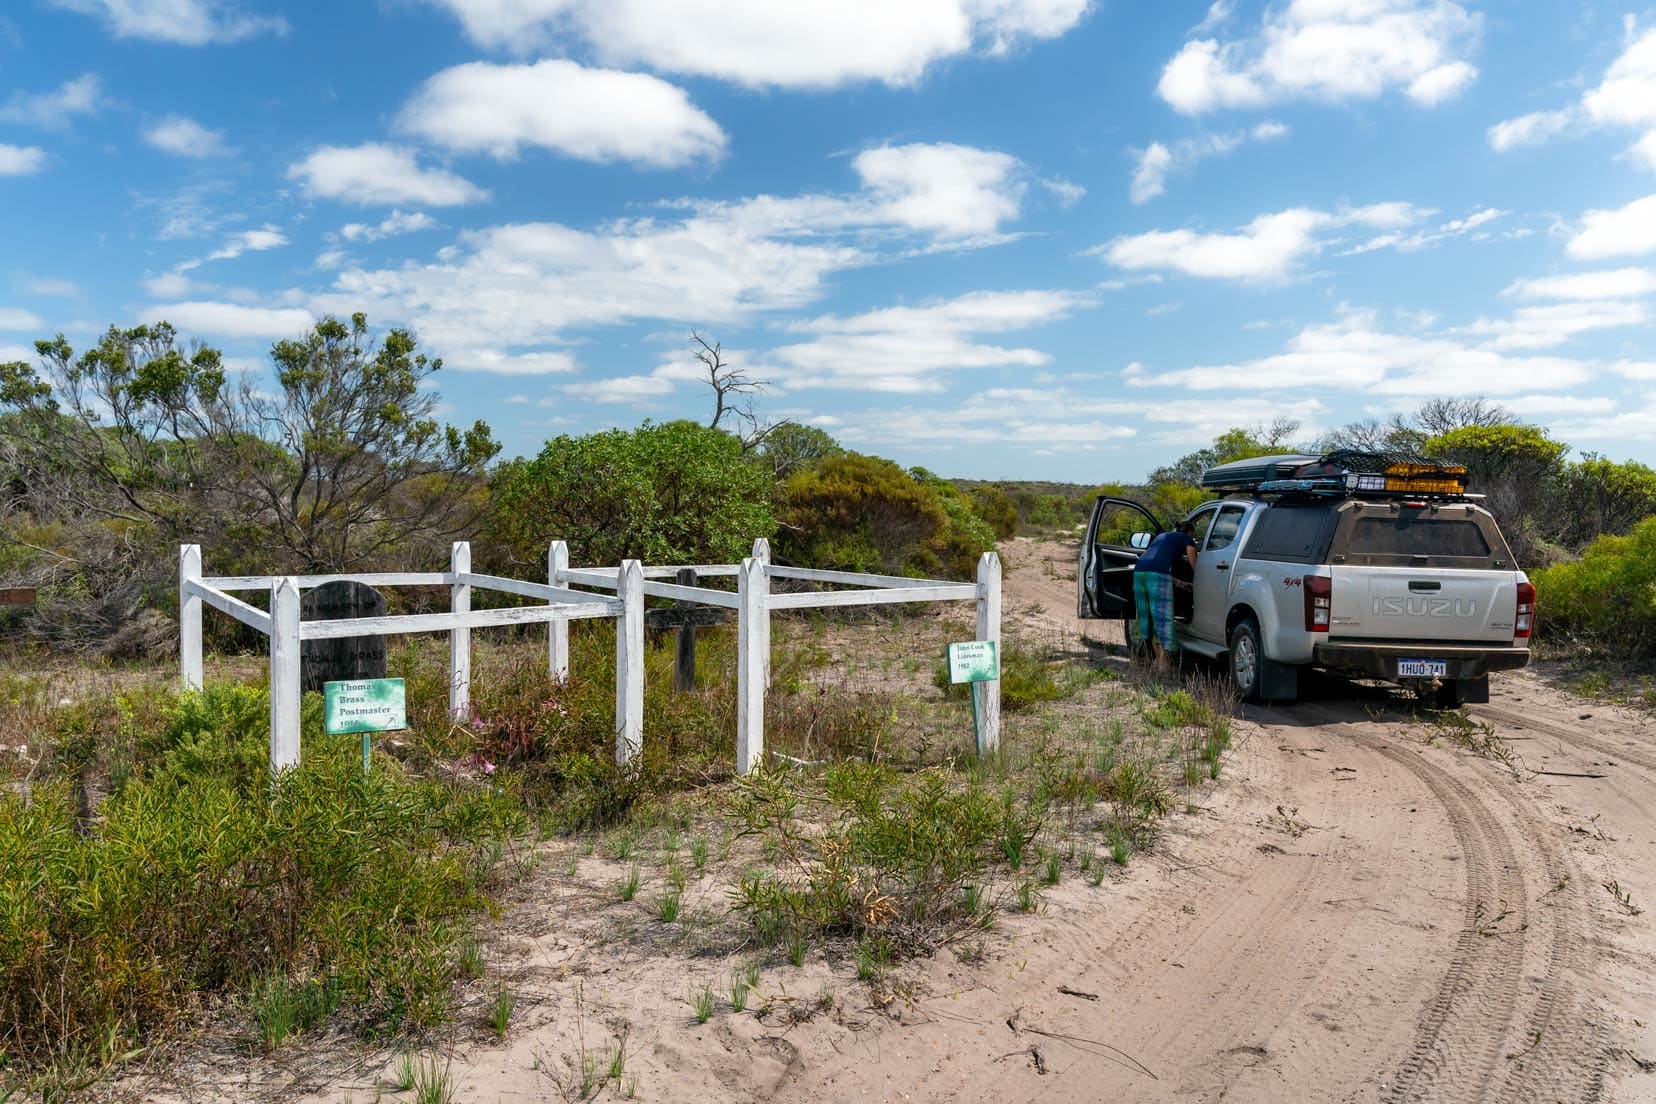
Gravesites
Here, you can see the grave markers of Thomas Brass, the Postmaster; John Cook, the linesman; and Len Spurr (role unknown).
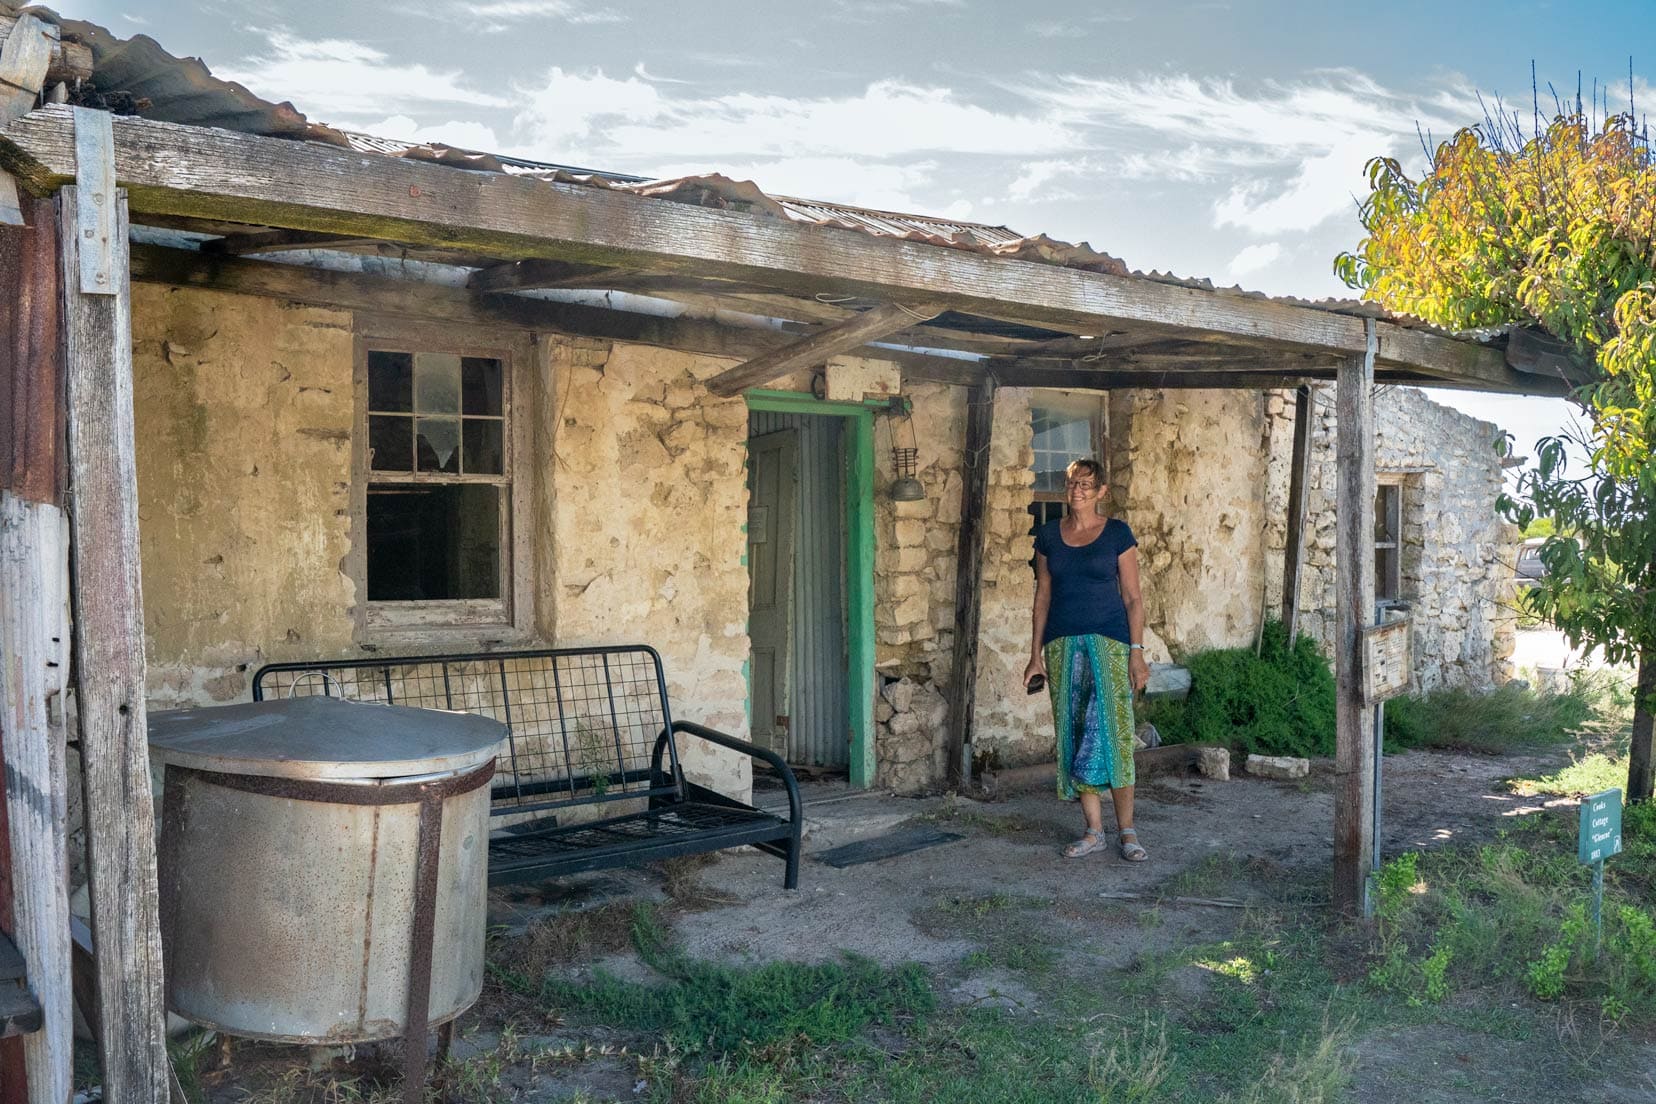
Cook’s cottage ‘Glencoe’
John Cook, the senior linesman at the station, built his family home, a limestone cottage called Glencoe Cottage.
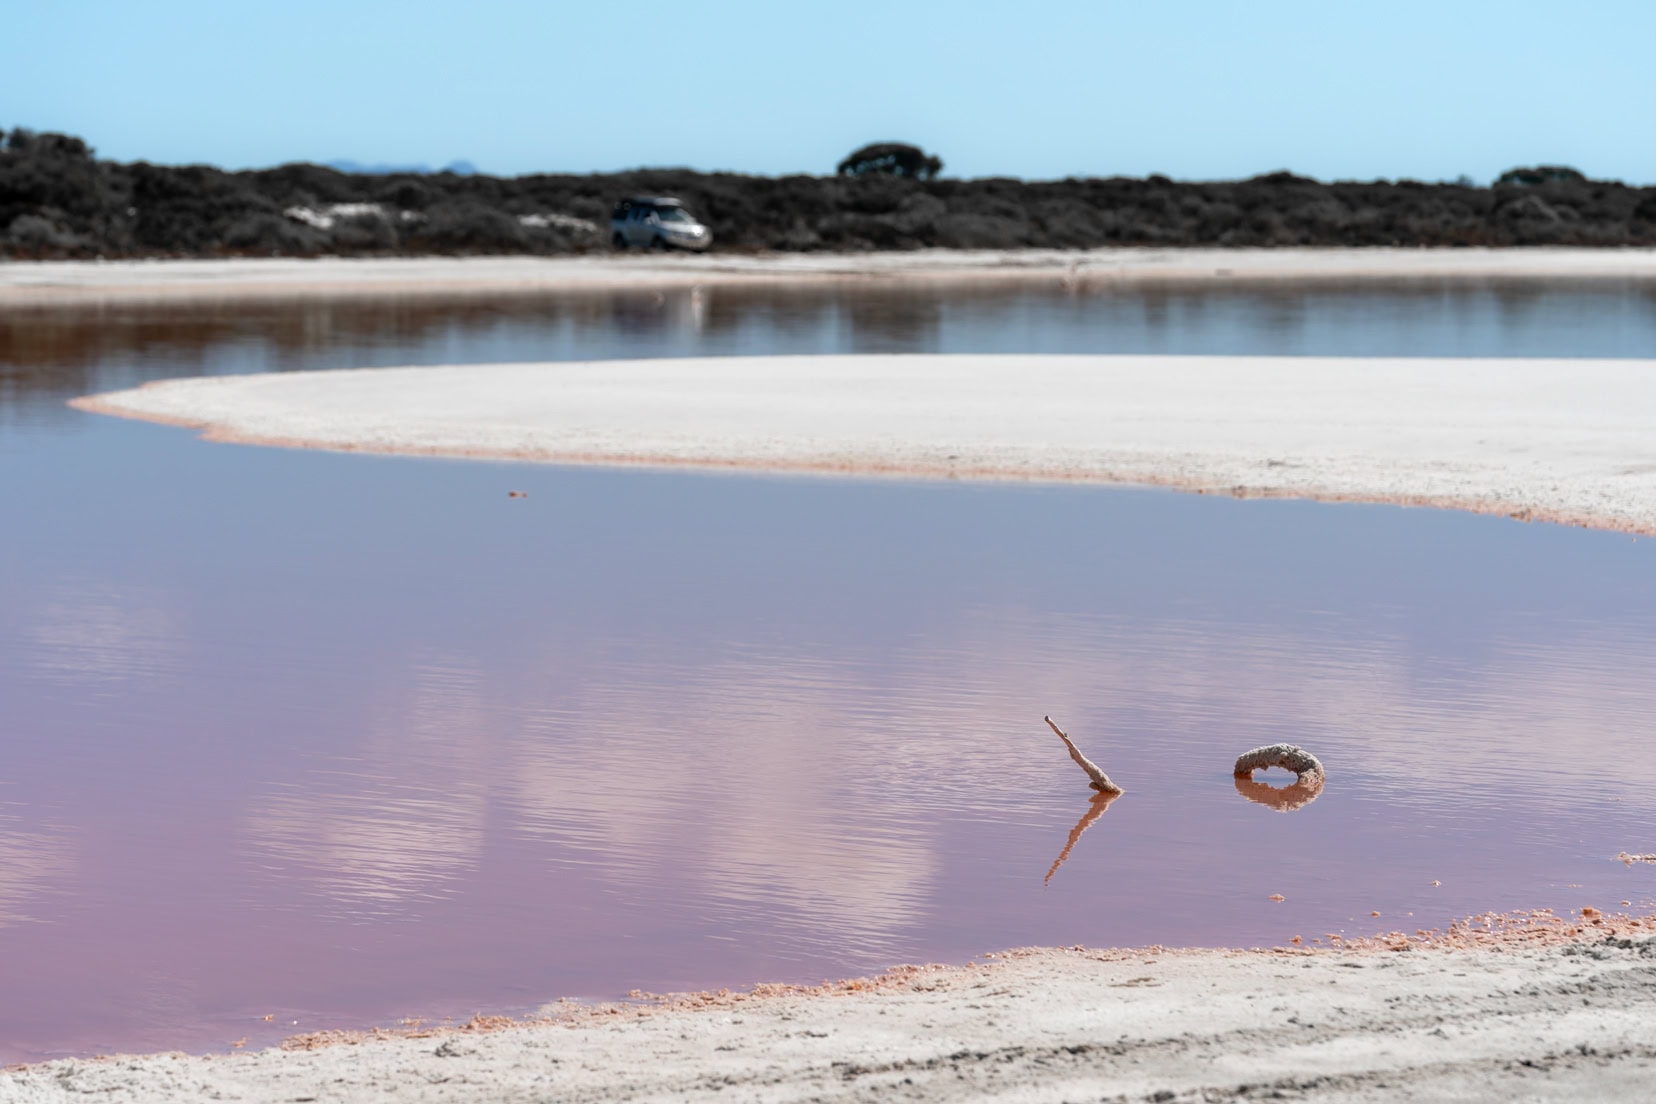
Salt Lake
This big salt lake, a stone’s throw from the telegraph station, was casting hues of purple and pink, making it eye-catching.
Bronze Whaler Bay – We drove to Bronze Whaler Bay, about 45 minutes north of Israelite Bay and into the Nuytsland Nature Reserve. Given its large rocky outcrop leading to the sea, it’s likely a good fishing spot, otherwise we didn’t see much else.
If you want to hide from the weather, there’s one sheltered spot between the dunes close to the point where you drive down onto the rock ledge.

Wildlife at Israelite Bay
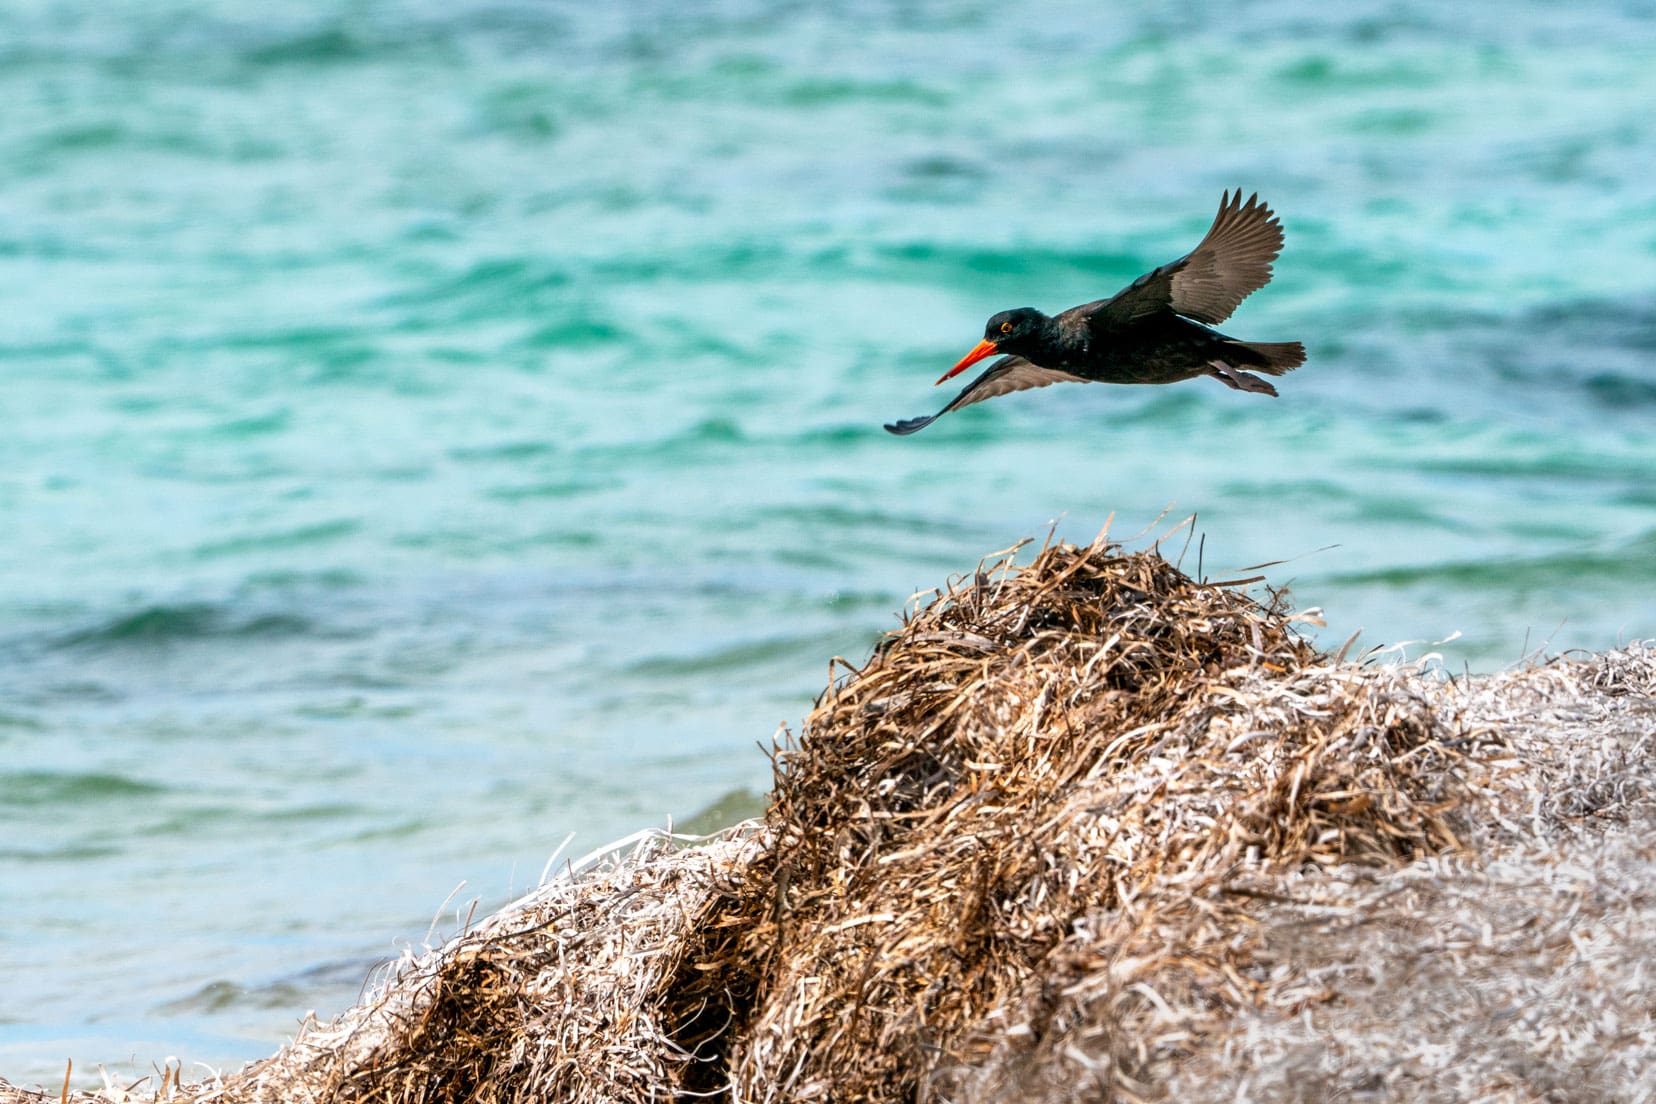
The bird life is prolific, with cormorants and gulls vying for their favourite spots on the jetty.
Late afternoons, a resident White-Bellied Sea Eagle made a fleeting visit to the jetty.
Sooty oystercatchers plied the seagrass on the shoreline whilst Black-shouldered kites hovered above the coastline scrub at sunrise and sunset, searching for the next meal.
Being near the jetty was a great spot for photography.
If you are keen on photography, you may enjoy my article on road trip photo ideas and tips.
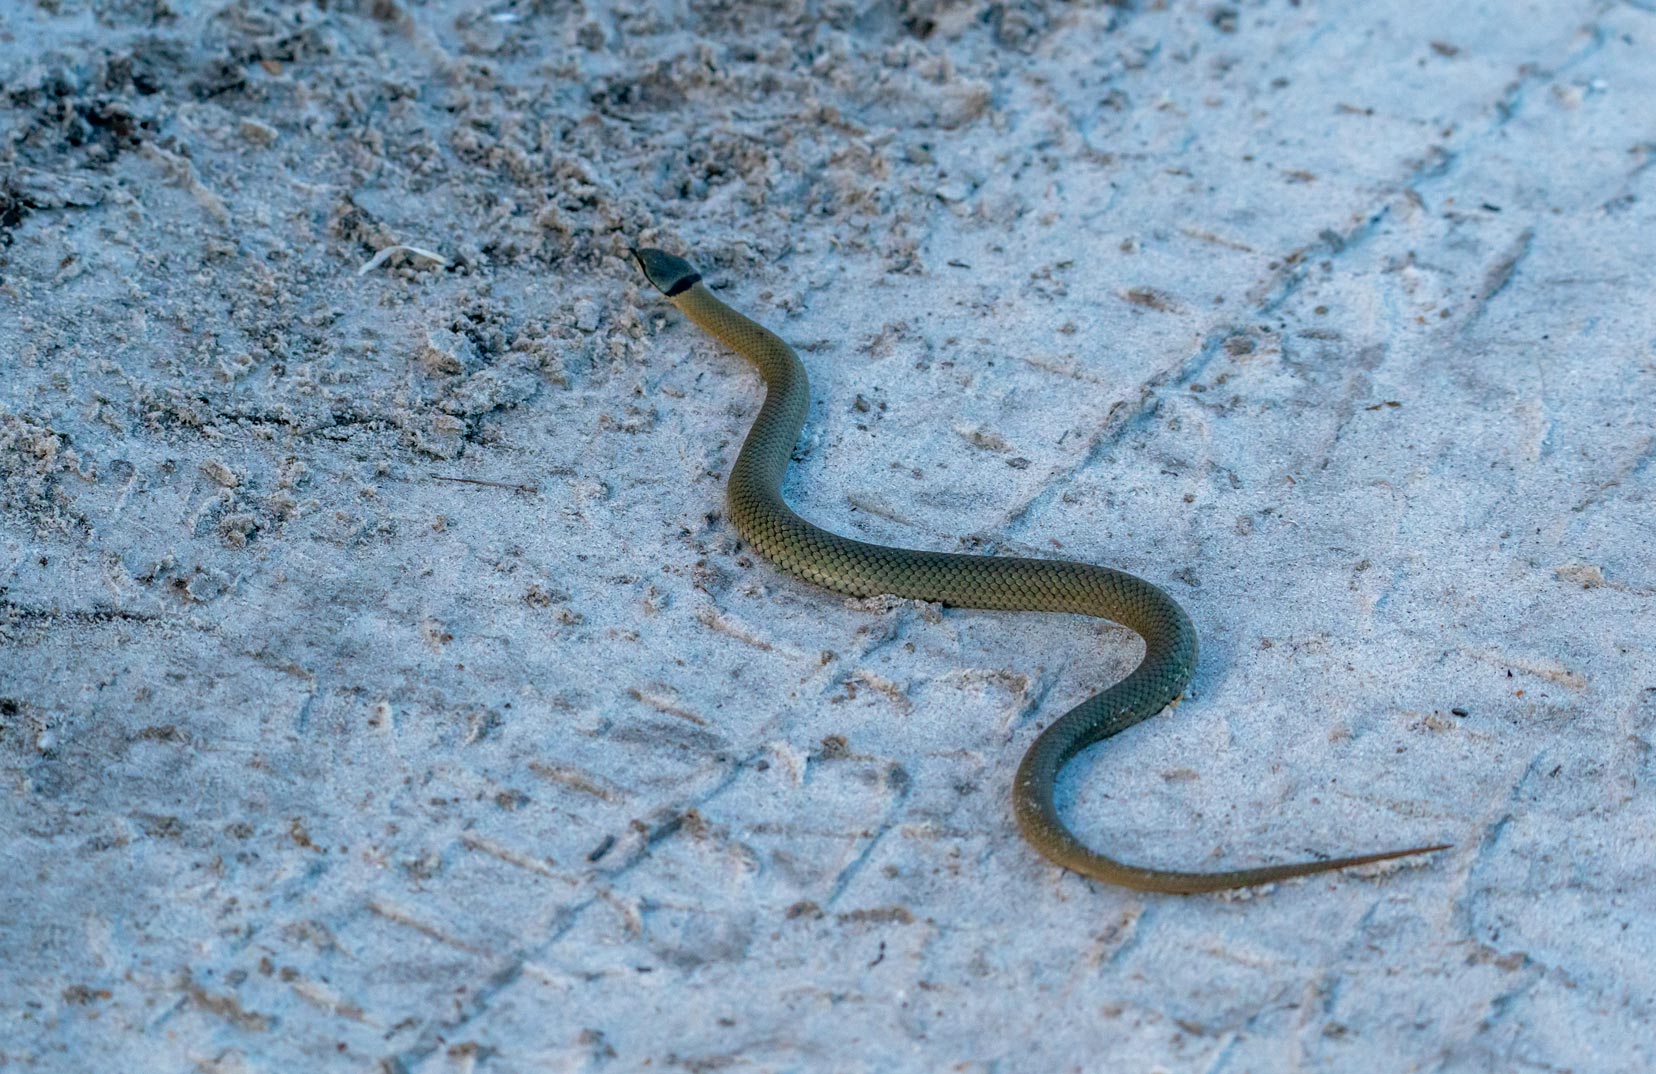
I spied a metre-long Western Crowned snake in the scrub near the beach. It’s a venomous snake but not considered dangerous to humans.
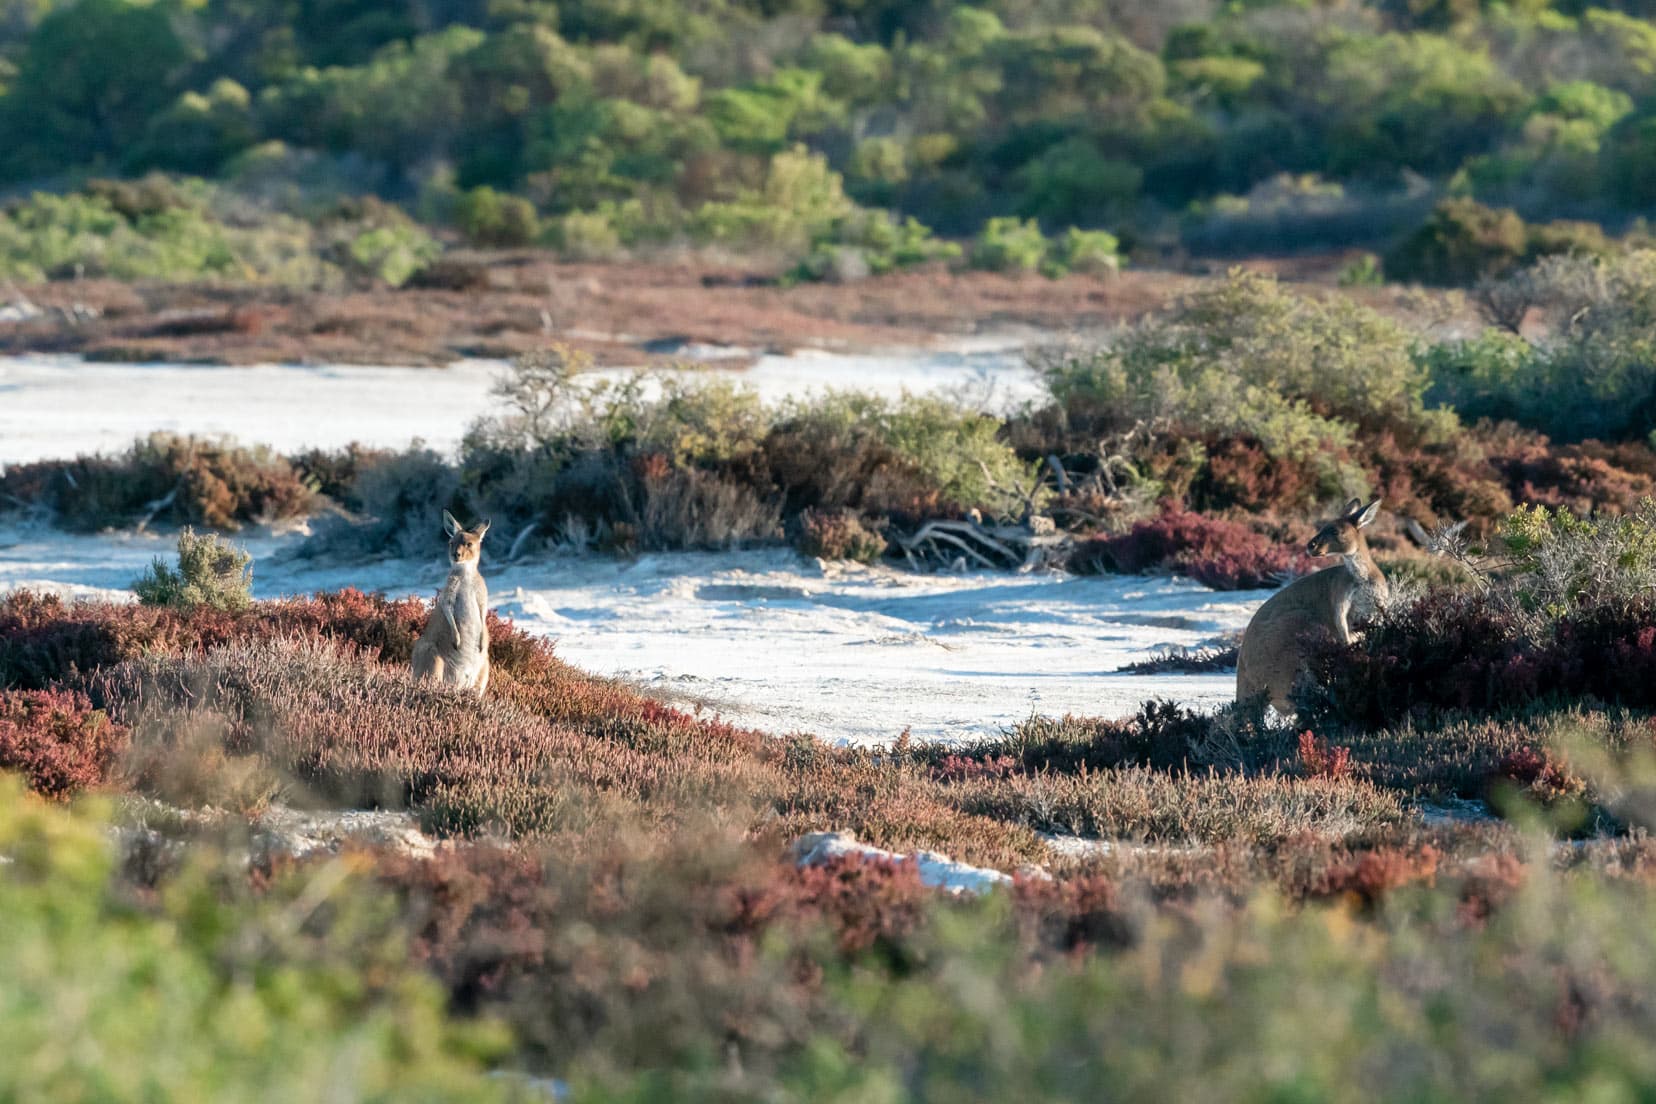
If you don’t see a roo (Aussie slang for kangaroo) or two, you’re not in Australia. These two below were foraging at the salt pans.
Our constant camp companions were Hooded-plovers, New Holland Honeyeaters and the Wattlebirds.
We had plenty of company at the quiet end of town.
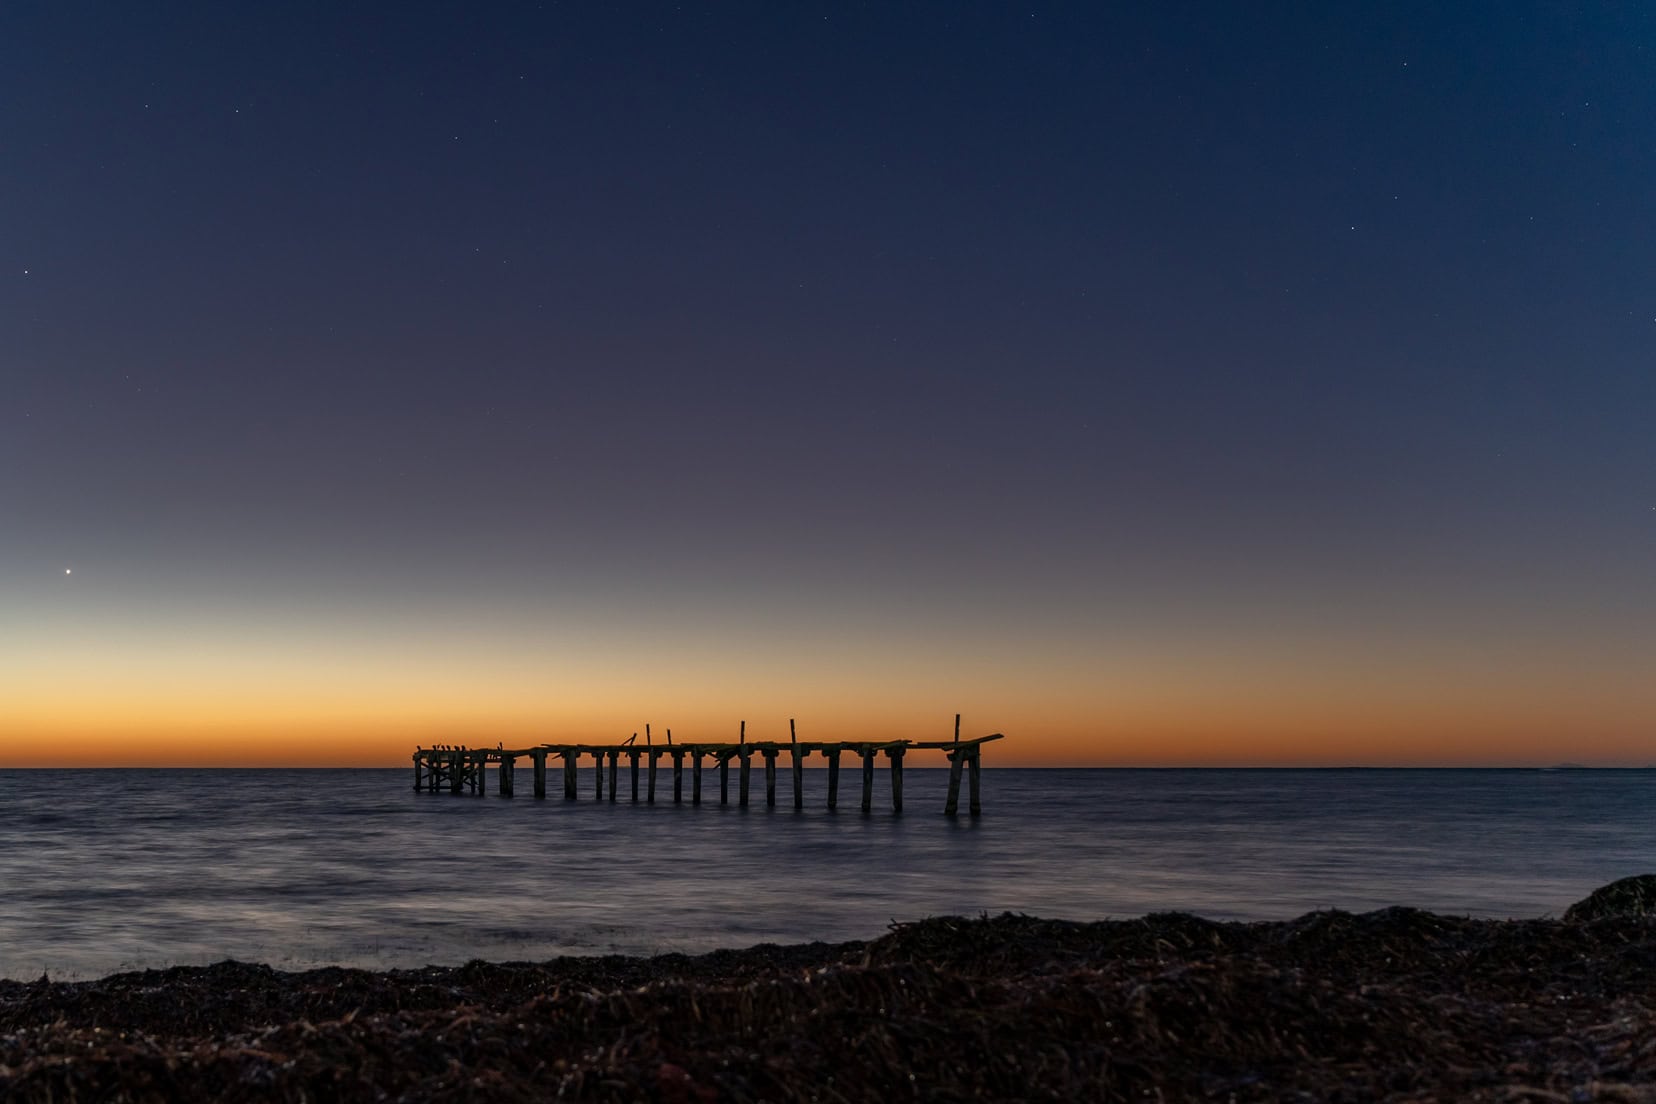
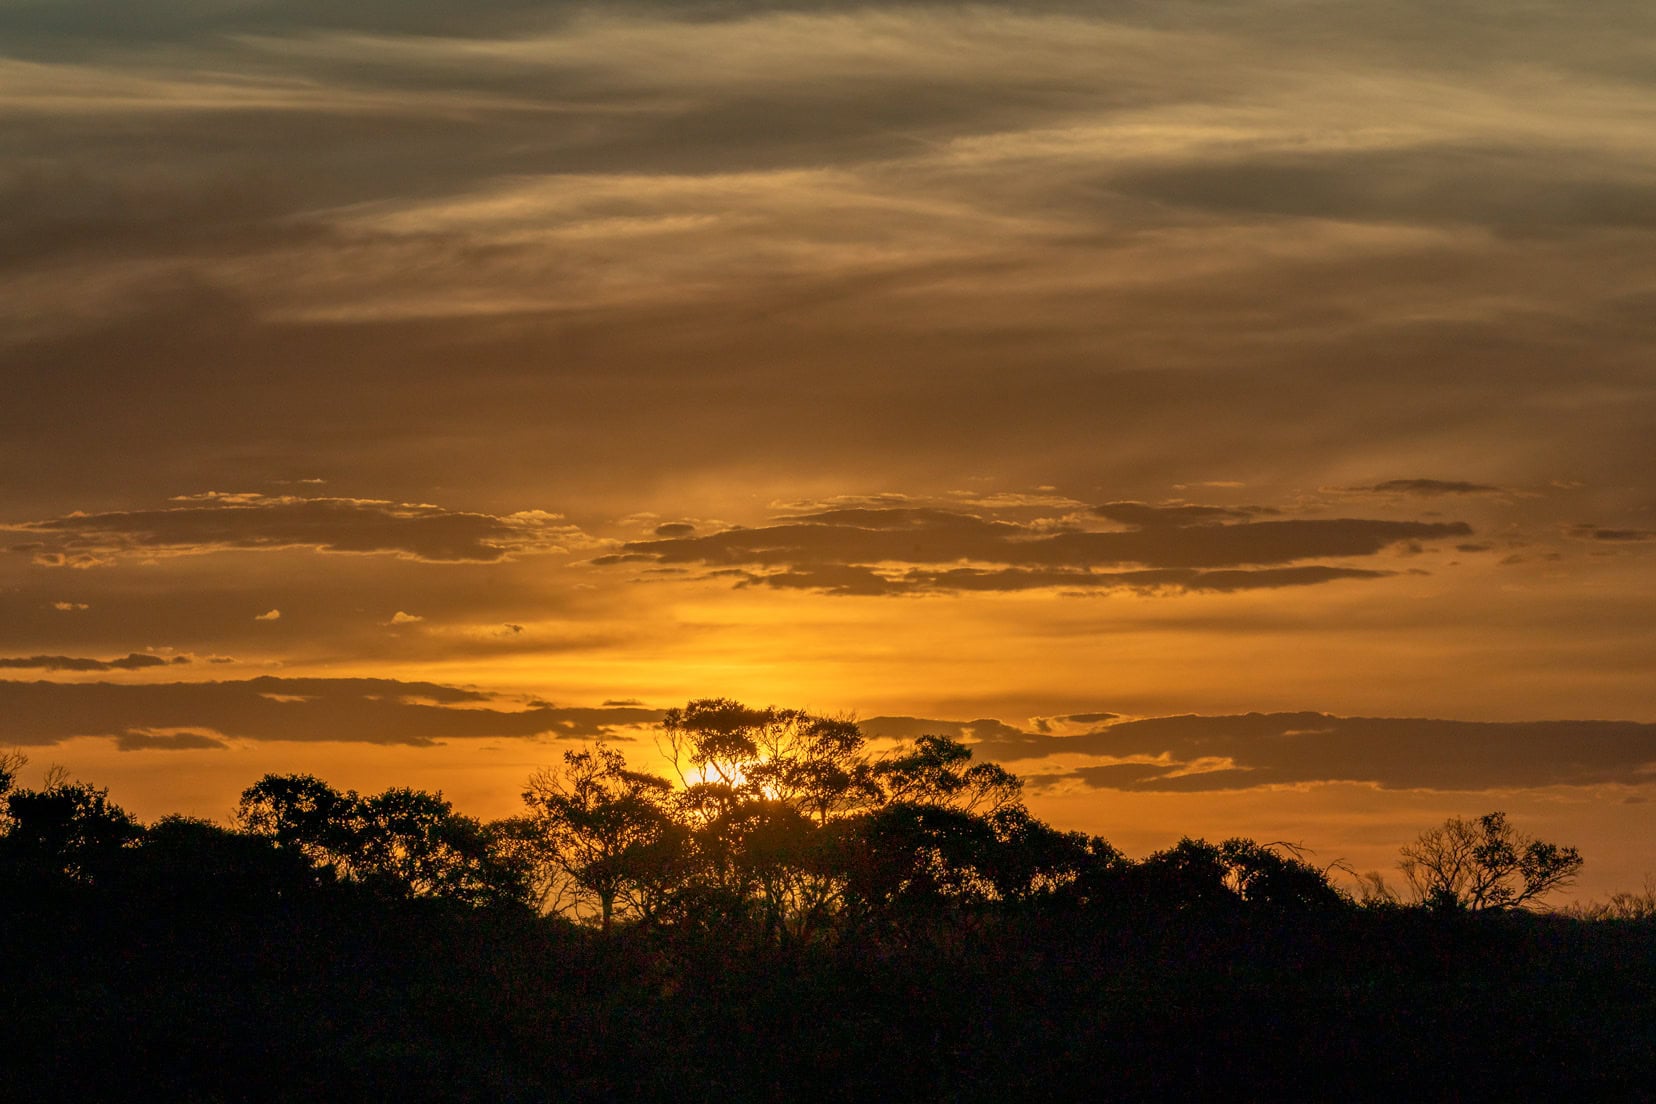
Photography at Israelite Bay
The landscapes and wildlife at Israelite Bay are a boon for photographers, and birders will also find much to keep them busy.
Photographers should consider taking a tripod and ND filters for long exposure shots during night, sunrise, and sunset photography. Having a telephoto lens will help bring wildlife to you—this is one of my must-have items in my photography gear.
Some possible photography locations: the jetty, telegraph station, the salt pan and any spot for astro.
⚠️ What I did find problematic when shooting at night were the night fishermen who drove around with their massively bright spotlights.
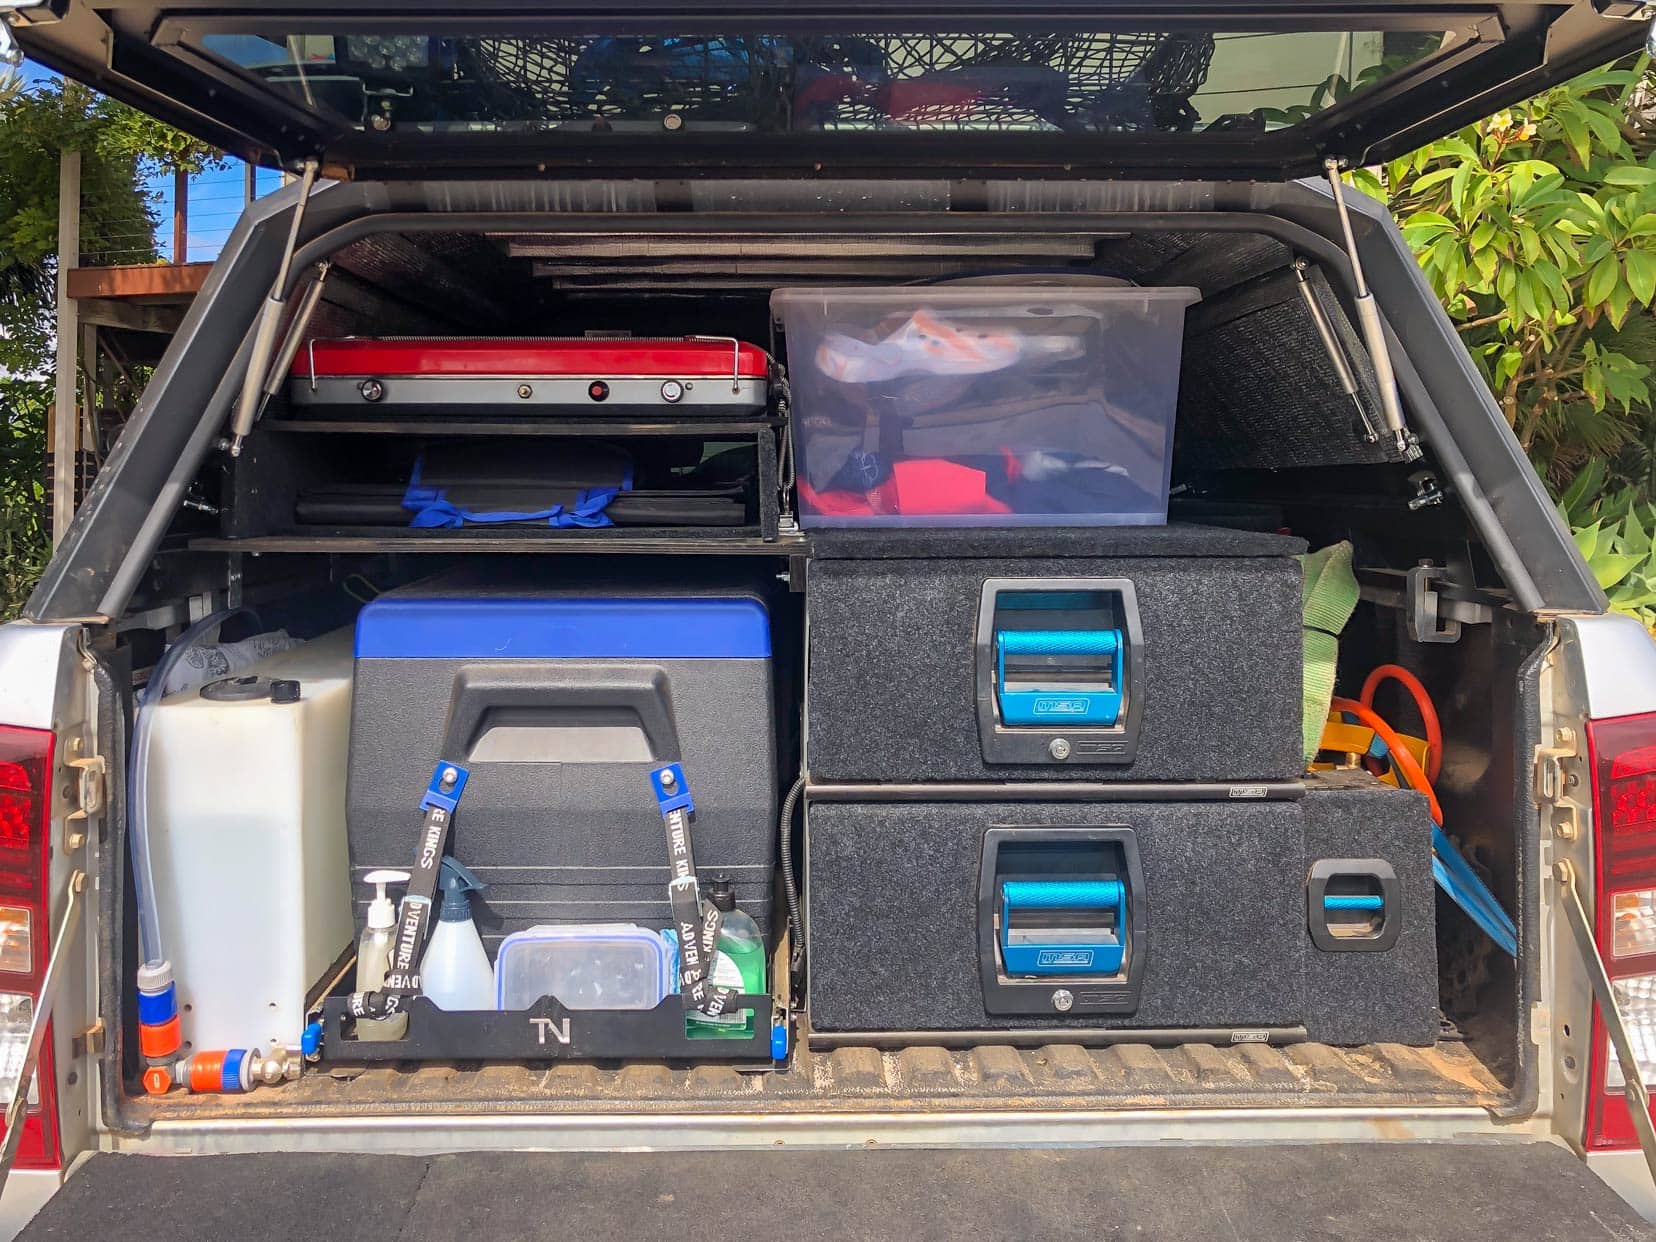
Preparing for the Trip
Venturing off-grid means you need to be self-sufficient. Give strong consideration to the points below:
- Water Supply: Take as much water as you can. Water should be one of your highest priorities. After 4 nights of camping (including 1 night at Seal Creek), our 65 litres was quite low. This was the deciding factor that made us leave.
- Personal Locator Beacon (PLB): Travel with a personal locator beacon. This electronic emergency distress beacon uses satellites to forward your position to a Rescue Coordination Centre. We own a GME PLB.
- Tyres: Use suitably rated tyres such as a light truck (LT) with strengthened side walls compared to an HT (highway terrain) tyre, which is important when driving on a de-pressurised tyre.
- Air Compressor: Carry an air compressor to inflate tyres.
- Tools and Spares: Carry sufficient tools and spares in the event of an incident, e.g., fan belt.
- Offline Maps: Have an offline map to reference locations and offroad routes, e.g., OsmAndMaps, Maps.me.
- Food Supply: Carry non-perishable food.
Read More: For more of on Our Camping, check out our Our Top Ten Camping and 4×4 Essentials
Managing the Threat of Dieback at Israelite Bay
As mentioned, Dieback is a serious issue. This pathogen attacks plants and trees, restricting the uptake of water and nutrients and eventually leading to death.
The risk of spread is at its highest during spring and autumn. Wet, warm soil provides the ideal conditions for the pathogen to produce and spread millions of spores into the ground and water.
The ways we can be responsible for preventing the spread of dieback are:
- Avoiding wet and muddy conditions
- Take responsibility and clean your vehicle of mud and dirt before entering dieback-free areas. This includes any camping gear.
- Staying on designated tracks will minimise soil disturbance.
Safety Tips
A few safety points for the drive and when at Israelite Bay:
- Communications: No phone network signal, so consider taking a UHF radio or PLB.
- Driving Safety: Don’t drive on coastal seagrass. The seagrass is thick but not compacted, so it does not provide a solid base, and it is impossible to see what you’re driving on and into. For instance, a guy drove onto the beach, bounced every which way for 200m before deciding it wasn’t the right move and promptly left the beach.
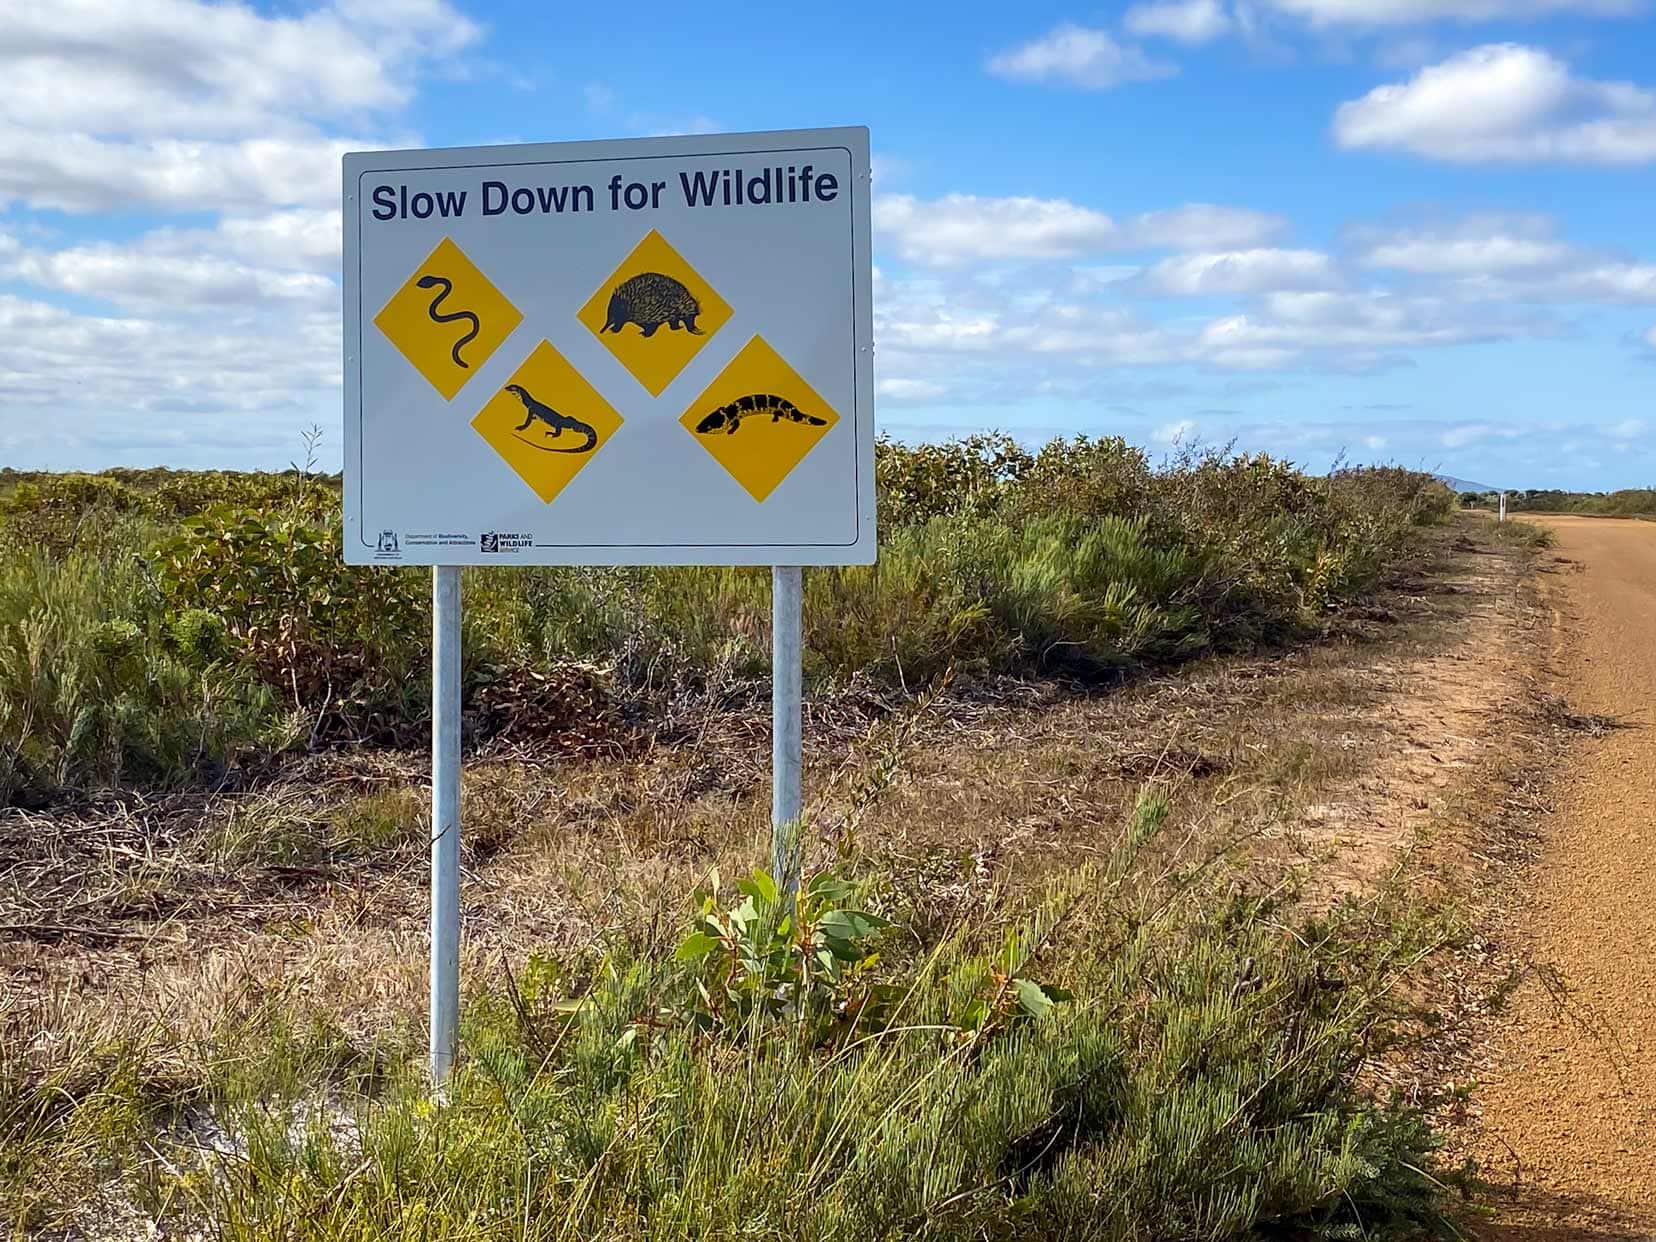
- Wildlife Awareness: You’re in the bush, so expect snakes. My photo shows they’re around. There is also a warning sign for snakes at the old Telegraph station.
- Beach Driving: Know the tide times if you intend to drive on the beach.
Best Time to Visit Israelite Bay
Spring (September to November) and Autumn (March to May) are generally considered the best times to visit Israelite Bay. Note that school holidays will see an influx of campers, especially over the Easter break.
These seasons offer mild temperatures, more stable weather conditions, and beautiful natural scenery, making it ideal for outdoor activities and exploration.
Not surprisingly, summer months are hot whilst winter months cold and wet. During wet periods, the track can sometimes be closed to reduce the spread of Dieback.
4×4 Israelite Bay … That’s a Wrap
Planning a 4×4 road trip to Israelite Bay is truly rewarding for those seeking adventure and solitude in Western Australia’s remote wilderness.
Driving the Fisheries Track isn’t challenging, and you won’t need loads of 4×4 experience to enjoy a visit to Israelite Bay. You’ll probably want to overnight, so remember you need to be totally self-sufficient.
Whether camping under the stars, exploring remote areas in your 4×4, or discovering historical ruins, every moment spent in Israelite Bay offers a chance to connect with nature and the past.
I’m sure you’ll leave with great memories and thoroughly chilled.
If you enjoy 4×4 adventures, then check out my post on 4×4 driving Yeagarup Dunes near Pemberton, WA.
Have you been to Israelite Bay before? Do you have any helpful tips to share? I’d like to hear them. As always, ask me anything about the trip—I’m always happy to help.
EXPLORE MORE OF WESTERN AUSTRALIA
EXPLORE THE SOUTH COAST: Discover the pristine beaches of Western Australia, from the famous white sands of Lucky Bay in Esperance to the secluded beauty of Wharton Beach.
WILDERNESS ADVENTURES: Experience Western Australia’s unique landscapes by walking among ancient trees on the Giant Tingle Tree Walk, or in the Tree Top Walk in Walpole.
UNIQUE LOCAL ATTRACTIONS: From the quirky Gnomesville WA to the artistic installations along the Swarbrick Art Loop, and the Tin Horse highway in our Golden Outback, uncover the charming and unexpected sides of Western Australia.
HISTORIC SITES AND NATURAL WONDERS: Visit the ancient Stonehenge in Esperance or explore geological marvels like Wave Rock.
EPIC ROAD TRIPS: Plan your ultimate road trip adventure with our comprehensive itineraries, from a long drive across the southern edge of Australia, Perth to Melbourne, to a detailed guide through the heartlands, Perth to Wave Rock.
Find more on our Western Australia page with an interactive map.
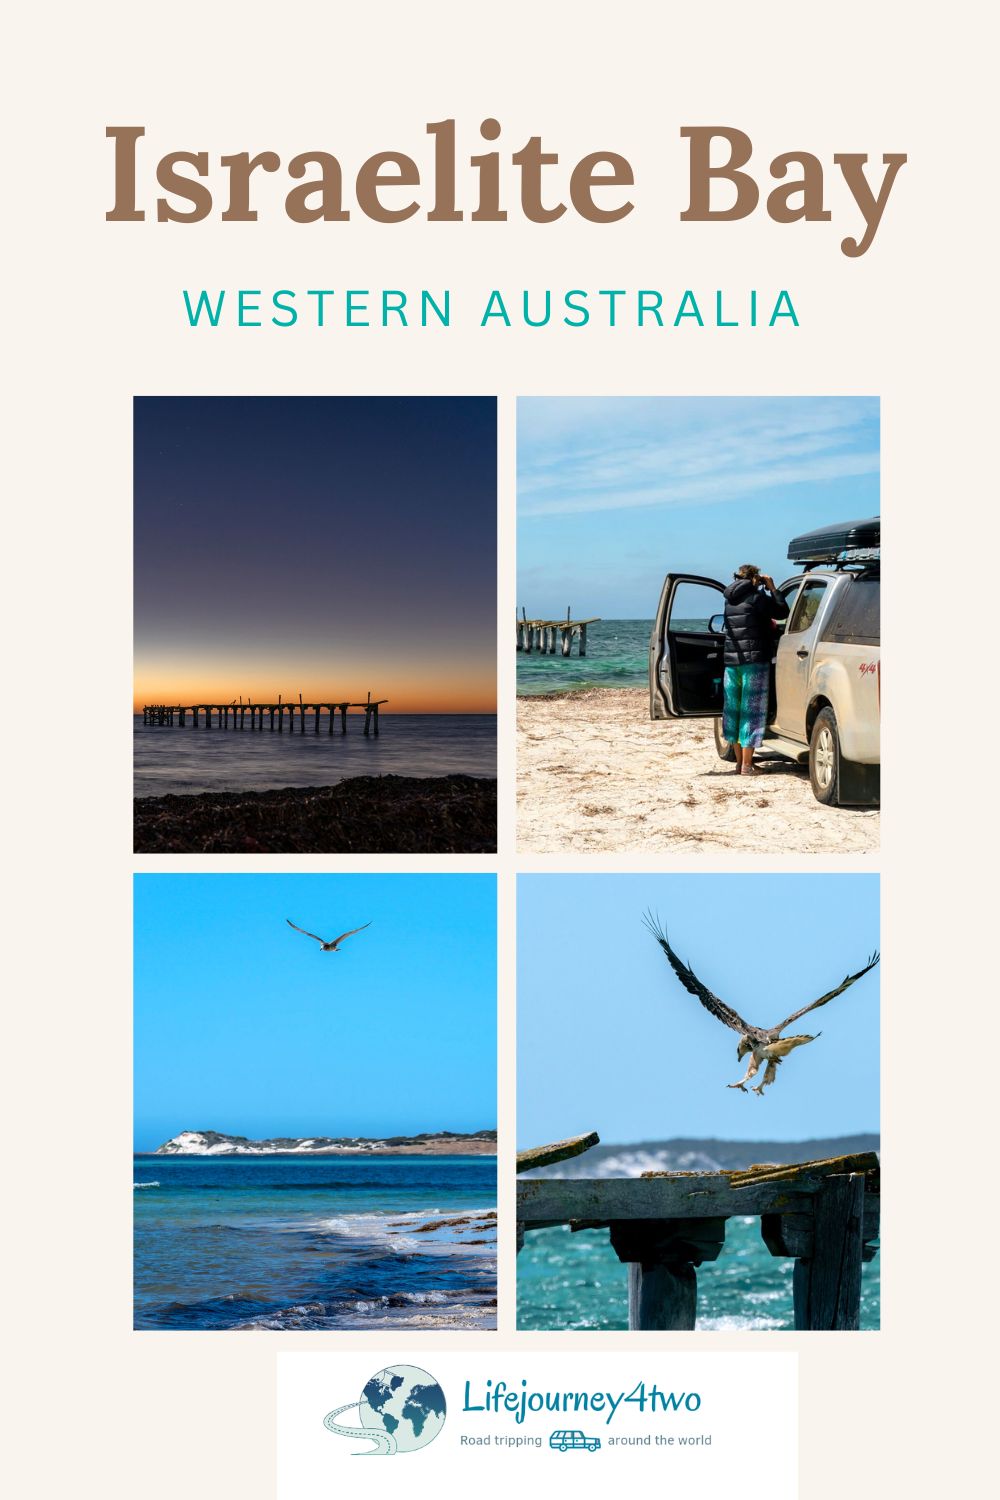
Pin on Pinterest and save for later
Planning Your Travels?
These are the travel resources we recommend and use when planning our trips.
- 🚘 Car Hire: We use DiscoverCars.com
- Motorhome/Campervan Rental: We highly recommend the Motorhome Republic
- 🪪 Order your International Driver’s Licence online here
- 🛏 Book Accommodation: We use Booking.com to find accommodation that suits our budget
- 🐶 Pet Sitting/Pet Sitters: Check Out TrustedHousesitters here (Use our Discount code: LIFEJOURNEY25 for 25% off. )
- Activities and Experiences: Get Your Guide and Viator
- Travel Insurance: Safetywing or World Nomads
- 🥾 Travel Gear and Accessories: Check out our top picks here — Lifejourney4two page on Amazon
For a more thorough list, visit our Travel Resources page here.